springboot-shiro:搭建测试环境
1 创建一个springboot项目
创建过程中添加web模块
2 导入thymeleaf依赖
pom.xml
<!--thymeleaf模板引擎-->
<dependency>
    <groupId>org.thymeleaf</groupId>
    <artifactId>thymeleaf-spring5</artifactId>
</dependency>
<dependency>
    <groupId>org.thymeleaf.extras</groupId>
    <artifactId>thymeleaf-extras-java8time</artifactId>
</dependency>
3 编写主页
src/main/resources/templates/index.html
<!DOCTYPE html>
<html lang="en">
<head>
    <meta charset="UTF-8">
    <title>Title</title>
</head>
<body>
<h1>首页</h1>
<p th:text="${msg}"></p>
</body>
</html>
4 创建一个controller包,在该包下编写一个MyController
src/main/java/com/lv/controller/MyController.java
package com.lv.controller;

import org.springframework.stereotype.Controller;
import org.springframework.ui.Model;
import org.springframework.web.bind.annotation.RequestMapping;

@Controller
public class MyController {
    @RequestMapping({"/","/index"})
    public String toIndex(Model model){
        model.addAttribute("msg","hello Shiro");
        return "index";
    }
}
5 启动项目,访问首页
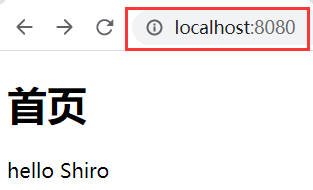
首页访问成功后,就可以进行接下来的操作
6 导入shiro和spring整合的依赖
<!--shiro整合spring的包-->
<dependency>
    <groupId>org.apache.shiro</groupId>
    <artifactId>shiro-spring</artifactId>
    <version>1.8.0</version>
</dependency>
7 创建一个config包,在该包下编写一个自定义的realm的类
在这个realm类中可以编写一些查询的方法,或者认证与授权的逻辑
src/main/java/com/lv/config/UserRealm.java
package com.lv.config;

import org.apache.shiro.authc.AuthenticationException;
import org.apache.shiro.authc.AuthenticationInfo;
import org.apache.shiro.authc.AuthenticationToken;
import org.apache.shiro.authz.AuthorizationInfo;
import org.apache.shiro.realm.AuthorizingRealm;
import org.apache.shiro.subject.PrincipalCollection;

//自定义的UserRealm  extends AuthorizingRealm
public class UserRealm extends AuthorizingRealm {
    //授权
    @Override
    protected AuthorizationInfo doGetAuthorizationInfo(PrincipalCollection principalCollection) {
        System.out.println("执行了=>授权doGetAuthorizationInfo");
        return null;
    }
    //认证
    @Override
    protected AuthenticationInfo doGetAuthenticationInfo(AuthenticationToken authenticationToken) throws AuthenticationException {
        System.out.println("执行了=>认证doGetAuthorizationInfo");
        return null;
    }
}
8 在config包下编写一个shiro配置类
需要在这个配置类中配置三个核心API:
- Subject 用户
- SecurityManger 管理所有用户
- Realm 连接数据
src/main/java/com/lv/config/ShiroConfig.java
package com.lv.config;

import org.apache.shiro.spring.web.ShiroFilterFactoryBean;
import org.apache.shiro.web.mgt.DefaultWebSecurityManager;
import org.springframework.beans.factory.annotation.Qualifier;
import org.springframework.context.annotation.Bean;
import org.springframework.context.annotation.Configuration;

//声明为配置类
@Configuration
public class ShiroConfig {
    //ShiroFilterFactoryBean : 第三步
    @Bean
    public ShiroFilterFactoryBean getShiroFilterFactoryBean(@Qualifier("securityManager") DefaultWebSecurityManager defaultWebSecurityManager){
        ShiroFilterFactoryBean bean = new ShiroFilterFactoryBean();
        //设置安全管理器
        bean.setSecurityManager(defaultWebSecurityManager);
        return bean;
    }

    //DefaultWebSecurityManager : 第二步
    @Bean(name = "securityManager")
    public DefaultWebSecurityManager getDefaultWebSecurityManager(@Qualifier("userRealm") UserRealm userRealm){
        DefaultWebSecurityManager securityManager = new DefaultWebSecurityManager();
        //关联userRealm
        securityManager.setRealm(userRealm);
        return securityManager;
    }

    //创建realm对象,需要自定义类 : 第一步
    @Bean
    public UserRealm userRealm(){
        return new UserRealm();
    }
}
9 创建两个页面
在templates下新建一个user目录 并在该目录下编写add.html和update.html
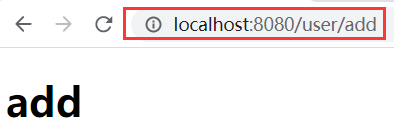
src/main/resources/templates/user/add.html
<!DOCTYPE html>
<html lang="en">
<head>
    <meta charset="UTF-8">
    <title>Title</title>
</head>
<body>
<h1>add</h1>
</body>
</html>
src/main/resources/templates/user/update.html
<!DOCTYPE html>
<html lang="en">
<head>
    <meta charset="UTF-8">
    <title>Title</title>
</head>
<body>
<h1>update</h1>
</body>
</html>
10 在controller中添加跳转页面的方法
src/main/java/com/lv/controller/MyController.java
@RequestMapping("/user/add")
public String add(){
    return "user/add";
}
@RequestMapping("/user/update")
public String update(){
    return "user/update";
}
11 在首页,增加跳转链接
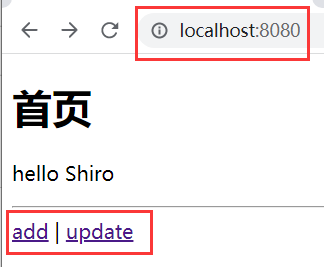
src/main/resources/templates/index.html
<body>
<h1>首页</h1>
<p th:text="${msg}"></p>
<hr>
<a th:href="@{/user/add}">add</a> | <a th:href="@{/user/update}">update</a>
</body>
12 重启项目,测试
访问首页
点击add链接
点击update链接
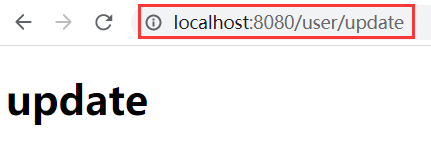
页面跳转成功

 浙公网安备 33010602011771号