springboot-配置springmvc
1 springboot对springmvc的默认配置
- 视图解析器:Inclusion of ContentNegotiatingViewResolver and BeanNameViewResolver beans.
- 支持静态资源文件夹的路径,以及webjars: Support for serving static resources, including support for WebJars
- 转换器,通用转换器(这就是我们网页提交数据到后台自动封装成为对象的东西,比如把"1"字符串自动转换为int类型),格式化器(比如页面给我们了一个2019-8-10,它会给我们自动格式化为Date对象):Automatic registration of Converter, GenericConverter, and Formatter beans.
- Http信息转换器(SpringMVC用来转换Http请求和响应的的,比如我们要把一个User对象转换为JSON字符串):Support for HttpMessageConverters
- 定义错误代码生成规则:Automatic registration of MessageCodesResolver
- 首页定制:Static index.html support.
- 图标定制:Custom Favicon support
- 初始化数据绑定器(帮我们把请求数据绑定到JavaBean中):Automatic use of a ConfigurableWebBindingInitializer bean
2 自定义mvc配置
- 如果您想保留 springboot 默认的 mvc 配置 并增加一些自定义的 mvc 配置(拦截器,格式化程序,视图控制器和其他功能),您可以编写一个自己的 WebMvcConfigurer 类并添加 @Configuration 注解,但不添加 @EnableWebMvc注解:If you want to keep those Spring Boot MVC customizations and make more MVC customizations (interceptors, formatters, view controllers, and other features), you can add your own @Configuration class of type WebMvcConfigurer but without @EnableWebMvc.
- 如果您想提供 RequestMappingHandlerMapping,RequestMappingHandlerAdapter 或 ExceptionHandlerExceptionResolver 的自定义实例,并且仍然保留 springboot 默认的 mvc 配置,您可以声明一个 WebMvcRegistrations 类型的 bean 并使用它来提供这些组件的自定义实例:If you want to provide custom instances of RequestMappingHandlerMapping, RequestMappingHandlerAdapter, or ExceptionHandlerExceptionResolver, and still keep the Spring Boot MVC customizations, you can declare a bean of type WebMvcRegistrations and use it to provide custom instances of those components.
- 如果你想完全接管 springmvc(springboot对springmvc的自动配置全部失效,所有配置都是我们自己去编写),您可以编写一个自己的 WebMvcConfigurer 类并添加 @Configuration 注解和 @EnableWebMvc注解:If you want to take complete control of Spring MVC, you can add your own @Configuration annotated with @EnableWebMvc
3 测试添加一个自定义视图解析器
ContentNegotiatingViewResolver 这个视图解析器就是用来组合所有的视图解析器的,如果我们给容器中去添加一个视图解析器,这个类就会帮我们自动的将它组合进来
3.1 编写一个mvc配置文件
package com.lv.config;

import org.springframework.context.annotation.Bean;
import org.springframework.context.annotation.Configuration;
import org.springframework.web.servlet.View;
import org.springframework.web.servlet.ViewResolver;
import org.springframework.web.servlet.config.annotation.WebMvcConfigurer;

import java.util.Locale;

//扩展springmvc dispatchServlet
@Configuration
public class MyMvcConfig implements WebMvcConfigurer {
    //如果,你想自定义一些定制化功能,只要写这个组件,然后将它交给springboot,springboot就会帮我们自动装配
    @Bean
    public ViewResolver myViewResolver(){
        return new MyViewResolver();
    }
    //ViewResolver:实现了视图解析器接口的类,我们就可以把它看作视图解析器
    //自定义了一个自己的视图解析器MyViewResolver
    public static class MyViewResolver implements ViewResolver{
        @Override
        public View resolveViewName(String viewName, Locale locale) throws Exception{
            return null;
        }
    }
}
3.2 debug断点测试
我们给 DispatcherServlet类 中的 doDispatch方法加个断点进行调试一下,因为所有的请求都会走到这个方法中,然后启动项目,随便访问一个页面,查看一下Debug信息
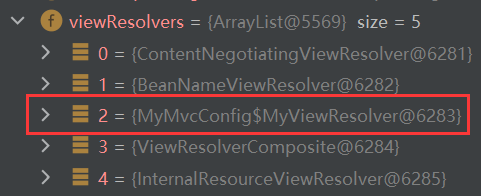
这个就是我们自定义的视图解析器,说明已经生效了
4 日期格式化
4.1springboot默认配置的日期格式
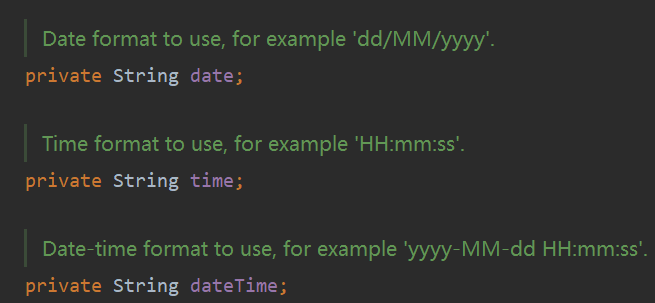
4.2 我们可以在spingboot配置文件自定义格式来覆盖默认的
application.properties
spring.mvc.format.date-time=yyyy-MM-dd HH:mm:ss5 扩展springmvc方式
以下使用添加视图跳转演示
5.1在src/main/resources/templates新建一个html页面
<!DOCTYPE html>
<html lang="en">
<head>
    <meta charset="UTF-8">
    <title>Title</title>
</head>
<body>
<h1>我自己定义的,嘿嘿嘿</h1>
</body>
</html>
5.2 导入thymeleaf依赖
<!--thymeleaf模板引擎-->
<dependency>
    <groupId>org.thymeleaf</groupId>
    <artifactId>thymeleaf-spring5</artifactId>
</dependency>
<dependency>
    <groupId>org.thymeleaf.extras</groupId>
    <artifactId>thymeleaf-extras-java8time</artifactId>
</dependency>
5.2 编写一个MyMvcConfig.java
package com.lv.config;

import org.springframework.context.annotation.Configuration;
import org.springframework.web.servlet.config.annotation.ViewControllerRegistry;
import org.springframework.web.servlet.config.annotation.WebMvcConfigurer;

//如果我们要扩展springmvc,官方建议我们这样去做
@Configuration
public class MyMvcConfig implements WebMvcConfigurer {
    //视图跳转
    @Override
    public void addViewControllers(ViewControllerRegistry registry) {
        registry.addViewController("/lv").setViewName("test");
    }
}
5.3 启动程序测试
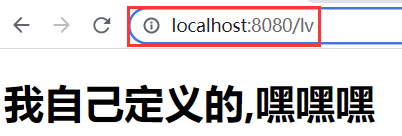
跳转成功,结论:我们要扩展SpringMVC,官方就推荐我们使用这种方式,既保SpringBoot留所有的自动配置,也能用我们扩展的配置
6 全面接管springmvc方式
springboot对springmvc的默认配置全部失效,只生效我们自定义的配置,只需要在配置类中加入@EnableWebMvc注解即可,不推荐这种方式,下面测试一下
6.1 在src/main/resources/static 目录下新建一个 index.html
<!DOCTYPE html>
<html lang="en">
<head>
    <meta charset="UTF-8">
    <title>Title</title>
</head>
<body>
<h1>我自己写的首页,嘿嘿嘿</h1>
</body>
</html>
这是springboot默认定制首页的方式,会自动在src/main/resources/static目录下寻找index.html作为首页,这个行为就代表了springboot对springmvc的默认配置
6.2 启动项目访问首页

访问成功,说明目前springboot对springmvc的默认配置是生效的
6.3 在MyMvcConfig.java中加入@EnableWebMvc注解
package com.lv.config;

import org.springframework.context.annotation.Configuration;
import org.springframework.web.servlet.config.annotation.EnableWebMvc;
import org.springframework.web.servlet.config.annotation.ViewControllerRegistry;
import org.springframework.web.servlet.config.annotation.WebMvcConfigurer;

@Configuration
@EnableWebMvc
public class MyMvcConfig implements WebMvcConfigurer {
    @Override
    public void addViewControllers(ViewControllerRegistry registry) {
        registry.addViewController("/lv").setViewName("test");
    }
}
6.4 重启程序,再次访问首页
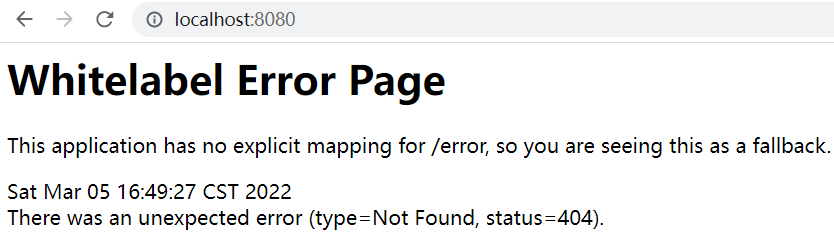
首页访问不到了,说明springboot对springmvc的默认配置失效了

 浙公网安备 33010602011771号