springMVC-JSON
1 引入依赖
<dependency>
    <groupId>com.fasterxml.jackson.core</groupId>
    <artifactId>jackson-databind</artifactId>
    <version>2.10.0</version>
</dependency>所有引入的依赖都需要在IDEA项目发布中,添加lib依赖,参考这篇博客的第2步:springMVC-HelloSpringMVC
2 配置测试相关springMVC配置
2.1 web.xml
<?xml version="1.0" encoding="UTF-8"?>
<web-app xmlns="http://xmlns.jcp.org/xml/ns/javaee"
         xmlns:xsi="http://www.w3.org/2001/XMLSchema-instance" xmlns:mvc="http://www.w3.org/1999/xhtml"
         xsi:schemaLocation="http://xmlns.jcp.org/xml/ns/javaee http://xmlns.jcp.org/xml/ns/javaee/web-app_4_0.xsd"
         version="4.0">
    <!--配置DispatchServlet-->
    <servlet>
        <servlet-name>springmvc</servlet-name>
        <servlet-class>org.springframework.web.servlet.DispatcherServlet</servlet-class>
        <init-param>
            <param-name>contextConfigLocation</param-name>
            <param-value>classpath:springmvc-servlet.xml</param-value>
        </init-param>
        <load-on-startup>1</load-on-startup>
    </servlet>
    <servlet-mapping>
        <servlet-name>springmvc</servlet-name>
        <url-pattern>/</url-pattern>
    </servlet-mapping>
    <!--配置springmvc的编码过滤器-->
    <filter>
        <filter-name>encoding</filter-name>
        <filter-class>org.springframework.web.filter.CharacterEncodingFilter</filter-class>
        <init-param>
            <param-name>encoding</param-name>
            <param-value>utf-8</param-value>
        </init-param>
    </filter>
    <filter-mapping>
        <filter-name>encoding</filter-name>
        <url-pattern>/*</url-pattern>
    </filter-mapping>
</web-app>
2.2 springmvc-servlet.xml
<?xml version="1.0" encoding="UTF-8"?>
<beans xmlns="http://www.springframework.org/schema/beans"
       xmlns:xsi="http://www.w3.org/2001/XMLSchema-instance"
       xmlns:context="http://www.springframework.org/schema/context"
       xmlns:mvc="http://www.springframework.org/schema/mvc"
       xsi:schemaLocation="http://www.springframework.org/schema/beans
        http://www.springframework.org/schema/beans/spring-beans.xsd
        http://www.springframework.org/schema/context
        http://www.springframework.org/schema/context/spring-context.xsd
        http://www.springframework.org/schema/mvc
        http://www.springframework.org/schema/mvc/spring-mvc.xsd">

    <!--自动扫描指定包下的注解,将他放到Spring的IOC容器-->
    <context:component-scan base-package="com.lv.controller"/>
    <!--视图解析器:DispatcherServlet给他的ModelAndView-->
    <bean class="org.springframework.web.servlet.view.InternalResourceViewResolver" id="InternalResourceViewResolver">
        <!--前缀-->
        <property name="prefix" value="/WEB-INF/jsp/"/>
        <!--后缀-->
        <property name="suffix" value=".jsp"/>
    </bean>
</beans>
3 解决乱码
有两种方式选择一种即可
3.1 在方法的注解中增加参数
@RequestMapping (value = "j1",produces = "application/json;charset=utf-8")3.2 在spirngMVC配置文件中增加全局配置(推荐)
<!--JSON解决乱码配置-->
<mvc:annotation-driven>
    <mvc:message-converters register-defaults="true">
        <bean class="org.springframework.http.converter.StringHttpMessageConverter">
            <constructor-arg value="utf-8"/>
        </bean>
        <bean class="org.springframework.http.converter.json.MappingJackson2HttpMessageConverter">
            <property name="objectMapper">
                <bean class="org.springframework.http.converter.json.Jackson2ObjectMapperFactoryBean">
                    <property name="failOnEmptyBeans" value="false"/>
                </bean>
            </property>
        </bean>
    </mvc:message-converters>
</mvc:annotation-driven>
4 测试JSON.stringify() 和 JSON.parse() 方法
4.1 新建一个html
<!DOCTYPE html>
<html lang="en">
<head>
<meta charset="UTF-8">
<title>Title</title>
<script type="text/javascript">
//编写一个JavaScript对象 ES6
let user = {
name : "哈哈",
age : 3,
sex : "男"
};
//将js对象转化为json对象
let json = JSON.stringify(user);
//将json对象转化为js对象
let obj = JSON.parse(json);
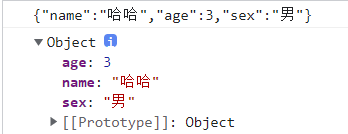
console.log(json);
console.log(obj);
</script>
</head>
<body>
</body>
</html>4.2 在浏览器运行,查询控制台
5 测试返回JSON格式的对象
5.1 新建一个User实体类
需要引入lombok依赖
@Data
@AllArgsConstructor
@NoArgsConstructor
public class User {
    private String name;
    private int age;
    private String sex;
}
5.2 编写一个UserController控制器类
@Controller
//@RestController 使用了这个注解以后这类种所有方法都不会走视图解析器指挥返回一个字符串
public class UserController {
//@RequestMapping (value = "j1",produces = "application/json;charset=utf-8")
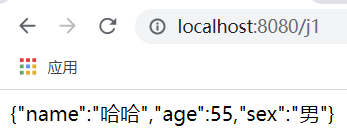
@RequestMapping("j1")
@ResponseBody //添加了这个注解以后,就不会走视图解析器,会直接返回一个字符串
public String json1() throws JsonProcessingException {
//创建一个对象
User user = new User("哈哈",55,"男");
//jackson ObjectMapper
ObjectMapper mapper = new ObjectMapper();
String str = mapper.writeValueAsString(user);
return str;
}
}5.2 配置tomcat 启动测试
6 测试返回JSON格式存储对象的集合
6.1 在UserController中添加方法
@ResponseBody
@RequestMapping("j2")
public String json2() throws JsonProcessingException{
    ObjectMapper mapper = new ObjectMapper();
    List<User> userList = new ArrayList<>();
    User user1 = new User("哈哈1号", 6, "男");
    User user2 = new User("哈哈2号", 7, "女");
    User user3 = new User("哈哈3号", 8, "女");
    User user4 = new User("哈哈4号", 5, "男");

    userList.add(user1);
    userList.add(user2);
    userList.add(user3);
    userList.add(user4);

    String str = mapper.writeValueAsString(userList);
    return str;
}
6.2 测试结果

7 测试返回时间对象
7.1 使用时间戳的方式
7.1.1 在UserController中添加方法
@ResponseBody
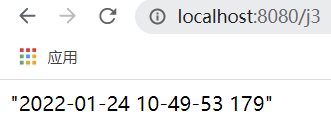
@RequestMapping("j3")
public String json3() throws JsonProcessingException{
ObjectMapper mapper = new ObjectMapper();
Date date = new Date();
//自定义日期格式
SimpleDateFormat sdf = new SimpleDateFormat("yyyy-MM-dd HH-mm-ss SSS");
String time = sdf.format(date);
return mapper.writeValueAsString(time);
}7.1.2 测试结果
7.2 通过配置 ObjectMapper的方式
7.2.1 在UserController中添加方法
@ResponseBody
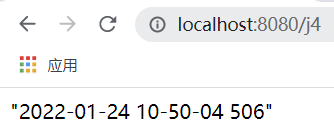
@RequestMapping("j4")
public String json4() throws JsonProcessingException{
ObjectMapper mapper = new ObjectMapper();
//ObjectMapper,时间解析后的默认格式为Timestamp,时间戳
mapper.configure(SerializationFeature.WRITE_DATES_AS_TIMESTAMPS,false);
SimpleDateFormat sdf = new SimpleDateFormat("yyyy-MM-dd HH-mm-ss SSS");
mapper.setDateFormat(sdf);
Date date = new Date();
return mapper.writeValueAsString(date);
}7.2.2 测试结果
8 提取工具类
8.1 新建一个工具类
public class JsonUtils {
    public static String getJson(Object o,String dateFormat){
        ObjectMapper mapper = new ObjectMapper();
        //不使用时间戳的方式
        mapper.configure(SerializationFeature.WRITE_DATES_AS_TIMESTAMPS,false);
        //自定义日期的格式
        SimpleDateFormat sdf = new SimpleDateFormat(dateFormat);
        mapper.setDateFormat(sdf);
        try {
            return mapper.writeValueAsString(o);
        } catch (JsonProcessingException e) {
            e.printStackTrace();
        }
        return null;
    }
    public static String getJson(Object o){
        return getJson(o,"yyyy-MM-dd HH-mm-ss SSS");
    }
}
8.2 在Controller类的方法直接调用工具类
@ResponseBody
@RequestMapping("j5")
public String json5(){
    Date date = new Date();
    return JsonUtils.getJson(date, "yyyy-MM-dd HH-mm-ss SSS");
}
8.3 执行结果
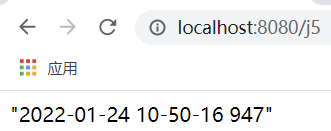
注:返回对象,返回集合,还是返回时间对象,都可以直接调用工具类的方法,这里只展示了返回时间对象
9 FastJson 的常用方法
fastjson 是阿里巴巴开发的一款与json相关的工具包
9.1 引入依赖
<dependency>
    <groupId>com.alibaba</groupId>
    <artifactId>fastjson</artifactId>
    <version>1.2.75</version>
</dependency>
9.2 在Controller类中增加一个方法
@ResponseBody
@RequestMapping("j6")
public String json6(){
    List<User> userList = new ArrayList<>();
    User user = new User("哈哈", 1, "男");
    userList.add(new User("哈哈1号", 6, "男"));
    userList.add(new User("哈哈2号", 7, "女"));
    userList.add(new User("哈哈3号", 8, "女"));
    userList.add(new User("哈哈4号", 5, "男"));
    //java对象转JSON字符串
    String jsonStringList = JSON.toJSONString(userList);
    System.out.println("java集合转JSON字符串:JSON.toJSONString(userList)==>"+jsonStringList);
    String jsonString = JSON.toJSONString(user);
    System.out.println("java对象转JSON字符串:JSON.toJSONString(user)==>"+jsonString);
    //JSON字符串转java对象
    Object object = JSON.parseObject(jsonString, User.class);
    System.out.println("jJSON字符串转java对象:JSON.parseObject(jsonString, User.class)==>"+jsonString);
    //java对象转JSON对象
    JSONObject jsonObject = (JSONObject) JSON.toJSON(user);
    System.out.println("java对象转JSON对象:(JSONObject) JSON.toJSON(user)==>"+jsonObject);
    //JSON对象转java对象
    Object object1 = JSON.toJavaObject(jsonObject, User.class);
    System.out.println("JSON对象转java对象:JSON.toJavaObject(jsonObject, User.class)==>"+object1);
    return "Hello";
}
9.3 配置tomcat测试,查看后端控制台


 浙公网安备 33010602011771号