springMVC-注解开发springMVC
流程对照这篇博客:springMVC-HelloSpringMVC
1 引入依赖
与上面博客的第1步相同
2 在IDEA项目发布中,添加lib依赖
与上面博客的第2步相同
3 配置web.xml,注册DispatcherServlet
与上面博客的第3步相同
4 编写springMVC的配置文件
<?xml version="1.0" encoding="UTF-8"?>
<beans xmlns="http://www.springframework.org/schema/beans"
       xmlns:xsi="http://www.w3.org/2001/XMLSchema-instance"
       xmlns:context="http://www.springframework.org/schema/context"
       xmlns:mvc="http://www.springframework.org/schema/mvc"
       xsi:schemaLocation="http://www.springframework.org/schema/beans
        http://www.springframework.org/schema/beans/spring-beans.xsd
        http://www.springframework.org/schema/context
        http://www.springframework.org/schema/context/spring-context.xsd
        http://www.springframework.org/schema/mvc
        http://www.springframework.org/schema/mvc/spring-mvc.xsd">

    <!--自动扫描指定包下的注解,将他放到Spring的IOC容器-->
    <context:component-scan base-package="com.lv.controller"/>
    <!--让springMVC 不处理静态资源 .css .js .html .mp3-->
    <mvc:default-servlet-handler/>
    <!--注解驱动-->
    <mvc:annotation-driven/>
    <!--视图解析器:DispatcherServlet给他的ModelAndView-->
    <bean class="org.springframework.web.servlet.view.InternalResourceViewResolver" id="InternalResourceViewResolver">
        <!--前缀-->
        <property name="prefix" value="/WEB-INF/jsp/"/>
        <!--后缀-->
        <property name="suffix" value=".jsp"/>
    </bean>
</beans>
5 编写操作业务的controller类
package com.lv.controller;

import org.springframework.stereotype.Controller;
import org.springframework.ui.Model;
import org.springframework.web.bind.annotation.RequestMapping;

@Controller
public class HelloController {
    @RequestMapping("/hello")
    public String hello(Model model){
        //封装数据
        model.addAttribute("message","Hello SpringMVCAnnotation");
        return "hello"; //会被视图解析器处理
    }
}
6 编写跳转的jsp页面
与上面博客的第7步相同
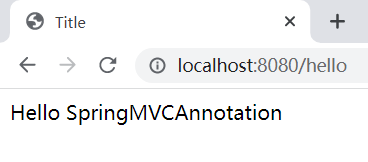
7 配置Tomcat 启动测试

 浙公网安备 33010602011771号