【Java】【Swagger】——接口过滤
在前后端分离时代,Swagger能够实时更新API,十分好用。那么如果根据实际业务需要,展示接口呢?
前提
已经成功使用Swagger。知道增加 @Bean 注解增加分组。此时不同的分组就涉及到不同的过滤。如何过滤接口?

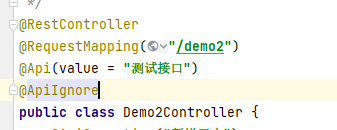
增加注解@ApiIgnore
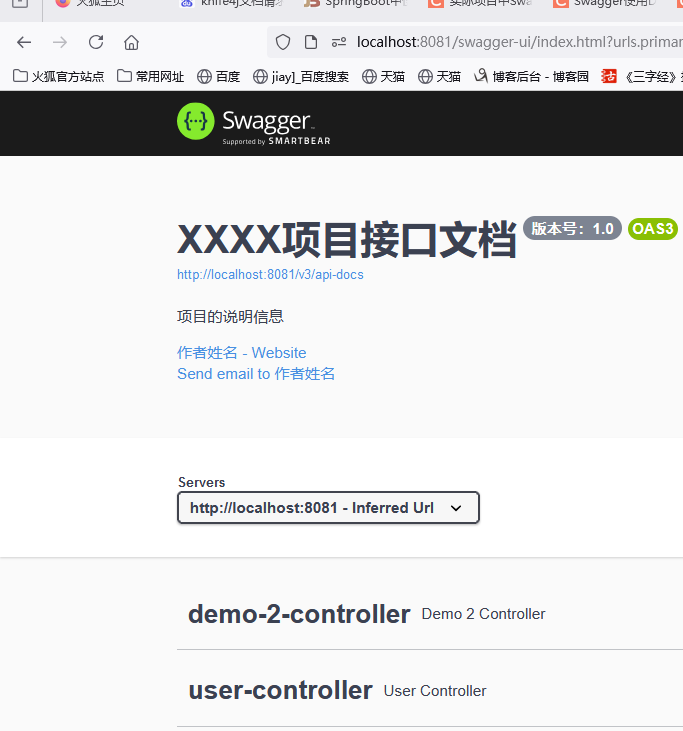
假设,增加注解前有两个接口。

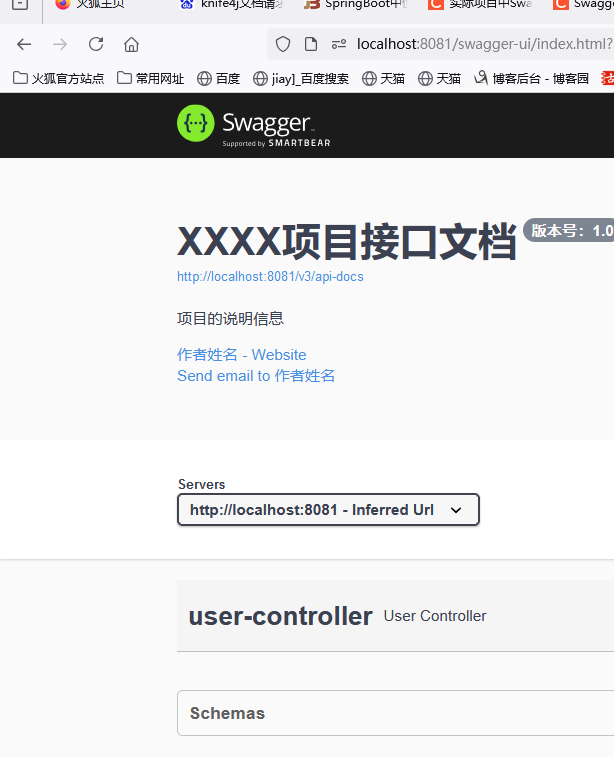
Demo2Controller增加 @ApiIgnore 注解后。Swagger文档只包含一个注解。@ApiIgnore 可以放在类名上,用款放在具体的接口上。


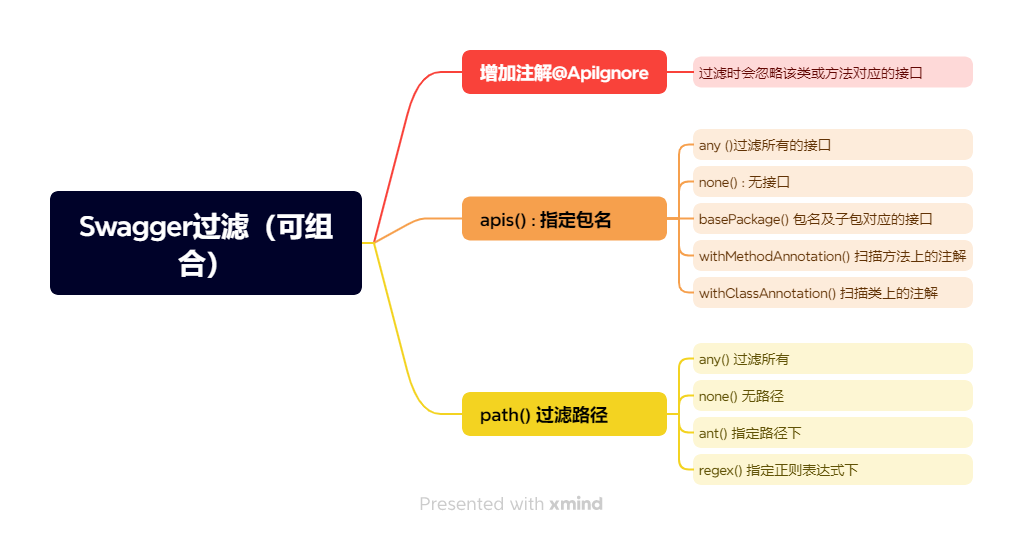
apis()方法 : 过滤包
any() : 所有的
 @Bean
    public Docket createRestApi(){
        return new Docket(DocumentationType.OAS_30)
                .apiInfo(apiInfo())  // API的基本信息,展示在文档页面中(自定义展示信息)
                // 设置哪些接口暴露给Swaager展示
                .select()
                // 当前项目所有对的接口
                .apis(RequestHandlerSelectors.any())
                .build();
    }
none() :无
 @Bean
    public Docket createRestApi(){
        return new Docket(DocumentationType.OAS_30)
                .apiInfo(apiInfo())  // API的基本信息,展示在文档页面中(自定义展示信息)
                // 设置哪些接口暴露给Swaager展示
                .select()
                // 不显示任何接口
                .apis(RequestHandlerSelectors.none())
                .build();
    }
basePackage() : 包名及子包的接口
@Bean
    public Docket createRestApi(){
        return new Docket(DocumentationType.OAS_30)
                .apiInfo(apiInfo())  // API的基本信息,展示在文档页面中(自定义展示信息)
                // 设置哪些接口暴露给Swaager展示
                .select()
                // 包com.example.demo1以及子包
                .apis(RequestHandlerSelectors.basePackage("com.example.demo1"))
                .build();
    }
withMethodAnnotation: 扫描方法上的注解
@Bean
    public Docket createRestApi(){
        return new Docket(DocumentationType.OAS_30)
                .apiInfo(apiInfo())  // API的基本信息,展示在文档页面中(自定义展示信息)
                // 设置哪些接口暴露给Swaager展示
                .select()
                // 扫码方法上的注解(即注解包含 @ApiOperation),这种方式比较灵活,推荐
                .apis(RequestHandlerSelectors.withMethodAnnotation(ApiOperation.class))
                .build();
    }
withClassAnnotation : 扫描类上的注解
  @Bean
    public Docket createRestApi(){
        return new Docket(DocumentationType.OAS_30)
                .apiInfo(apiInfo())  // API的基本信息,展示在文档页面中(自定义展示信息)
                // 设置哪些接口暴露给Swaager展示
                .select()
                // 扫描类上的注解(即注解包含 @Api)
                .apis(RequestHandlerSelectors.withClassAnnotation(Api.class))
                .build();
    }
apis下的条件不是只有一条,可以用.and 或.or 组合起来
@Bean
    public Docket createRestApi(){
        return new Docket(DocumentationType.OAS_30)
                .apiInfo(apiInfo())  // API的基本信息,展示在文档页面中(自定义展示信息)
                // 设置哪些接口暴露给Swaager展示
                .select()
                // 扫描类上的注解(即注解包含 @Api)且在包 "com.example.demo1" 的接口
                .apis(RequestHandlerSelectors.withClassAnnotation(Api.class)
                        .and(RequestHandlerSelectors.basePackage("com.example.demo1"))
                )
                .build();
    }
path : 过滤路径
any: 过滤所有
@Bean
    public Docket createRestApi(){
        return new Docket(DocumentationType.OAS_30)
                .apiInfo(apiInfo())  // API的基本信息,展示在文档页面中(自定义展示信息)
                // 设置哪些接口暴露给Swaager展示
                .select()
                // 过滤所有的路径
                .paths(PathSelectors.any())
                .build();
    }
none: 无
 @Bean
    public Docket createRestApi(){
        return new Docket(DocumentationType.OAS_30)
                .apiInfo(apiInfo())  // API的基本信息,展示在文档页面中(自定义展示信息)
                // 设置哪些接口暴露给Swaager展示
                .select()
                // 不过滤任何路径
                .paths(PathSelectors.none())
                .build();
    }
ant : 过滤路径下的
 @Bean
    public Docket createRestApi(){
        return new Docket(DocumentationType.OAS_30)
                .apiInfo(apiInfo())  // API的基本信息,展示在文档页面中(自定义展示信息)
                // 设置哪些接口暴露给Swaager展示
                .select()
                // 过滤/user路径下的接口
                .paths(PathSelectors.ant("/user/**"))
                .build();
    }
regex: 正则表单四匹配
 @Bean
    public Docket createRestApi(){
        return new Docket(DocumentationType.OAS_30)
                .apiInfo(apiInfo())  // API的基本信息,展示在文档页面中(自定义展示信息)
                // 设置哪些接口暴露给Swaager展示
                .select()
                // 过滤路径名称 ( demo+一个字符/+ 任意目录 ) ? 匹配1个字符 ; * 匹配0个或多个字符 ; ** 匹配0个或多个目录
                .paths(PathSelectors.regex("/demo.?/.*"))
                .build();
    }
总之,过滤路径的方法有3中,通过注解不显示、通过apis和path指定包名和路径名。可以根据实际需要,组合过滤。
参考文档
SpringBoot中使用Swagger的最全方法详解:https://www.jb51.net/program/306740lkd.htm
Swagger的简单应用:https://blog.csdn.net/m0_46313726/article/details/123285695
有志者,事竟成,破釜沉舟,百二秦关终属楚; 苦心人,天不负,卧薪尝胆,三千越甲可吞吴。


