转:Angular CLI 安装和使用
原博客地址:https://www.cnblogs.com/wyt007/p/10260524.html
1. 背景介绍
关于Angular版本,Angular官方已经统一命名Angular 1.x同一为Angular JS;Angular 2.x及以上统称Angular;
CLI是Command Line Interface的简写,是一种命令行接口,实现自动化开发流程,比如:ionic cli、vue cli等;它可以创建项目、添加文件以及执行一大堆开发任务,比如测试、打包和发布。
- 官方文档:https://angular.io
- 官方文档:https://angular.io/guide/quickstart
- GitHub:https://github.com/angular/angular-cli
- Angular Material:https://material.angular.io/
2. 安装Angular CLI
1. 首先确认安装了node.js和npm。
1 // 显示当前node和npm版本
2 $ node -v
3 $ npm -v
4 // node 版本高于6.9.3  npm版本高于3.0.0
2. 全局安装typescript(可选)。
1 $ npm install -g typescript
2 // 新建项目的时候会自动安装typescript(非全局)所以这里也可以不用安装。
3. 安装Angular CLI。
$ npm install -g @angular/cli
经过不算漫长的等待,你的Angular CLI就装好了。确认一下:
$ ng v

// 出现下面画面说明安装成功,如果不成功你可能需要uninstall一下,再重新来过
$ ng v
    _                      _                 ____ _     ___
   / \   _ __   __ _ _   _| | __ _ _ __     / ___| |   |_ _|
  / △ \ | '_ \ / _` | | | | |/ _` | '__|   | |   | |    | |
 / ___ \| | | | (_| | |_| | | (_| | |      | |___| |___ | |
/_/   \_\_| |_|\__, |\__,_|_|\__,_|_|       \____|_____|___|
               |___/
@angular/cli: 1.1.1
node: 7.10.0
os: darwin x64
3.新建Angular项目
ng new my-app
这里要等很久啊,大概要下载141M东西。
如果你已经建好了项目文件夹就可以使用ng init my-app来新建项目,ng init和ng new的区别是ng new会帮我们创建一个和项目名称相同的文件夹。
趁着它在下载,来看一下运行ng new之后Angular cli已经帮我们干了什么:
$ ng new helloKeriy
installing ng
  create .editorconfig
  create README.md
  create src/app/app.component.css      // 使用HTML模板、CSS样式和单元测试定义AppComponent组件。 它是根组件,随着应用的成长它会成为一棵组件树的根节点。
  create src/app/app.component.html
  create src/app/app.component.spec.ts
  create src/app/app.component.ts       // 定义AppModule,这个根模块会告诉Angular如何组装该应用
  create src/app/app.module.ts
  create src/assets/.gitkeep            // 这个文件夹下你可以放图片等任何东西,在构建应用时,它们全都会拷贝到发布包中。
  create src/environments/environment.prod.ts
  create src/environments/environment.ts
  create src/favicon.ico        // 每个网站都希望自己在书签栏中能好看一点。 请把它换成你自己的图标。
  create src/index.html         // 宿主页面
  create src/main.ts
  create src/polyfills.ts
  create src/styles.css         // 公共样式
  create src/test.ts            // 这是单元测试的主要入口点
  create src/tsconfig.app.json
  create src/tsconfig.spec.json
  create src/typings.d.ts
  create .angular-cli.json      // Anguar 编译依赖
  create e2e/app.e2e-spec.ts    // e2e 端对端测试目录
  create e2e/app.po.ts
  create e2e/tsconfig.e2e.json
  create .gitignore
  create karma.conf.js
  create package.json           // Angular 的依赖包
  create protractor.conf.js
  create tsconfig.json          // TypeScript 编译器的参数
  create tslint.json
Successfully initialized git.
Installing packages for tooling via npm.
Installed packages for tooling via npm.
Project 'helloKeriy' successfully created.
强烈推荐安装淘宝镜像源!
1 $ ng new helloKeriy --skip-install  // 先跳过npm安装
2 $ cd helloKeriy
3 $ cnpm install                      // 使用淘宝源安装
4. 成果展示
安装完成之后就可以启动项目了:
cd helloKeriy
ng serve -open
ng serve命令会启动开发服务器,监听文件变化,并在修改这些文件时重新构建此应用。
使用--open(或-o)参数可以自动打开浏览器并访问http://localhost:4200/。
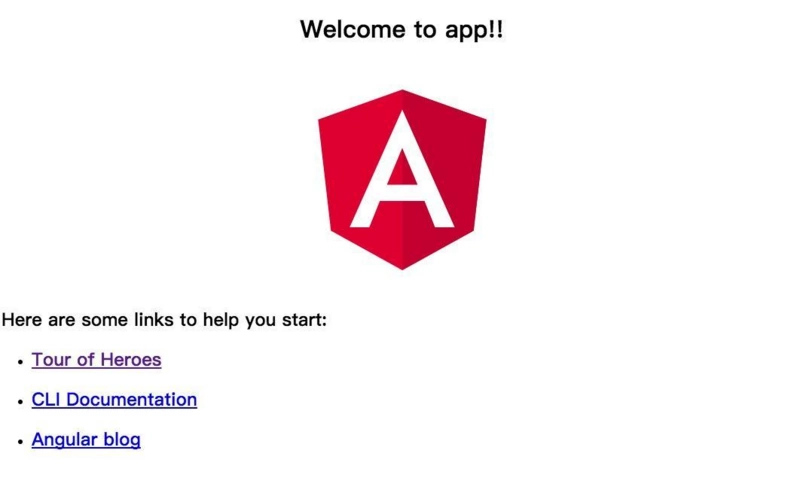
接下来你将看到:
5. 安装Angular Material
5.1 安装
官方安装说明:https://material.angular.io/guide/getting-started
npm install --save @angular/material @angular/cdk @angular/animations
然后执行恢复:
npm audit fix
5.2 配置animations
将BrowserAnimationsModule导入应用程序以启用动画支持。
1 import {BrowserAnimationsModule} from '@angular/platform-browser/animations';
2
3 @NgModule({
4   ...
5   imports: [BrowserAnimationsModule],
6   ...
7 })
8 export class PizzaPartyAppModule { }
示例:打开app.module.ts并修改:
 1 import { BrowserModule } from '@angular/platform-browser';
 2 import { NgModule } from '@angular/core';
 3
 4 import { BrowserAnimationsModule } from '@angular/platform-browser/animations';
 5
 6 import { AppComponent } from './app.component';
 7
 8 @NgModule({
 9   declarations: [
10     AppComponent
11   ],
12   imports: [
13     BrowserModule,
14     BrowserAnimationsModule
15   ],
16   providers: [],
17   bootstrap: [AppComponent]
18 })
19 export class AppModule { }
5.3 导入组件模块
1 import {MatButtonModule, MatCheckboxModule} from '@angular/material';
2
3 @NgModule({
4   ...
5   imports: [MatButtonModule, MatCheckboxModule],
6   ...
7 })
8 export class PizzaPartyAppModule { }
示例:打开app.module.ts并修改:
 1 import { BrowserModule } from '@angular/platform-browser';
 2 import { NgModule } from '@angular/core';
 3
 4 import { BrowserAnimationsModule } from '@angular/platform-browser/animations';
 5 import {MatButtonModule, MatCheckboxModule} from '@angular/material';
 6
 7 import { AppComponent } from './app.component';
 8
 9 @NgModule({
10   declarations: [
11     AppComponent
12   ],
13   imports: [
14     BrowserModule,
15     BrowserAnimationsModule,
16     MatButtonModule,
17     MatCheckboxModule
18   ],
19   providers: [],
20   bootstrap: [AppComponent]
21 })
22 export class AppModule { }
5.4 添加主题
包含主题是将所有核心和主题样式应用于您的应用程序所必需的。要开始使用预先构建的主题,请在应用程序中全局包含Angular Material的预构建主题之一。如果您正在使用Angular CLI,则可以将其添加到styles.css中。
如果您不使用Angular CLI,则可以通过“index.html”中的<link>元素包含预构建的主题。有关主题的更多信息以及有关如何创建自定义主题的说明,请参阅主题指南。
@import "~@angular/material/prebuilt-themes/indigo-pink.css";
5.5 添加手势支持
npm install --save hammerjs
然后在“src/main.ts ”中引入:
import 'hammerjs';
5.6 添加图标
如果您想将mat-icon组件与正式的材质设计图标一起使用,请在 “index.html”中加载图标字体。
<link href="https://fonts.googleapis.com/icon?family=Material+Icons" rel="stylesheet">

 浙公网安备 33010602011771号