
BeanDefinition是什么?
不废话,直接看源码
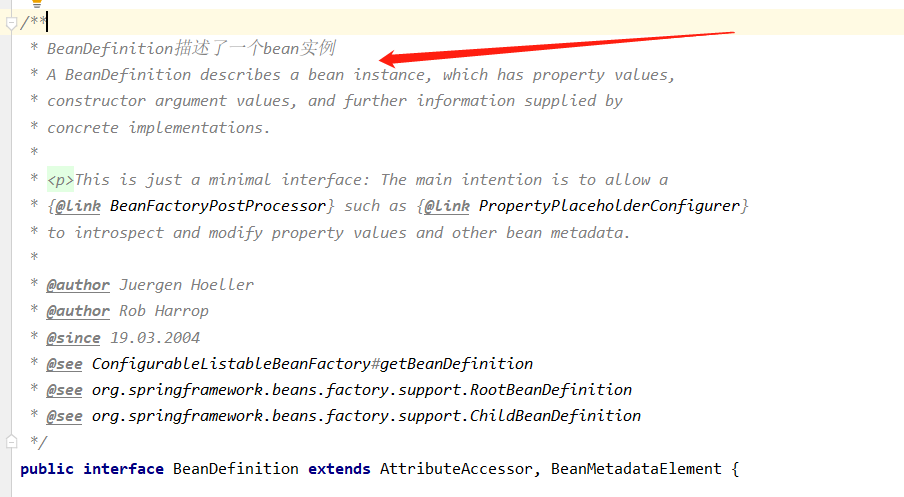
BeanDefinition描述了一个bean实例
这是一个小的接口:主要目的是允许BeanFactoryPostProcessor和PropertyPlaceholderConfigurer修改属性值和其他bean元数据。
先看一下继承关系:

1.BeanDefinition继承的接口:AttributeAccessor
先来看接口上标注的这段
/**
 * Interface defining a generic contract for attaching and accessing metadata
 * to/from arbitrary objects.
 * @author Rob Harrop
 * @since 2.0
 */
public interface AttributeAccessor {
翻译下来就是:
这个接口为从其它任意类中获取或设置元数据提供了一个通用的规范。
其实这就是访问者模式的一种体现,采用这方方法,我们可以将数据接口跟操作方法进行分离。
我们再来看这个接口中定义的方法:
void setAttribute(String name, @Nullable Object value);

Object getAttribute(String name);

Object removeAttribute(String name);

boolean hasAttribute(String name);

String[] attributeNames();
就是提供了一些属性跟设置属性的方法
那么现在问题来了,在我们整个BeanDefiniton体系中,这个被操作的数据结构在哪呢?不要急,在后文中的AbstractBeanDefinition会介绍
2.BeanDefinition继承的接口:BeanMetadataElement
/**
 * Interface to be implemented by bean metadata elements
 * that carry a configuration source object.
 *
 * @author Juergen Hoeller
 * @since 2.0
 */
public interface BeanMetadataElement {
译:这个接口提供了一个方法去获取配置源对象,其实就是我们的原文件。
这个接口只提供了一个方法:
/**
     * Return the configuration source {@code Object} for this metadata element
     * (may be {@code null}).
     */
    @Nullable
    Object getSource();
我们可以理解为,当我们通过注解的方式定义了一个IndexService时,那么此时的IndexService对应的BeanDefinition通过getSource方法返回的就是IndexService.class这个文件对应的一个File对象。
如果我们通过@Bean方式定义了一个IndexService的话,那么此时的source是被@Bean注解所标注的一个Mehthod对象。
3.AbstractBeanDefinition:
public abstract class AbstractBeanDefinition extends BeanMetadataAttributeAccessor
        implements BeanDefinition, Cloneable {
...
}
为什么需要AbstractBeanDefinition?
对比BeanDefinition的源码我们可以发现,AbstractBeanDefinition对BeanDefinition的大部分方法做了实现(没有实现parentName相关方法)。同时定义了一系列的常量及默认字段。
这是因为BeanDefinition接口过于顶层,如果我们依赖BeanDefinition这个接口直接去创建其实现类的话过于麻烦,所以通过AbstractBeanDefinition做了一个下沉,并给很多属性赋了默认值,
例如:
// 默认情况不是懒加载的
private boolean lazyInit = false;
// 默认情况不采用自动注入
private int autowireMode = AUTOWIRE_NO;
// 默认情况作为自动注入的候选bean
private boolean autowireCandidate = true;
// 默认情况不作为优先使用的bean
private boolean primary = false;
........
这样可以方便我们创建其子类,如我们接下来要讲的:ChildBeanDefinition,RootBeanDefinition等等
AttributeAccerror
我们在上文中已经提到过,AttributeAccerror采用了访问者的涉及模式,将数据结构跟操作方法进行了分离,数据结构在哪呢?就在AttributeAccessorSupport这个类中,我们看下它的代码:
public abstract class AttributeAccessorSupport implements AttributeAccessor, Serializable {

    /** Map with String keys and Object values. */
    private final Map<String, Object> attributes = new LinkedHashMap<>();


    @Override
    public void setAttribute(String name, @Nullable Object value) {
        Assert.notNull(name, "Name must not be null");
        if (value != null) {
            this.attributes.put(name, value);
        }
        else {
            removeAttribute(name);
        }
    }

    @Override
    @Nullable
    public Object getAttribute(String name) {
        Assert.notNull(name, "Name must not be null");
        return this.attributes.get(name);
    }

    @Override
    @Nullable
    public Object removeAttribute(String name) {
        Assert.notNull(name, "Name must not be null");
        return this.attributes.remove(name);
    }

    @Override
    public boolean hasAttribute(String name) {
        Assert.notNull(name, "Name must not be null");
        return this.attributes.containsKey(name);
    }

    @Override
    public String[] attributeNames() {
        return StringUtils.toStringArray(this.attributes.keySet());
    }


    /**
     * Copy the attributes from the supplied AttributeAccessor to this accessor.
     * @param source the AttributeAccessor to copy from
     */
    protected void copyAttributesFrom(AttributeAccessor source) {
        Assert.notNull(source, "Source must not be null");
        String[] attributeNames = source.attributeNames();
        for (String attributeName : attributeNames) {
            setAttribute(attributeName, source.getAttribute(attributeName));
        }
    }


    @Override
    public boolean equals(Object other) {
        return (this == other || (other instanceof AttributeAccessorSupport &&
                this.attributes.equals(((AttributeAccessorSupport) other).attributes)));
    }

    @Override
    public int hashCode() {
        return this.attributes.hashCode();
    }

}
可以看到,在这个类中,维护了一个map,这就是BeanDefinition体系中,通过访问者模式所有操作的数据对象。
BeanMetadataAttributeAccessor
这个类主要就是对我们上面的map中的数据操作做了更深一层的封装,我们就看其中的两个方法:
public void addMetadataAttribute(BeanMetadataAttribute attribute) {
    super.setAttribute(attribute.getName(), attribute);
}
public BeanMetadataAttribute getMetadataAttribute(String name) {
    return (BeanMetadataAttribute) super.getAttribute(name);
}
可以发现,它只是将属性统一封装成了一个BeanMetadataAttribute,然后就调用了父类的方法,将其放入到map中。
我们的AbstractBeanDefinition通过继承了BeanMetadataAttributeAccessor这个类,可以对BeanDefinition中的属性进行操作。
这里说的属性仅仅指的是BeanDefinition中的一个map,而不是它的其它字段。
AbstractBeanDefinition的三个子类
GenericBeanDefinition:
替代了原来的ChildBeanDefinition,比起ChildBeanDefinition更为灵活,ChildBeanDefinition在实例化的时候必须要指定一个parentName,而GenericBeanDefinition不需要。
我们通过注解配置的bean以及我们的配置类(除@Bena外)的BeanDefiniton类型都是GenericBeanDefinition。
ChildBeanDefinition:
现在已经被GenericBeanDefinition所替代了。我在5.1.x版本没有找到使用这个类的代码。
RootBeanDefinition
Spring在启动时会实例化几个初始化的BeanDefinition,这几个BeanDefinition的类型都为RootBeanDefinition
Spring在合并BeanDefinition返回的都是RootBeanDefinition
我们通过@Bean注解配置的bean,解析出来的BeanDefinition都是RootBeanDefinition(实际上是其子类ConfigurationClassBeanDefinition)
AnnotatedBeanDefinition
这个接口继承了我们的BeanDefinition接口,我们查看其源码可以发现:
AnnotationMetadata getMetadata();

@Nullable
MethodMetadata getFactoryMethodMetadata();
这个接口相比于BeanDefinition, 仅仅多提供了两个方法
getMetadata(),主要用于获取注解元素据。从接口的命名上我们也能看出,这类主要用于保存通过注解方式定义的bean所对应的BeanDefinition。所以它多提供了一个关于获取注解信息的方法getFactoryMethodMetadata(),这个方法跟我们的@Bean注解相关。当我们在一个配置类中使用了@Bean注解时,被@Bean注解标记的方法,就被解析成了FactoryMethodMetadata。
AnnotatedBeanDefinition的三个实现类
AnnotatedGenericBeanDefinition:
通过形如下面的API注册的bean都是AnnotatedGenericBeanDefinition
public static void main(String[] args) {
    AnnotationConfigApplicationContext ac = new AnnotationConfigApplicationContext();
    ac.register(Config.class);
}
这里的config对象,最后在Spring容器中就是一个AnnotatedGenericBeanDefinition。
通过@Import注解导入的类,最后都是解析为AnnotatedGenericBeanDefinition。
ScannedGenericBeanDefinition:
通过注解扫描的类,如@Service,@Compent等方式配置的Bean都是ScannedGenericBeanDefinition
ConfigurationClassBeanDefinition:
通过@Bean的方式配置的Bean为ConfigurationClassBeanDefinition
什么是合并?
我们来看官网上的一段介绍:

大概翻译如下:
一个BeanDefinition包含了很多的配置信息,包括构造参数,setter方法的参数还有容器特定的一些配置信息,比如初始化方法,静态工厂方法等等。
一个子BeanDefinition可以从它父BeanDefinition继承配置信息,不仅如此,还可以覆盖其中的一些值或者添加一些自己需要的属性。
使用BeanDefinition的父子定义可以减少很多的重复属性的设置,父BeanDefinition可以作为BeanDefinition定义的模板。
想到了什么,多态对吧
我们通过一个例子来观察下合并发生了什么,编写一个Demo如下:
<?xml version="1.0" encoding="UTF-8"?>
<beans xmlns="http://www.springframework.org/schema/beans"
       xmlns:xsi="http://www.w3.org/2001/XMLSchema-instance"
       xsi:schemaLocation="http://www.springframework.org/schema/beans http://www.springframework.org/schema/beans/spring-beans.xsd">
    <bean id="parent" abstract="true"
          class="com.dmz.official.merge.TestBean">
        <property name="name" value="parent"/>
        <property name="age" value="1"/>
    </bean>
    <bean id="child"
          class="com.dmz.official.merge.DerivedTestBean"
          parent="parent" >
        <property name="name" value="override"/>
    </bean>
</beans>
实体类
public class DerivedTestBean {
    private String name;

    private int age;

    // 省略getter setter方法
}

public class TestBean {
    private String name;

    private String age;

     // 省略getter setter方法
}

public class Main {
    public static void main(String[] args) {
        ClassPathXmlApplicationContext cc = new ClassPathXmlApplicationContext("application.xml");
        DerivedTestBean derivedTestBean = (DerivedTestBean) cc.getBean("child");
        System.out.println("derivedTestBean的name = " + derivedTestBean.getName());
        System.out.println("derivedTestBean的age = " + derivedTestBean.getAge());
    }
}
运行:
derivedTestBean的name = override
derivedTestBean的age = 1
在上面的例子中,我们将DerivedTestBean的parent属性设置为了parent,指向了我们的TestBean,同时将TestBean的age属性设置为1,
但是我们在配置文件中并没有直接设置DerivedTestBean的age属性。
但是在最后运行结果,我们可以发现,DerivedTestBean中的age属性已经有了值,并且为1,就是我们在其parent Bean(也就是TestBean)中设置的值。
也就是说,子BeanDefinition会从父BeanDefinition中继承没有的属性。
另外,DerivedTestBean跟TestBean都指定了name属性,但是可以发现,这个值并没有被覆盖掉,
也就是说,子BeanDefinition中已经存在的属性不会被父BeanDefinition中所覆盖。
合并的总结:
所以我们可以总结如下:
子BeanDefinition会从父BeanDefinition中继承没有的属性
这个过程中,子BeanDefinition中已经存在的属性不会被父BeanDefinition中所覆盖
关于合并需要注意的点:
另外我们需要注意的是:
1.子BeanDefinition中的class属性如果为null,同时父BeanDefinition又指定了class属性,那么子BeanDefinition也会继承这个class属性。
2.子BeanDefinition必须要兼容父BeanDefinition中的所有属性。这是什么意思呢?
以我们上面的demo为例,我们在父BeanDefinition中指定了name跟age属性,但是如果子BeanDefinition中子提供了一个name的setter方法,这个时候Spring在启动的时候会报错。
因为子BeanDefinition不能承接所有来自父BeanDefinition的属性
关于BeanDefinition中abstract属性的说明:
1.并不是作为父BeanDefinition就一定要设置abstract属性为true,abstract只代表了这个BeanDefinition是否要被Spring进行实例化并被创建对应的Bean,如果为true,代表容器不需要去对其进行实例化。
2.如果一个BeanDefinition被当作父BeanDefinition使用,并且没有指定其class属性。
那么必须要设置其abstract为trueabstract=true一般会跟父BeanDefinition一起使用,因为当我们设置某个
3.BeanDefinition的abstract=true时,一般都是要将其当作BeanDefinition的模板使用,否则这个BeanDefinition也没有意义,除非我们使用其它BeanDefinition来继承它的属性

