Salesforce 文件上传功能
项目上有时候会需要使用自定义的组件来上传需要的文件,通过Docusment借助Salesforce标准的组件来完成这个演示
先看运行效果:

VF Page 代码
<apex:page controller="FileUploadController" showHeader="false" sidebar="false" >
    <apex:form >
        <apex:pagemessages />
        <apex:pageBlock >
            <apex:pageBlockSection columns="4">
            <apex:inputFile value="{!csvFileBody}" filename="{!csvAsString}"/>
            <apex:commandButton value="Import file" action="{!importFile}"/>
            </apex:pageBlockSection>
        </apex:pageBlock>
    </apex:form>
</apex:page>
APEX 代码
public class FileUploadController {
    public Blob csvFileBody{get;set;}
    public String csvAsString{get;set;}
    public String oppId{get;set;}

    public FileUploadController(){
        oppId = ApexPages.currentPage().getParameters().get('oppId');
        System.debug(oppId);
    }
    public void importFile(){
        // Insert file
        ContentVersion contentVersion_1 = new ContentVersion();
        contentVersion_1.Title = csvAsString;
        contentVersion_1.PathOnClient = csvAsString;
        contentVersion_1.VersionData = csvFileBody;
        insert contentVersion_1;
        System.debug('file id:' + contentVersion_1.Id);

        // query file
        List<ContentVersion> list_version = [SELECT contentdocumentid,ownerid FROM ContentVersion WHERE id =: contentVersion_1.Id];
        ContentDocumentLink link = new ContentDocumentLink();
        link.ContentDocumentId = list_version[0].contentdocumentid;
        link.LinkedEntityId = oppId;
        link.ShareType = 'V';
        // save file in the record
        insert link;
    }
}
访问VF页面时传入Opportunity的Id,点击上传文件,Import后传入的文件会出现在对应的Opportunity下面。
调用Salesforce的标准组件来实现,唯一需要注意的是对Document的DML操作, 相对Attachment来说要更复杂一些,不过这样实现的页面有一个很严重的问题,那就是组件上传的文件大小,受VisualPage本身135KB大小的限制(现在似乎更新到170KB), 进而导致上传的文件必须小于170KB, 这样的实现是不够的
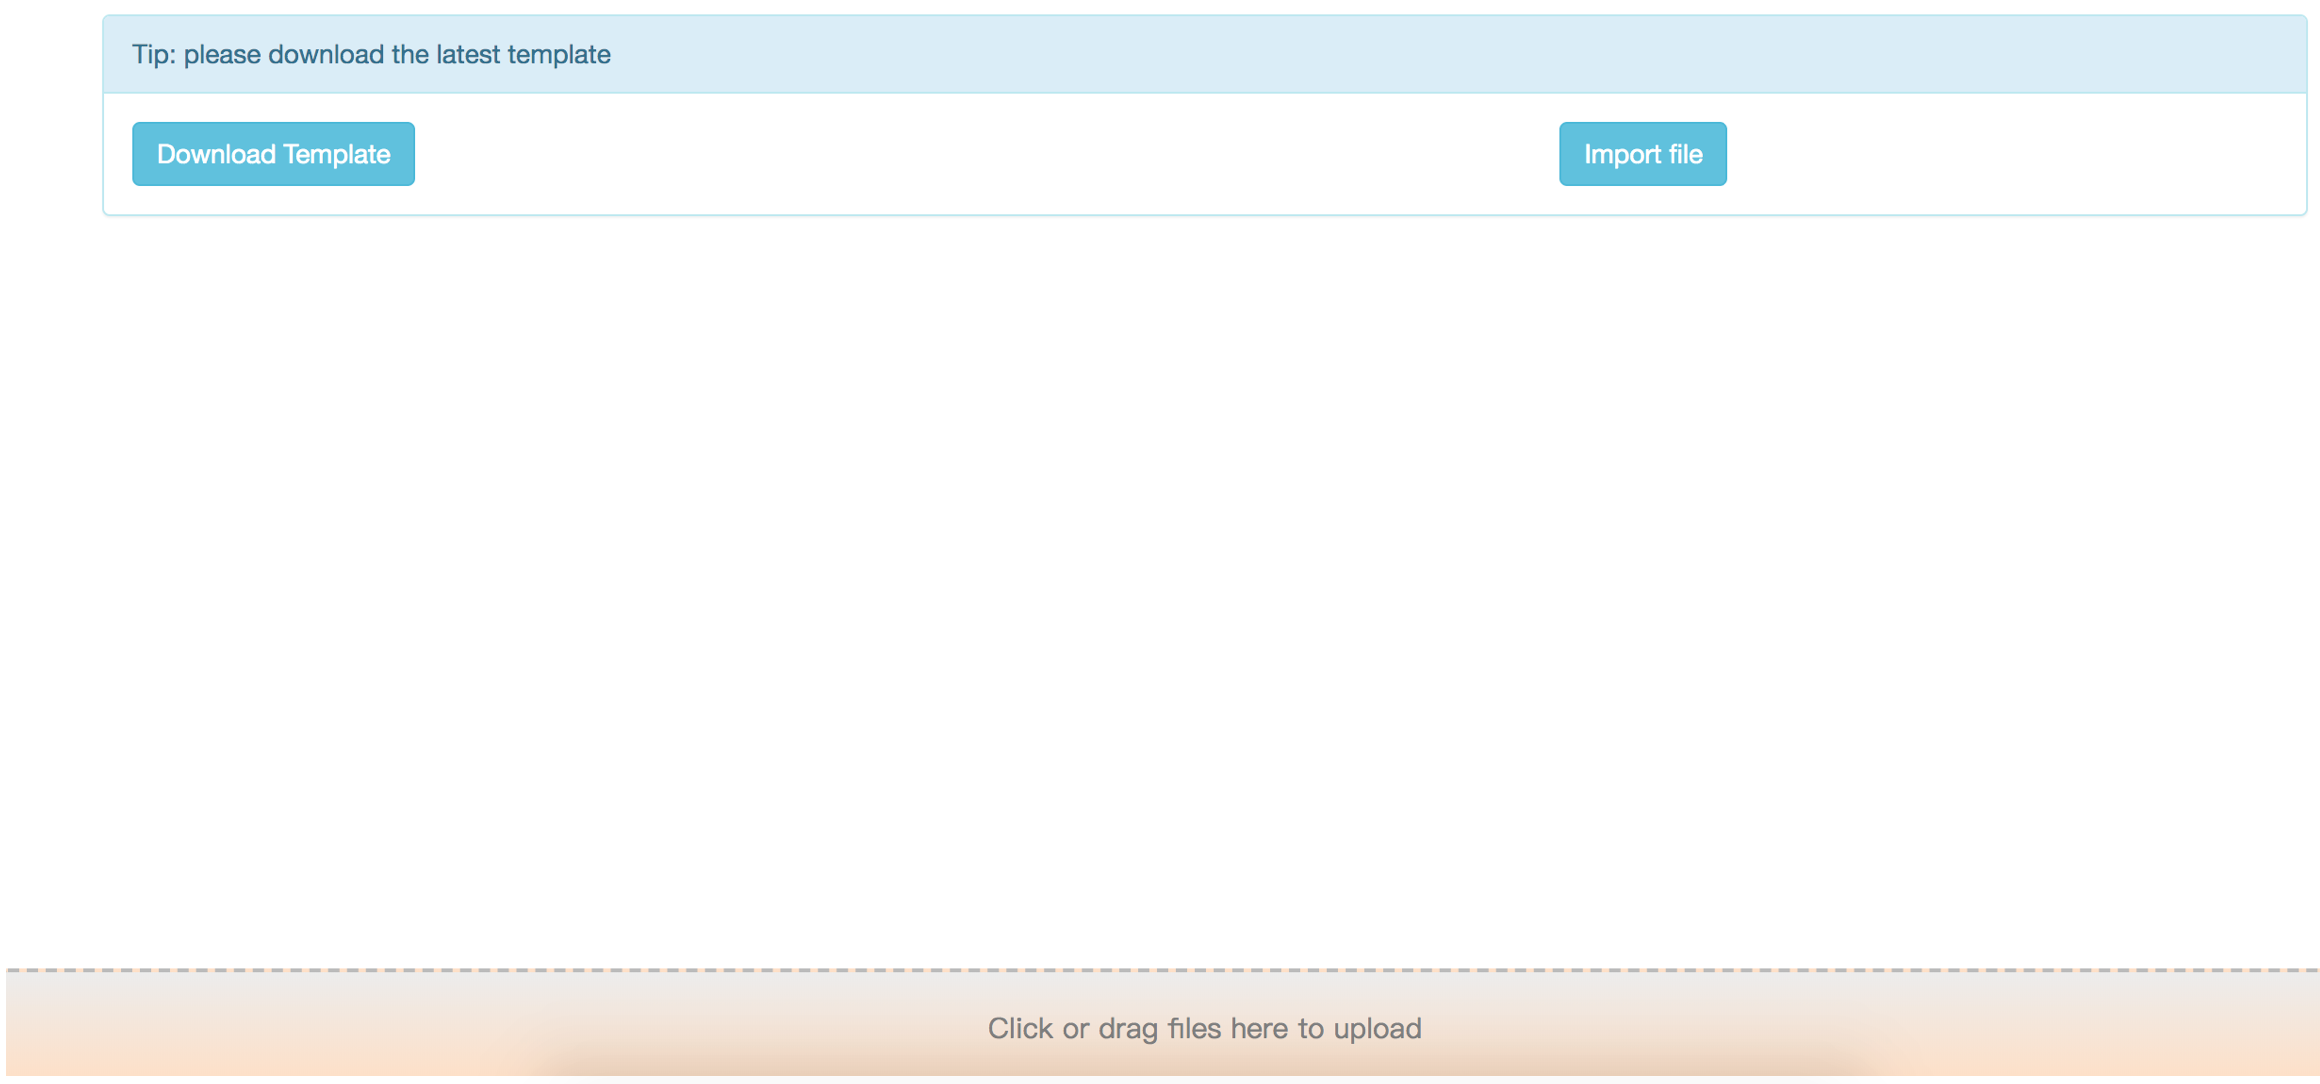
那么我们迭代一个新的版本,优化一下页面元素,同时将文件上传的大小限制扩大
迭代后运行效果如下:

VF Page代码:
<apex:page controller="FileUploadController" sidebar="false" showHeader="false" standardStylesheets="false">
    <head>
        <meta charset="utf-8" />
        <meta http-equiv="X-UA-Compatible" content="IE=edge" />
        <meta name="viewport" content="width=device-width, initial-scale=1" />
        <apex:stylesheet value="{!URLFOR($Resource.bootstrap3, '/css/bootstrap.css')}"/>
        <apex:includeScript value="{!URLFOR($Resource.jqueryui,'/external/jquery/jquery.js')}" />
        <apex:includeScript value="{!URLFOR($Resource.jqueryui, '/jquery-ui.js')}" />
        <apex:includeScript value="{!URLFOR($Resource.bootstrap3, '/js/bootstrap.js')}"/>

        <style type="text/css">
            #drop {
                border: 2px dashed #bbb;
                border-radius: 5px;
                text-align: center;
                font: 15px bold,"Vollkorn";
                color: gray;
                background: -webkit-gradient(linear, 0% 0%, 0% 100%, from(#ECECEC),to(#FEE0C6));
                position: fixed;
                bottom: 0;
                left: 0;
                height: 60px; line-height: 60px; width: 100%; z-index: 4;
            }
        </style>
        <body>
            <apex:form >
                <div class="container" style="padding-top: 15px; margin-bottom: 50px;">
                    <div class="row">
                        <div class="panel panel-info">
                            <div class="panel-heading" id="output">Tip: please download the latest template </div>
                            <div class="panel-body">
                                <div class="row" id="buttonGroupArea">
                                    <div class="col-md-7">
                                        <apex:outputPanel >
                                            <a class="btn btn-info" target="_blank" href="模板下载链接">Download Template</a>
                                        </apex:outputPanel>
                                    </div>
                                    <div class="col-md-2">
                                        <div class="btn-group pull-right " role="group" aria-label="..."></div>
                                        <button type="button" id="upload" class="btn btn-info" onclick="saveAttachment()">Import file</button>
                                    </div>
                                </div>
                            </div>
                        </div>
                    </div>
                </div>
            </div>
            <!--Hide input to handle click uploads-->
            <div style="display:none;">
                <input type="file" id="fileInput" value="" filename="fileInput"/>
            </div>
            <div id="drop">
                Click or drag files here to upload
            </div>
            </apex:form>
        </body>
        <script type="text/javascript">
            function saveAttachment() {
                var testFiles = document.getElementById('fileInput').files;
                filesReader(testFiles);
            }
            /**
            * Click the upload file button and trigger when a file is selected
            * * */
            function changeFileValue(e){
                // get file elements
                var fileInput = document.getElementById('fileInput')
                var testFiles = fileInput.files;
                var testFile = testFiles[0];
                if(testFile != undefined){
                    var file_Name = testFile.name;
                    var dropValue = document.getElementById('drop');
                    dropValue.innerText = 'Selected files:' + file_Name;
                }
            }
            /*****
                *
                * Triggered when placing a file into a specified area
                */
            function handleDrop(e) {
                e.stopPropagation();
                e.preventDefault();
                var files = e.dataTransfer.files;
                filesReader(files);
            }
            function filesReader(testFiles){
                var maxFileSize = 4350000; //Maximum number of file bytes after Base64 encoding
                var file_Body; //file body
                var file_Name; //file Name
                var testFile = testFiles[0];
                if(testFile != undefined) {
                    if(testFile.size <= maxFileSize) {
                        file_Name = testFile.name;
                        var dropValue = document.getElementById('drop');
                        dropValue.innerText = 'Please wait,' + file_Name + ' is uploading ...';
                        var fileReader = new FileReader();
                        fileReader.onloadend = function(e) {
                            file_Body = window.btoa(this.result); //Base 64 encode the file
                            Visualforce.remoting.Manager.invokeAction('{!$RemoteAction.FileUplo adController.testAddAttachment}',file_Name,file_Body,'{!oppId}',
                            function(result,event) {
                                dropValue.innerText = 'Click or drag files here to upload';
                                alert(result);
                            });
                        }
                        fileReader.onerror = function(e) {
                            alert("Upload failed, please try again");
                        }
                        fileReader.onabort = function(e) {
                            alert("Upload failed, please try again");
                        }
                        fileReader.readAsBinaryString(testFile);
                    } else {
                        alert("Base64 encoding allows up to 4.3M files");
                    }
                } else {
                    alert("Please select a file to upload first.");
                }
            }
            function handleDragover(e) {
                e.stopPropagation();
                e.preventDefault();
                e.dataTransfer.dropEffect = 'copy';
            }
            // Click to pop up file selection window function
            showFileBox(){
                var active = document.getElementById("fileInput");
                var mouseEvent = document.createEvent("MouseEvents");
                mouseEvent.initEvent("click", true, true);
                active.dispatchEvent(mouseEvent);
            }
            // Add drag event listener
            var drop = document.getElementById('drop');
            if (drop.addEventListener) {
                drop.addEventListener('dragenter', handleDragover, false);
                drop.addEventListener('dragover', handleDragover, false);
                drop.addEventListener('drop', handleDrop, false);
                //Add click file event listener
                drop.addEventListener('click',showFileBox,false);
            }
            // Listen for the Change event of InputFile
            var fileInputDom = document.getElementById('fileInput');
            if(fileInputDom.addEventListener){
                fileInputDom.addEventListener('change',changeFileValue,false);
            }
        </script>
    </head>
</apex:page>
Apex Code 代码:
public class FileUploadController {
    public Blob csvFileBody{get;set;}
    public String csvAsString{get;set;}
    public String oppId{get;set;}

    public FileUploadController(){
        oppId = ApexPages.currentPage().getParameters().get('oppId');
        System.debug(oppId);
    }
    @RemoteAction
    public static String testAddAttachment(String attachmentName,String attachmentBody,String parentId) {
        String operateResult;
        ContentVersion contentVersion_1 = new ContentVersion();
        contentVersion_1.Title = attachmentName;
        contentVersion_1.PathOnClient = attachmentName;
        contentVersion_1.VersionData = EncodingUtil.base64Decode(attachmentBody);
        try {
            insert contentVersion_1;
            List<ContentVersion> list_version = [SELECT contentdocumentid,ownerid FROM ContentVersion WHERE id =: contentVersion_1.Id];
            ContentDocumentLink link = new ContentDocumentLink();
            link.ContentDocumentId = list_version[0].contentdocumentid;
            link.LinkedEntityId = parentId;
            link.ShareType = 'V';
            // save file in the record
            insert link;
            operateResult = 'import Successfully';
        } catch (Exception e){
            operateResult = 'import Failed';
        }
        return operateResult;
    }
}
比较初始版本,这个版本的UI进行了简单的调整,在新增了拖拽文件上传的功能的同时,将文件上传的大小扩增至4.3M(Base64编码大小限制),通过异步传递数据,绕过了VisualForce Page大小的限制
Tips: 新版本需要引入Jquery和Bootstrap3的资源库来实现
文件的上传真要实现起来很比较这个更加复杂,比如将上传文件的大小进一步扩大该如何实现,比如如何同时上传多个文件,将文件上传的状态进度条分别进行显示,需求很多,只能略做抛砖引玉,希望有所帮助
本文来自博客园,作者:Ricardo.M.Lu,转载请注明原文链接:https://www.cnblogs.com/luqinghua/p/12632110.html


