SpringCloudAlibaba(三)——Nacos客户端开发和openfeign服务间通信
nacos客户端开发
1、新建一个模块springclouAlibaba-nacos-client-8989

2、导入相关依赖
<dependencies>
    <dependency>
        <groupId>org.springframework.boot</groupId>
        <artifactId>spring-boot-starter-web</artifactId>
    </dependency>
</dependencies>
<!--引入nacos client的依赖-->
<dependency>
    <groupId>com.alibaba.cloud</groupId>
    <artifactId>spring-cloud-starter-alibaba-nacos-discovery</artifactId></dependency>
3、编写application.properties配置文件
server.port=8989
spring.application.name=NACOSCLIENT

#指定服务名称
spring.cloud.nacos.server-addr=47.106.105.80:8848
4、编写主启动类
package com.study.springcloudAlibaba;

import org.springframework.boot.SpringApplication;
import org.springframework.boot.autoconfigure.SpringBootApplication;
import org.springframework.cloud.client.discovery.EnableDiscoveryClient;

@SpringBootApplication
@EnableDiscoveryClient   //开启服务的注册(可以省略不写)
public class NacosClientApplication {
    public static void main(String[] args) {
        SpringApplication.run(NacosClientApplication.class,args);
    }
}
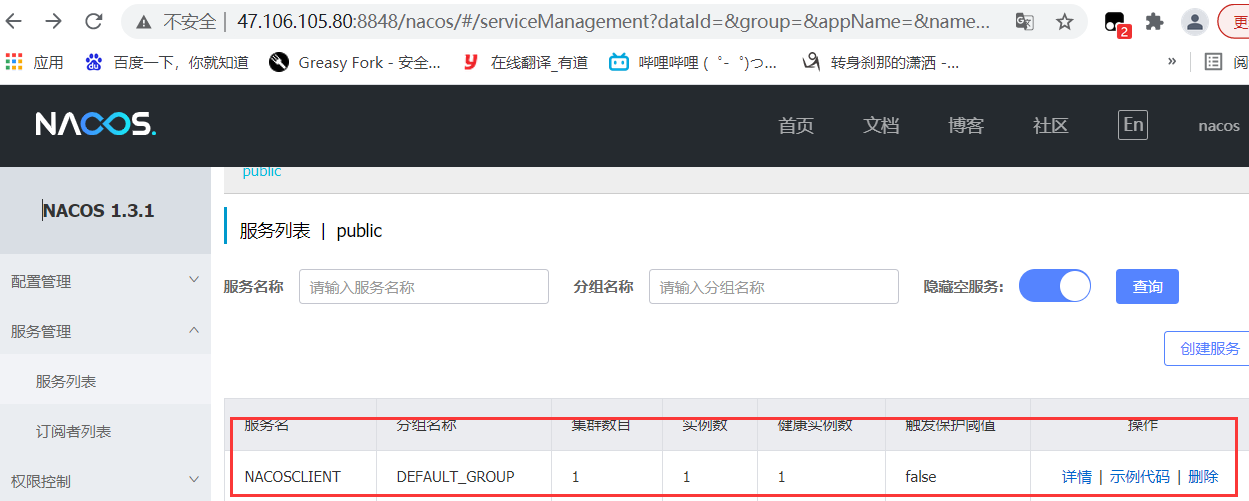
5、启动测试
openfeign服务间的通信
一、生产者模块
1、新建一个提供者模块springcloudAlibaba-products-9090

2、导入相关依赖
 <dependencies>
    <dependency>
        <groupId>org.springframework.boot</groupId>
        <artifactId>spring-boot-starter-web</artifactId>
    </dependency>
    <dependency>
        <groupId>com.alibaba.cloud</groupId>
        <artifactId>spring-cloud-starter-alibaba-nacos-discovery</artifactId>
    </dependency>
</dependencies>
3、编写application.properties配置文件
server.port=9090
spring.application.name=PRODUCTS

#指定nacos server地址
spring.cloud.nacos.server-addr=47.106.105.80:8848
4、编写主启动类
package com.sutdy.springcloudAlibaba;

import org.springframework.boot.SpringApplication;
import org.springframework.boot.autoconfigure.SpringBootApplication;

@SpringBootApplication
public class ProductsApplication_9090 {
    public static void main(String[] args) {
        SpringApplication.run(ProductsApplication_9090.class,args);
    }
}
5、编写controller层
package com.sutdy.springcloudAlibaba.controller;

import org.springframework.beans.factory.annotation.Value;
import org.springframework.web.bind.annotation.GetMapping;
import org.springframework.web.bind.annotation.PathVariable;
import org.springframework.web.bind.annotation.RestController;

@RestController
public class ProductsController {

    @Value("${server.port}")
    private int port;

    @GetMapping("/product/{id}")
    public String products(@PathVariable("id") Integer id){
        return "调用商品服务返回:"+id+",当前提供服务的端口为:"+port;
    }
}
二、消费者模块
1、新建一个消费者模块springcloudAlibaba-users-8989

2、导入相关依赖
    <dependencies>
        <dependency>
            <groupId>org.springframework.boot</groupId>
            <artifactId>spring-boot-starter-web</artifactId>
        </dependency>
        <!--引入nacos client的依赖-->
        <dependency>
            <groupId>com.alibaba.cloud</groupId>
            <artifactId>spring-cloud-starter-alibaba-nacos-discovery</artifactId>
        </dependency>
        <!--导入openfeign-->
        <dependency>
            <groupId>org.springframework.cloud</groupId>
            <artifactId>spring-cloud-starter-openfeign</artifactId>
        </dependency>
    </dependencies>
3、编写application.properties配置文件
server.port=8989
spring.application.name=USERS

#指定nacos server地址
spring.cloud.nacos.server-addr=47.106.105.80:8848
4、编写主启动类,添加@EnableFeignClients注解开启Openfeign
package com.study.springcloudAlibaba;

import org.springframework.boot.SpringApplication;
import org.springframework.boot.autoconfigure.SpringBootApplication;
import org.springframework.cloud.openfeign.EnableFeignClients;

@SpringBootApplication
@EnableFeignClients //开启Openfeign调用支持
public class UserApplication_8989 {
    public static void main(String[] args) {
        SpringApplication.run(UserApplication_8989.class,args);
    }
}
5、编写openfeign客户端接口,添加@FeignClient("PRODUCTS")注解调用名称为"PRODUCTS"的微服务,实现服务之间的通信。
package com.study.springcloudAlibaba.feignclients;

import org.springframework.cloud.openfeign.FeignClient;

import org.springframework.web.bind.annotation.PathVariable;
import org.springframework.web.bind.annotation.RequestMapping;


@FeignClient("PRODUCTS")
public interface ProductClient {
    @RequestMapping("/product/{id}")
    String product(@PathVariable("id") Integer id);
}
6、编写controller层实现服务通信接口
package com.study.springcloudAlibaba.controller;

import com.study.springcloudAlibaba.feignclients.ProductClient;
import org.springframework.beans.factory.annotation.Autowired;
import org.springframework.web.bind.annotation.GetMapping;
import org.springframework.web.bind.annotation.RestController;

@RestController
public class UserController {

    @Autowired
    private ProductClient productClient;

    @GetMapping("/invoke")
    public String invokeProduct(){
        String result = productClient.product(21);
        return "调用用户服务成功.....调用商品服务结果:{}"+result;
    }
}
三、启动测试
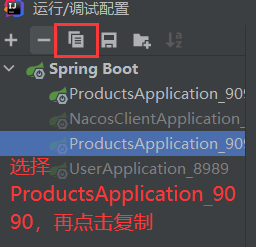
1、点击 编辑配置

2、选择ProductsApplication_9090,再点击复制
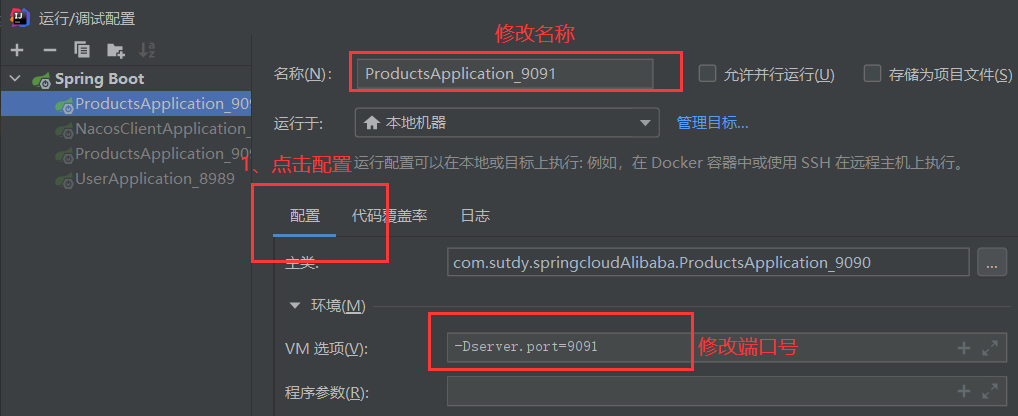
3、点击复制出来的ProductsApplication_9091,再点击配置,修改名称和端口号
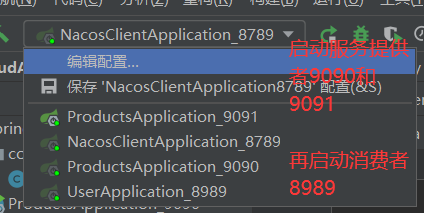
4、启动服务提供者9090和9091,再启动消费者8989
5、进入 http://localhost:8989/invoke 页面

刷新

分类:
SpringCloud


【推荐】国内首个AI IDE,深度理解中文开发场景,立即下载体验Trae
【推荐】编程新体验,更懂你的AI,立即体验豆包MarsCode编程助手
【推荐】抖音旗下AI助手豆包,你的智能百科全书,全免费不限次数
【推荐】轻量又高性能的 SSH 工具 IShell:AI 加持,快人一步
· 探究高空视频全景AR技术的实现原理
· 理解Rust引用及其生命周期标识(上)
· 浏览器原生「磁吸」效果!Anchor Positioning 锚点定位神器解析
· 没有源码,如何修改代码逻辑?
· 一个奇形怪状的面试题:Bean中的CHM要不要加volatile?
· 分享4款.NET开源、免费、实用的商城系统
· 全程不用写代码,我用AI程序员写了一个飞机大战
· Obsidian + DeepSeek:免费 AI 助力你的知识管理,让你的笔记飞起来!
· MongoDB 8.0这个新功能碉堡了,比商业数据库还牛
· 白话解读 Dapr 1.15:你的「微服务管家」又秀新绝活了