git-安装部署-数据管理
1.Git安装部署
Git是分布式的版本控制系统,我们只要有了一个原始Git版本仓库,就可以让其他主机克隆走这个原始版本仓库,从而使得一个Git版本仓库可以被同时分布到不同的主机之上,并且每台主机的版本库都是一样的,没有主次之分,极大的保证了数据安全性,并使得用户能够自主选择向那个Git服务器推送文件了,其实部署一个git服务器是非常简单的。
1.1在Linux上安装
1.安装Git
[root@git-node1 ~]# yum install git -y
2.配置git全局用户以及邮箱
[root@git-node1 ~]# git config --global user.name "xuliangwei"
[root@git-node1 ~]# git config --global user.email "xuliangwei@foxmail.com"
[root@git-node1 ~]# git config --global color.ui true
3.检查git相关配置
[root@git-node1 ~]# git config --list
user.name=xuliangwei
user.email=xuliangwei@foxmail.com
color.ui=true
1.2在Mac上安装
在 Mac 上安装 Git,使用图形化 Git 安装工具,界面如图 1-3-1,下载地址在:
http://sourceforge.net/projects/git-osx-installer/ 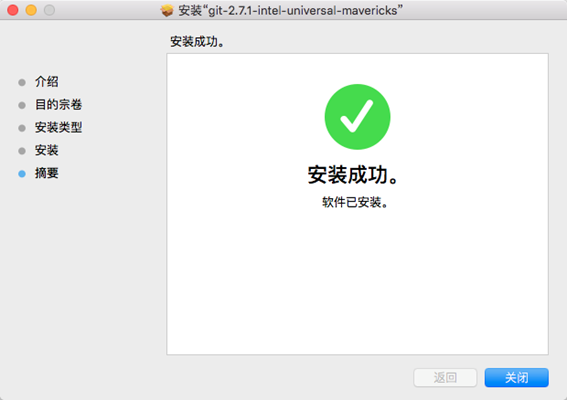
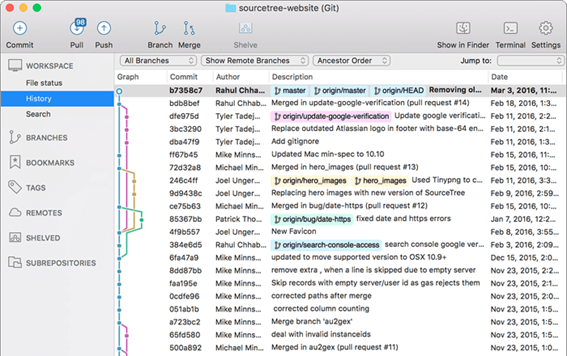
Mac下git客户端图形管理工具(也可用于windows),界面如图 1-3-2,
下载地址https://www.sourcetreeapp.com/
1.3在Windows上安装
在 Windows 上安装 Git,使用图形化 Git 安装工具,界面如图 1-3-3,
下载地址https://git-for-windows.github.io/

数据管理
1.Git基本管理
git常用的基本操作
1.1提交数据
我们可以简单的把工作目录理解成是一个被Git服务程序管理的目录,Git会时刻的追踪目录内文件的改动,另外在安装好了Git服务程序后,默认就会创建好了一个叫做master的分支,我们直接可以提交数据到了
1.创建本地工作目录demo,并初始化为git工作目录
[root@git-node1 ~]# mkdir demo
[root@git-node1 ~]# cd demo/
[root@git-node1 git-demo]# git init
Initialized empty Git repository in /root/demo/.git/
2.创建readme.txt文件
[root@git-node1 demo]# touch index.html
3.查看git状态
[root@git-node1 demo]# git status
# 位于分支 master
#
# 初始提交
#
# 未跟踪的文件:
# (使用 "git add <file>..." 以包含要提交的内容)
#
# index.html
提交为空,但是存在尚未跟踪的文件(使用 "git add" 建立跟踪)
4.提示使用git add添加文件至暂存区
[root@git-node1 demo]# git add index.html
[root@git-node1 demo]# git status //查看变更状态
# 位于分支 master
#
# 初始提交
#
# 要提交的变更:
# (使用 "git rm --cached <file>..." 撤出暂存区)
#
# 新文件: index.html
5.使用git cmmit提交暂存区文件至git版本仓库 -m:提交描述信息(提交至远程需添加远程仓库)
[root@git-node1 demo]# git commit -m "the first commit index.html"
[master(根提交) 85bd268] the first commit index.html
1 file changed, 0 insertions(+), 0 deletions(-)
create mode 100644 index.html
1.2移除数据
有些时候会将已经添加到暂存区的文件移除,但仍然希望文件在工作目录中不丢失,换句话说,就是把文件从追踪清单中删除。
1.建立新文件
[root@git-node1 demo]# touch index.php
2.添加新文件至暂存区
[root@git-node1 demo]# git add index.php
[root@git-node1 demo]# git status
# 位于分支 master
# 要提交的变更:
# (使用 "git reset HEAD <file>..." 撤出暂存区)
#
# 新文件: index.php
#
3.将新文件从暂存区撤出(并不会删除工作目录内的数据)
[root@git-node1 demo]# git reset HEAD index.php
[root@git-node1 demo]# git status //index.php文件状态为未跟踪
# 位于分支 master
# 未跟踪的文件:
# (使用 "git add <file>..." 以包含要提交的内容)
#
# index.php
提交为空,但是存在尚未跟踪的文件(使用 "git add" 建立跟踪)
如果想将文件数据从git暂存区和工作目录一起删除,可以做如下操作。
[root@git-node1 demo]# git add index.php
[root@git-node1 demo]# git rm index.php //文件存已经放入暂存区域,防止误删
error: 'index.php' 有变更已暂存至索引中
(使用 --cached 保存文件,或用 -f 强制删除)
[root@git-node1 demo]# git rm -f index.php //使用追加强制删除-f参数。或者—cache保存
rm 'index.php'
[root@git-node1 demo]# git status //查看当前状态
# 位于分支 master
无文件要提交,干净的工作区
[root@git-node1 demo]# ls //index.php文件已经被删除
index.html
1.3移动数据
有些时候会将已经添加到暂存区的文件重新修改名称,可使用如下操作完成。
1.git重新命名文件名称,使用git mv操作。
[root@git-node1 demo]# git mv index.html index.php
2.使用git status查看更改状态
[root@git-node1 demo]# git status
# 位于分支 master
# 要提交的变更:
# (使用 "git reset HEAD <file>..." 撤出暂存区)
#
# 重命名: index.html -> index.php
#
3.使用git commit 提交git仓库,并描述提交信息
[root@git-node1 demo]# git commit -m "chnged name index.html->index.php"
[master 9573413] chnged name index.html->index.php
1 file changed, 0 insertions(+), 0 deletions(-)
rename index.html => index.php (100%)
1.4历史数据
在提交了若干更新之后,想回顾下提交历史,可以使用 git log 命令查看提交历史记录。
1.查看提交历史记录
[root@git-node1 demo]# git log
commit 95734131860ef7c9078b8a208ff6437d0952380b
Author: xuliangwei <xuliangwei@foxmail.com>
Date: Sun Nov 6 02:15:35 2016 +0800
chnged name index.html->index.php
commit 85bd2680bd4b70aeded9dbd230c07ab086712ff9
Author: xuliangwei <xuliangwei@foxmail.com>
Date: Sun Nov 6 01:51:22 2016 +0800
the first commit index.html
2.查看历史2次提交记录
[root@git-node1 demo]# git log -10
commit 95734131860ef7c9078b8a208ff6437d0952380b
Author: xuliangwei <xuliangwei@foxmail.com>
Date: Sun Nov 6 02:15:35 2016 +0800
chnged name index.html->index.php
commit 85bd2680bd4b70aeded9dbd230c07ab086712ff9
Author: xuliangwei <xuliangwei@foxmail.com>
Date: Sun Nov 6 01:51:22 2016 +0800
the first commit index.html
3.显示提交的内容差异,例如仅查看最近一次差异
[root@git-node1 demo]# git log -p -2
commit 95734131860ef7c9078b8a208ff6437d0952380b
Author: xuliangwei <xuliangwei@foxmail.com>
Date: Sun Nov 6 02:15:35 2016 +0800
chnged name index.html->index.php
diff --git a/index.html b/index.html
deleted file mode 100644
index e69de29..0000000
diff --git a/index.php b/index.php
new file mode 100644
index 0000000..e69de29
commit 85bd2680bd4b70aeded9dbd230c07ab086712ff9
Author: xuliangwei <xuliangwei@foxmail.com>
Date: Sun Nov 6 01:51:22 2016 +0800
the first commit index.html
diff --git a/index.html b/index.html
new file mode 100644
index 0000000..e69de29
简要显示数据增改行数
[root@git-node1 demo]# git log --stat
commit 95734131860ef7c9078b8a208ff6437d0952380b
Author: xuliangwei <xuliangwei@foxmail.com>
Date: Sun Nov 6 02:15:35 2016 +0800
chnged name index.html->index.php
index.html | 0
2 files changed, 0 insertions(+), 0 deletions(-)
commit 85bd2680bd4b70aeded9dbd230c07ab086712ff9
Author: xuliangwei <xuliangwei@foxmail.com>
Date: Sun Nov 6 01:51:22 2016 +0800
the first commit index.html
index.html | 0
1 file changed, 0 insertions(+), 0 deletions(-)
5.根据不同的格式展示提交的历史信息
[root@git-node1 demo]# git log --pretty=oneline
95734131860ef7c9078b8a208ff6437d0952380b chnged name index.html->index.php
85bd2680bd4b70aeded9dbd230c07ab086712ff9 the first commit index.htm
可以使用format参数来指定具体的输出格式,这样非常便于后期编程的提取分析哦,常用的格式有:
%s 提交说明。
%cd 提交日期。
%an 作者的名字。
%cn 提交者的姓名。
%ce 提交者的电子邮件。
%H 提交对象的完整SHA-1哈希字串。
%h 提交对象的简短SHA-1哈希字串。
%T 树对象的完整SHA-1哈希字串。
%t 树对象的简短SHA-1哈希字串。
%P 父对象的完整SHA-1哈希字串。
%p 父对象的简短SHA-1哈希字串。
%ad 作者的修订时间。
定制详细的日志输出
[root@git-node1 demo]# git log --graph --pretty=format:'%Cred%h%Creset -%C(yellow)%d%Creset %s %Cgreen(%cr)%Creset %cn"' --abbrev-commit --date=relative
* 5f3f588 - (HEAD, origin/master, –r, tt, master) merge branch linux readme.txt (68 分钟之前) xulia
|\
| * 4580c3b - (linux) touch readme.txt (80 分钟之前) xuliangwei"
* | 4c7a145 - touch readme.txt (72 分钟之前) xuliangwei"
|/
* 9573413 - (tag: v1.0.0) chnged name index.html->index.php (5 小时之前) xuliangwei"
* 85bd268 - the first commit index.html (5 小时之前) xuliangwei"
配置.git/config文件,增加如下2行,以后即可使用 git hlog代替如上复杂命令
[root@git-node1 demo]# tail -2 .git/config
[alias]
hlog = log --graph --pretty=format:'%Cred%h%Creset -%C(yellow)%d%Creset %s %Cgreen(%cr)%Creset %cn' --abbrev-commit --date=relative
//以后使用git hlog即可实现复杂的命令
1.5还原数据
将文件boss good写成了boss dou,但是已经提交至远程仓库,现在想要撤回重新提交。
(本小结涉及远程仓库,可先学习后面章节,在回头学习本章节)
1.查看index.html文件
[root@git-node1 demo]# git checkout -b dev //内容存在dev分支
[root@git-node1 demo]# cat index.html
hello boss
[root@git-node1 demo]# echo "boos doubi" >> index.html
2.追加内容至index.html,并提交至远程仓库
[root@git-node1 demo]# git add index.html
[root@git-node1 demo]# git commit -m "boss dou"
[master 1941990] boss dou
1 file changed, 1 insertion(+)
[root@git-node1 demo]# git push origin dev
Counting objects: 5, done.
Compressing objects: 100% (2/2), done.
Writing objects: 100% (3/3), 298 bytes | 0 bytes/s, done.
Total 3 (delta 0), reused 0 (delta 0)
To git@git-node1:root/git_demo.git
507bf99..1941990 dev -> dev
3.此时觉得写的不妥,想还原上一次提交的文件快照,找出历史信息
[root@git-node1 demo]# git hlog -2
* 1941990 - (HEAD, origin/dev, dev) boss dou (2 分钟之前) xuliangwei
* 507bf99 - hello (30 分钟之前) xuliangwei
4.找到历史还原点的值后,就可以还原(值不写全,系统会自动匹配)
[root@git-node1 demo]# git reset --hard 507bf99
HEAD 现在位于 507bf99 hello
[root@git-node1 xuliangwei]# git push origin dev -f //强制推送至dev分支
[root@git-node1 demo]# cat index.html
hello boss
1.6基本操作小结
相信大家对Git的基本操作有一定的了解,下面进行一下简单的梳理总结:
命令 git config --global user.name "name" #配置git使用用户
# git config --global user.email "mail" #配置git使用邮箱
# git config --global color.ui true #配置颜色
# git config --list #查看当前配置
# git init #初始为git工作目录
# git status #查看git状态
# git reflog #查看未来历史更新点
# git reset --hard 4bf5b29 #找到历史还原点的SHA-1值,就可以还原(值不写全,系统会自动匹配)
# git checkout -- file #恢复暂存区至上一版本
# git add [file1] [file2] ... #添加指定文件至暂存区
# git add [dir] #添加指定目录至暂存区,包括子目录(递归添加)
# git add . #添加当前目录所有文件至暂存区
# git rm [file1] [file2] ... #删除工作区文件,并将这次删除放入暂存区
# git rm –cached [file] #停止追踪指定文件,但该文件会保留在工作区
# git mv [file-old] [file-new] #重命名文件,修改后放入暂存区

 浙公网安备 33010602011771号