机器学习笔记(二十三)——Tensorflow 2(可视化)
本博客仅用于个人学习,不用于传播教学,主要是记自己能够看得懂的笔记(
学习知识来自:【吴恩达团队Tensorflow2.0实践系列课程第一课】TensorFlow2.0中基于TensorFlow2.0的人工智能、机器学习和深度学习简介及基础编程_哔哩哔哩_bilibili
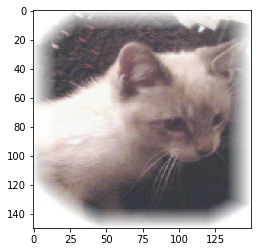
上次鉴别了一下人与马,这次换了一个数据集,鉴别猫与狗。方法与上次一毛一样,不过这次后面要加一个可视化操作,来看看我们的图片经过卷积和池化之后的有什么变化,有什么突出的地方。
这次为了方便,用的是jupyter notebook编辑的(之前使用VScode),数据集下载地址:https://storage.googleapis.com/mledu-datasets/cats_and_dogs_filtered.zip
可视化的话,就在我上次写的代码后面加上下面这些,就可以了。另外,代码中的plt.show()在jupyter notebook中可以删除。
import random
from tensorflow.keras.preprocessing.image import img_to_array,load_img
import matplotlib.pyplot as plt

s_outputs=[layer.output for layer in model.layers[1:]] #储存每一层的输出
v_model=tf.keras.models.Model(inputs=model.input,outputs=s_outputs) #建立新的模型

for root,dirs,catsnam in os.walk(filepath+'/tmp/train/cats'):
    used_up_variable=0
for root,dirs,dogsnam in os.walk(filepath+'/tmp/train/dogs'):
    used_up_variable=0
catsnam=[filepath+'/tmp/train/cats/'+nam for nam in catsnam]
dogsnam=[filepath+'/tmp/train/dogs/'+nam for nam in dogsnam] #获取所有文件的绝对路径

img_path=random.choice(catsnam+dogsnam) #随机取一个图片
img=load_img(img_path,target_size=(150,150)) #以150*150加载图片
plt.imshow(img)
plt.show()

x=img_to_array(img)
x=x.reshape((1,)+x.shape) #变为(1,150,150,3)
x/=255.0 #归一化

maps=v_model.predict(x) #生成结果
ans=model.predict(x,batch_size=10) #预测结果
print(ans[0])
if ans[0]<0.5:
    print('This is a cat.')
else:
    print('This is a dog.')
layernams=[layer.name for layer in model.layers] #获取每一层的名字

for layernam,map in zip(layernams,maps):
    if len(map.shape)==4: #输出Flatten之前的卷积层和池化层的图像
        tunnel=map.shape[-1] #获取特征数
        size=map.shape[1] #获取输出图像的边长
        d_grid=np.zeros((size,size*tunnel)) #建立0矩阵,之后将输出图像放置在其中,有tunnel张图
        for i in range(tunnel): #以下为图像美化处理,我也不知道什么原理
            x=map[0,:,:,i]
            x-=x.mean()
            x=x/x.std()
            x*=64
            x+=128
            x=np.clip(x,0,255).astype('uint8')
            d_grid[:,i*size:(i+1)*size]=x #并入到矩阵中
        scale=20.0/tunnel #总长:20
        plt.figure(figsize=(scale*tunnel,scale)) #输出大小:20*something
        plt.title(layernam)
        plt.grid(False)
        plt.gray()
        plt.imshow(d_grid,aspect='auto',cmap='viridis') #见参考博客
        plt.show()
得到结果:


