springboot+webserver接口如何在postman里调用测试
测试环境:springboot+webservice
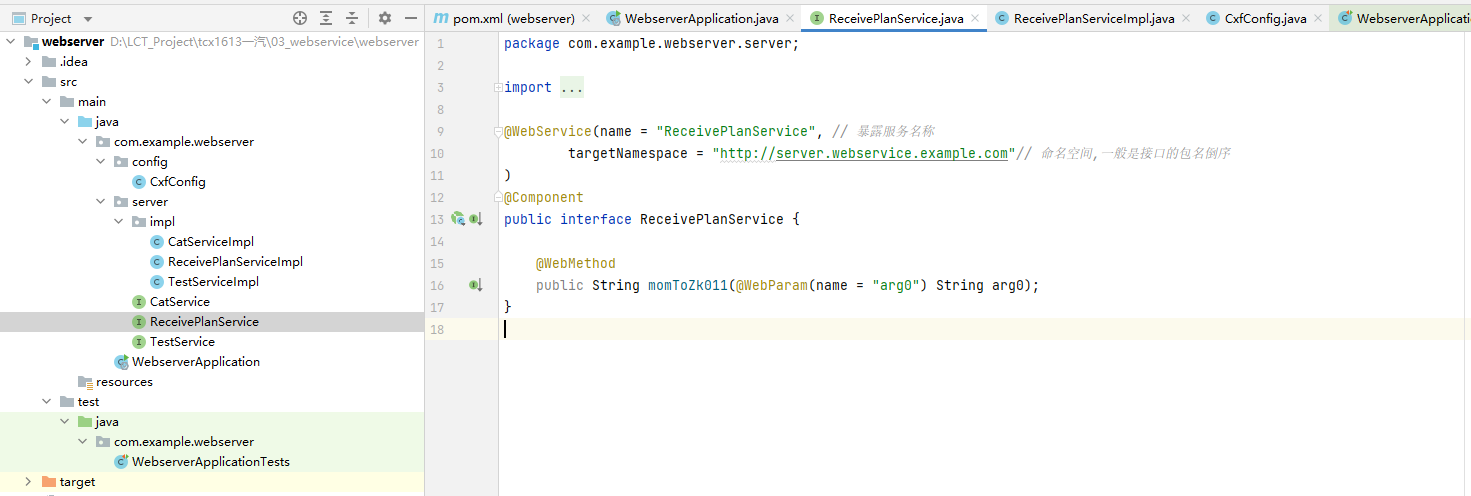
接口入口
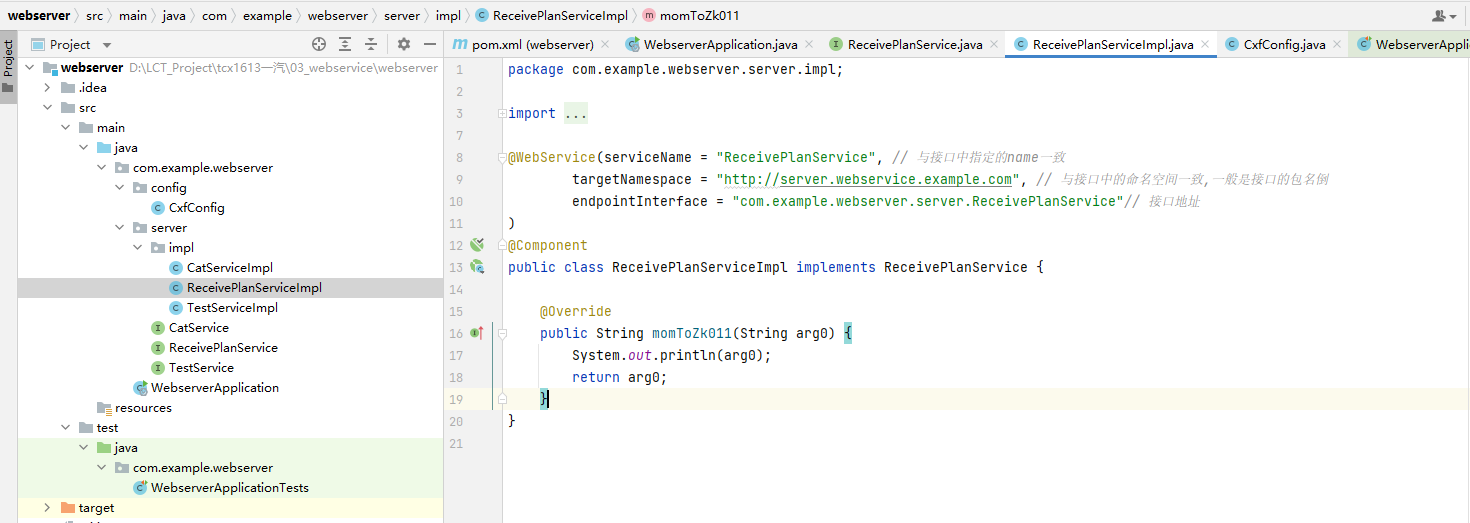
接口实现
cxf配置
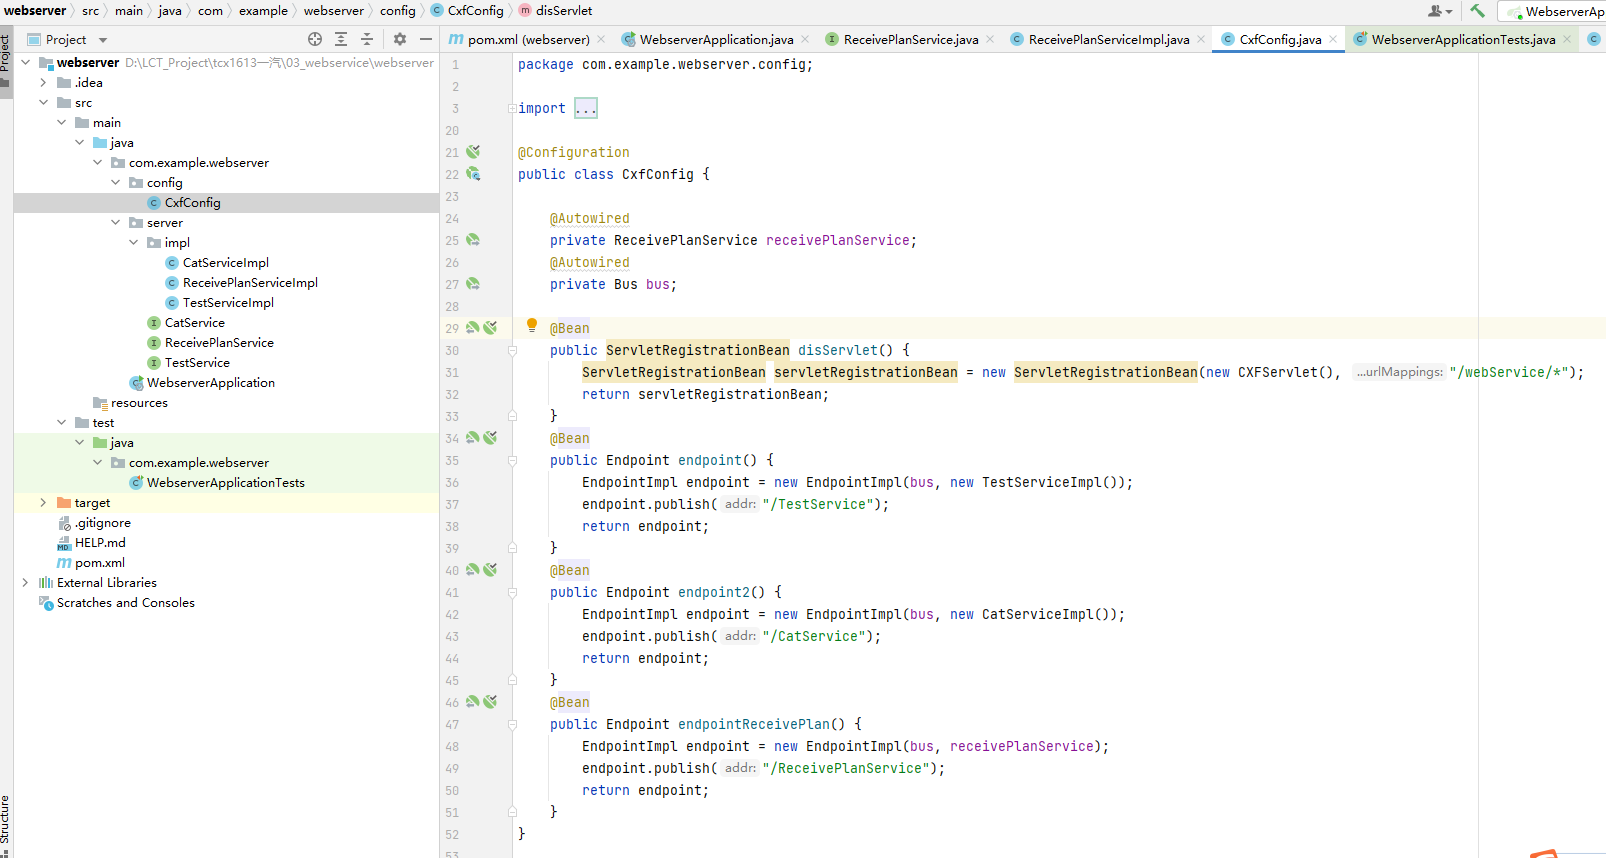
cxf配置文件中决定了如何在浏览器查看wsdl文件
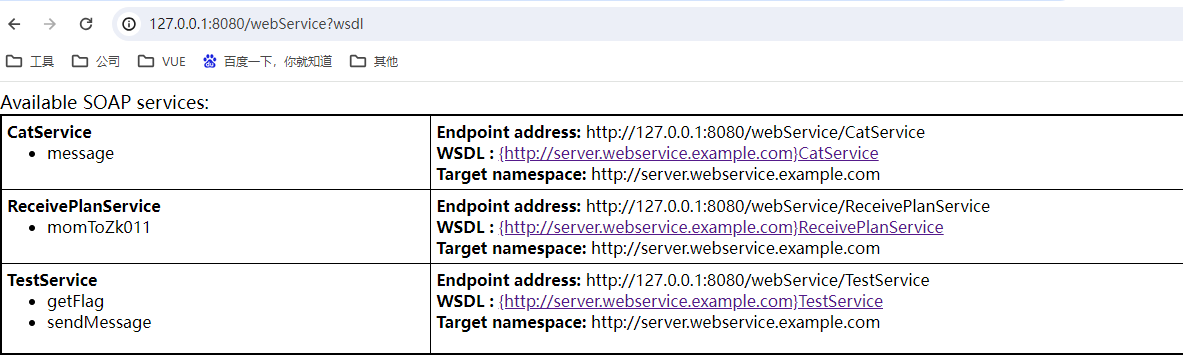
例如在浏览器中输入http://127.0.0.1:8080/webService?wsdl展示该项目下所有的接口服务
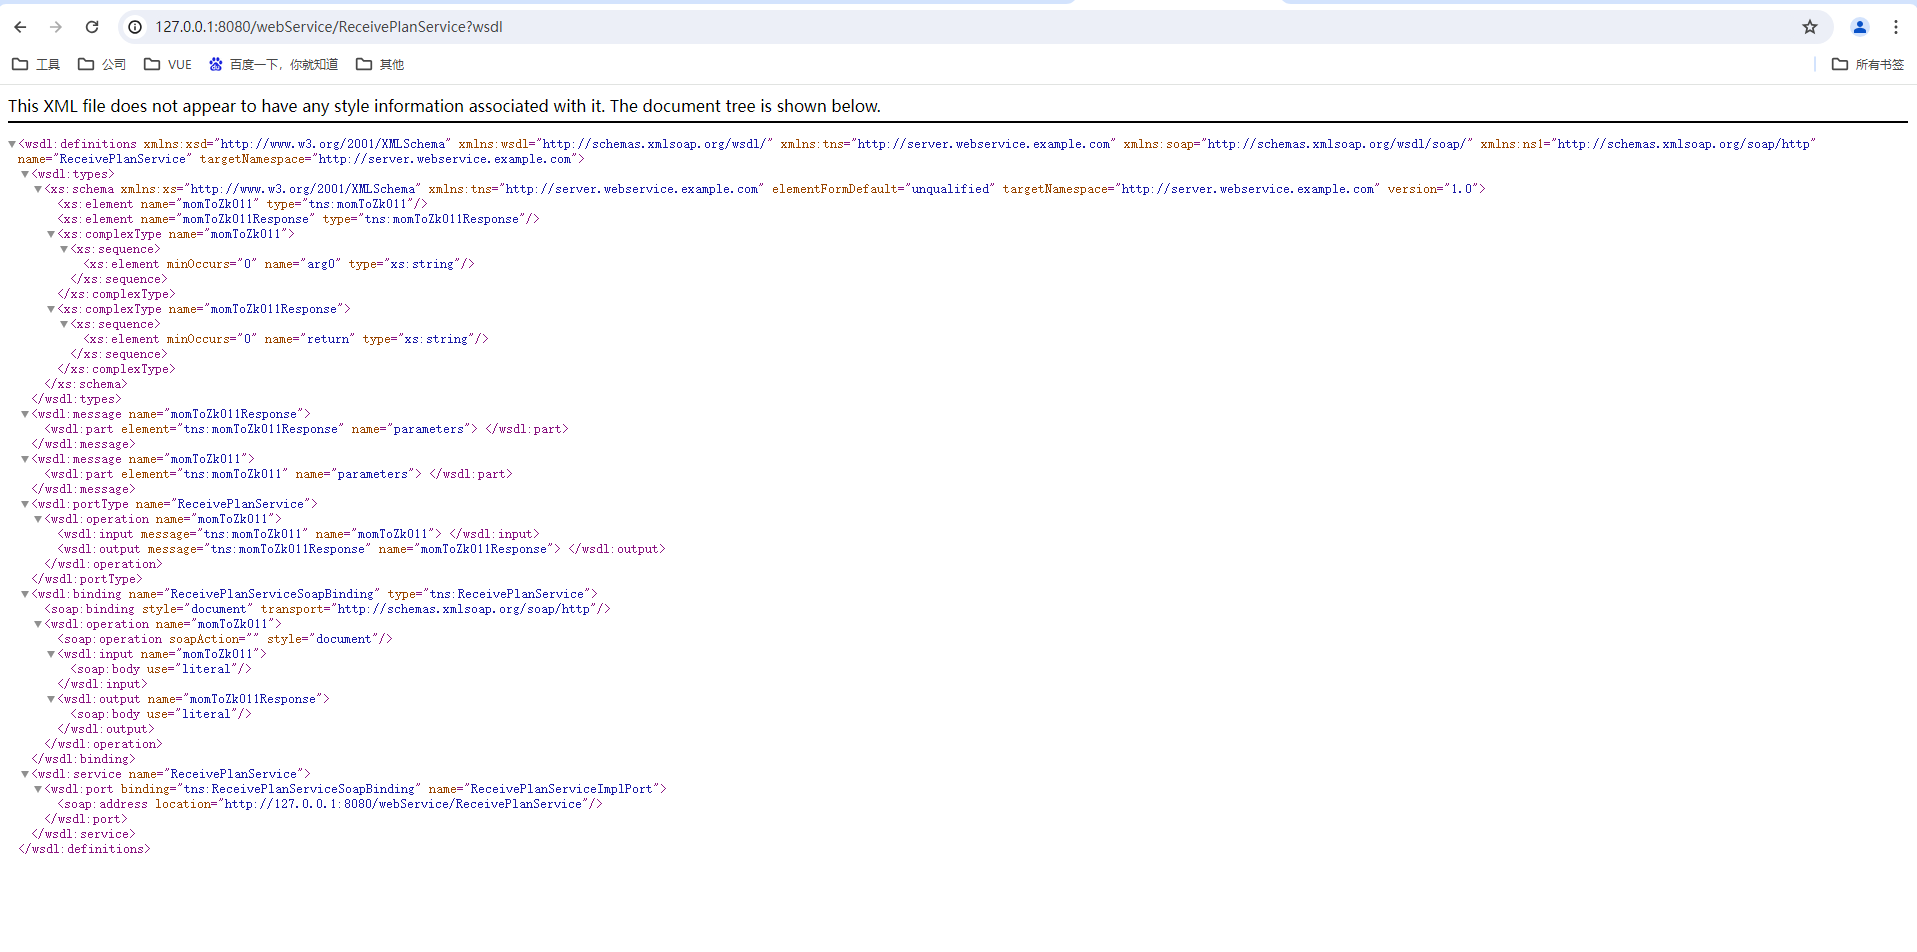
在浏览器中输入http://127.0.0.1:8080/webService/ReceivePlanService?wsdl展示该接口服务的wsdl详细信息
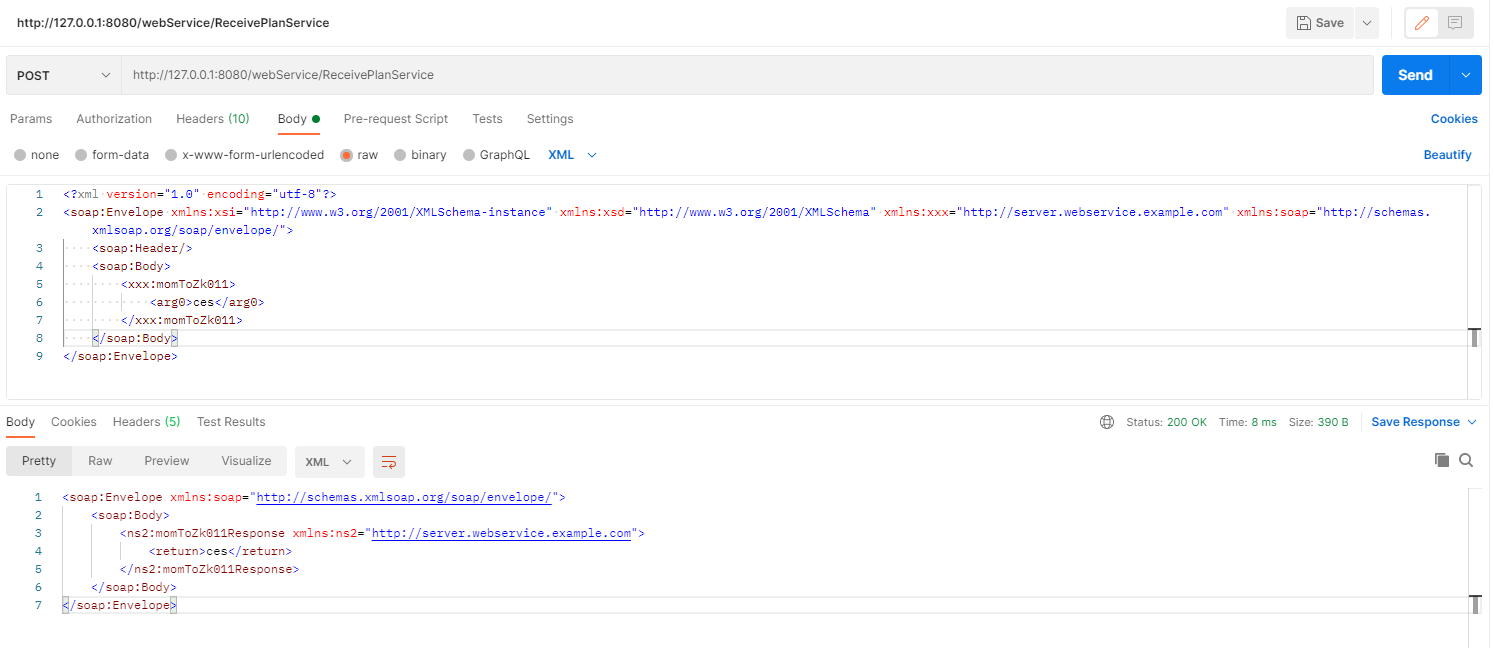
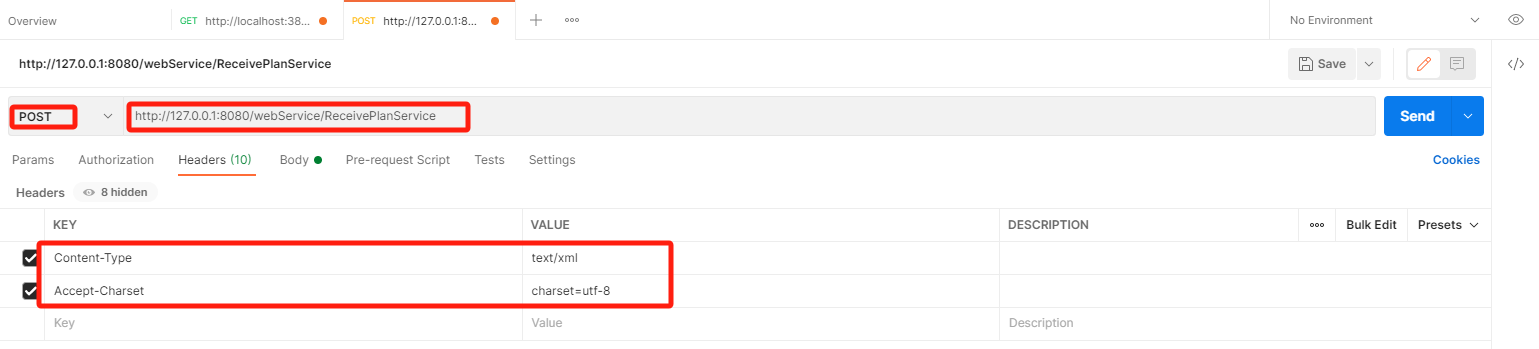
在postman工具中输入接口服务地址,选择post发送,输入Headers中的两项,再选择Body--raw--xml选项,输入下面两种报文种的一个
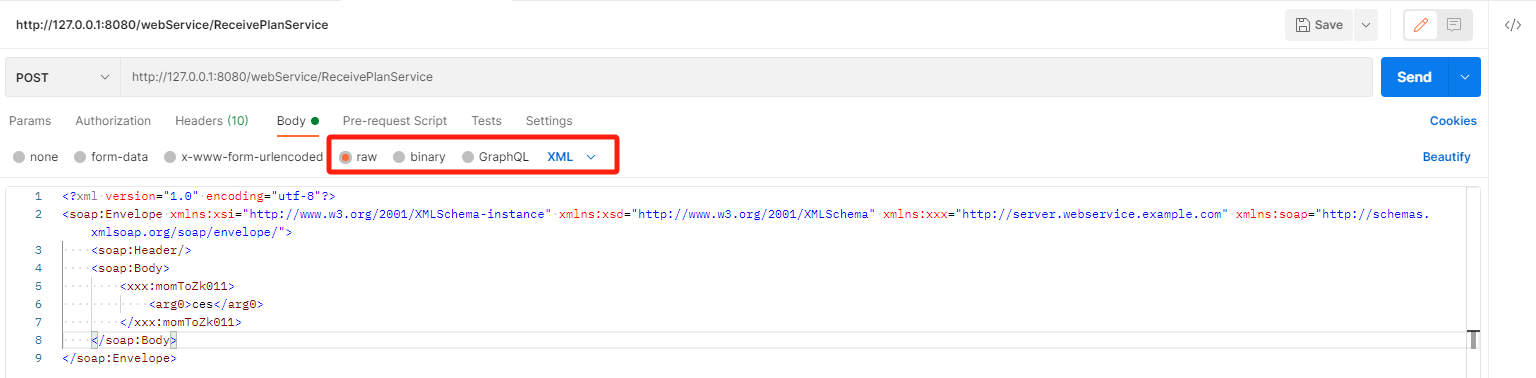
其中【xmlns:xxx="http://xxx.xxxxx.ws.xxxxx.xxxxxx.com"】中的【mlns:xxx】中的xxx为自定义输入内容。【<xxx:暴漏的方法>】中的【xxx】与前面的自定义内容保持一致即可。
【"http://xxx.xxxxx.ws.xxxxx.xxxxxx.com"】为命名空间值。
<soapenv:Envelope xmlns:xsi="http://www.w3.org/2001/XMLSchema-instance" xmlns:xsd="http://www.w3.org/2001/XMLSchema" xmlns:xxx="http://xxx.xxxxx.ws.xxxxx.xxxxxx.com" xmlns:soapenv="http://schemas.xmlsoap.org/soap/envelope/" >
   <soapenv:Header/>
   <soapenv:Body>
      <xxx:暴漏的方法>
          <参数名>ces</参数名>
      </xxx:暴漏的方法>
   </soapenv:Body>
</soapenv:Envelope>
<?xml version="1.0" encoding="utf-8"?>
<soap:Envelope xmlns:xsi="http://www.w3.org/2001/XMLSchema-instance" xmlns:xsd="http://www.w3.org/2001/XMLSchema" xmlns:xxx="http://xxx.xxxxx.ws.xxxxx.xxxxxx.com" xmlns:soap="http://schemas.xmlsoap.org/soap/envelope/">
  <soap:Header/>
  <soap:Body>
    <xxx:暴漏的方法>
        <参数名>ces</参数名>
    </xxx:暴漏的方法>
  </soap:Body>
</soap:Envelope>
点击send按钮发生请求,结果如下。