Orchard模块开发全接触3:分类的实现及内容呈现(Display)
一:分类用现有技术怎么实现?
实际就是创建 Query 和 Projection,如果不知道怎么做,参考:Orchard之在前台显式一个属于自己的列表(在这篇里,还进行了稍稍拓展),当然,基础的知道,我们可以参考 Orchard 相关文档,不难。
1.1 当前这种模式的缺点
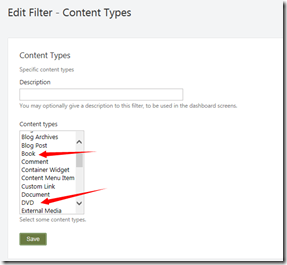
这种模式的缺点就是,你要么查询 Book ,要么查询 DVD,
不能查询全部的 Product,这样一来,我们又要自己写代码了。
二:更新 Module.txt
因为我们的模块依赖一个特性, Orchard.Projections,所以,修改为:
name: tminji.shop
antiforgery: enabled
author: tminji.com
website: http://www.tminji.com
version: 1.0.0
orchardversion: 1.0.0
description: The tminji.com module is a shopping module.
Dependencies: Orchard.Projections
features:
shop:
Description: shopping module.
Category: ASample
三:创建 Filter
然后,
1:增加 Filters 文件夹;
2:创建 ProductPartFilter.cs,如下:
using Orchard.Localization;
using Orchard.Mvc.Filters;
using Orchard.Projections.Descriptors.Filter;
using System;
using System.Collections.Generic;
using System.Linq;
using System.Text;
using System.Threading.Tasks;
using TMinji.Shop.Models;namespace TMinji.Shop.Filters
{
public class ProductPartFilter : Orchard.Projections.Services.IFilterProvider
{
public Localizer T { get; set; }public ProductPartFilter()
{
T = NullLocalizer.Instance;
}public void Describe(DescribeFilterContext describe)
{
describe.For(
"Content", // The category of this filter
T("Content"), // The name of the filter (not used in 1.4)
T("Content")) // The description of the filter (not used in 1.4)// Defines the actual filter (we could define multiple filters using the fluent syntax)
.Element(
"ProductParts", // Type of the element
T("Product Parts"), // Name of the element
T("Product parts"), // Description of the element
ApplyFilter, // Delegate to a method that performs the actual filtering for this element
DisplayFilter // Delegate to a method that returns a descriptive string for this element
);
}private void ApplyFilter(FilterContext context)
{// Set the Query property of the context parameter to any IHqlQuery. In our case, we use a default query
// and narrow it down by joining with the ProductPartRecord.
context.Query = context.Query.Join(x => x.ContentPartRecord(typeof(ProductPartRecord)));
}private LocalizedString DisplayFilter(FilterContext context)
{
return T("Content with ProductPart");
}
}}
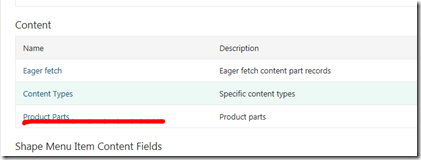
现在,在后台,就可以看到这个 Filter 了,如下:
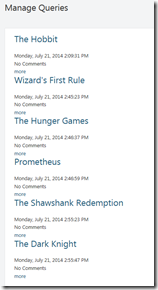
现在,我们增加这个 filter,就可以得到结果了,如下:
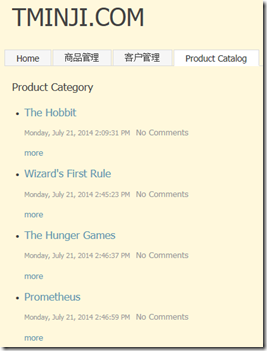
我们添加 Projection(不再赘述),然后在前台显式出来:
四:内容呈现(Dispaly)
但是,我们发现一个问题,就是 Price 和 SKU 并没有呈现出来,包括我们点击 More ,也并没有出现这些我们的核心数据。
还记得什么没有,我们在后台创建 Book 或者 DVD 的时候,一开始根本没有保存上,是因为我们没有在 Driver 中存在返回 DriverResult 的方法,以及定义对应的 cshtml 文件,现在,让我们来完成这件事情。
首先,修改 ProductPartDriver 类,增加方法:
protected override DriverResult Display(ProductPart part, string displayType, dynamic shapeHelper)
{
return ContentShape("Parts_Product", () => shapeHelper.Parts_Product(
Price: part.UnitPrice,
Sku: part.Sku
));
}
前台在呈现含有 ProductPart 的页面的时候,会调用这个 Display 方法。根据这个方法,我们知道,创建了一个 Parts_Product 的 shape,它对应的 cshtml 文件是:
Views/Parts/Product.cshtml
现在,我们来创建这个文件:
@{
var price = (decimal)Model.Price;
var sku = (string)Model.Sku;
}
<article>
Price: @price<br />
Sku: @sku
</article>
然后,记住,修改我们的 placement.info:
<Placement>
<Place Parts_Product_Edit="Content:1" />
<Place Parts_Product="Content:0" />
</Placement>
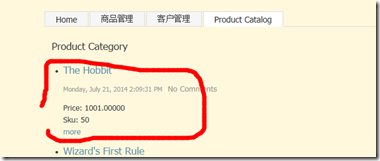
大功告成,见:
参考:http://skywalkersoftwaredevelopment.net/blog/writing-an-orchard-webshop-module-from-scratch-part-1




【推荐】国内首个AI IDE,深度理解中文开发场景,立即下载体验Trae
【推荐】编程新体验,更懂你的AI,立即体验豆包MarsCode编程助手
【推荐】抖音旗下AI助手豆包,你的智能百科全书,全免费不限次数
【推荐】轻量又高性能的 SSH 工具 IShell:AI 加持,快人一步
· 如何编写易于单元测试的代码
· 10年+ .NET Coder 心语,封装的思维:从隐藏、稳定开始理解其本质意义
· .NET Core 中如何实现缓存的预热?
· 从 HTTP 原因短语缺失研究 HTTP/2 和 HTTP/3 的设计差异
· AI与.NET技术实操系列:向量存储与相似性搜索在 .NET 中的实现
· 周边上新:园子的第一款马克杯温暖上架
· Open-Sora 2.0 重磅开源!
· .NET周刊【3月第1期 2025-03-02】
· 分享 3 个 .NET 开源的文件压缩处理库,助力快速实现文件压缩解压功能!
· Ollama——大语言模型本地部署的极速利器