iOS创建与集成组件源码及framework方案一
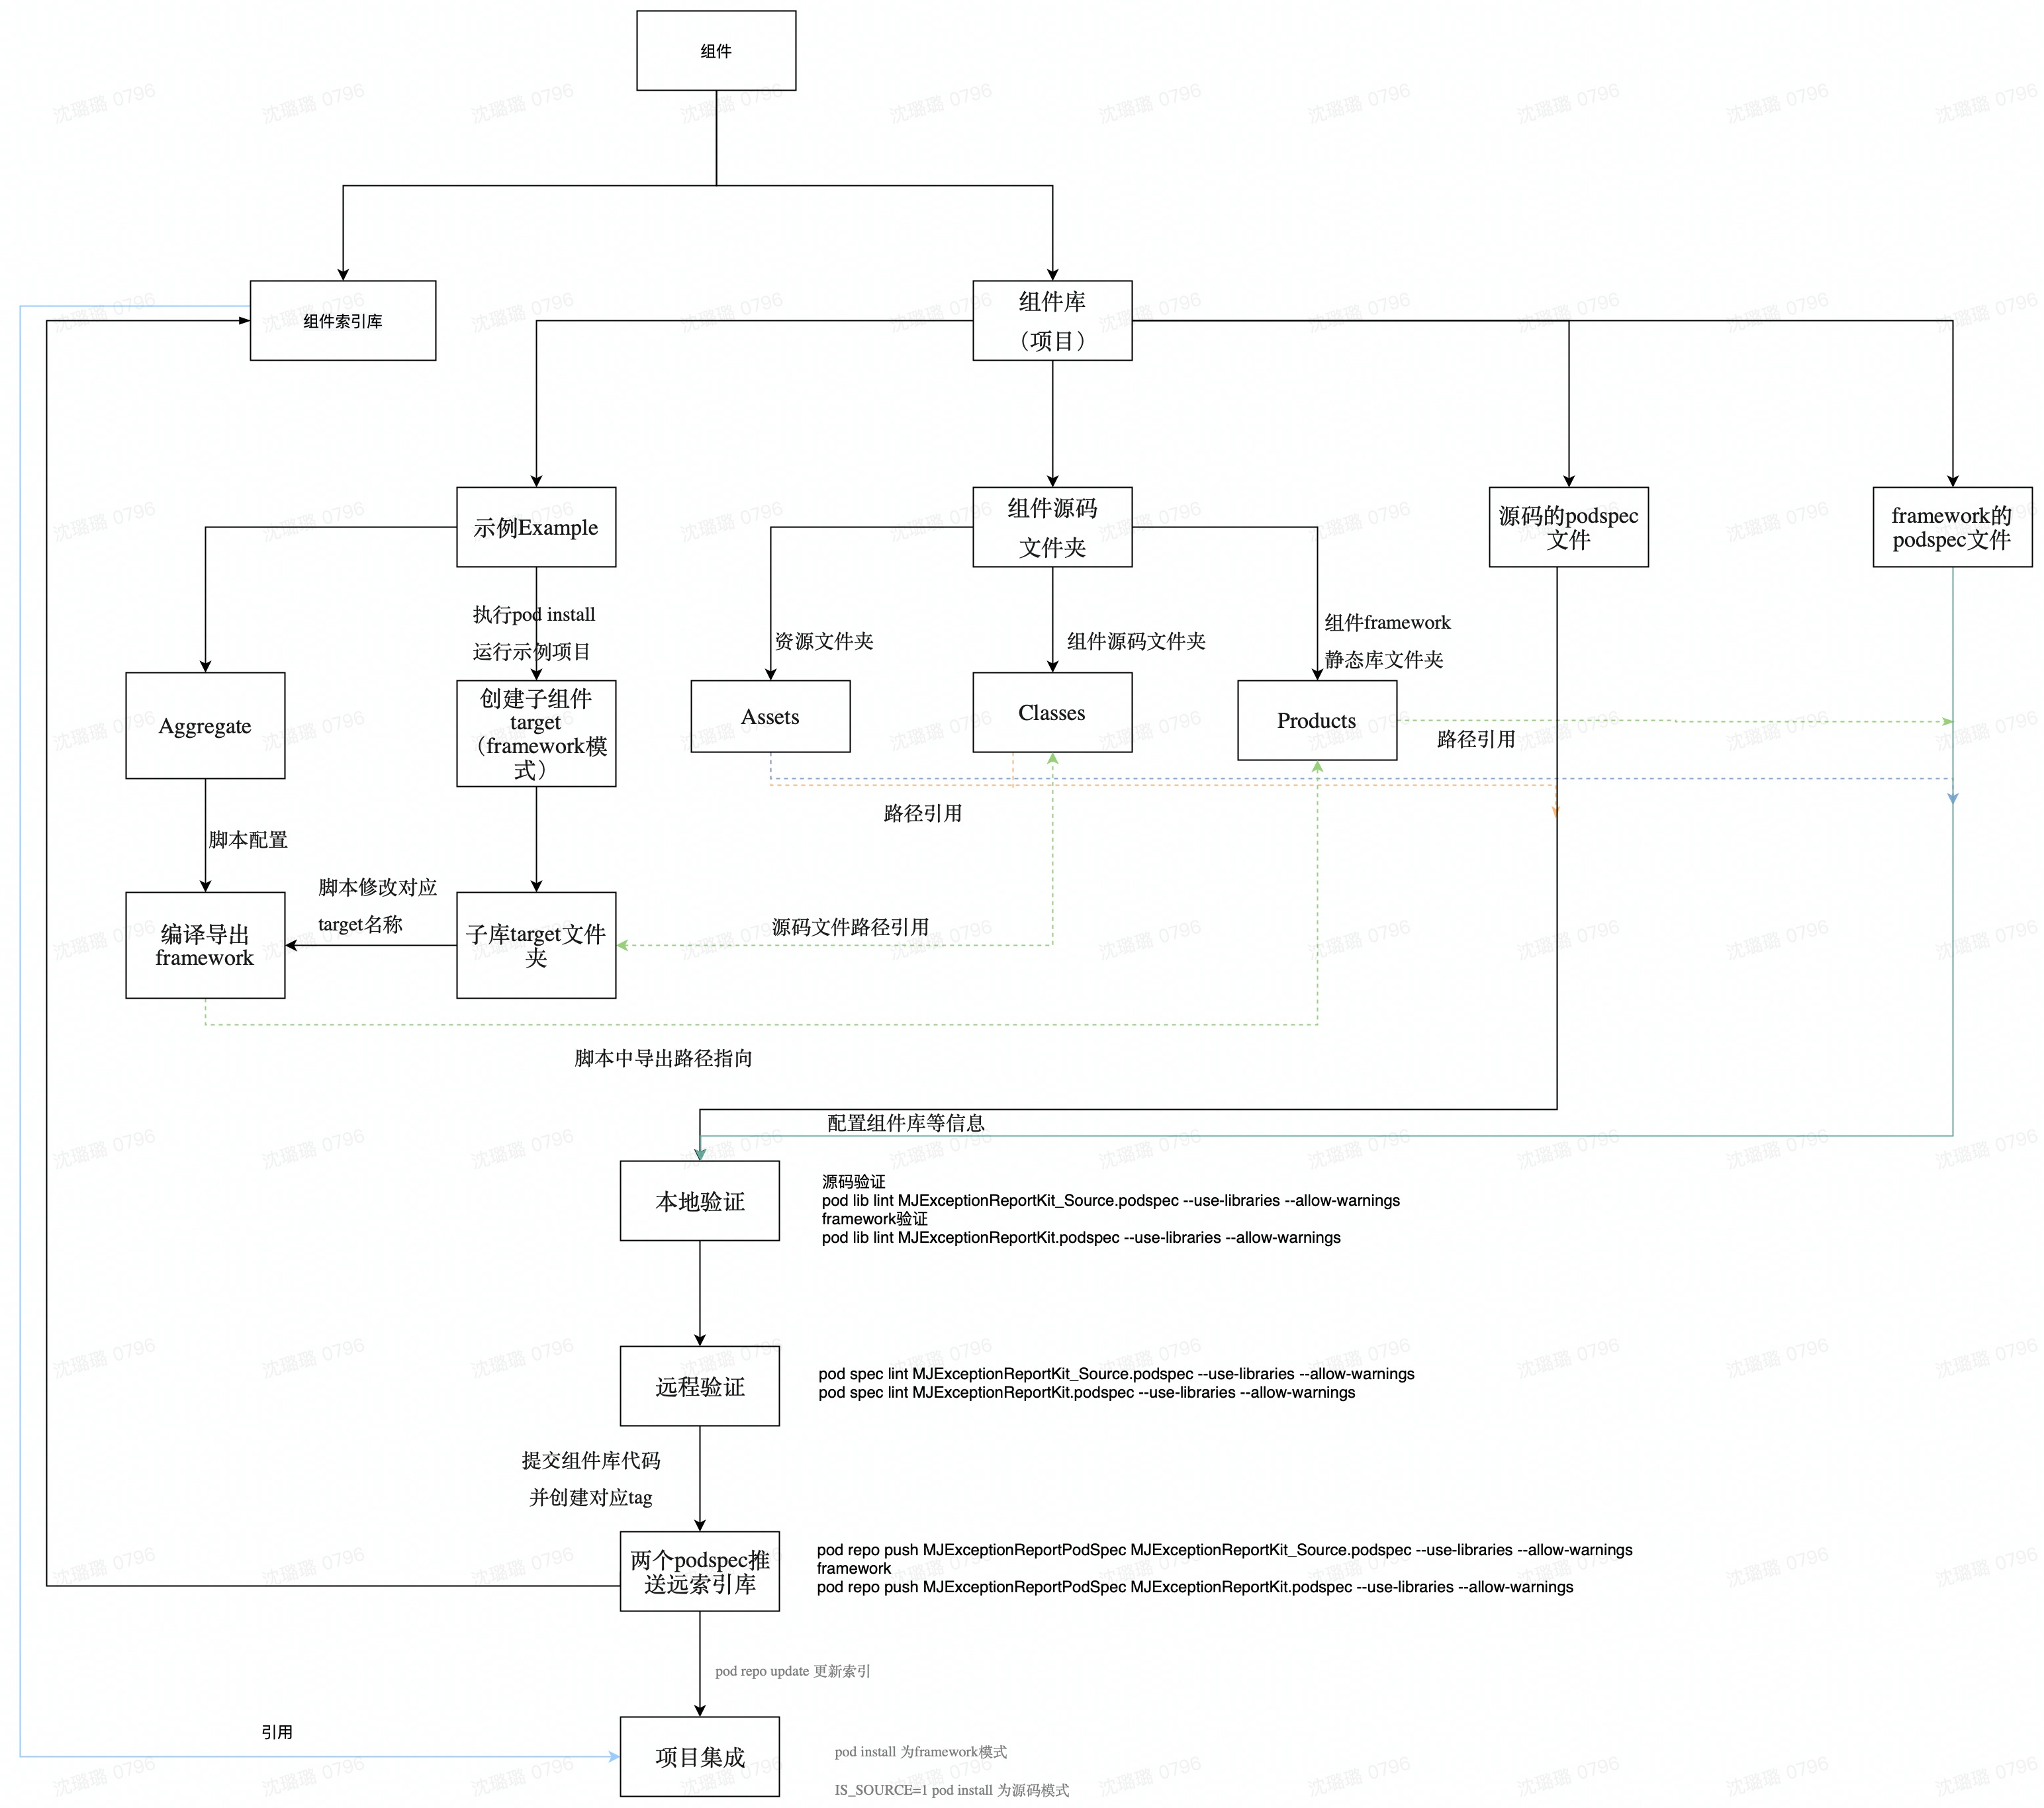
主要UML流程如下图:
一、创建组件库
第一步: 创建组件库及索引库,参考组件创建
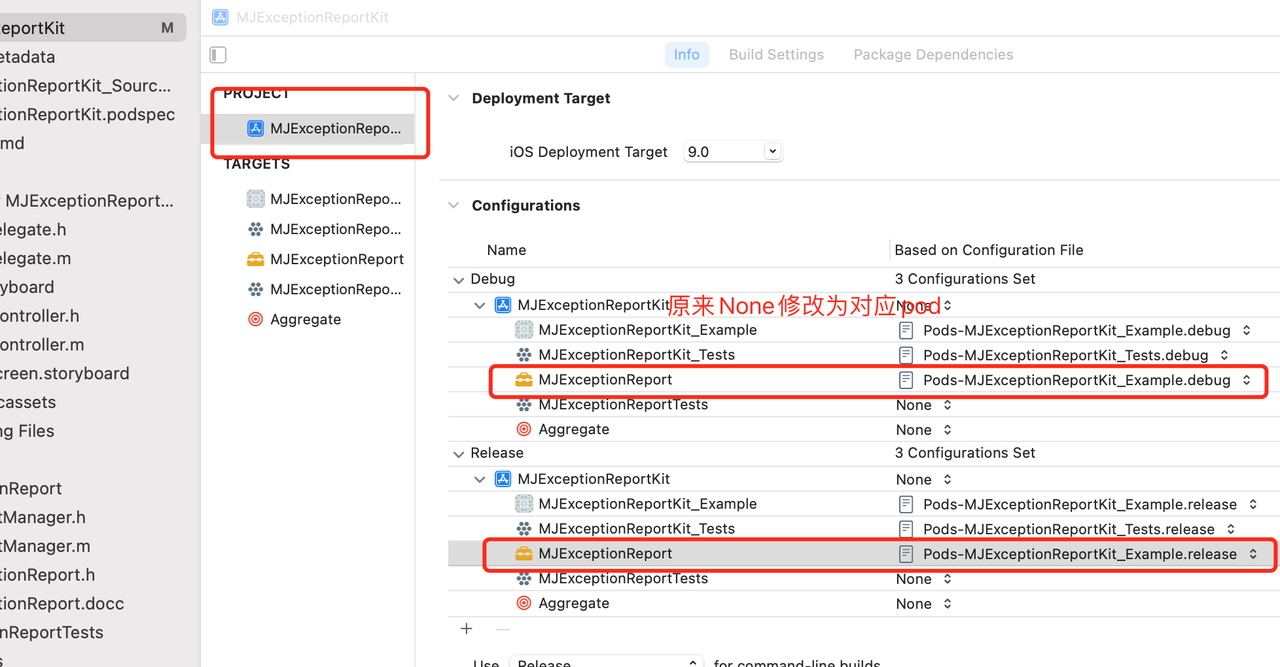
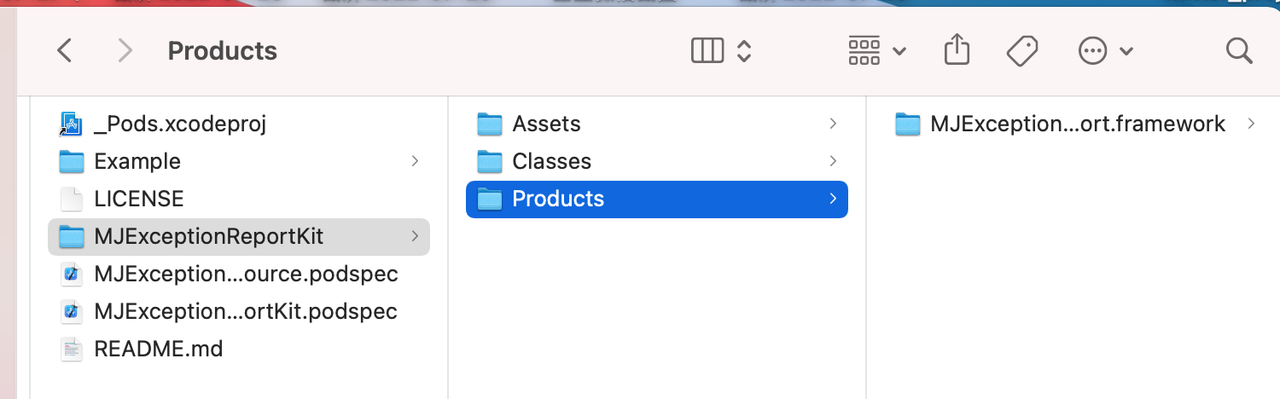
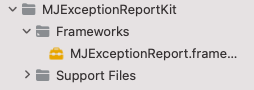
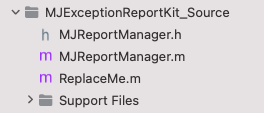
第二步:组件库目录说明,以MJExceptionReportKit库为例:

二、组件库开发
1、源码开发
第一步:把组件库的源码复制到MJExceptionReportKit/Classes/目录下;
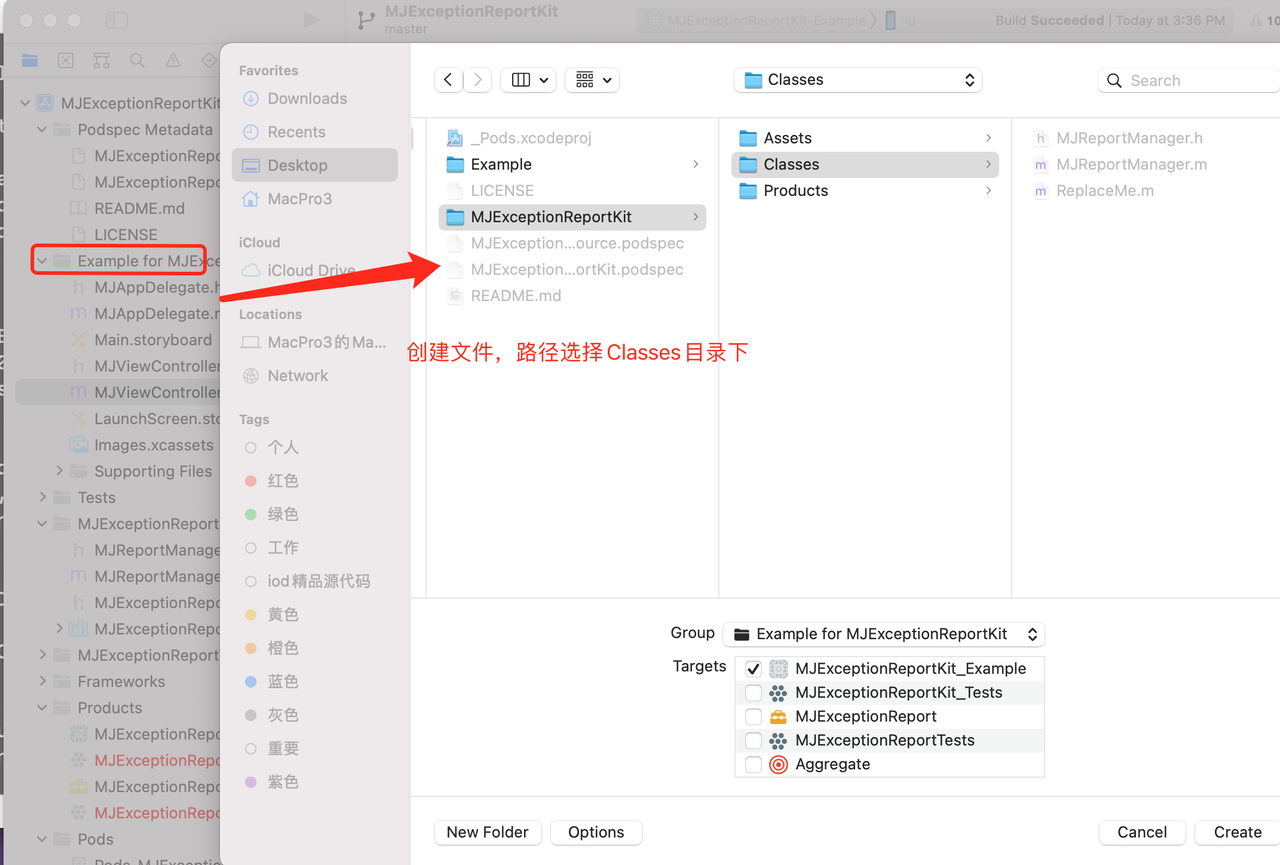
第二步:打开Example项目,如果目前没有源码第一步可忽略,后续开发,可在Example创建文件,创建时指向MJExceptionReportKit/Classes/目录即可,如下图:
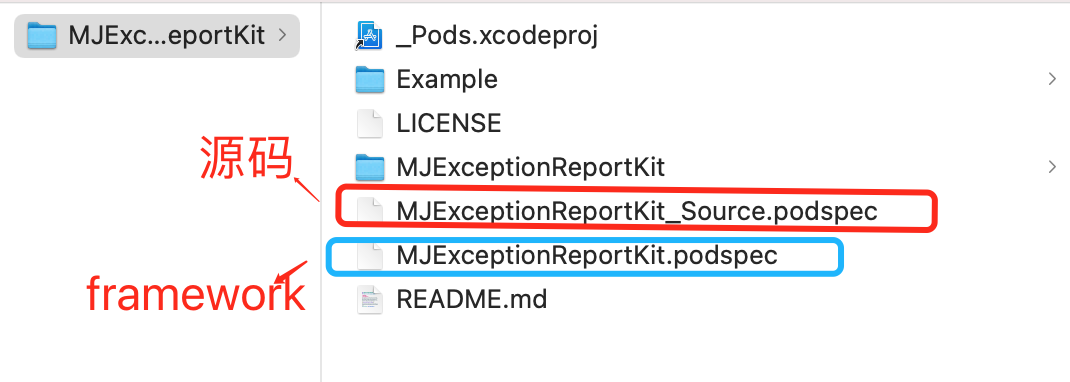
第三步:区分源码及framework的podspec文件
Pod::Spec.new do |s|
   s.name             = 'MJExceptionReportKit_Source'
   s.version          = '0.0.3'
   s.summary          = 'A short description of MJExceptionReportKit.'
   s.description      = '组件'
   s.homepage         = 'https://codeup.aliyun.com/xpx/IOS/MJComponentKit/MJExceptionReport/MJExceptionReportPodSpec'
   s.license          = { :type => 'MIT', :file => 'LICENSE' }
   s.author           = { 'xxx' => 'xxx@51xpx.com' }
   s.source           = { :git => 'https://codeup.aliyun.com/xpx/IOS/MJComponentKit/MJExceptionReport/MJExceptionReportKit.git', :tag => s.version.to_s }
   s.pod_target_xcconfig = { 'VALID_ARCHS' => 'x86_64 armv7 arm64' }
   s.static_framework = true
   s.ios.deployment_target = '8.0'
   s.public_header_files = 'MJExceptionReportKit/Classes/**/*.h'
   s.source_files = 'MJExceptionReportKit/Classes/**/*'
   s.dependency 'Bugly'
end
Pod::Spec.new do |s|
  s.name             = 'MJExceptionReportKit'
  s.version          = '0.0.3'
  s.summary          = 'A short description of MJExceptionReportKit.'
  s.description      = '组件'
  s.homepage         = 'https://codeup.aliyun.com/xpx/IOS/MJComponentKit/MJExceptionReport/MJExceptionReportPodSpec'
  s.license          = { :type => 'MIT', :file => 'LICENSE' }
  s.author           = { 'shenlulu' => 'shenlulu@51xpx.com' }
  s.source           = { :git => 'https://codeup.aliyun.com/xpx/IOS/MJComponentKit/MJExceptionReport/MJExceptionReportKit.git', :tag => s.version.to_s }
  s.pod_target_xcconfig = { 'VALID_ARCHS' => 'x86_64 armv7 arm64' }
  s.static_framework = true
  s.ios.deployment_target = '8.0'

  s.vendored_framework = 'MJExceptionReportKit/Products/MJExceptionReport.framework'
  s.dependency 'Bugly'
end
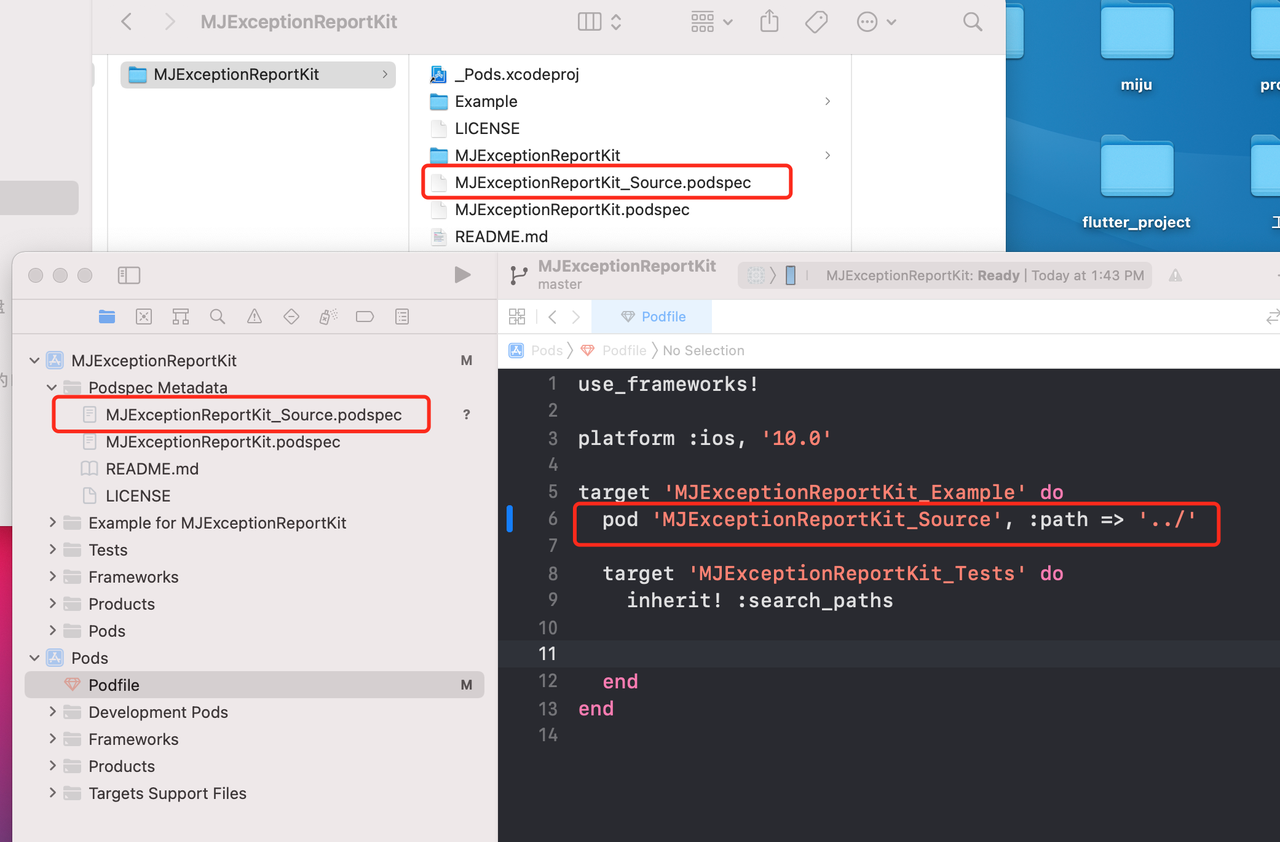
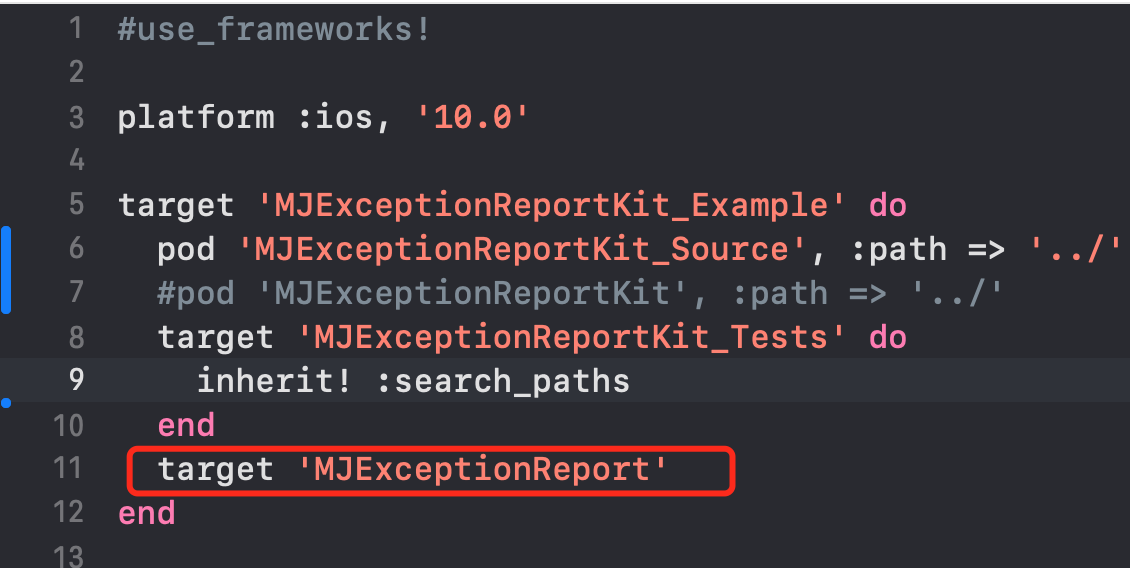
第四步:配置podfile文件,如下:
#use_frameworks!
platform :ios, '10.0'
target 'MJExceptionReportKit_Example' do
  pod 'MJExceptionReportKit_Source', :path => '../'
 # pod 'MJExceptionReportKit', :path => '../'
  target 'MJExceptionReportKit_Tests' do
    inherit! :search_paths
  end
end
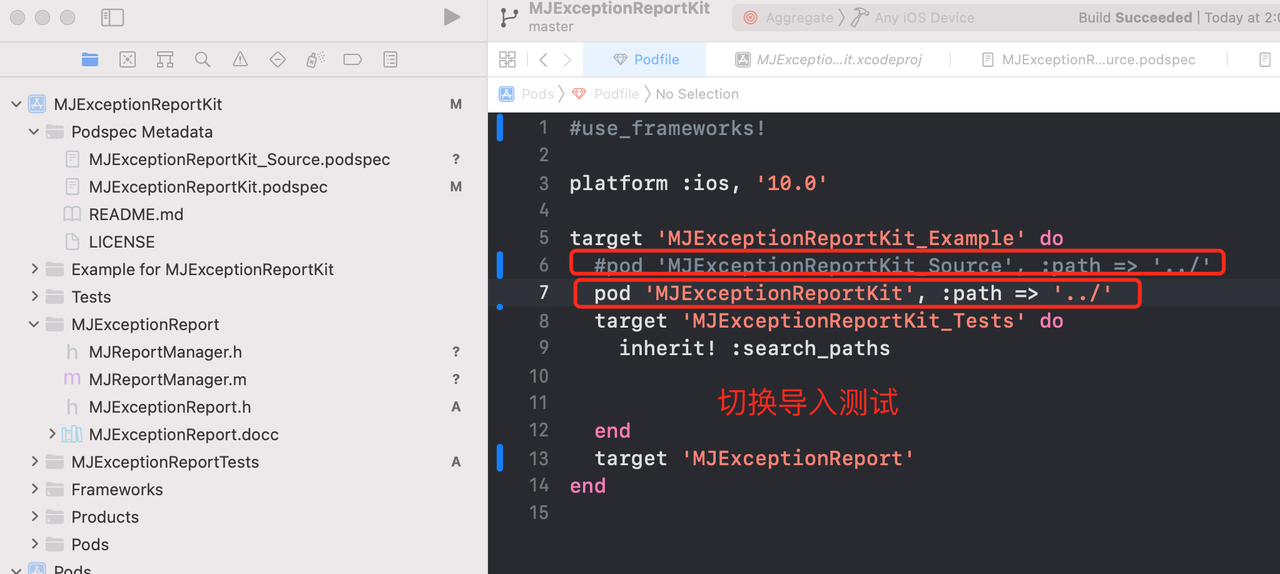
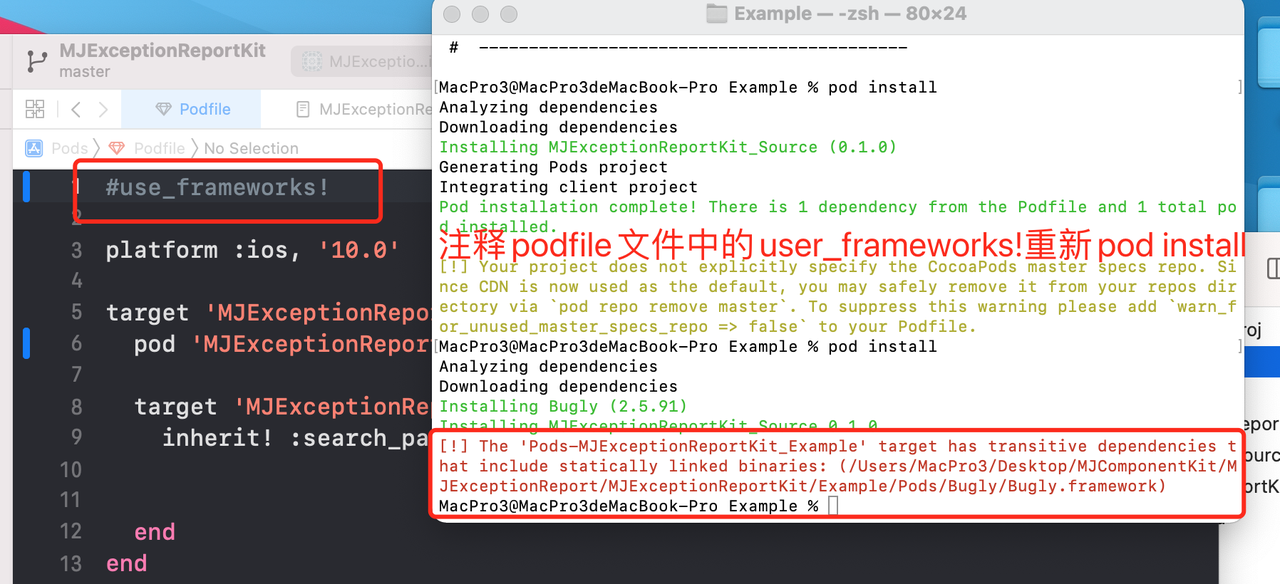
注意这里更改为集成源码模式,修改为MJExceptionReportKit_Source集成。目前没有导出framework,所以即使使用framework集成也是空的。
注释掉use_frameworks!的原因可能遇到的问题,如下图,还有可能后续导出framework包时缺少二进制文件。
注意:
如果创建的组件库依赖了其他私有组件、私有组件又依赖三方组件,此时podfile中头部需要添加私有组件库的source
  source 'https://github.com/CocoaPods/Specs.git'
  source 'https://codeup.aliyun.com/xpx/IOS/MJComponentKit/MJExceptionReport/MJExceptionReportPodSpec.git'
第五步:cd 到Example项目下 执行pod install 并运行项目没有问题的情况下,完成源码开发及集成;
2、framework开发
第一步:完成源码开发集成;
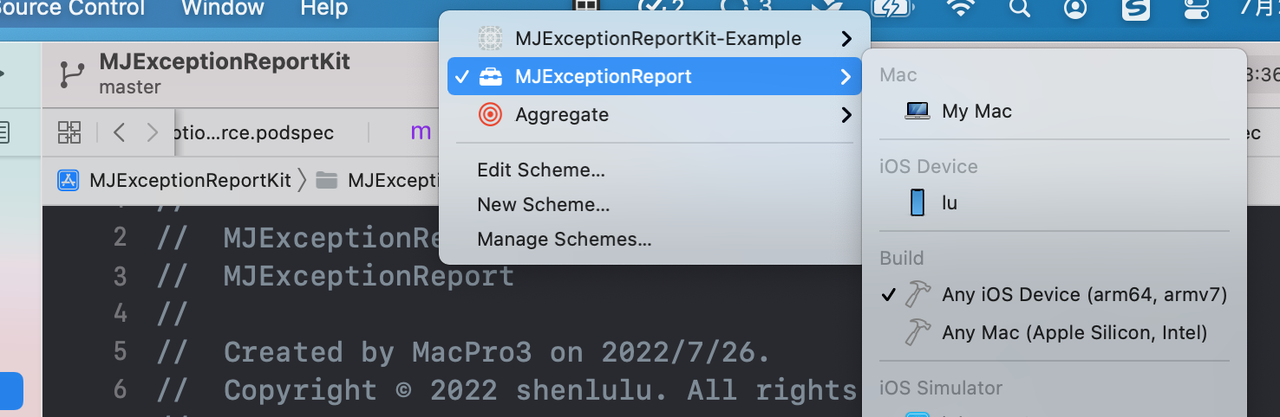
第二步:在Example项目中创建framework 模式的target,创建framework 可参考iOS制作framework

配置参考iOS制作framework
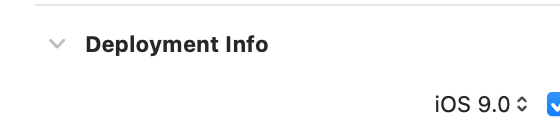
1)系统支持设置
2)Buildsetting 设置:
-
-
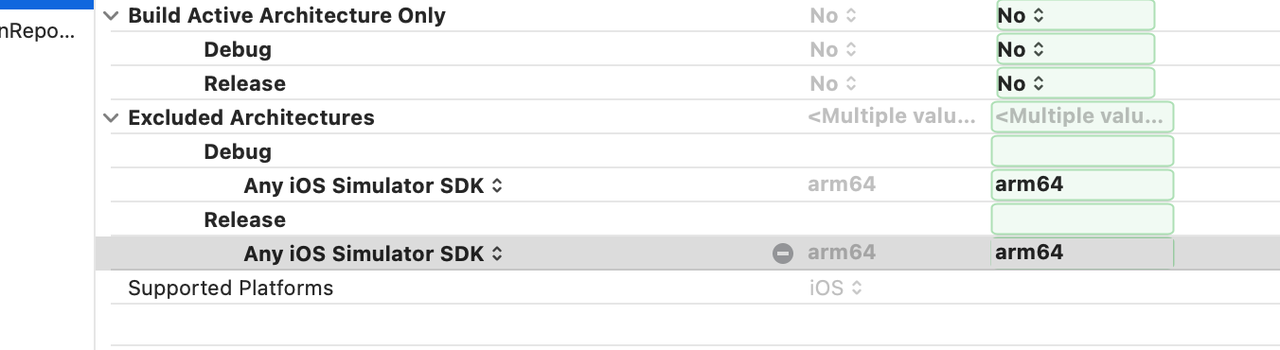
设置Build Active Architecture Only 值 为NO。
-
-
-
设置Mach-O Type值为Static Library(静态库)
-
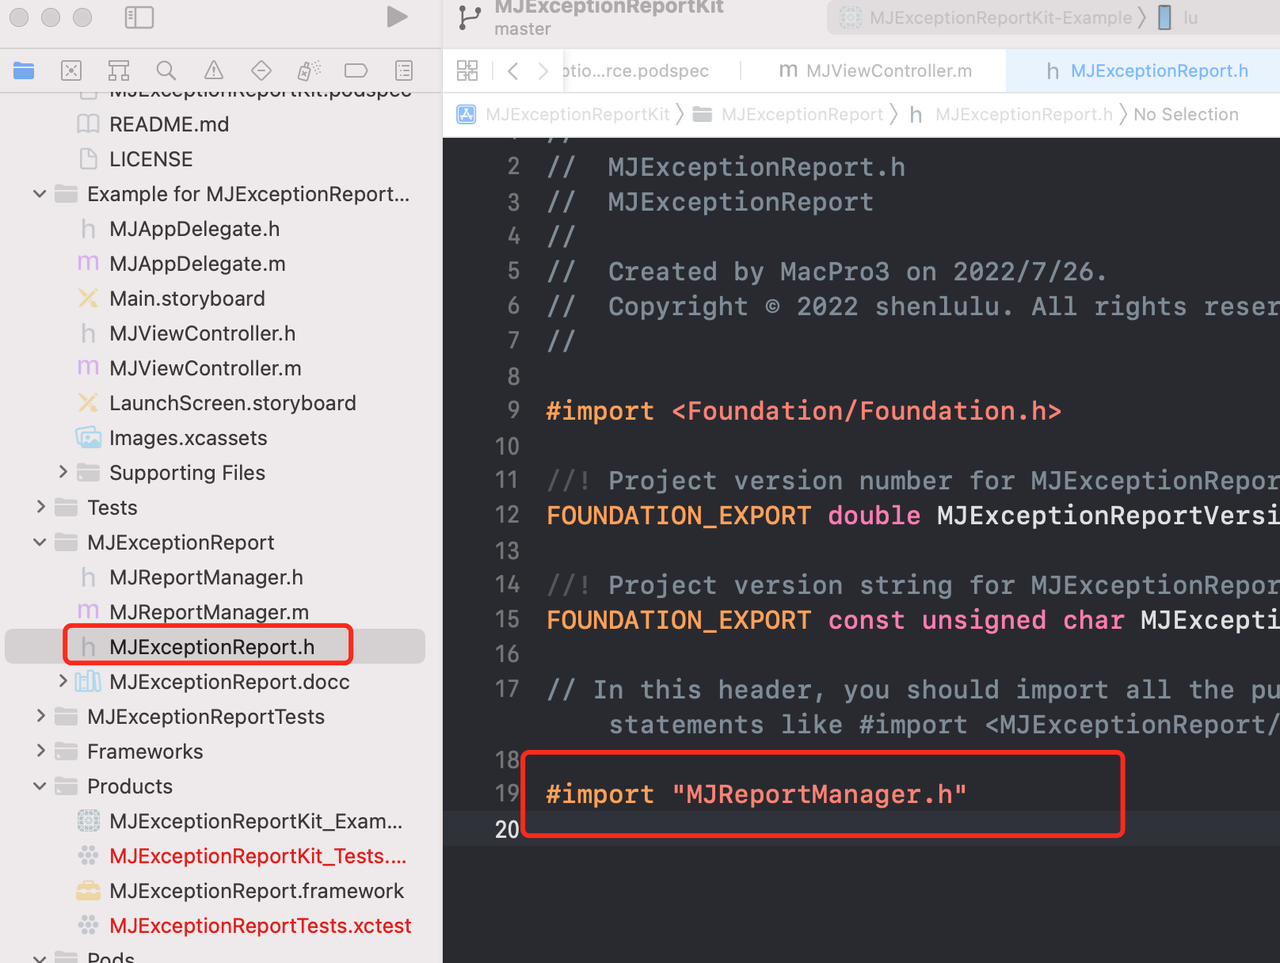
3)头文件:
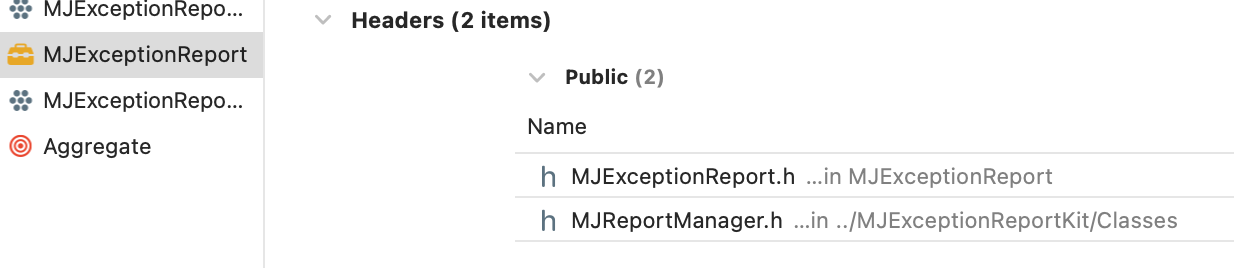
生成的.h文件中要导入头文件,否则打出的包引用头文件时会有警告
第三步:framework引用源码文件
把组件的源码文件路径引用到创建的target文件目录下,如下图:
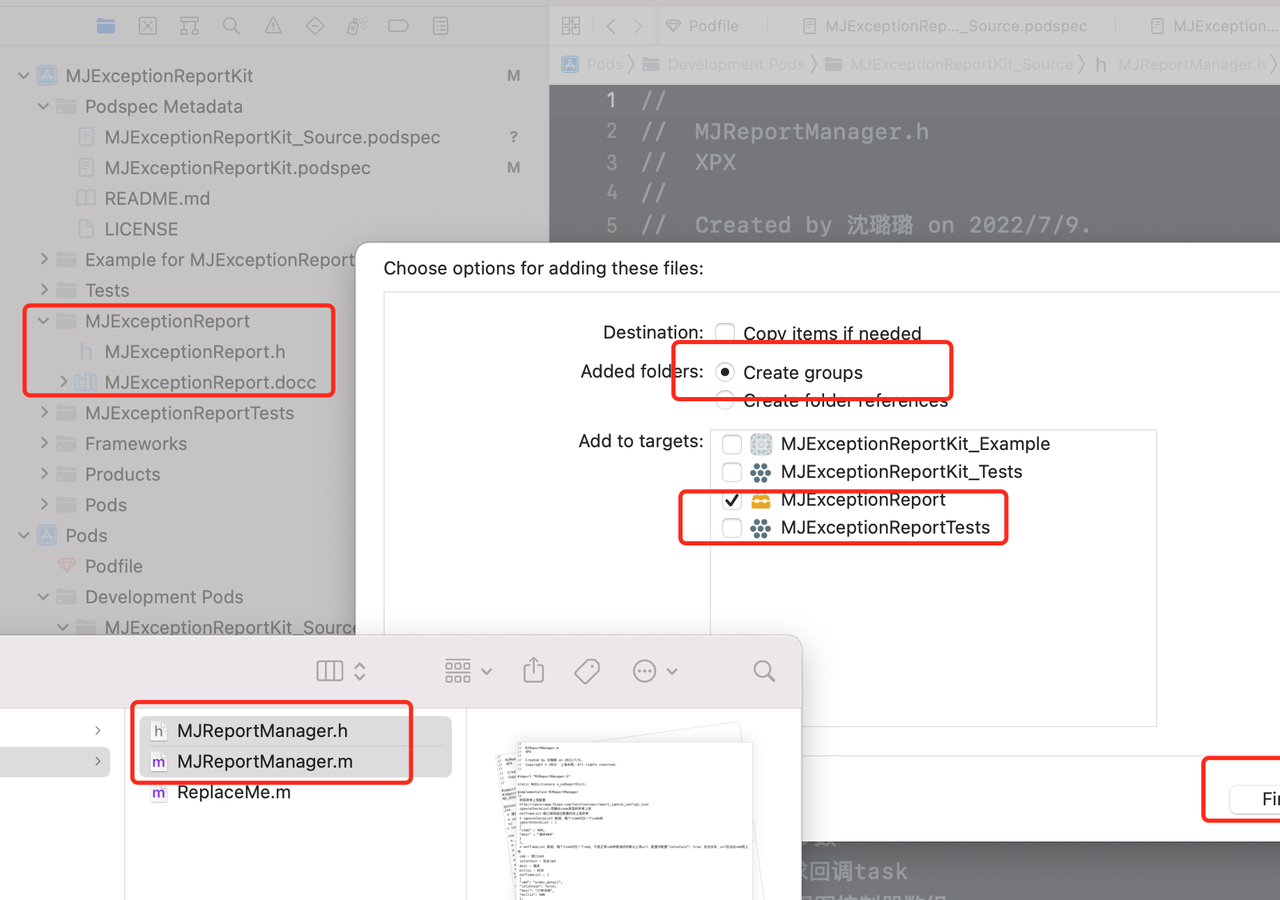
注意与.h文件相同时修改文件名
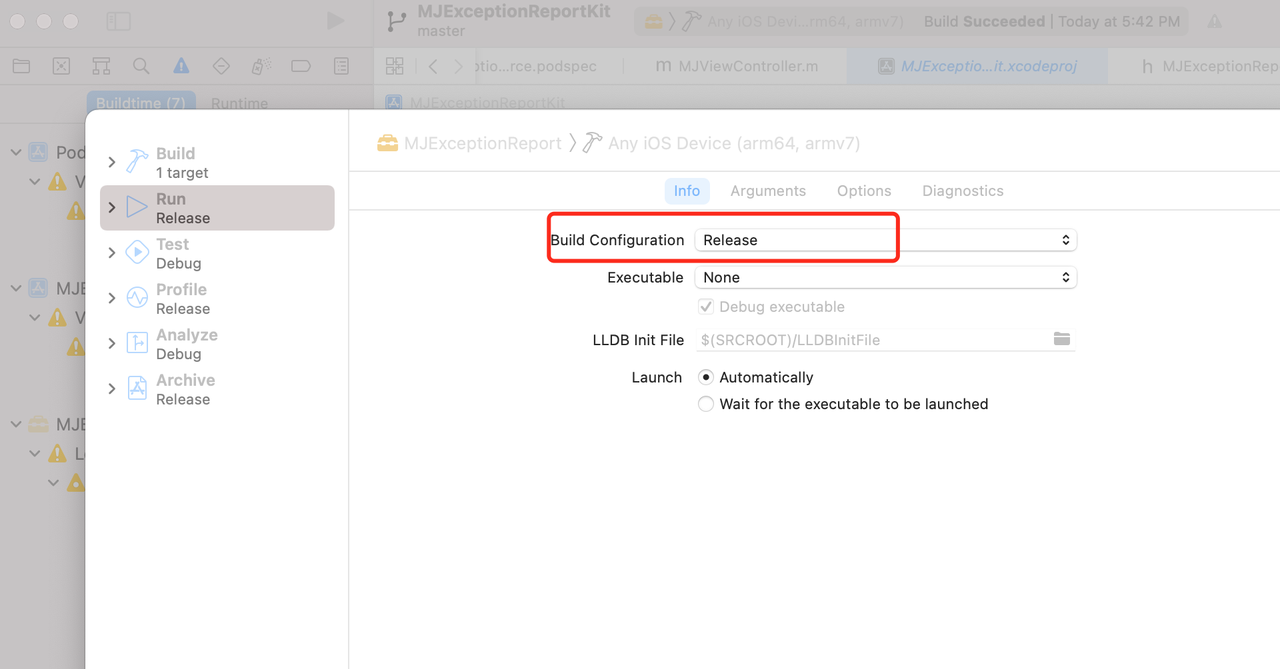
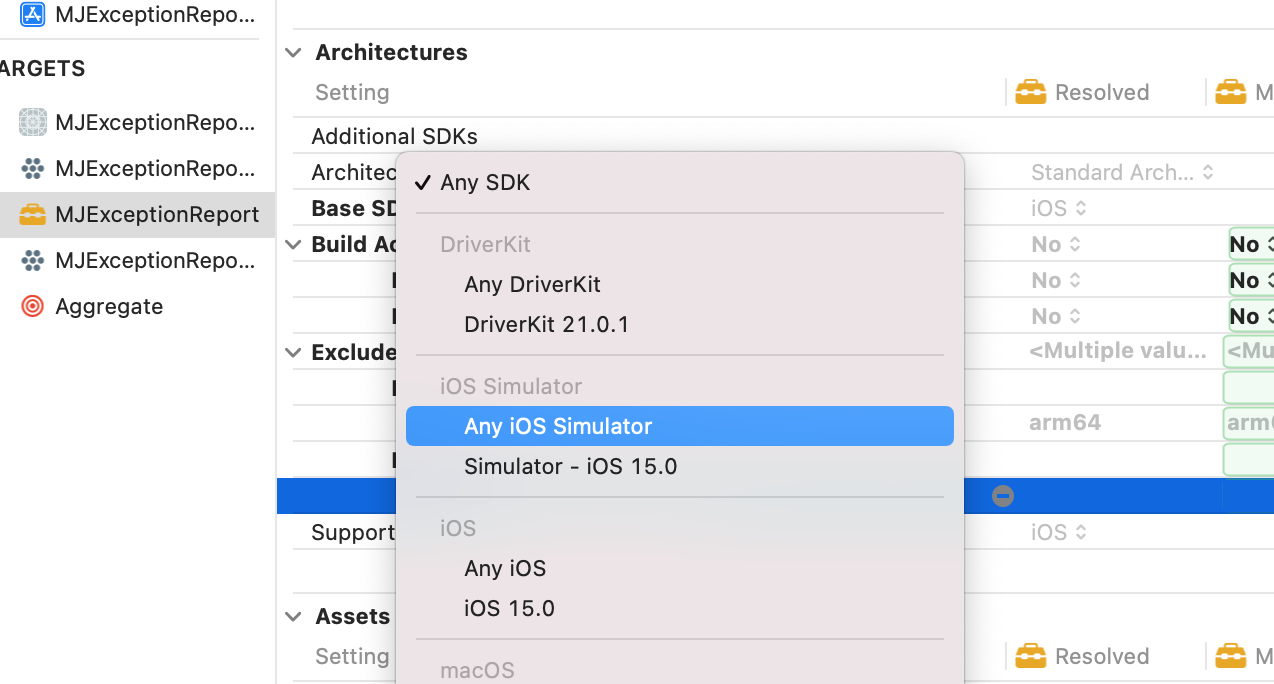
第四步:配置
1)设置target运行模式Release
2)配置Excluded Architectures下的 Any ios Simulator SDK 值为 arm64。(模拟器生成的.framework, 不需要arm64架构)
第五步:Build framework
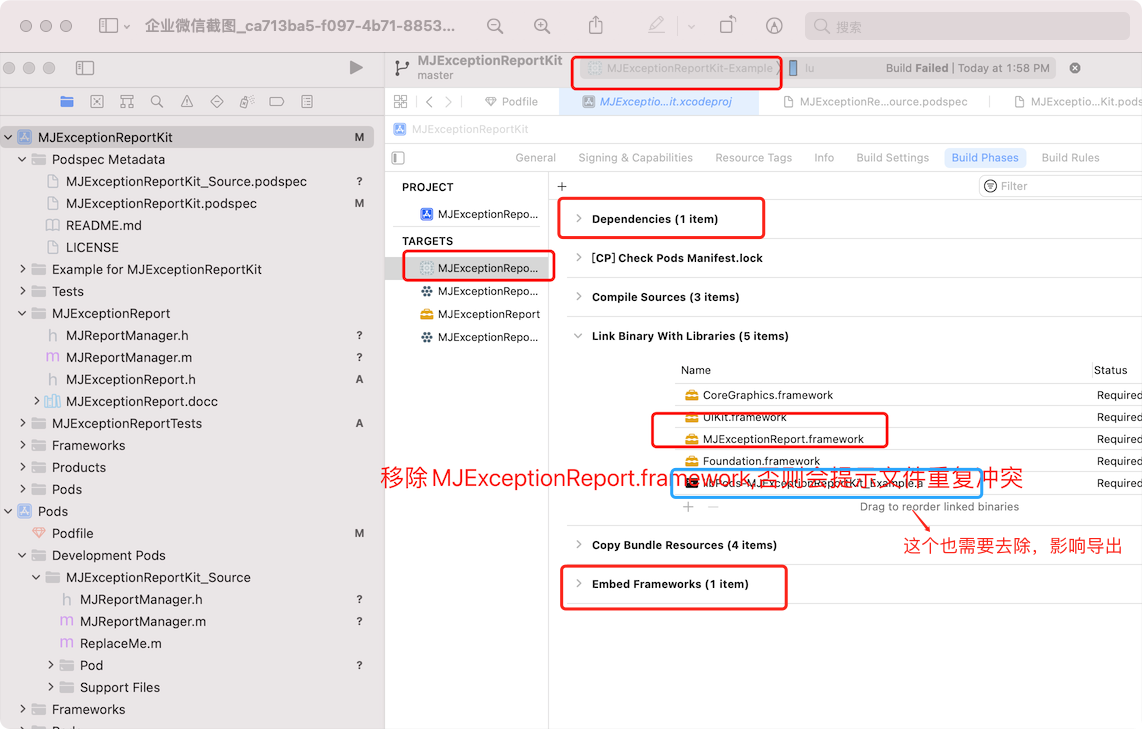
可能出现的问题:
同步的可能要删除Build Phases默认集成的framework,否则运行Example项目时可能包文件冲突问题:
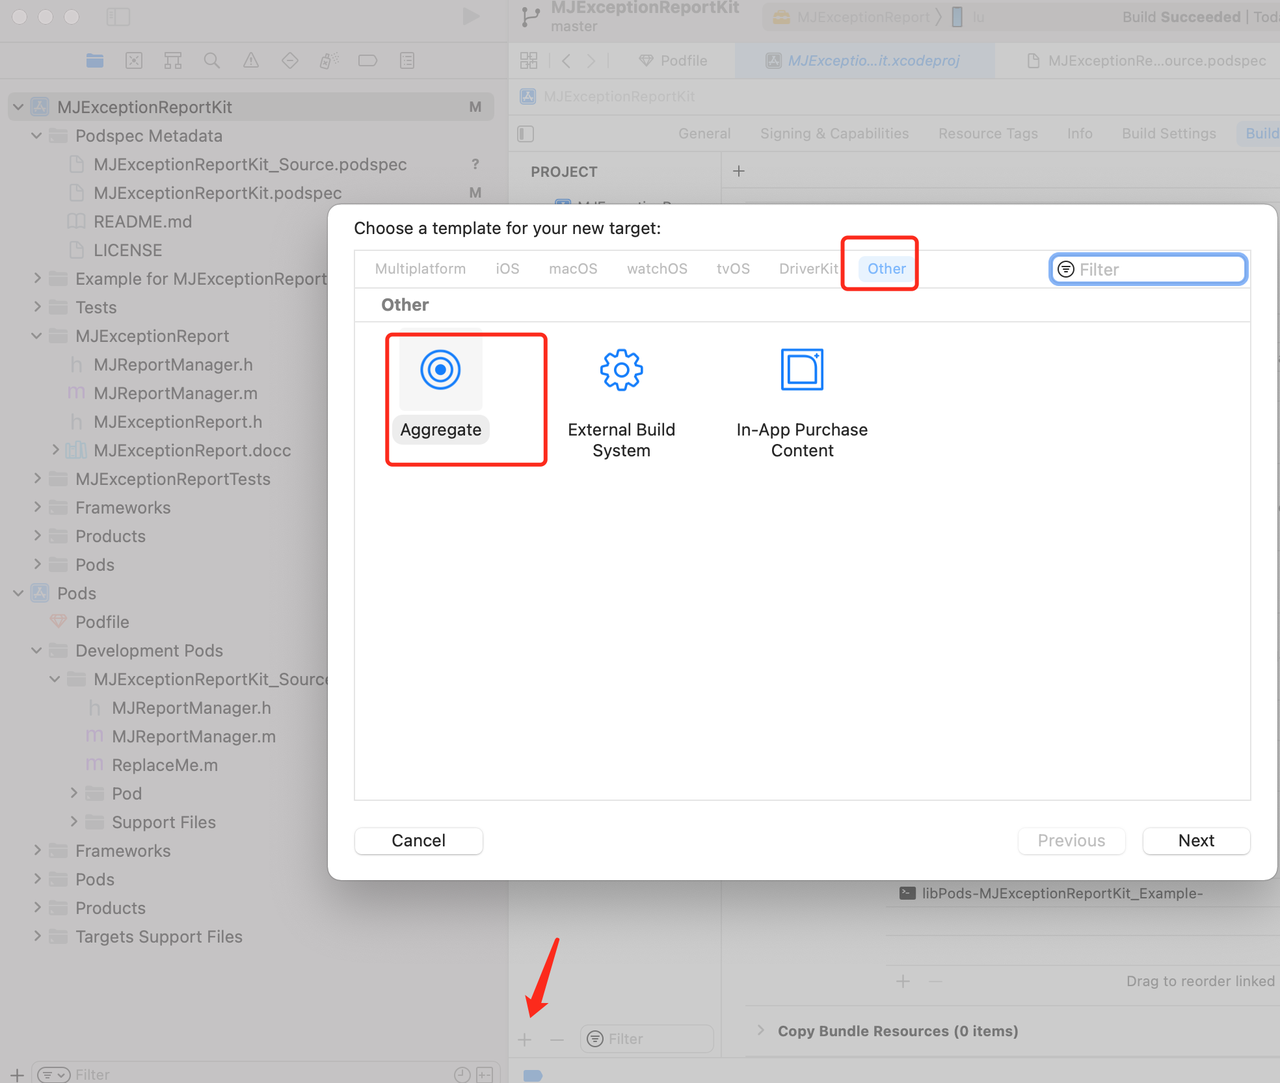
第六步:创建Aggregate 导出framework
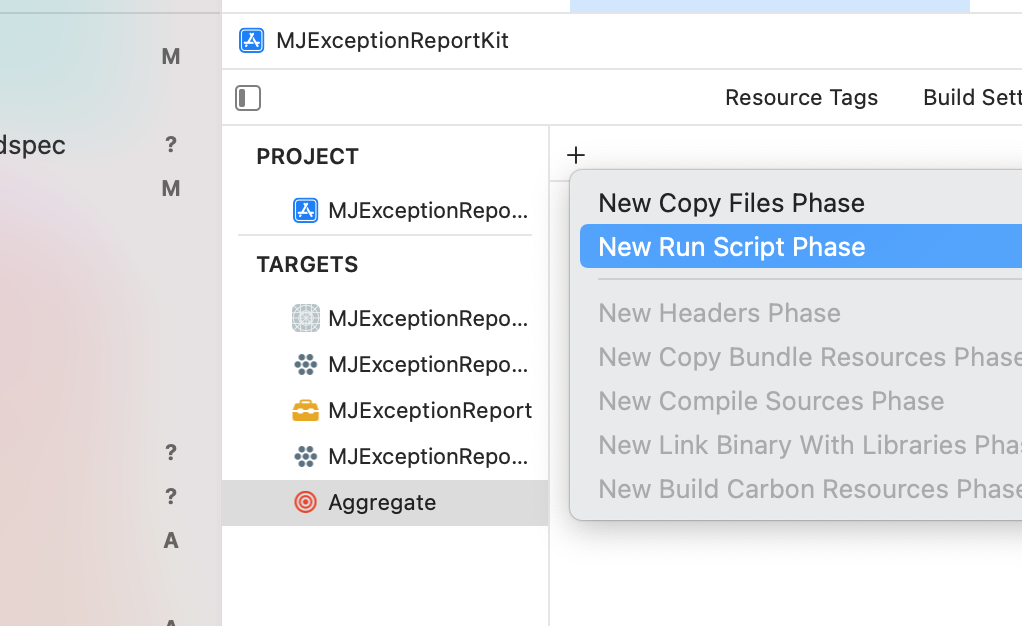
#!/bin/sh
#要build的target名
TARGET_NAME=MJExceptionReport
if [[ $1 ]]
then
TARGET_NAME=$1
fi
UNIVERSAL_OUTPUT_FOLDER="${SRCROOT}/../MJExceptionReportKit/Products"
#创建输出目录,并删除之前的framework文件
mkdir -p "${UNIVERSAL_OUTPUT_FOLDER}"
rm -rf "${UNIVERSAL_OUTPUT_FOLDER}/${TARGET_NAME}.framework"
#分别编译模拟器和真机的Framework
xcodebuild -target "${TARGET_NAME}" ONLY_ACTIVE_ARCH=NO -configuration ${CONFIGURATION} -sdk iphoneos BUILD_DIR="${BUILD_DIR}" BUILD_ROOT="${BUILD_ROOT}" clean build
xcodebuild -target "${TARGET_NAME}" ONLY_ACTIVE_ARCH=NO -configuration ${CONFIGURATION} -sdk iphonesimulator BUILD_DIR="${BUILD_DIR}" BUILD_ROOT="${BUILD_ROOT}" clean build
#拷贝framework到univer目录
cp -R "${BUILD_DIR}/${CONFIGURATION}-iphonesimulator/${TARGET_NAME}.framework" "${UNIVERSAL_OUTPUT_FOLDER}"
#合并framework,输出最终的framework到build目录
lipo -create -output "${UNIVERSAL_OUTPUT_FOLDER}/${TARGET_NAME}.framework/${TARGET_NAME}" "${BUILD_DIR}/${CONFIGURATION}-iphonesimulator/${TARGET_NAME}.framework/${TARGET_NAME}" "${BUILD_DIR}/${CONFIGURATION}-iphoneos/${TARGET_NAME}.framework/${TARGET_NAME}"
#删除编译之后生成的无关的配置文件
dir_path="${UNIVERSAL_OUTPUT_FOLDER}/${TARGET_NAME}.framework/"
for file in ls $dir_path
do
if [[ ${file} =~ ".xcconfig" ]]
then
rm -f "${dir_path}/${file}"
fi
done
#判断build文件夹是否存在,存在则删除
if [ -d "${SRCROOT}/build" ]
then
rm -rf "${SRCROOT}/build"
fi
rm -rf "${BUILD_DIR}/${CONFIGURATION}-iphonesimulator" "${BUILD_DIR}/${CONFIGURATION}-iphoneos"
#打开合并后的文件夹
open "${UNIVERSAL_OUTPUT_FOLDER}"
三、组件验证
1、本地验证
cd到组件目录下
源码验证
pod lib lint MJExceptionReportKit_Source.podspec --use-libraries --allow-warnings
framework验证
pod lib lint MJExceptionReportKit.podspec --use-libraries --allow-warnings
注意:如果组件中依赖了私有组件,私有组件又依赖三方需要添加--sources,例如:pod lib lint 'MJCheckAppVersionKit_Source.podspec' --sources='https://github.com/CocoaPods/Specs.git,https://codeup.aliyun.com/xpx/IOS/MJComponentKit/MJExtension/MJExtensionPodSpec.git'--use-libraries --allow-warnings --verbose
示例工程里面的 Pod支持的版本要和 .podspec文件里面指定的版本一致:

源码验证
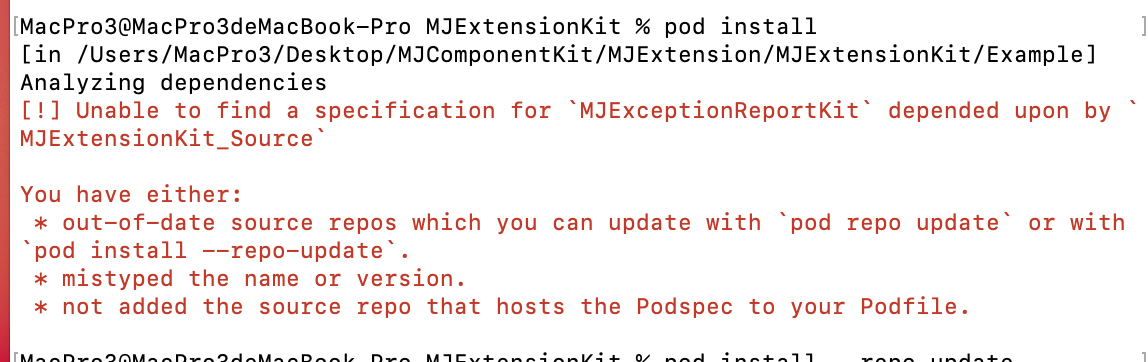
pod lib lint MJExtensionKit_Source.podspec --use-libraries --allow-warnings --sources='https://codeup.aliyun.com/xpx/IOS/MJComponentKit/MJExceptionReport/MJExceptionReportPodSpec.git,https://github.com/CocoaPods/Specs.git'
framework验证
pod lib lint MJExtensionKit.podspec --use-libraries --allow-warnings --sources='https://codeup.aliyun.com/xpx/IOS/MJComponentKit/MJExceptionReport/MJExceptionReportPodSpec.git,https://github.com/CocoaPods/Specs.git'
不添加源可能出现下图中的问题:
2、远程验证
本地验证通过后提交代码推送到远端,并创建同步版本号的tag。
同本地验证类似:
pod spec lint MJExceptionReportKit_Source.podspec --use-libraries --allow-warnings
pod spec lint MJExceptionReportKit.podspec --use-libraries --allow-warnings
pod spec lint MJExtensionKit_Source.podspec --use-libraries --allow-warnings --sources='https://codeup.aliyun.com/xpx/IOS/MJComponentKit/MJExceptionReport/MJExceptionReportPodSpec.git,https://github.com/CocoaPods/Specs.git'
pod spec lint MJExtensionKit.podspec --use-libraries --allow-warnings --sources='https://codeup.aliyun.com/xpx/IOS/MJComponentKit/MJExceptionReport/MJExceptionReportPodSpec.git,https://github.com/CocoaPods/Specs.git'
3、推送到索引库
参考组件创建创建关联索引库
源码
pod repo push MJExceptionReportPodSpec MJExceptionReportKit_Source.podspec --use-libraries --allow-warnings
framework
pod repo push MJExceptionReportPodSpec MJExceptionReportKit.podspec --use-libraries --allow-warnings
如果报引入的私有库找不到,则需要在推送时为相应库配置source源,如下图:

推送代码:
pod repo push 'MJCheckAppVersion' 'MJCheckAppVersionKit_Source.podspec' --sources='https://github.com/CocoaPods/Specs.git
,https://codeup.aliyun.com/xpx/IOS/MJComponentKit/MJCheckAppVersion/MJCheckAppVersionPodSpec.git,https://codeup.aliyun.com/xpx/IOS/MJComponentKit/MJExtension/MJExtensionPodSpec.git,https://codeup.aliyun.com/xpx/IOS/MJComponentKit/MJExceptionReport/MJExceptionReportPodSpec.git' --verbose --allow-warnings --use-libraries
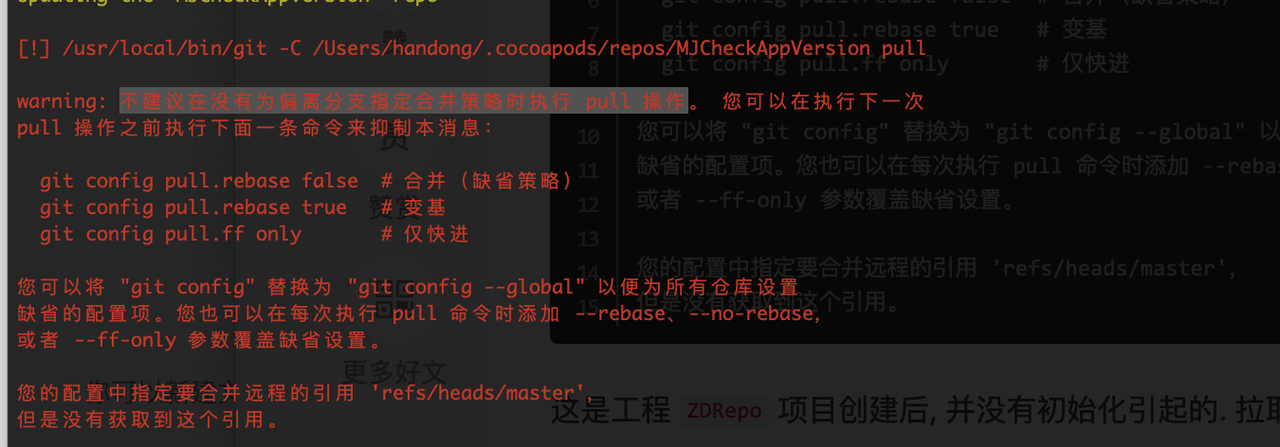
如果报如下错误,是因为没有初始化仓库引起的,在远端仓库新建README.md文件就行

四、集成使用
Podfile
添加源
source 'https://codeup.aliyun.com/xpx/IOS/MJComponentKit/MJExceptionReport/MJExceptionReportPodSpec.git'
target中添加pod
pod 'MJExceptionReportKit','~> 0.0.3' #异常上报framework
或
pod 'MJExceptionReportKit_Source','~> 0.0.3' #异常上报源码
pod install 之后查看
#if __has_include(<MJExtension/MJExtension.h>)
#import <MJExtension/MJExtension.h>
#else
#import "MJExtension.h"
#endif
五、扩展组件库集成已有私有组件库配置
如MJExtensionKit.podspec
s.vendored_framework = 'MJExtensionKit/Products/MJExtension.framework'
s.dependency 'MJExceptionReportKit'
s.dependency 'Bugly'
MJExtensionKit_Source.podspec
 s.public_header_files = 'MJExtensionKit/Classes/**/*.h'
 s.source_files = 'MJExtensionKit/Classes/**/*'
 s.dependency 'MJExceptionReportKit_Source'
 s.dependency 'Bugly'
framework对应framework ,源码对应源码
组件中引用私有组件头文件如下
#if __has_include(<MJExceptionReport/MJReportManager.h>)
#import <MJExceptionReport/MJReportManager.h>
#endif
#if __has_include("MJReportManager.h")
#import "MJReportManager.h"
#endif
代码:
NSException *exception = [NSException exceptionWithName:className reason:msg userInfo:infoDict];
#if __has_include(<MJExceptionReport/MJReportManager.h>)
[MJReportManager reportJsonException:exception vcArray:@[]];
 #endif
#if __has_include("MJReportManager.h")
[MJReportManager reportJsonException:exception vcArray:@[]];
#endif
项目中头文件
#if __has_include(<MJExtension/MJExtension.h>)
#import <MJExtension/MJExtension.h>
#else
#import "MJExtension.h"
#endif

 浙公网安备 33010602011771号