Spring Security 登录认证--案例
引言
最近写项目涉及到登录认证和授权,一直不太熟,就从网上找了很多用户登录认证和授权的资料。几天下拉也算是会用了一些,在这里记录一些简单的例子。
Spring Security是Spring 家族中的一个安全管理框架,它的出现还要早于Spring Boot,只是使用的不多,安全管理这个领域,一直是 Shiro 争霸。
相对于 Shiro,在 SSM/SSH 中整合 Spring Security 都是比较麻烦的操作,所以,Spring Security 虽然功能比 Shiro 强大,但是使用反而没有 Shiro 多(Shiro 虽然功能没有 Spring Security 多,但是对于大部分项目而言,Shiro 也够用了)。
但是!!!自从有了 Spring Boot 之后,Spring Boot 对于 Spring Security 提供了 自动化配置方案,可以零配置使用 Spring Security。
Spring Security的简单介绍这里不多说,以项目代码为主:
1. 代码实现
第一步,引入Security依赖
<dependency>
    <groupId>org.springframework.boot</groupId>
    <artifactId>spring-boot-starter-security</artifactId>
</dependency>
第二步,实体类实现UserDetails接口
import org.springframework.security.core.GrantedAuthority;
import org.springframework.security.core.userdetails.UserDetails;
import org.springframework.stereotype.Component;

import java.util.Collection;

/**
 * 实现了UserDetails接口,只留必需的属性,也可添加自己需要的属性
 * @author itle
 * @version 1.0
 * @date 2020/10/27
 */
@Component
public class User implements UserDetails{
    private Integer id;
    private String username;    //登录用户名
    private String password;    //登录密码
    private Collection<? extends GrantedAuthority> authorities;

    public Integer getId() {
        return id;
    }

    public void setId(Integer id) {
        this.id = id;
    }

    public void setUsername(String username) {
        this.username = username;
    }

    public void setPassword(String password) {
        this.password = password;
    }

    public void setAuthorities(Collection<? extends GrantedAuthority> authorities) {
        this.authorities = authorities;
    }

    @Override
    public Collection<? extends GrantedAuthority> getAuthorities() {
        return authorities;
    }

    @Override
    public String getPassword() {
        return password;
    }

    @Override
    public String getUsername() {
        return username;
    }
    //账户是否未过期
    @Override
    public boolean isAccountNonExpired() {
        return true;
    }
    //账户是否未锁定
    @Override
    public boolean isAccountNonLocked() {
        return true;
    }
    //密码是否未过期
    @Override
    public boolean isCredentialsNonExpired() {
        return true;
    }
    //账户是否存在
    @Override
    public boolean isEnabled() {
        return true;
    }


}
第三步,配置适配器WebSecurityConfigurerAdapter
import com.fasterxml.jackson.databind.ObjectMapper;
import com.itle.security.service.impl.MyPasswordEncoder;
import com.itle.security.service.impl.UserDetailsServiceImpl;
import org.springframework.beans.factory.annotation.Autowired;
import org.springframework.context.annotation.Bean;
import org.springframework.context.annotation.Configuration;
import org.springframework.security.authentication.AuthenticationProvider;
import org.springframework.security.authentication.BadCredentialsException;
import org.springframework.security.authentication.DisabledException;
import org.springframework.security.authentication.dao.DaoAuthenticationProvider;
import org.springframework.security.config.annotation.web.builders.HttpSecurity;
import org.springframework.security.config.annotation.web.builders.WebSecurity;
import org.springframework.security.config.annotation.web.configuration.WebSecurityConfigurerAdapter;
import org.springframework.security.core.userdetails.UsernameNotFoundException;

import javax.servlet.http.HttpServletResponse;
import java.io.PrintWriter;
import java.util.HashMap;
import java.util.Map;

/**
 *参考网址:
 * https://www.cnblogs.com/aismvy/p/12877713.html
 * https://www.jianshu.com/p/650a497b3a40
 *Security配置文件,项目启动时就加载了
 * @author itle
 * @date 2020/10/27
 * @return
 */
@Configuration
public class WebSecurityConfig extends WebSecurityConfigurerAdapter {

    @Autowired
    private UserDetailsServiceImpl userDetailsService;

    @Autowired
    private MyPasswordEncoder passwordEncoder;

    @Autowired
    private ObjectMapper objectMapper;


    @Override
    protected void configure(HttpSecurity http) throws Exception {

        http.authenticationProvider(authenticationProvider())
                .httpBasic()
                //未登录时,进行json格式的提示,很喜欢这种写法,不用单独写一个又一个的类
                .authenticationEntryPoint((request, response, authException) -> {
                    response.setContentType("application/json;charset=utf-8");
                    response.setStatus(HttpServletResponse.SC_FORBIDDEN);
                    PrintWriter out = response.getWriter();
                    Map<String, Object> map = new HashMap<String, Object>();
                    map.put("code", 403);
                    map.put("message", "未登录");
                    out.write(objectMapper.writeValueAsString(map));
                    out.flush();
                    out.close();
                })
                //请求认证管理
                .and()
                .authorizeRequests()
                .anyRequest().authenticated() //必须授权才能范围 //其他的路径都是登录后即可访问

                //from表单登录设置
                .and()
                .formLogin()
                .loginProcessingUrl("/login")   //自定义处理认证的url    默认为/login
                .usernameParameter("username")  //设置form表单中用户名对应的name参数  默认为username
                .passwordParameter("password")  //设置form表单中密码对应的name参数 默认为password
                .permitAll()        //对于需要所有用户都可以访问的界面 或者url进行设置
                //登录失败,返回json
                .failureHandler((request, response, ex) -> {
                    response.setContentType("application/json;charset=utf-8");
                    response.setStatus(HttpServletResponse.SC_UNAUTHORIZED);
                    Map<String, Object> map = new HashMap<>();
                    map.put("code", 401);
                    if (ex instanceof UsernameNotFoundException || ex instanceof BadCredentialsException) {
                        map.put("message", "用户名或密码错误");
                    } else if (ex instanceof DisabledException) {
                        map.put("message", "账户被禁用");
                    } else {
                        map.put("message", "登录失败!");
                    }
                    PrintWriter out = response.getWriter();
                    out.write(objectMapper.writeValueAsString(map));
                    out.flush();
                    out.close();
                })
                //登录成功,返回json
                .successHandler((request, response, authentication) -> {
                    Map<String, Object> map = new HashMap<>();
                    map.put("code", 200);
                    map.put("message", "登录成功");
                    map.put("data", authentication);
                    response.setContentType("application/json;charset=utf-8");
                    PrintWriter out = response.getWriter();
                    out.write(objectMapper.writeValueAsString(map));
                    out.flush();
                    out.close();
                });

        //没有权限,返回json
        http.exceptionHandling()
                .accessDeniedHandler((request, response, ex) -> {
                    response.setContentType("application/json;charset=utf-8");
                    response.setStatus(HttpServletResponse.SC_FORBIDDEN);
                    PrintWriter out = response.getWriter();
                    Map<String, Object> map = new HashMap<>();
                    map.put("code", 403);
                    map.put("message", "权限不足");
                    out.write(objectMapper.writeValueAsString(map));
                    out.flush();
                    out.close();
                });

        //退出成功,返回json
        http.logout()
                .logoutSuccessHandler((request, response, authentication) -> {
                    Map<String, Object> map = new HashMap<>();
                    map.put("code", 200);
                    map.put("message", "退出成功");
                    map.put("data", authentication);
                    response.setContentType("application/json;charset=utf-8");
                    PrintWriter out = response.getWriter();
                    out.write(objectMapper.writeValueAsString(map));
                    out.flush();
                    out.close();
                })
                .permitAll();
        //开启跨域访问
        http.cors()
                .and()
                //开启模拟请求,比如API POST测试工具的测试,不开启时,API POST为报403错误
                .csrf().disable();


    }

    @Override
    public void configure(WebSecurity web) {
        //对于在header里面增加token等类似情况,放行所有OPTIONS请求。
//        web.ignoring().antMatchers(HttpMethod.OPTIONS, "/**");
    }

    @Bean
    public AuthenticationProvider authenticationProvider() {
        DaoAuthenticationProvider authenticationProvider = new DaoAuthenticationProvider();
        //对默认的UserDetailsService进行覆盖
        authenticationProvider.setUserDetailsService(userDetailsService);
        authenticationProvider.setPasswordEncoder(passwordEncoder);
        return authenticationProvider;
    }
}
第四步,实现UserDetailsService接口
import com.itle.security.bean.User;
import org.springframework.security.core.userdetails.UserDetails;
import org.springframework.security.core.userdetails.UserDetailsService;
import org.springframework.security.core.userdetails.UsernameNotFoundException;
import org.springframework.stereotype.Service;

/**
 *
 * 自定义登录认证类,实现了UserDetailsService接口,用户登录时调用的第一类
 * @author itle
 * @date 2020/10/27
 * @return
 */
@Service
public class UserDetailsServiceImpl implements UserDetailsService {

    /**
     * 登陆验证时,通过username获取用户的所有权限信息
     * 并返回UserDetails放到spring的全局缓存SecurityContextHolder中,以供授权器使用
     */
    @Override
    public UserDetails loadUserByUsername(String s) throws UsernameNotFoundException {
        /*
         * 在这里可以自己调用数据库,对username进行查询,看看在数据库中是否存在
         * 不存在可以返回一个空User()对象,在后期的密码比对过程中一样会验证失败
         */
        User user = new User();
        user.setUsername(s);
        user.setPassword("123456");	//这里写死密码为123456
        return user;
    }
}
第五步,实现PasswordEncoder接口
import org.springframework.security.crypto.password.PasswordEncoder;
import org.springframework.stereotype.Component;

/**
 *自定义的密码加密方法,实现了PasswordEncoder接口
 * @author itle
 * @version 1.0
 * @date 2020/10/27
 */
@Component
public class MyPasswordEncoder implements PasswordEncoder {
    @Override
    public String encode(CharSequence charSequence) {
        //加密方法可以根据自己的需要修改
        return charSequence.toString();
    }

    @Override
    public boolean matches(CharSequence charSequence, String s) {
      	//加密解密还要写专门的工具类,所以这里没有加密,只是简单的对比
        return encode(charSequence).equals(s);
    }
}
说明:这个类主要是对密码加密的处理,以及用户传递过来的密码(即参数CharSequence)和数据库密码(UserDetailsService中的密码)进行比对。
Security规定密码必须要进行加密。
2. 简单测试
以上简单的一个登陆认证已经写完了,接下来需要进行测试。
测试一,未登录直接访问index,浏览器输入 localhost:8055/index ,页面直接重定向到默认的login页面,说明我们配置.authorizeRequests().anyRequest().authenticated() 成功。
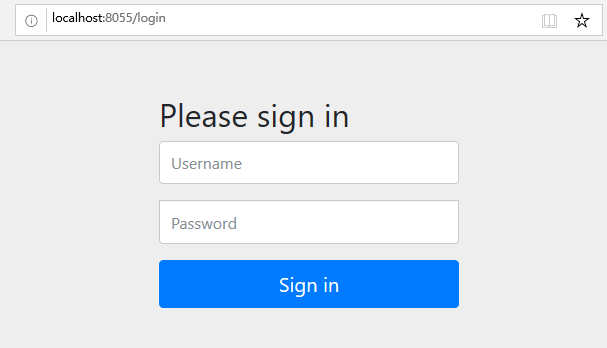
【注】:这是Spring Security 自带的默认登陆页面
测试二,登陆login后,返回登陆成功结果,测试成功

我们写自定义认证的时候规定,登陆密码为123456
测试三,故意输错密码,返回提示信息 ,测试成功
{"code":401,"message":"用户名或密码错误"}
测试四,访问 localhost:8055/logout 登出操作,返回提示信息,测试成功
{"code":200,"data":null,"message":"退出成功"}
3. 跨域问题
我们都知道,目前的项目是前后端分离的,所以我用VUE项目通过 axios 请求,于是引出了跨域问题。

要解决跨域问题,通过测试我得出一个完全解决的办法:
自定义配置类即可解决:
import org.springframework.context.annotation.Bean;
import org.springframework.context.annotation.Configuration;
import org.springframework.web.cors.CorsConfiguration;
import org.springframework.web.cors.UrlBasedCorsConfigurationSource;
import org.springframework.web.filter.CorsFilter;
import org.springframework.web.servlet.config.annotation.CorsRegistry;
import org.springframework.web.servlet.config.annotation.WebMvcConfigurer;

/**
 * @author itle
 * @version 1.0
 * @date 2020/10/27
 */
@Configuration
public class CorsConfig implements WebMvcConfigurer {
    private CorsConfiguration buildConfig() {
        CorsConfiguration corsConfiguration = new CorsConfiguration();
        corsConfiguration.addAllowedOrigin("*");
        corsConfiguration.addAllowedHeader("*");
        corsConfiguration.addAllowedMethod("*");
        corsConfiguration.addExposedHeader("Authorization");
        return corsConfiguration;
    }

    @Bean
    public CorsFilter corsFilter() {
        UrlBasedCorsConfigurationSource source = new UrlBasedCorsConfigurationSource();
        source.registerCorsConfiguration("/**", buildConfig());
        return new CorsFilter(source);
    }

    @Override
    public void addCorsMappings(CorsRegistry registry) {
        registry.addMapping("/**")
                .allowedOrigins("*")
                .allowCredentials(true)
                .allowedMethods("GET", "POST", "DELETE", "PUT")
                .maxAge(3600);
    }

}
加上这段配置后,需要跨域的Controller不需要加@CrossOrigin注解也可实现跨域,跨域问题完美解决!
欢迎访问个人博客:http://www.itle.info/

 浙公网安备 33010602011771号