
Openresty + nginx-upload-module支持文件上传
0. 说明
这种方式其实复杂,麻烦!建议通过这个方式搭建Openresty文件上传和下载服务器:http://www.cnblogs.com/lujiango/p/9056680.html
1. 包下载
openresty-1.13.6.1下载地址 https://openresty.org/download/openresty-1.13.6.1.tar.gz
nginx-upload-module-2.2由于原作者已经很长时间不更新了,本来从原作者github下载的时候,编译openresty的时候报错:ngx_http_upload_module.c:14:17: fatal error: md5.h: No such file or directory
2. 编译
(1)分别解压openresty-1.13.6.1.tar.gz和nginx-upload-module-2.2.zip
(2)执行/sdf/slb/openresty-1.13.6.1# ./configure --prefix=/sdf/slb/openresty --add-module=/sdf/slb/nginx_upload_module-2.2.0
3. 配置
3.1 nginx.conf
需要配置upload_pass作为文件上传之后的返回处理。
worker_processes  20;

error_log  logs/error.log notice;

events {
    worker_connections  1024;
}

http {
    include       mime.types;
    default_type  application/octet-stream;

    server {
        listen       8081;
        client_max_body_size 100m;

        # Upload form should be submitted to this location
        location /upload {文件上传的action
            # Pass altered request body to this location
            upload_pass /success;文件上传之后的返回

            # Store files to this directory
            # The directory is hashed, subdirectories 0 1 2 3 4 5 6 7 8 9 should exist
            upload_store /sdf/slb/store 1;文件存储的路径,要先手动创建0 1 2 3 4 5 6 7 8 9一共10个文件夹

            # Allow uploaded files to be read only by user
            upload_store_access user:rw;

            # Set specified fields in request body
            upload_set_form_field "${upload_field_name}_name" $upload_file_name;
            upload_set_form_field "${upload_field_name}_content_type" $upload_content_type;
            upload_set_form_field "${upload_field_name}_path" $upload_tmp_path;

            # Inform backend about hash and size of a file
            upload_aggregate_form_field "${upload_field_name}_md5" $upload_file_md5;
            upload_aggregate_form_field "${upload_field_name}_size" $upload_file_size;

            upload_pass_form_field "^submit$|^description$";
        }

        # Pass altered request body to a backend

        location /success {
            content_by_lua 'ngx.say("upload success!")';
        }

        location /site {
            root   html;
            index  upload.html;支持文件上传的静态页面
        }
    }
}
3.2 配置静态页面访问,作为文件上传的入口
搭建openresty静态页面访问,请参考http://www.cnblogs.com/lujiango/p/9001006.html#_lab2_4_0
upload.html的文件内容如下:请注意其中的action="/upload",与nginx.conf里面的location /upload{}是对应的。
<html>
<head>
<title>Test upload</title>
</head>
<body>
<h2>Select files to upload</h2>
<form enctype="multipart/form-data" action="/upload" method="post">
<input type="file" name="file1"><br>
<input type="file" name="file2"><br>
<input type="file" name="file3"><br>
<input type="file" name="file4"><br>
<input type="file" name="file5"><br>
<input type="file" name="file6"><br>
<input type="submit" name="submit" value="Upload">
<input type="hidden" name="test" value="value">
</form>
</body>
</html>
页面如下:

3.3 文件上传
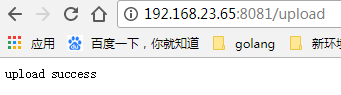
访问http:192.168.25.84:8081/site或http:192.168.25.84:8081/site/upload.html
可以进入文件上传的入口页面,选择文件上传即可,如下是文件上传成功。
此时,在nginx.conf配置的文件存储位置有如下文件:
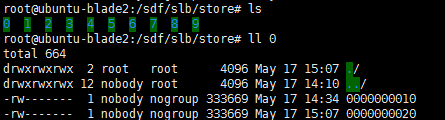
其中的0000000010和0000000020就是上传的文件。
注:在上传文件的时候报错:/sdf/slb/store/6/0000000006" for "89629.log" (13: Permission denied),这个是nginx权限的问题,可以参考https://www.ruby-forum.com/topic/1379755
x. 参考资料
https://www.ruby-forum.com/topic/1379755
http://www.grid.net.ru/nginx/upload.en.html
https://github.com/Austinb/nginx-upload-module/blob/2.2/nginx.conf

 浙公网安备 33010602011771号