建议收藏:vue-cli2 与vue-cli3,vue2与vue3 初始化项目,解析区别
vue-cli2 与 vue-cli3 的区别
vue-cli3是基于webpack4打造,vue-cli2是基于webpack3
vue-cli3的设计原则是“0配置”,移除(隐藏)配置文件build和config等目录
vue-cli3提供了vue ui 命令,提供了可视化配置
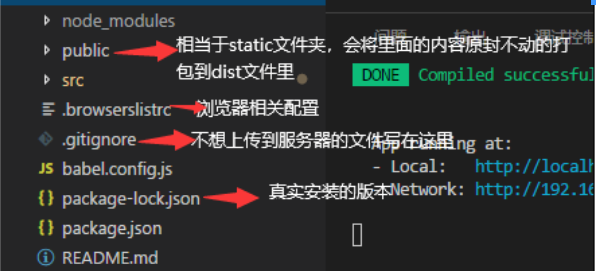
vue-cli3移除了static文件夹,新增了public文件夹,并且将index.html移动到public中
使用vue-cli2初始化项目 vue init webpack 项目名,生成的目录
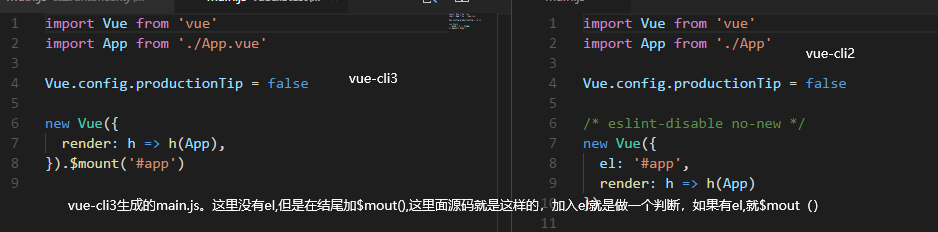
使用vue-cli3初始化项目 vue create 项目名,生成的目录例子1:
vue2
vue-cli 2.5.2 初始化项目
vue init webpack lujh(项目名称)
项目截图:
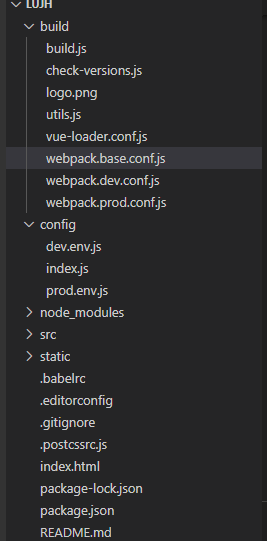
文件解析如下:
build  文件夹:webpack的一些相关配置;

config  文件夹:项目开发环境和生产环境的一些相关配置;

node_modules  文件夹 :这里存放的是安装包,比如webpack、第三方插件库、项目的依赖文件;

src  文件夹:我们将要写的代码放在这里面,打包上线时会进行编译、压缩等操作。

static 文件夹:这里存放的是一些静态文件比如图片、css文件、不需要进行压缩的js文件,打包时这个文件夹将原封不动的放到dist(打包时自动生产的文件夹)文件夹下面。

.babelrc 文件:ES6语法编译配置,主要是将ES 转成ES 需要适配那些浏览器

.editorconfig 文件:定义代码格式,对代码的风格进行一个统一。

.gitignore 文件:git上传需要忽略的文件格式

.postcssrc.js 文件:postcss配置文件

index.html  文件:要进行访问的首页面

package-lock.json 文件:锁定依赖模块和子模块的版本号

package.json 文件:项目基本信息,包依赖信息等

README.md  文件:项目说明文件
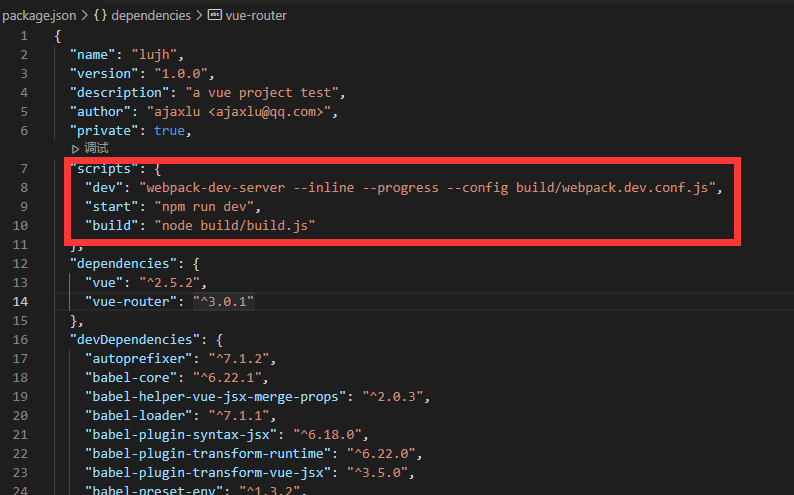
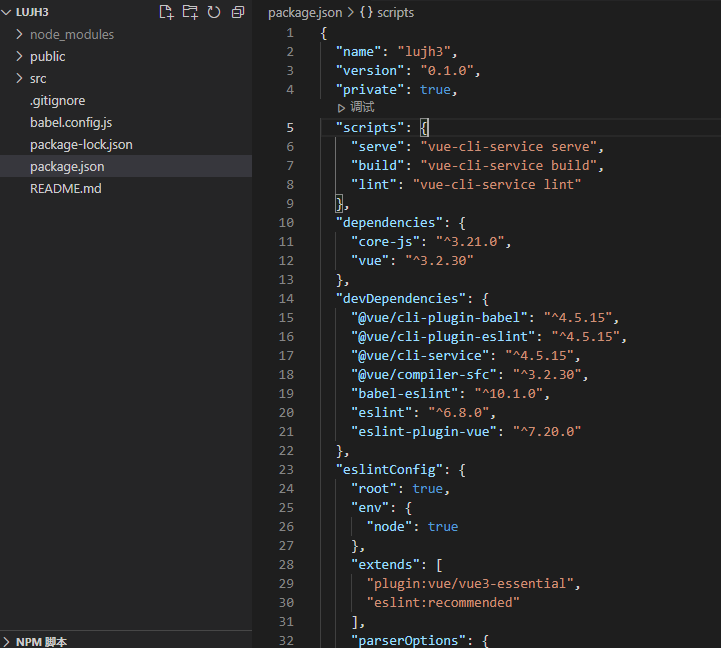
1、package.json 文件
当我们在命令行时 npm run dev 的时候程序执行的是package.json文件的“script”脚本里的“dev”命令;
脚本解析:
“webpack-dev-server” 服务器
“--inline” 是重新加载改变的部分,不会刷新页面
“--progress”是启动项目时显示进度百分比
“--config build/webpack.dev.conf.js” 是执行build下面的webpack.dev.conf.js 配置文件。
其他属性比如:
“--open” 是启动项目后自动在浏览器打开项目,其它配置可以查看相关文档(https://www.webpackjs.com/configuration/dev-server/#devserver)。
“start” 和“dev”的作用是一样的,
“build” 的作用是执行 build下的build.js文件,将当前的项目进行打包,打包后生成一个dist文件夹,放在其里面。
2、webpack.dev.conf.js文件是我们在开发环境下的webpack配置文件,entry(入口文件)、output(输出文件)、loader ,这些都是必备的,而一些plugins(插件)已经在对应的环境文件(webpack.dev.config.js、webpack.prod.config.js)中进行了配置:
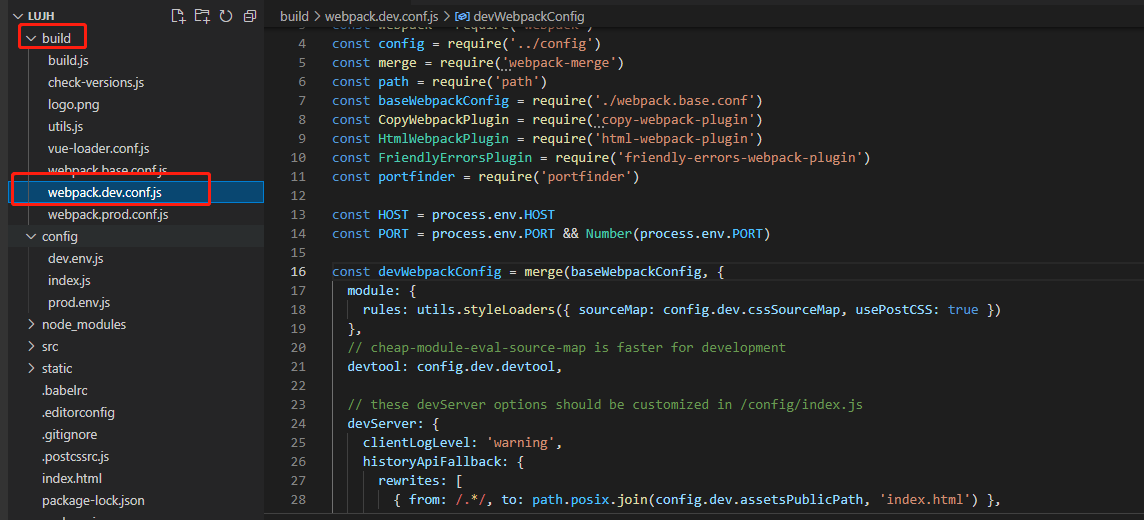
解析如下:
'use strict'
const utils = require('./utils')         //引入的工具包
const webpack = require('webpack')      //引入webpack包
const config = require('../config')     //引入 config下的index.js文件
const merge = require('webpack-merge')  //合并配置文件
const path = require('path')            //node的path模块,对路径进行处理
const baseWebpackConfig = require('./webpack.base.conf') //将生产和开发环境下共用的配置文件进行了抽离形成了改文件
const CopyWebpackPlugin = require('copy-webpack-plugin') //拷贝插件
const HtmlWebpackPlugin = require('html-webpack-plugin')  //加载html模块
const FriendlyErrorsPlugin = require('friendly-errors-webpack-plugin') //友好的错误提示插件
const portfinder = require('portfinder')   //在当前机器上找一个可打开的端口号,默认是8080,如果端口号被占用则重新寻找可打开的端口号。

const HOST = process.env.HOST
const PORT = process.env.PORT && Number(process.env.PORT)

const devWebpackConfig = merge(baseWebpackConfig, {   //利用merge插件将 baseWebpackConfig 配置与当前配置进行合并
  module: {
    rules: utils.styleLoaders({ sourceMap: config.dev.cssSourceMap, usePostCSS: true })  //引入utils中一些css-loader和postcss-loader
  },

  devtool: config.dev.devtool, //控制是否生成以及如何生成源码映射,这里引入的是config下的index.js的 “devtool: 'cheap-module-eval-source-map'”,

  // these devServer options should be customized in /config/index.js
  // dev-server的配置
  devServer: {
    clientLogLevel: 'warning',      //当使用inline mode,devTools的命令行中将会显示一些调试信息
    historyApiFallback: {           //当使用 HTML5 History API 时,任意的 404 响应都可能需要被替代为 index.html
      rewrites: [
        { from: /.*/, to: path.posix.join(config.dev.assetsPublicPath, 'index.html') },
      ],
    },
    hot: true,            //启用 webpack 的模块热替换特性
    contentBase: false,   // since we use CopyWebpackPlugin.
    compress: true,
    host: HOST || config.dev.host,   //要开启的域名,可在package.json中的“dev”命令中进行配置
    port: PORT || config.dev.port,   //要开启的端口号,可在package.json中的“dev”命令中进行配置
    open: config.dev.autoOpenBrowser,//是否自动在浏览器中打开,可在package.json中的“dev”命令中进行配置
    overlay: config.dev.errorOverlay
      ? { warnings: false, errors: true }
      : false,
    publicPath: config.dev.assetsPublicPath, //
    proxy: config.dev.proxyTable,   //当出现跨域时设置代理,这里引入了config下的index.js的配置
    quiet: true, // necessary for FriendlyErrorsPlugin  启用 quiet 后,除了初始启动信息之外的任何内容都不会被打印到控制台。这也意味着来自 webpack 的错误或警告在控制台不可见
    watchOptions: {
      poll: config.dev.poll,
    }
  },
  plugins: [ //插件部分
    new webpack.DefinePlugin({   //配置全局变量
      'process.env': require('../config/dev.env')
    }),
    new webpack.HotModuleReplacementPlugin(),     // 模块热替换它允许在运行时更新各种模块,而无需进行完全刷新
    new webpack.NamedModulesPlugin(),            //  HMR shows correct file names in console on update.
    new webpack.NoEmitOnErrorsPlugin(),          // 这个插件的作用是在热加载时直接返回更新文件名,而不是文件的id。
    // https://github.com/ampedandwired/html-webpack-plugin
    new HtmlWebpackPlugin({   //打包时生成index.html并且自动加载app.js文件  <!-- built files will be auto injected -->
      filename: 'index.html',
      template: 'index.html',
      inject: true
    }),
    // copy custom static assets
    new CopyWebpackPlugin([
      {
        from: path.resolve(__dirname, '../static'), //将static整个文件夹原封不动地拷贝到dist目录下。
        to: config.dev.assetsSubDirectory,
        ignore: ['.*']
      }
    ])
  ]
})

module.exports = new Promise((resolve, reject) => {
  portfinder.basePort = process.env.PORT || config.dev.port  //获取当前的端口号
  portfinder.getPort((err, port) => {
    if (err) {
      reject(err)
    } else {
      // publish the new Port, necessary for e2e tests
      process.env.PORT = port
      // add port to devServer config
      devWebpackConfig.devServer.port = port

      // Add FriendlyErrorsPlugin
      devWebpackConfig.plugins.push(new FriendlyErrorsPlugin({
        compilationSuccessInfo: {
          messages: [`Your application is running here: http://${devWebpackConfig.devServer.host}:${port}`],
        },
        onErrors: config.dev.notifyOnErrors
        ? utils.createNotifierCallback()
        : undefined
      }))

      resolve(devWebpackConfig)
    }
  })
})
3、 build/webpack.base.conf.js 文件 ,公共配置
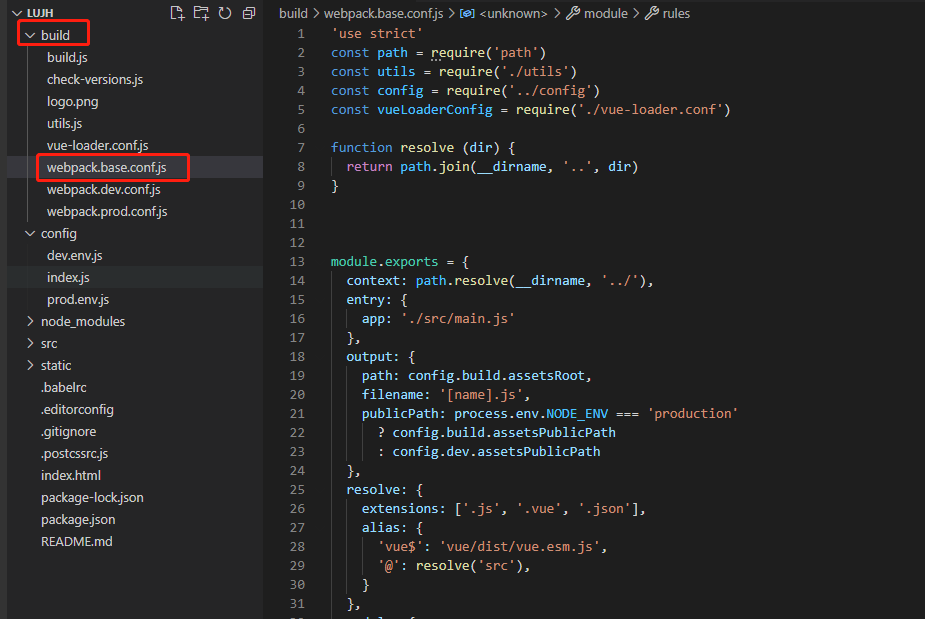
文件解析如下:
'use strict'
const path = require('path') //node的path模块,对路径进行处理
const utils = require('./utils') //引入的工具包
const config = require('../config')//引入 config下的index.js文件
const vueLoaderConfig = require('./vue-loader.conf') //根据NODE_ENV这个变量分析是否是生产环境,然后根据不同的环境来加载,判断是否开启了sourceMap的功能

function resolve (dir) {
  return path.join(__dirname, '..', dir) //对路径进行处理,获取到绝对路径
}


module.exports = {
  context: path.resolve(__dirname, '../'), //对路径进行处理,跳到当前项目的根目录下
  entry: {     //入口文件,即项目要引入哪个js文件
    app: './src/main.js'        //因为 context 中已经跳到了当前项目的根目录下,所以这里的路径是以 ./src 开头
  },
  output: { //输出文件,即项目要输出到哪里去
    path: config.build.assetsRoot,  //输出到根目录下的dist问价夹里,具体地址可以在config下的index.js中进行修改
    filename: '[name].js',      //以文件的原始名输出
    publicPath: process.env.NODE_ENV === 'production'   //根据process.env.NODE_ENV 来判断是生产模式还是开发模式,将最终打包的项目要放到服务器的什么地方,默认是 '/' 即服务器的根目录下。
      ? config.build.assetsPublicPath
      : config.dev.assetsPublicPath
  },
  resolve: {
    extensions: ['.js', '.vue', '.json'],  //简化一些文件名,引入文件时可以不带后缀名
    alias: {
      'vue$': 'vue/dist/vue.esm.js',
      '@': resolve('src'),          //简化文件的引入问题,如:本文件中要引入 src下的config里的index.js,你就可以这样引入:@/config/index.js
    }
  },
  module: {

    rules: [
      // 配置各种loader,来处理对应的文件
      {
        test: /\.vue$/,   //使用vue-loader处理以.vue结束的文件
        loader: 'vue-loader',
        options: vueLoaderConfig
      },
      {
        test: /\.js$/,    //使用babel-loader处理以.js结束的文件,即js文件
        loader: 'babel-loader',
        include: [resolve('src'), resolve('test'), resolve('node_modules/webpack-dev-server/client')]
      },
      {
        test: /\.(png|jpe?g|gif|svg)(\?.*)?$/,   //使用url-loader处理各种格式的图片资源,最大限制10000KB,这里不处理src同级目录下的static里的图片。
        loader: 'url-loader',
        options: {
          limit: 10000,
          name: utils.assetsPath('img/[name].[hash:7].[ext]')  //将处理后的放在img文件下,并且加上7位hash值。
        }
      },
      {
        test: /\.(mp4|webm|ogg|mp3|wav|flac|aac)(\?.*)?$/,   //使用url-loader处理视频文件。
        loader: 'url-loader',
        options: {
          limit: 10000,
          name: utils.assetsPath('media/[name].[hash:7].[ext]')
        }
      },
      {
        test: /\.(woff2?|eot|ttf|otf)(\?.*)?$/,            //使用url-loader处理字体文件。
        loader: 'url-loader',
        options: {
          limit: 10000,
          name: utils.assetsPath('fonts/[name].[hash:7].[ext]')
        }
      }
    ]
  },
  node: {
    // prevent webpack from injecting useless setImmediate polyfill because Vue
    // source contains it (although only uses it if it's native).
    setImmediate: false,
    // prevent webpack from injecting mocks to Node native modules
    // that does not make sense for the client
    dgram: 'empty',
    fs: 'empty',
    net: 'empty',
    tls: 'empty',
    child_process: 'empty'
  }
}
4、build/webpack.prod.config.js:

文件解析如下:
'use strict'
const path = require('path')
const utils = require('./utils')
const webpack = require('webpack')
const config = require('../config')
const merge = require('webpack-merge')
const baseWebpackConfig = require('./webpack.base.conf')
const CopyWebpackPlugin = require('copy-webpack-plugin')
const HtmlWebpackPlugin = require('html-webpack-plugin')
const ExtractTextPlugin = require('extract-text-webpack-plugin') //抽离css样式,防止将样式打包在js中引起页面样式加载错乱的现象
const OptimizeCSSPlugin = require('optimize-css-assets-webpack-plugin')//主要是用来压缩css文件
const UglifyJsPlugin = require('uglifyjs-webpack-plugin')  //对js文件进行压缩

const env = require('../config/prod.env')

const webpackConfig = merge(baseWebpackConfig, {
  module: {
    rules: utils.styleLoaders({
      sourceMap: config.build.productionSourceMap,
      extract: true,
      usePostCSS: true
    })
  },
  devtool: config.build.productionSourceMap ? config.build.devtool : false,  // 方便开发审查问题代码,推荐在开发环境使用,生产环境不使用
  output: {  // 出口
    path: config.build.assetsRoot,
    filename: utils.assetsPath('js/[name].[chunkhash].js'),
    chunkFilename: utils.assetsPath('js/[id].[chunkhash].js')
  },
  plugins: [
    // http://vuejs.github.io/vue-loader/en/workflow/production.html
    new webpack.DefinePlugin({
      'process.env': env
    }),
    new UglifyJsPlugin({
      uglifyOptions: {  //配置项
        compress: {
          warnings: false
        }
      },
      sourceMap: config.build.productionSourceMap,  //使用sourceMap将错误消息位置映射到模块(这会减慢编译速度)。
      parallel: true        //启用/禁用多进程并行运行,启用后会提高构建速度
    }),

    new ExtractTextPlugin({
      filename: utils.assetsPath('css/[name].[contenthash].css'),

      allChunks: true,
    }),
    // Compress extracted CSS. We are using this plugin so that possible
    // duplicated CSS from different components can be deduped.
    new OptimizeCSSPlugin({
      cssProcessorOptions: config.build.productionSourceMap
        ? { safe: true, map: { inline: false } }  //判断是否生成内联映射,如果生成则会生成一个source-map文件
        : { safe: true }
    }),
    // generate dist index.html with correct asset hash for caching.
    // you can customize output by editing /index.html
    // see https://github.com/ampedandwired/html-webpack-plugin
    new HtmlWebpackPlugin({
      filename: config.build.index, //将会生成一个index.html文件,放到dist文件下
      template: 'index.html',
      inject: true,                //将所有js资源放在body标签的底部
      minify: {                   //控制是否进行压缩
        removeComments: true,     //删除所有的注释
        collapseWhitespace: true, //折叠构成文档树中文本节点的空白
        removeAttributeQuotes: true //尽可能删除属性周围的引号
        // more options:
        // https://github.com/kangax/html-minifier#options-quick-reference
      },
      // necessary to consistently work with multiple chunks via CommonsChunkPlugin
      chunksSortMode: 'dependency'    //允许控制块在包含到HTML之前按照依赖排序
    }),
    // keep module.id stable when vendor modules does not change
    new webpack.HashedModuleIdsPlugin(), //该插件会根据模块的相对路径生成一个四位数的hash作为模块id, 建议用于生产环境。
    // enable scope hoisting
    new webpack.optimize.ModuleConcatenationPlugin(),//启用作用域提升,让代码文件更小、运行的更快
    // split vendor js into its own file
    new webpack.optimize.CommonsChunkPlugin({ //主要是用来提取第三方库和公共模块,避免首屏加载的bundle文件或者按需加载的bundle文件体积过大,从而导致加载时间过长
      name: 'vendor',
      minChunks (module) {
        // any required modules inside node_modules are extracted to vendor
        return (
          module.resource &&
          /\.js$/.test(module.resource) &&
          module.resource.indexOf(
            path.join(__dirname, '../node_modules')
          ) === 0
        )
      }
    }),
    // extract webpack runtime and module manifest to its own file in order to
    // prevent vendor hash from being updated whenever app bundle is updated
    new webpack.optimize.CommonsChunkPlugin({
      name: 'manifest',
      minChunks: Infinity
    }),
    // This instance extracts shared chunks from code splitted chunks and bundles them
    // in a separate chunk, similar to the vendor chunk
    // see: https://webpack.js.org/plugins/commons-chunk-plugin/#extra-async-commons-chunk
    new webpack.optimize.CommonsChunkPlugin({
      name: 'app',
      async: 'vendor-async',
      children: true,
      minChunks: 3
    }),

    // copy custom static assets
    new CopyWebpackPlugin([  //复制模块
      {
        from: path.resolve(__dirname, '../static'),
        to: config.build.assetsSubDirectory,
        ignore: ['.*']
      }
    ])
  ]
})

if (config.build.productionGzip) {
  const CompressionWebpackPlugin = require('compression-webpack-plugin')

  webpackConfig.plugins.push(
    new CompressionWebpackPlugin({
      asset: '[path].gz[query]',
      algorithm: 'gzip',
      test: new RegExp(
        '\\.(' +
        config.build.productionGzipExtensions.join('|') +
        ')$'
      ),
      threshold: 10240,
      minRatio: 0.8
    })
  )
}

if (config.build.bundleAnalyzerReport) {
  const BundleAnalyzerPlugin = require('webpack-bundle-analyzer').BundleAnalyzerPlugin
  webpackConfig.plugins.push(new BundleAnalyzerPlugin())
}

module.exports = webpackConfig
5、我们执行打包命令 npm run build ,就是执行build里面的文件,build.js中引入了webpack.prod.config.js,因此build.js才是生产环境所需的webpack文件。
build/build.js文件解析如下:

'use strict'
require('./check-versions')() //该文件用于检测node和npm的版本,实现版本依赖

process.env.NODE_ENV = 'production'  // 生产环境

const ora = require('ora')    //在node端加载动画模块
const rm = require('rimraf')  //用来删除文件和文件夹的
const path = require('path')
const chalk = require('chalk') //修改控制台中字符串的样式
const webpack = require('webpack')
const config = require('../config')
const webpackConfig = require('./webpack.prod.conf') // 生产环境的配置

const spinner = ora('building for production...') //设置一个动画的内容为 "building for production..."
spinner.start()   //加载动画

rm(path.join(config.build.assetsRoot, config.build.assetsSubDirectory), err => {  //利用 rm 模块先删除dist文件再生成新文件,因为有时候会使用hash来命名,删除整个文件可避免冗余
  if (err) throw err
  webpack(webpackConfig, (err, stats) => {   //将一下配置内容与 webpack.prod.conf.js中的配置进行合并
    spinner.stop()  //停止动画
    if (err) throw err
    process.stdout.write(stats.toString({
      colors: true,
      modules: false,
      children: false, // If you are using ts-loader, setting this to true will make TypeScript errors show up during build.
      chunks: false,
      chunkModules: false
    }) + '\n\n')

    if (stats.hasErrors()) {
      console.log(chalk.red('  Build failed with errors.\n'))
      process.exit(1)
    }

    console.log(chalk.cyan('  Build complete.\n'))
    console.log(chalk.yellow(
      '  Tip: built files are meant to be served over an HTTP server.\n' +
      '  Opening index.html over file:// won\'t work.\n'
    ))
  })
})
6、build/check-versions.js: 检测node和npm的版本,实现版本依赖
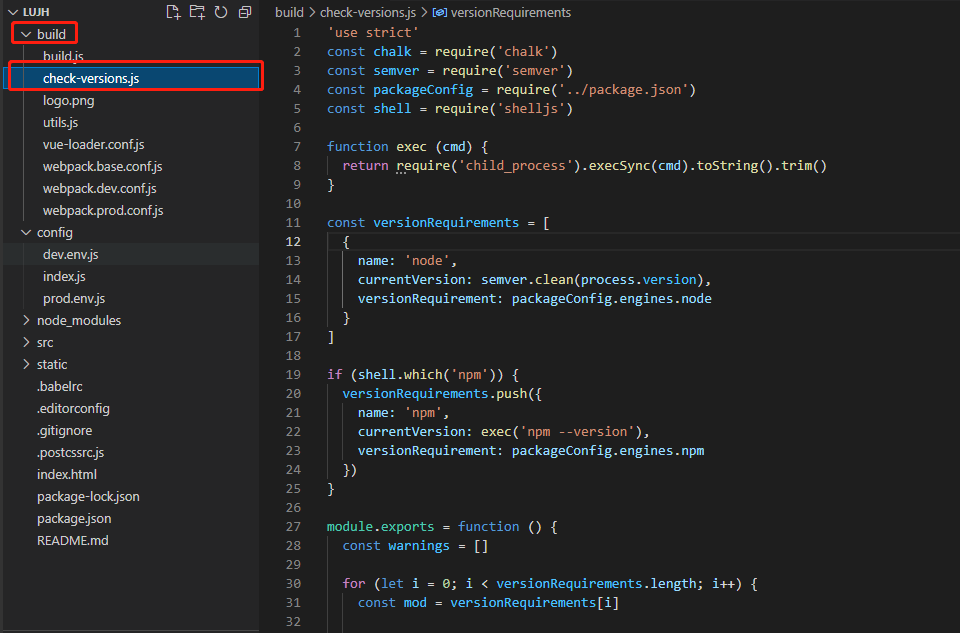
文件解析:
'use strict'
// 该文件用于检测node和npm的版本,实现版本依赖
const chalk = require('chalk')  //node.js中的模块,作用是修改控制台中字符串的样式
const semver = require('semver')  //node.js中的模块,对版本进行检查
const packageConfig = require('../package.json') //引入page.json文件
const shell = require('shelljs')

function exec (cmd) {
  //通过child_process模块的新建子进程,执行 Unix 系统命令后转成没有空格的字符串
  return require('child_process').execSync(cmd).toString().trim()
}

const versionRequirements = [
  {
    name: 'node',
    currentVersion: semver.clean(process.version),  //使用semver格式化版本
    versionRequirement: packageConfig.engines.node //获取package.json中设置的node版本
  }
]

if (shell.which('npm')) {
  versionRequirements.push({
    name: 'npm',
    currentVersion: exec('npm --version'),   //自动调用npm --version命令,并且把参数返回给exec函数,从而获取纯净的版本号
    versionRequirement: packageConfig.engines.npm
  })
}

module.exports = function () {
  const warnings = []

  for (let i = 0; i < versionRequirements.length; i++) {
    const mod = versionRequirements[i]

    if (!semver.satisfies(mod.currentVersion, mod.versionRequirement)) {
      //如果上面的版本号不符合package.json文件中指定的版本号,就执行下面错误提示的代码
      warnings.push(mod.name + ': ' +
        chalk.red(mod.currentVersion) + ' should be ' +
        chalk.green(mod.versionRequirement)
      )
    }
  }

  if (warnings.length) {
    console.log('')
    console.log(chalk.yellow('To use this template, you must update following to modules:'))
    console.log()

    for (let i = 0; i < warnings.length; i++) {
      const warning = warnings[i]
      console.log('  ' + warning)
    }

    console.log()
    process.exit(1)
  }
}
7、build/vue-loader.conf.js:

文件解析如下:
'use strict'

//根据NODE_ENV这个变量分析是否是生产环境,然后根据不同的环境来加载,判断是否开启了sourceMap的功能。方便之后在cssLoaders中加上sourceMap功能。然后判断是否设置了cacheBusting属性,
// 它指的是缓存破坏,特别是进行sourceMap debug时,设置成false是非常有帮助的。最后就是一个转化请求的内容,video、source、img、image等的属性进行配置。具体的还是需要去了解vue-loader这个
// webpack的loader加载器

const utils = require('./utils')
const config = require('../config')
const isProduction = process.env.NODE_ENV === 'production'
const sourceMapEnabled = isProduction
  ? config.build.productionSourceMap
  : config.dev.cssSourceMap
//处理项目中的css文件,生产环境和测试环境默认是打开sourceMap,而extract中的提取样式到单独文件只有在生产环境中才需要
module.exports = {
  loaders: utils.cssLoaders({
    sourceMap: sourceMapEnabled,
    extract: isProduction
  }),
  cssSourceMap: sourceMapEnabled,
  cacheBusting: config.dev.cacheBusting,
  transformToRequire: {//在模版编译过程中,编译器可以将某些属性,如 src 路径,转换为require调用,以便目标资源可以由 webpack 处理.
    video: ['src', 'poster'],
    source: 'src',
    img: 'src',
    image: 'xlink:href'
  }
}
8、build/util.js
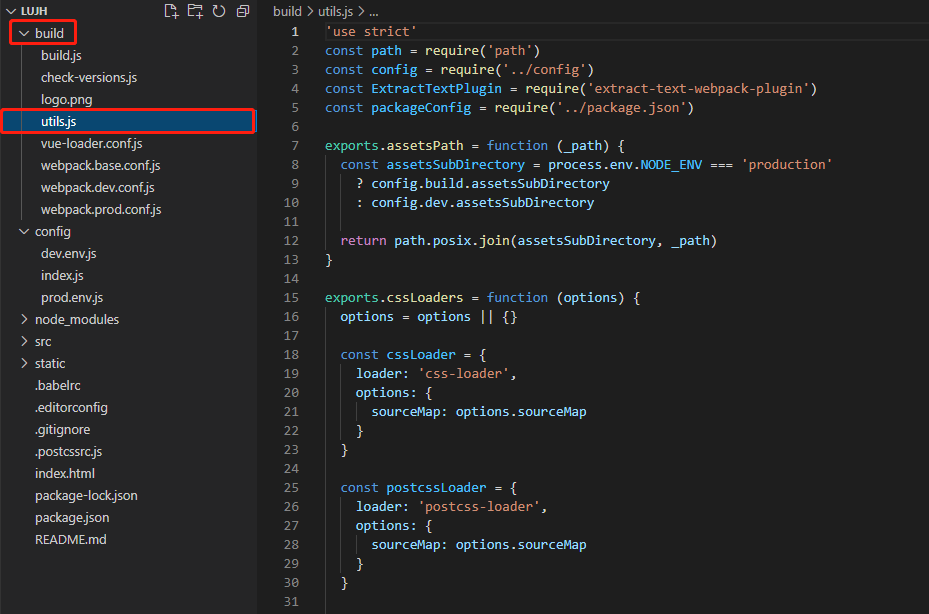
文件解析如下:
'use strict'
const path = require('path')
const config = require('../config')
const ExtractTextPlugin = require('extract-text-webpack-plugin') ////抽离css样式,防止将样式打包在js中引起页面样式加载错乱的现象
const packageConfig = require('../package.json')


//导出文件的位置,根据环境判断开发环境和生产环境,为config文件中index.js文件中定义的build.assetsSubDirectory或
exports.assetsPath = function (_path) {
  const assetsSubDirectory = process.env.NODE_ENV === 'production'
    ? config.build.assetsSubDirectory
    : config.dev.assetsSubDirectory

  return path.posix.join(assetsSubDirectory, _path)
}

//使用了css-loader和postcssLoader,通过options.usePostCSS属性来判断是否使用postcssLoader中压缩等方法
exports.cssLoaders = function (options) {   //导出css-loader
  options = options || {}

  const cssLoader = {
    loader: 'css-loader',
    options: {
      sourceMap: options.sourceMap
    }
  }

  const postcssLoader = {
    loader: 'postcss-loader',
    options: {
      sourceMap: options.sourceMap
    }
  }

  // generate loader string to be used with extract text plugin
  function generateLoaders (loader, loaderOptions) {
    const loaders = options.usePostCSS ? [cssLoader, postcssLoader] : [cssLoader] //根据传入的参数判断是使用cssLoader、 postcssLoader还是只使用 cssLoader

    if (loader) {
      loaders.push({
        loader: loader + '-loader',
        options: Object.assign({}, loaderOptions, {  //将后面的两个对象合并后再进行复制
          sourceMap: options.sourceMap
        })
      })
    }

    // Extract CSS when that option is specified
    // (which is the case during production build)
    if (options.extract) {
      return ExtractTextPlugin.extract({
        use: loaders,
        fallback: 'vue-style-loader'
      })
    } else {
      return ['vue-style-loader'].concat(loaders)
    }
  }

  // https://vue-loader.vuejs.org/en/configurations/extract-css.html
  return {
    css: generateLoaders(),
    postcss: generateLoaders(),
    less: generateLoaders('less'),
    sass: generateLoaders('sass', { indentedSyntax: true }),
    scss: generateLoaders('sass'),
    stylus: generateLoaders('stylus'),
    styl: generateLoaders('stylus')
  }
}

// Generate loaders for standalone style files (outside of .vue)
exports.styleLoaders = function (options) {
  const output = []
  const loaders = exports.cssLoaders(options)

  for (const extension in loaders) {
    const loader = loaders[extension]
    output.push({
      test: new RegExp('\\.' + extension + '$'),
      use: loader
    })
  }

  return output
}

exports.createNotifierCallback = () => {
  const notifier = require('node-notifier')

  return (severity, errors) => {
    if (severity !== 'error') return

    const error = errors[0]
    const filename = error.file && error.file.split('!').pop()

    notifier.notify({
      title: packageConfig.name,
      message: severity + ': ' + error.name,
      subtitle: filename || '',
      icon: path.join(__dirname, 'logo.png')
    })
  }
}
9、config/index.js: 生产 和 开发 环境下webpack的公共配置文件
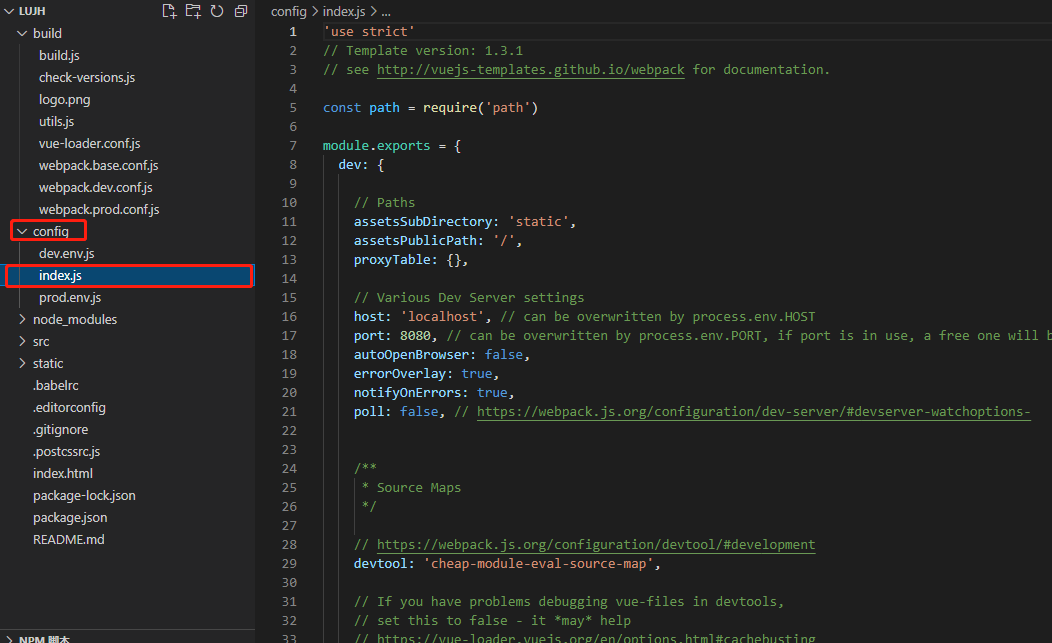
文件解析如下:
const path = require('path')

module.exports = {
  dev: {  //开发环境下的配置

    // Paths
    assetsSubDirectory: 'static', //子目录,一般存放css,js,image等文件
    assetsPublicPath: '/', //根目录
    proxyTable: {},  //在这里使用代理解决跨越问题

    // Various Dev Server settings
    host: 'localhost', // 域名
    port: 8080, // 开启的端口号,默认是8080
    autoOpenBrowser: true, //是否自动打开浏览器
    errorOverlay: true,  //浏览器错误提示
    notifyOnErrors: true, //跨平台错误提示
    poll: false, // 使用文件系统(file system)获取文件改动的通知devServer.watchOptions


    /**
     * Source Maps
     */

    // https://webpack.js.org/configuration/devtool/#development
    devtool: 'cheap-module-eval-source-map',//增加调试,该属性为原始源代码(仅限行)不可在生产环境中使用

    cacheBusting: true,//使缓存失效

    cssSourceMap: true   //代码压缩后进行调bug定位将非常困难,于是引入sourcemap记录压缩前后的位置信息记录,当产生错误时直接定位到未压缩前的位置,将大大的方便我们调试
  },

  build: { //生产发环境下的配置
    // Template for index.html
    index: path.resolve(__dirname, '../dist/index.html'), //index.html编译后生成的位置和名字

    // Paths
    assetsRoot: path.resolve(__dirname, '../dist'),//编译后存放生成环境代码的位置
    assetsSubDirectory: 'static',  //js,css,images存放文件夹名
    assetsPublicPath: '/',  //发布的根目录,通常本地打包dist后打开文件会报错,此处修改为./。如果是上线的文件,可根据文件存放位置进行更改路径

    productionSourceMap: true,

    devtool: '#source-map',

    productionGzip: false,
    productionGzipExtensions: ['js', 'css'],

    bundleAnalyzerReport: process.env.npm_config_report
  }
}
10、config/dev.env.js:文件
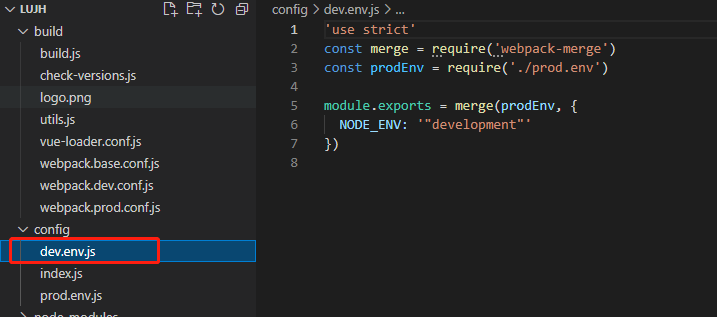
文件解析如下:
'use strict'
// 当在开发环境下引用(webpack.dev.config.js中的plugin中)的是此文件,此文件指定了 开发模式: node-env ,
//利用merge方法将prod.env.js与本文件进行合并,在开发模式下输出 NODE_ENV="development"

    //webpack.dev.config.js中的plugin引用如下:
    // new webpack.DefinePlugin({
    //   'process.env': require('../config/dev.env')
    // })
const merge = require('webpack-merge')
const prodEnv = require('./prod.env')
module.exports = merge(prodEnv, {
  NODE_ENV: '"development"'
})
11、config/prod.env.js:
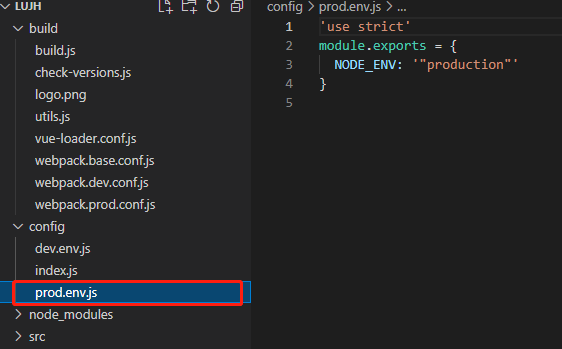
文件解析如下:
'use strict'
// 在生产模式下调用此文件
// 在webpack.prod.config.js中的plugin中引用如下:
      //const env = require('../config/prod.env')
      // new webpack.DefinePlugin({
      //   'process.env': env
      // }),
module.exports = {
  NODE_ENV: '"production"'
}
12 、node_modules文件夹:该文件夹下存放的是node的一些依赖模块,比如:require模块、path模块、http-proxy-middleware模块,还有一些我们通过npm安装的插件模块,比如vue、md5、vue-cli、ivew等。
13.、src文件夹: 该文件夹下面存放的是我们项目代码以及一些文件,components文件夹存放了我们自己写的组件,router文件夹里面存放了路由配置,mian.js是整个项目的入口js,在build文件夹下的webpack.dev.config.js中的entry中有配置(
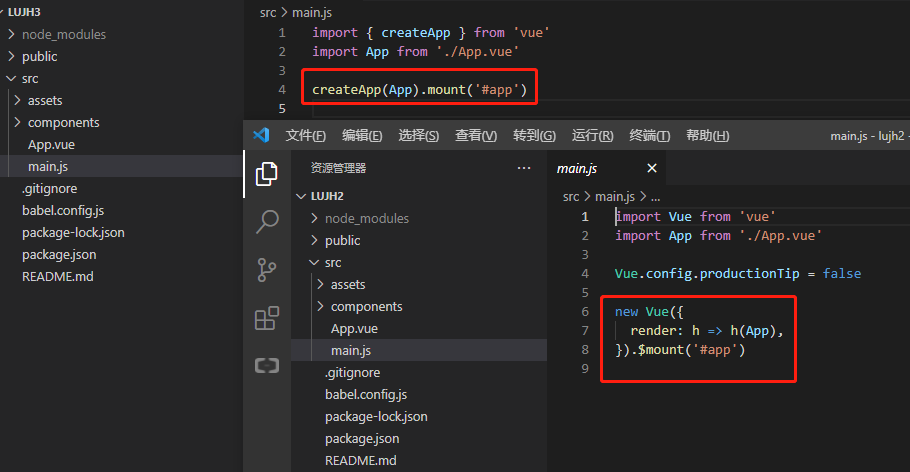
例子2:
vue2.0 或 vue3.0
vue cli v4.5.15 初始化项目
使用命令:vue create lujh(项目名称)
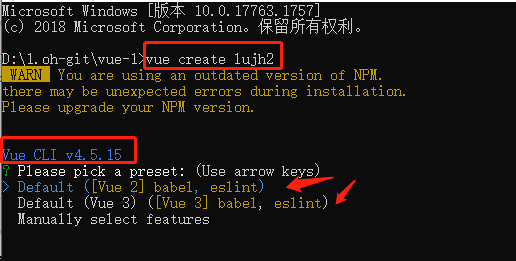
选择vue2或者vue3,安装包差不多,版本不一样

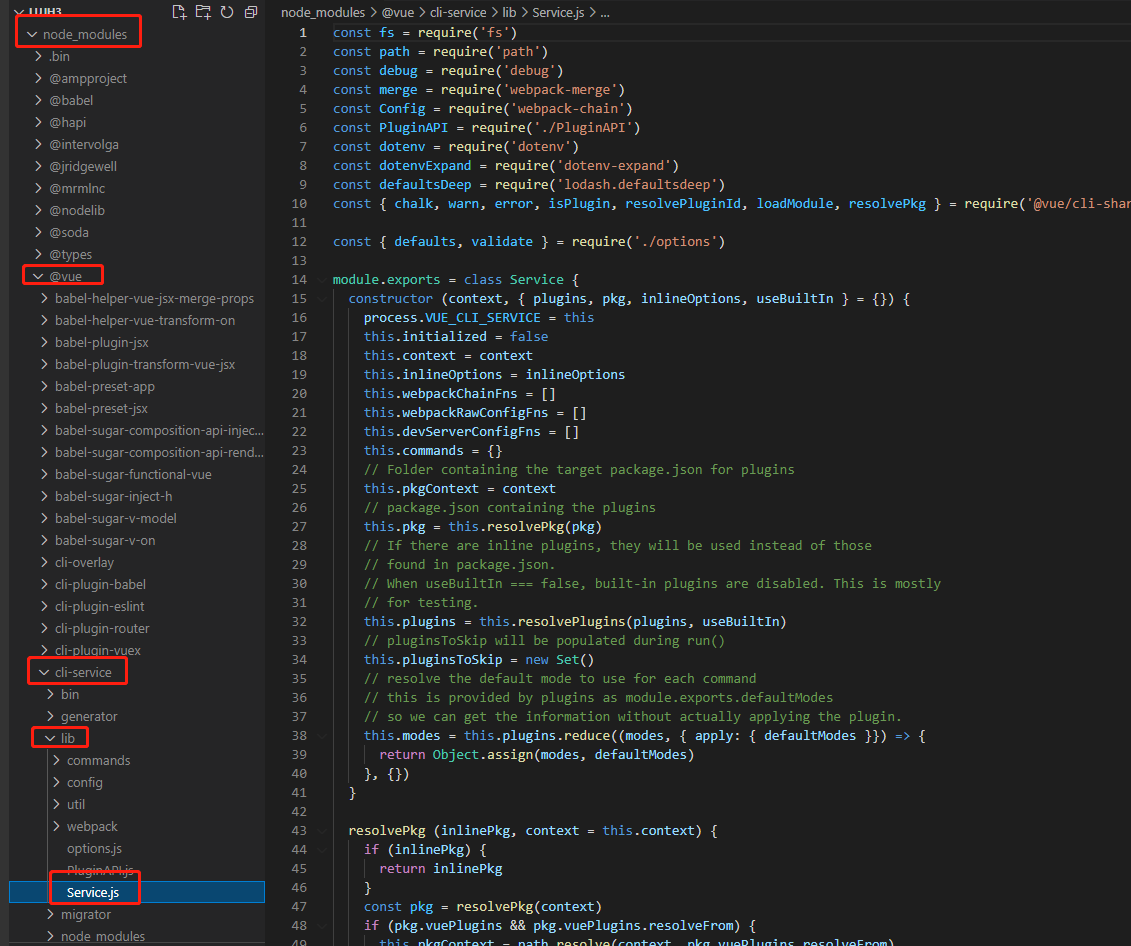
修改配置,因为vue-cli3把配置文件都给隐藏了,隐藏到哪里了?
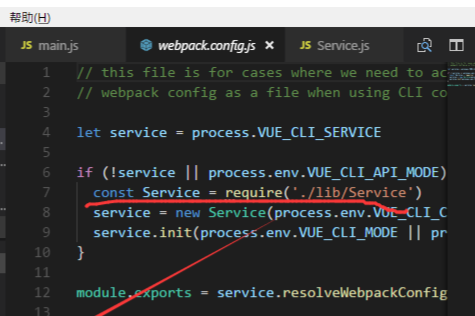
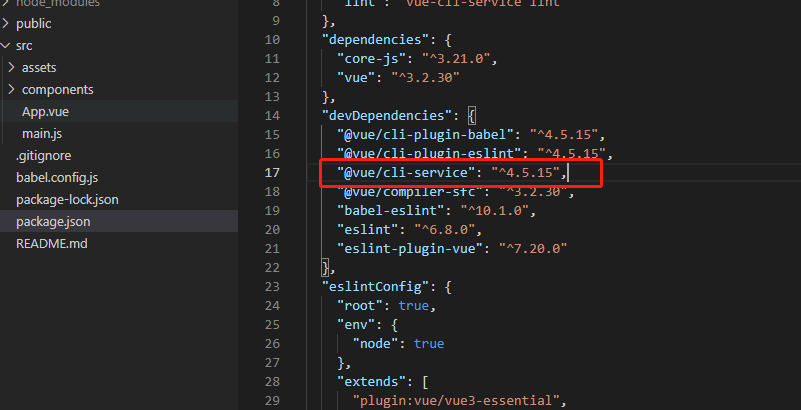
我们如何修改配置?
方法一:在隐藏的文件夹直接修改

 浙公网安备 33010602011771号