ES(elasticsearch)使用教程
一、索引管理
Elasticsearch 是面向文档型数据库,一条数据在这里就是一个文档。 为了方便大家理解,我们将 Elasticsearch 里存储文档数据和关系型数据库 MySQL 存储数据的概念进行一个类比:

ES 里的 Index 可以看做一个库,而 Types 相当于表, Documents 则相当于表的行。这里 Types 的概念已经被逐渐弱化, Elasticsearch 6.X 中,一个 index 下已经只能包含一个type, Elasticsearch 7.X 中, Type 的概念已经被删除了。
1.1、索引的创建
对比关系型数据库,创建索引就等同于创建数据库。
创建方法:
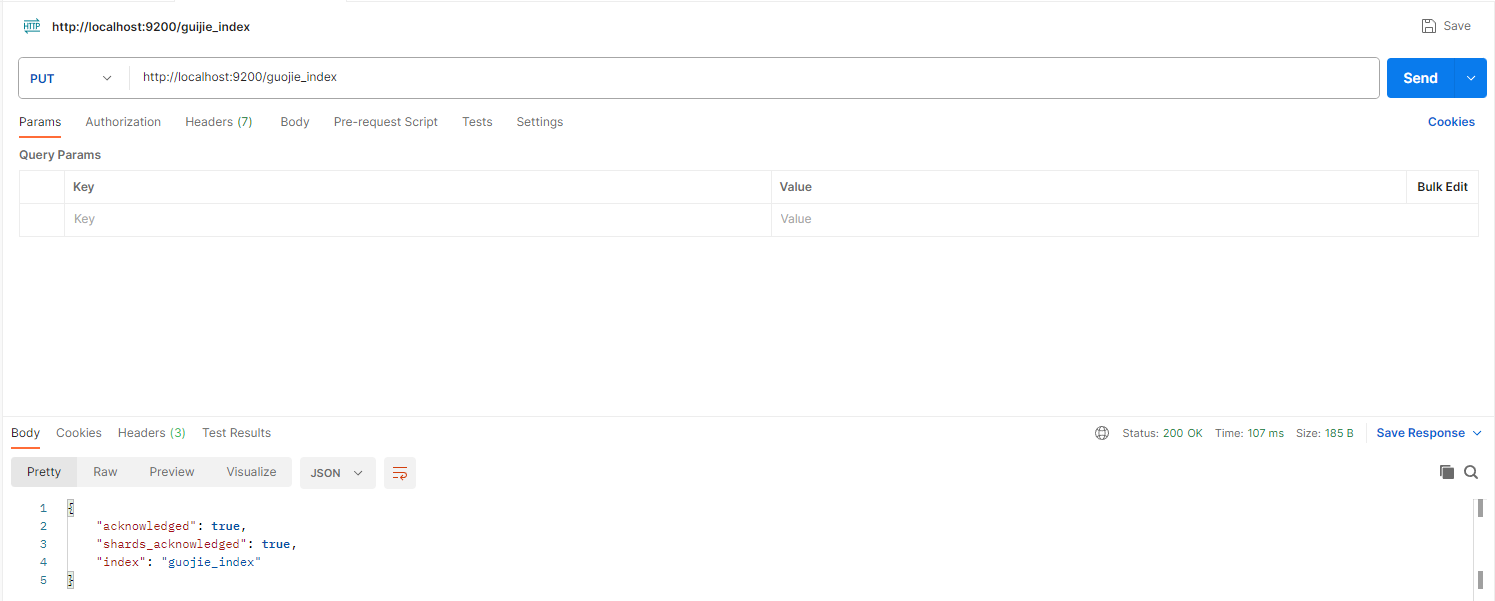
向接口发送PUT请求:http://localhost:9200/索引名
成功后它会返回结果:
{
    "acknowledged": true,
    "shards_acknowledged": true,
    "index": "索引名"
}
注意:请求方式必须是PUT,不能重复提交相同索引名称的请求,不然会报错。
同时可以看到它会对应打印一条索引创建的日志:

1.2、查看索引
1.2.1 查看所有索引
向接口发送GET请求:http://localhost:9200/_cat/indices?v
这里请求路径中的_cat 表示查看的意思, indices 表示索引,所以整体含义就是查看当前 ES服务器中的所有索引,就好像 MySQL 中的 show tables 的感觉,服务器响应结果如下 :

| 表头 | 含义 |
|---|---|
| health | 当前服务器健康状态: green(集群完整) yellow(单点正常、集群不完整) red(单点不正常) |
| status | 索引打开、关闭状态 |
| index | 索引名 |
| uuid | 索引统一编号 |
| pri | 主分片数量 |
| rep | 副本数量 |
| docs.count | 可用文档数量 |
| docs.deleted | 文档删除状态(逻辑删除) |
| store.size | 主分片和副分片整体占空间大小 |
| pri.store.size | 主分片占空间大小 |
1.2.2 查看单个索引
向接口发送GET请求:http://localhost:9200/索引名
返回结果:
{
    "guojie_index": {//索引名
        "aliases": {},//别名
        "mappings": {},//映射
        "settings": {//设置
            "index": {//设置 - 索引
                "creation_date": "1697614167809",//设置 - 索引 - 创建时间
                "number_of_shards": "1",//设置 - 索引 - 主分片数量
                "number_of_replicas": "1",//设置 - 索引 - 副本分片数量
                "uuid": "cqRj0fLOTACWBXF0srFaiA",//设置 - 索引 - 是索引的唯一标识符
                "version": { //设置 - 索引 - 包含与索引版本相关的信息。
                    "created": "7080099"//设置 - 索引 - 版本信息 - 表示索引的创建版本
                },
                "provided_name": "guojie_index"//设置 - 索引 - 表示为索引提供的名称
            }
        }
    }
}
1.3、删除索引
向接口发送DELETE请求:http://localhost:9200/索引名
返回结果如下:
{
    "acknowledged": true
}
此时再去查询索引就没有了。
二、文档管理
假设索引已经创建好了,接下来我们来创建文档,并添加数据。这里的文档可以类比为关系型数据库中的表数据,添加的数据格式为 JSON 格式。
2.1 创建文档
向接口发送POST请求:http://localhost:9200/索引名/_doc,里面的_doc也可以换成_create,这样可能好理解。

注意:此处发送请求的方式必须为 POST,不能是 PUT,否则会发生错误 。
返回结果:
{
    "_index": "guojie_index",//文档所属的Elasticsearch索引的名称
    "_type": "_doc",//类型-文档
    "_id": "WibZQYsBNJ9lvl5TRSzV",//唯一标识,可以类比为 MySQL 中的主键,随机生成
    "_version": 1,//版本
    "result": "created",//结果,这里的 created 表示创建成功
    "_shards": {//分片
        "total": 2,//分片 - 总数
        "successful": 1,//分片 - 文档成功写入的分片数量
        "failed": 0 //失败的分片数,如果有分片写入失败,则会在此处记录。
    },
    "_seq_no": 0,//这是文档的序列号,用于实现并发控制。每次文档发生变化时,序列号也会递增。
    "_primary_term": 1 //这是与分布式一致性相关的一个概念,用于确保主分片之间的一致性。
}
上面的数据创建后,由于没有指定数据唯一性标识(ID),默认情况下, ES 服务器会随机生成一个。如果想要自定义唯一性标识,需要在创建时在请求地址中指定。
指定文档唯一标识:http://localhost:9200/索引名/_doc/ID

2.2 文档查询
2.2.1 主键查询
查看文档时,需要指明文档的唯一性标识,类似于 MySQL 中数据的主键查询。
向接口发送GET请求:http://localhost:9200/索引名/_doc/文档唯一标识(id)
返回结果:
{
    "_index": "guojie_index",
    "_type": "_doc",
    "_id": "1",
    "_version": 2,
    "_seq_no": 2,
    "_primary_term": 1,
    "found": true,
    "_source": {
        "name": "陆国杰",
        "gender": "男",
        "age": 23,
        "Phone": "12345678910",
        "address": "云南省昆明市呈贡区XXXXX"
    }
}

2.2.2 全查询
以上通过主键_id查询可以准确查询出文档,但是更多时候我们都记不得准确id或者想要查询所有文档,然后就可以通过以下方法查询。
向接口发送GET请求:http://localhost:9200/索引名/_search
返回结果:
{
    "took": 1,
    "timed_out": false,
    "_shards": {
        "total": 1,
        "successful": 1,
        "skipped": 0,
        "failed": 0
    },
    "hits": {
        "total": {
            "value": 3,
            "relation": "eq"
        },
        "max_score": 1.0,
        "hits": [
            {
                "_index": "guojie_index",
                "_type": "_doc",
                "_id": "WibZQYsBNJ9lvl5TRSzV",
                "_score": 1.0,
                "_source": {
                    "name": "陆国杰",
                    "gender": "男",
                    "age": 23,
                    "Phone": "12345678910",
                    "address": "云南省昆明市呈贡区XXXXX"
                }
            },
            {
                "_index": "guojie_index",
                "_type": "_doc",
                "_id": "1",
                "_score": 1.0,
                "_source": {
                    "name": "陆国杰",
                    "gender": "男",
                    "age": 23,
                    "Phone": "12345678910",
                    "address": "云南省昆明市呈贡区XXXXX"
                }
            },
            {
                "_index": "guojie_index",
                "_type": "_doc",
                "_id": "2",
                "_score": 1.0,
                "_source": {
                    "name": "陆国杰",
                    "gender": "男",
                    "age": 23,
                    "Phone": "12345678910",
                    "address": "云南省昆明市呈贡区XXXXX"
                }
            }
        ]
    }
}

注意:postman虽然选择GET请求但是它还是会带着Body去请求,需要把它清除,选到none。或者可以直接复制地址到浏览器直接查询也可以。
2.3 文档修改
2.3.1 全量修改
和新增文档一样,输入相同的 URL 地址请求,如果请求体变化,会将原有的数据内容覆盖。
向接口发送POST请求:http://localhost:9200/索引名/_doc/文档唯一标识(id)
例:
查询原数据:

假设要把age改成28:

再次查看,发现数据修改完成:

2.3.2 局部修改
修改数据时,也可以只修改某一给条数据的局部信息。
向接口发送POST请求:http://localhost:9200/索引名/_update/文档唯一标识(id),注意:这里从_doc变为了_update。

再查看文档,age已近被修改为23:

2.4 文档删除
删除一个文档不会立即从磁盘上移除,它只是被标记成已删除(逻辑删除)。
向接口发送DELETE请求:http://localhost:9200/索引名/_update/文档唯一标识(id)

再查询显示已经没有了

三、文档查询
3.1 条件查询
假设有以下文档内容,发送GET请求:http://localhost:9200/guojie_index/_search
{
    "took": 42,
    "timed_out": false,
    "_shards": {
        "total": 1,
        "successful": 1,
        "skipped": 0,
        "failed": 0
    },
    "hits": {
        "total": {
            "value": 7,
            "relation": "eq"
        },
        "max_score": 1.0,
        "hits": [
            {
                "_index": "guojie_index",
                "_type": "_doc",
                "_id": "1001",
                "_score": 1.0,
                "_source": {
                    "name": "关羽",
                    "gender": "男",
                    "age": 43,
                    "opus": "《三国演义》"
                }
            },
            {
                "_index": "guojie_index",
                "_type": "_doc",
                "_id": "1002",
                "_score": 1.0,
                "_source": {
                    "name": "刘备",
                    "gender": "男",
                    "age": 38,
                    "opus": "《三国演义》"
                }
            },
            {
                "_index": "guojie_index",
                "_type": "_doc",
                "_id": "1003",
                "_score": 1.0,
                "_source": {
                    "name": "张飞",
                    "gender": "男",
                    "age": 29,
                    "opus": "《三国演义》"
                }
            },
            {
                "_index": "guojie_index",
                "_type": "_doc",
                "_id": "1004",
                "_score": 1.0,
                "_source": {
                    "name": "貂蝉",
                    "gender": "女",
                    "age": 18,
                    "opus": "《三国演义》"
                }
            },
            {
                "_index": "guojie_index",
                "_type": "_doc",
                "_id": "1005",
                "_score": 1.0,
                "_source": {
                    "name": "孙悟空",
                    "gender": "男",
                    "age": 1432423,
                    "opus": "《西游记》"
                }
            },
            {
                "_index": "guojie_index",
                "_type": "_doc",
                "_id": "1006",
                "_score": 1.0,
                "_source": {
                    "name": "唐僧",
                    "gender": "男",
                    "age": 40,
                    "opus": "《西游记》"
                }
            },
            {
                "_index": "guojie_index",
                "_type": "_doc",
                "_id": "1007",
                "_score": 1.0,
                "_source": {
                    "name": "猪八戒",
                    "gender": "男",
                    "age": 423432,
                    "opus": "《西游记》"
                }
            }
        ]
    }
}
3.1.1 URL带参查询
向接口发送GET请求:http://localhost:9200/索引名/_search?q=字段名:"字段值"
例如查询如上文档中的貂蝉:http://localhost:9200/guojie_index/_search?q=name:"貂蝉"

3.1.2 请求体带参查询
上述为URL带参数形式查询,这很容易让不善者心怀恶意,或者参数值出现中文会出现乱码情况。为了避免这些情况,我们可用使用带JSON请求体请求进行查询。
接下带JSON请求体,还是查找name为貂蝉的文档。
向接口发送GET请求:http://localhost:9200/索引名/_search
请求体:
{
    "query": {
        "match": {
            "name": "貂蝉"
        }
    }
}
查询结果:
{
    "took": 11,
    "timed_out": false,
    "_shards": {
        "total": 1,
        "successful": 1,
        "skipped": 0,
        "failed": 0
    },
    "hits": {
        "total": {
            "value": 1,
            "relation": "eq"
        },
        "max_score": 3.5283816,
        "hits": [
            {
                "_index": "guojie_index",
                "_type": "_doc",
                "_id": "1004",
                "_score": 3.5283816,
                "_source": {
                    "name": "貂蝉",
                    "gender": "女",
                    "age": 18,
                    "opus": "《三国演义》"
                }
            }
        ]
    }
}

3.1.3 带请求体方式的查找所有内容
还是一样的,向接口发送GET请求:http://localhost:9200/索引名/_search
请求体match换成match_all,但是查询条件为空。
{
	"query":{
		"match_all":{}
	}
}
然后它会返回改索引下的所有文档。

3.1.4 查询指定字段
比如以上文档,我只想看name、和opus,就可以再请求体里添加过滤条件,控制需要查询的字段:
{
    "query": {
        "match_all": {}
    },
    "_source": ["name","opus"]
}

3.1.5 查询大于\小于多少
如果需要查询某个条件在xxx以上或者以下的,就需要使用range,还是上面的文档,比如查询age在100以上的,使用gt,如果查询在100以下的就用lt。
{
    "query": {//查询
        "bool": {//条件
            "filter": {//过滤
                "range": {//范围
                    "age": {
                        "gt": 100//大于100
                    }
                }
            }
        }
    }
}

3.2 分页查询
分页查询类似于MySQL中的limit,可以在请求体里添加指定from和size来过滤查询结果,其中from用来定义起始位,即从第几条开始查,如果从最开始查就是0,size用来指定每页显示的条数。如下:
还是查询上面的文档,请求体:
{
    "query": {
        "match_all": {}
    },
    "_source": ["name","opus"],
    "from": 0,
    "size": 2
}
返回结果:
{
    "took": 1,
    "timed_out": false,
    "_shards": {
        "total": 1,
        "successful": 1,
        "skipped": 0,
        "failed": 0
    },
    "hits": {
        "total": {
            "value": 7,
            "relation": "eq"
        },
        "max_score": 1.0,
        "hits": [
            {
                "_index": "guojie_index",
                "_type": "_doc",
                "_id": "1001",
                "_score": 1.0,
                "_source": {
                    "name": "关羽",
                    "opus": "《三国演义》"
                }
            },
            {
                "_index": "guojie_index",
                "_type": "_doc",
                "_id": "1002",
                "_score": 1.0,
                "_source": {
                    "name": "刘备",
                    "opus": "《三国演义》"
                }
            }
        ]
    }
}

3.3 排序
排序通过请求体中添加,有两种排序规则asc为升序,desc为降序:
"sort": { "字段名": { "order": "排序规则" } }
比如还是查上面的文档:
{
    "query": {
        "match_all": {}
    },
    "sort": {
        "age": {
            "order": "asc"
        }
    }
}


3.4 多条件查询
3.4.1 同时满足(must)
还是上面那个文档,比如现在我要查询opus是《三国演义》并且name是张飞:
{
    "query": {//查询
        "bool": {//条件
            "must": [//必须,即条件要同时成立,类似于MySQL中的and
                {
                    "match": {//匹配
                        "opus": "《三国演义》"//条件1,opus要为《三国演义》
                    }
                },
                {
                    "match": {//匹配
                        "name": "张飞"//条件2,name要为张飞
                    }
                }
            ]
        }
    }
}

3.4.2 只要满足其中一个就可以(should)
还是上面那个文档,比如现在我要查询name是关羽或者孙悟空的:
{
    "query": {//查询
        "bool": {//条件
            "should": [//可能,即条件满足其一就行,类似于MySQL中的or
                {
                    "match": {//匹配
                        "name": "关羽"//条件1,name要为关羽
                    }
                },
                {
                    "match": {//匹配
                        "name": "孙悟空"//条件2,name要为张飞
                    }
                }
            ]
        }
    }
}

3.5 全文检索(match)
这功能像搜索引擎那样,如品牌输入“孙关”,返回结果带回品牌有“孙悟空”和“关羽”。因为这些词语全部被分词了,只要查询条件有的关键字它都会匹配到。
{
    "query": {
        "match": {
            "name": "孙关"
        }
    }
}

3.6 完全匹配(match_phrase)
使用match_phrase将会要求完全匹配,但是查询“孙”或者“孙悟”、“孙悟空”,它都可以查到孙悟空,但是“孙关”就不行了。
{
    "query": {
        "match_phrase": {
            "name": "孙关"
        }
    }
}

3.7 查询结果高亮显示

3.8 聚合查询
聚合允许使用者对 es 文档进行统计分析,类似与关系型数据库中的 group by,当然还有很多其他的聚合,例如取最大值max、平均值avg等等。(好像只能对数据类型为数值型的分组)
分组查询:
{
	"aggs":{//聚合操作
		"price_group":{//名称,随意起名
			"terms":{//分组
				"field":"age"//分组字段
			}
		}
	}
}
加个size它会去掉原数据,只显统计结果:
{
	"aggs":{//聚合操作
		"price_group":{//名称,随意起名
			"terms":{//分组
				"field":"age"//分组字段
			}
		}
	},
    "size": 0
}

求平均值:

四、映射关系
有了索引库,等于有了数据库中的 database。
接下来就需要建索引库(index)中的映射了,类似于数据库(database)中的表结构(table)。
创建数据库表需要设置字段名称,类型,长度,约束等;索引库也一样,需要知道这个类型下有哪些字段,每个字段有哪些约束信息,这就叫做映射(mapping)。
先创建一个索引:
PUT http://127.0.0.1:9200/user
返回结果:
{
    "acknowledged": true,
    "shards_acknowledged": true,
    "index": "user"
}
创建映射:
地址:
PUT http://127.0.0.1:9200/user/_mapping
Body:
{
    "properties": {
        "name":{
        	"type": "text",
        	"index": true
        },
        "sex":{
        	"type": "keyword",
        	"index": true
        },
        "tel":{
        	"type": "keyword",
        	"index": false
        }
    }
}
返回结果:
{
    "acknowledged": true
}
查看映射:
GET http://127.0.0.1:9200/user/_mapping
返回结果:
{
    "user": {
        "mappings": {
            "properties": {
                "name": {
                    "type": "text"
                },
                "sex": {
                    "type": "keyword"
                },
                "tel": {
                    "type": "keyword",
                    "index": false
                }
            }
        }
    }
}
增加数据:
地址:
PUT http://127.0.0.1:9200/user/_create/1001
Body:
{
	"name":"小米",
	"sex":"男的",
	"tel":"1111"
}
返回结果:
{
    "_index": "user",
    "_type": "_doc",
    "_id": "1001",
    "_version": 1,
    "result": "created",
    "_shards": {
        "total": 2,
        "successful": 1,
        "failed": 0
    },
    "_seq_no": 0,
    "_primary_term": 1
}
查找name含有”小“数据:
#GET http://127.0.0.1:9200/user/_search
{
	"query":{
		"match":{
			"name":"小"
		}
	}
}
返回结果:
{
    "took": 495,
    "timed_out": false,
    "_shards": {
        "total": 1,
        "successful": 1,
        "skipped": 0,
        "failed": 0
    },
    "hits": {
        "total": {
            "value": 1,
            "relation": "eq"
        },
        "max_score": 0.2876821,
        "hits": [
            {
                "_index": "user",
                "_type": "_doc",
                "_id": "1001",
                "_score": 0.2876821,
                "_source": {
                    "name": "小米",
                    "sex": "男的",
                    "tel": "1111"
                }
            }
        ]
    }
}
查找sex含有”男“数据:
#GET http://127.0.0.1:9200/user/_search
{
	"query":{
		"match":{
			"sex":"男"
		}
	}
}
返回结果:
{
    "took": 1,
    "timed_out": false,
    "_shards": {
        "total": 1,
        "successful": 1,
        "skipped": 0,
        "failed": 0
    },
    "hits": {
        "total": {
            "value": 0,
            "relation": "eq"
        },
        "max_score": null,
        "hits": []
    }
}
找不想要的结果,只因创建映射时"sex"的类型为"keyword"。
"sex"只能完全为”男的“,才能得出原数据。
#GET http://127.0.0.1:9200/user/_search
{
	"query":{
		"match":{
			"sex":"男的"
		}
	}
}
返回结果:
{
    "took": 2,
    "timed_out": false,
    "_shards": {
        "total": 1,
        "successful": 1,
        "skipped": 0,
        "failed": 0
    },
    "hits": {
        "total": {
            "value": 1,
            "relation": "eq"
        },
        "max_score": 0.2876821,
        "hits": [
            {
                "_index": "user",
                "_type": "_doc",
                "_id": "1001",
                "_score": 0.2876821,
                "_source": {
                    "name": "小米",
                    "sex": "男的",
                    "tel": "1111"
                }
            }
        ]
    }
}
查找电话:
# GET http://127.0.0.1:9200/user/_search
{
	"query":{
		"match":{
			"tel":"11"
		}
	}
}
返回结果:
{
    "error": {
        "root_cause": [
            {
                "type": "query_shard_exception",
                "reason": "failed to create query: Cannot search on field [tel] since it is not indexed.",
                "index_uuid": "ivLnMfQKROS7Skb2MTFOew",
                "index": "user"
            }
        ],
        "type": "search_phase_execution_exception",
        "reason": "all shards failed",
        "phase": "query",
        "grouped": true,
        "failed_shards": [
            {
                "shard": 0,
                "index": "user",
                "node": "4P7dIRfXSbezE5JTiuylew",
                "reason": {
                    "type": "query_shard_exception",
                    "reason": "failed to create query: Cannot search on field [tel] since it is not indexed.",
                    "index_uuid": "ivLnMfQKROS7Skb2MTFOew",
                    "index": "user",
                    "caused_by": {
                        "type": "illegal_argument_exception",
                        "reason": "Cannot search on field [tel] since it is not indexed."
                    }
                }
            }
        ]
    },
    "status": 400
}
报错只因创建映射时"tel"的"index"为false。


【推荐】国内首个AI IDE,深度理解中文开发场景,立即下载体验Trae
【推荐】编程新体验,更懂你的AI,立即体验豆包MarsCode编程助手
【推荐】抖音旗下AI助手豆包,你的智能百科全书,全免费不限次数
【推荐】轻量又高性能的 SSH 工具 IShell:AI 加持,快人一步
· 开发者必知的日志记录最佳实践
· SQL Server 2025 AI相关能力初探
· Linux系列:如何用 C#调用 C方法造成内存泄露
· AI与.NET技术实操系列(二):开始使用ML.NET
· 记一次.NET内存居高不下排查解决与启示
· 开源Multi-agent AI智能体框架aevatar.ai,欢迎大家贡献代码
· Manus重磅发布:全球首款通用AI代理技术深度解析与实战指南
· 被坑几百块钱后,我竟然真的恢复了删除的微信聊天记录!
· 没有Manus邀请码?试试免邀请码的MGX或者开源的OpenManus吧
· 园子的第一款AI主题卫衣上架——"HELLO! HOW CAN I ASSIST YOU TODAY