手撸一个SpringBoot-Starter
1. 简介
通过了解SpringBoot的原理后,我们可以手撸一个spring-boot-starter来加深理解。
1.1 什么是starter
- starters是一组方便的依赖描述符(根据功能特点将用到的依赖标记封装到同一个pom中),可以将其包含在应用程序中。
- 通过starters可以获取所需的所有Spring和相关技术的一站式服务,而无需搜索示例代码或复制粘贴加载的依赖项描述符。
1.2 命名规则
官方首发都遵循类似的命名模式:spring-boot-starter-*,其中*是特定类型的应用程序,例如: spring-boot-starter-web。
第三方启动器不应以spring-boot开头,因为它是为官方 Spring Boot 工件保留的,相反,第三方启动器通常以项目名称开头,例如:ldx.spring-boot-starter。
1.3 代码结构
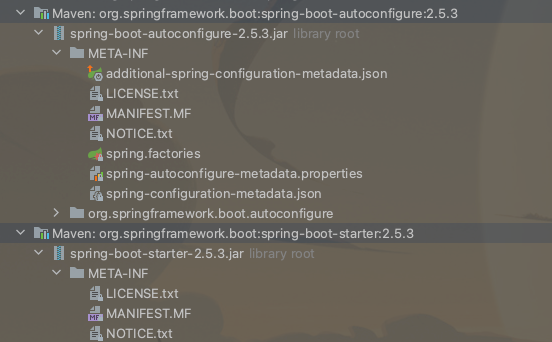
如图,官方的spring-boot-starter Jar中其实没有包含代码,starter其实是就是一组依赖描述的集合,而其中主要包含的就是autoconfigure模块和一些必要的依赖模块。
spring-boot官方所有的auto-configuration-classes
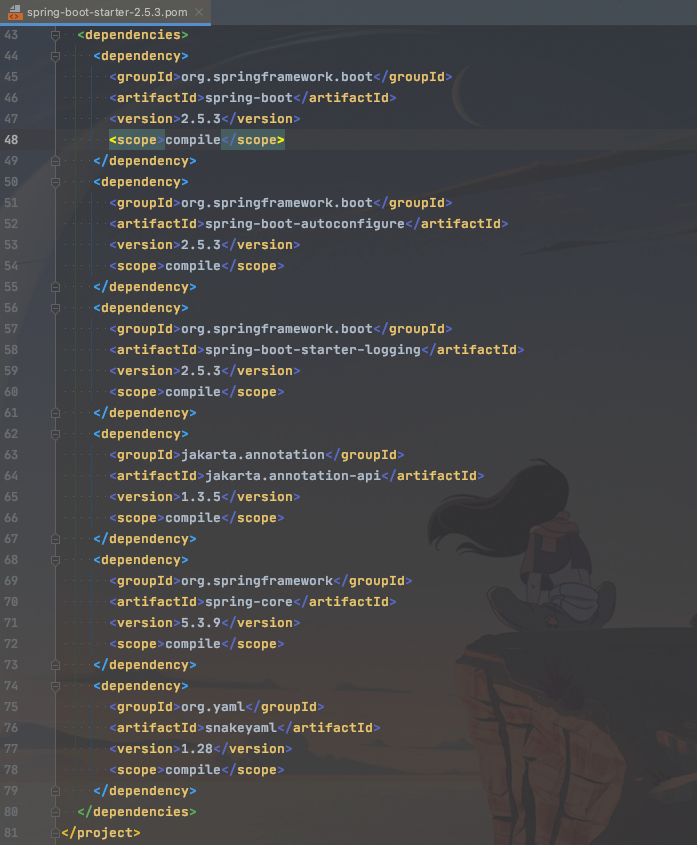
springboot官方的starter中依赖如下:
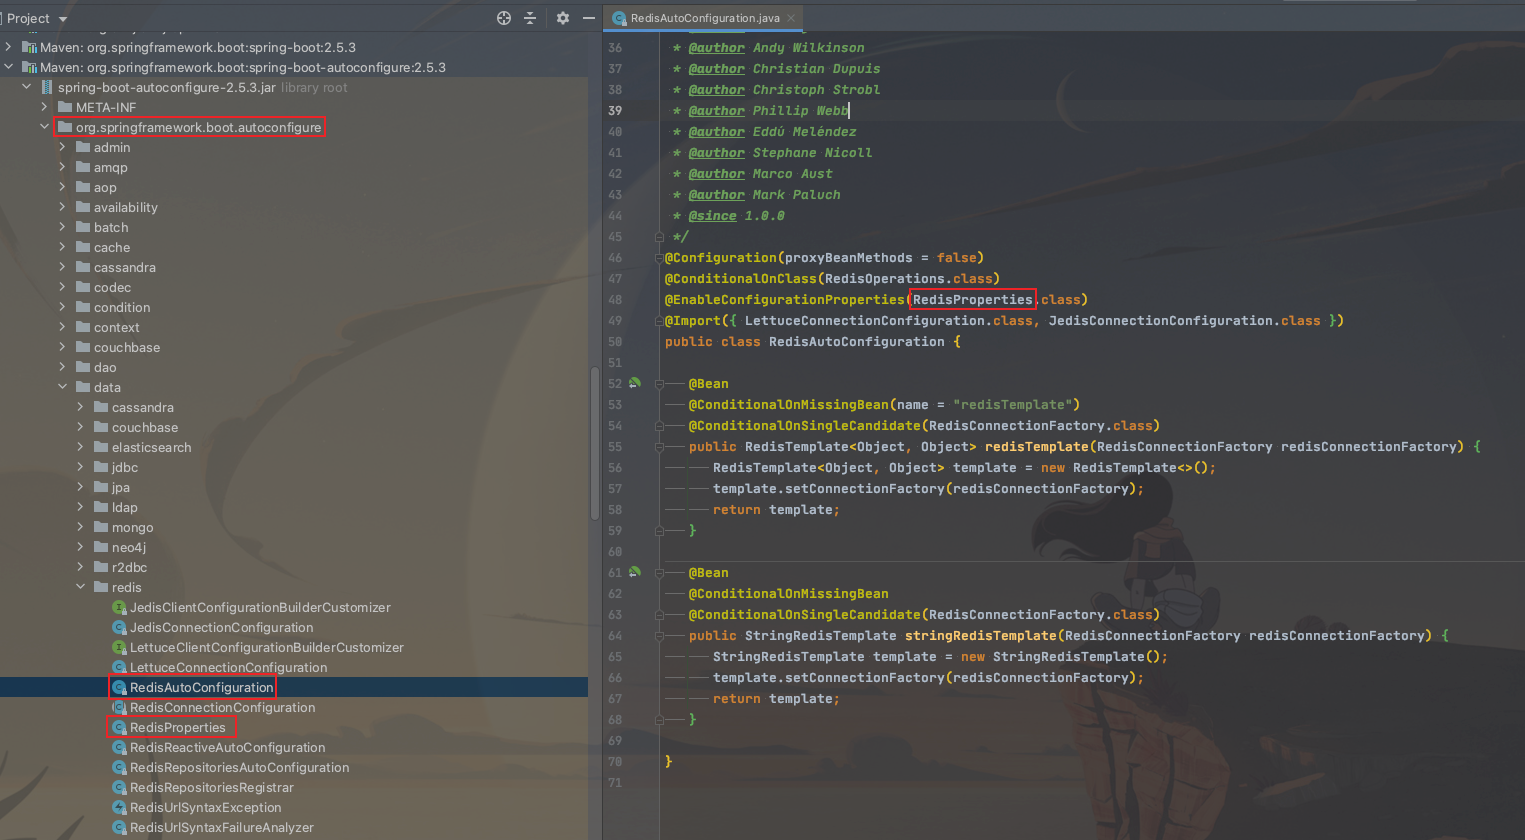
当我们进入到官方autoconfiguration中查看redis配置源码如下,而我们待会儿也会模仿RedisAutoConfiguration写一个自己的starter
2. 开撸
2.1 项目结构
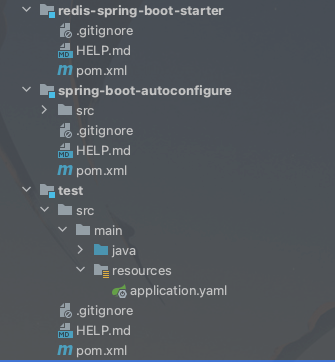
结构说明:
2.2 spring-boot-autoconfigure
正如简介中提到的一样,该模块用于提供autoconfigure核心功能,通过META-INF/spring.factories实现对RedisAutoConfiguration.class的扫描,然后在RedisAutoConfiguration.class中实现Jedis的条件化注入,从而实现springboot的自动装配功能。
2.2.1 导入依赖
spring-boot-autoconfigure-processor是一个注释处理器,依赖用于生成META-INF/spring-autoconfigure-metadata.properties并且被包含在项目 jar 中,其文件记录了当前classpath下所有的autoconfigure的元信息,在项目启动时会先扫描此文件(如果存在),此文件有助于缩短启动时间,但不是程序正常运行所必需的。
2.2.2 RedisProperty
2.2.3 RedisAutoConfiguration
2.2.4 spring.factories
在resources下创建META-INF/spring.factories,EnableAutoConfiguration指向RedisAutoConfiguration
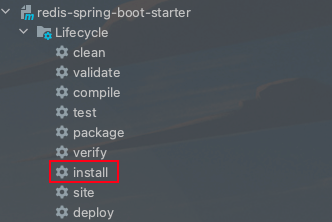
2.2.5 安装依赖
将当前模块打成Jar安装到本地仓库。

2.3 redis-spring-boot-starter
2.3.1 导入依赖
在其pom中添加我们刚才创建的spring-boot-autoconfigure模块,并且添加jedis模块(autoconfigure模块中jedis不允许传递依赖因为将来autoconfigure文件中的会有各种各样的第三方自动化配置,不可能全部传递依赖,只能是用到哪个的时候就自行在starter中添加哪个即可)
2.3.2 安装依赖
将当前模块打成Jar安装到本地仓库。
2.4 test
test模块为测试模块,测试starter功能。
2.4.1 导入依赖
2.4.2 修改启动类
2.4.3 启动测试
启动项目成功获取到了设置的数据。
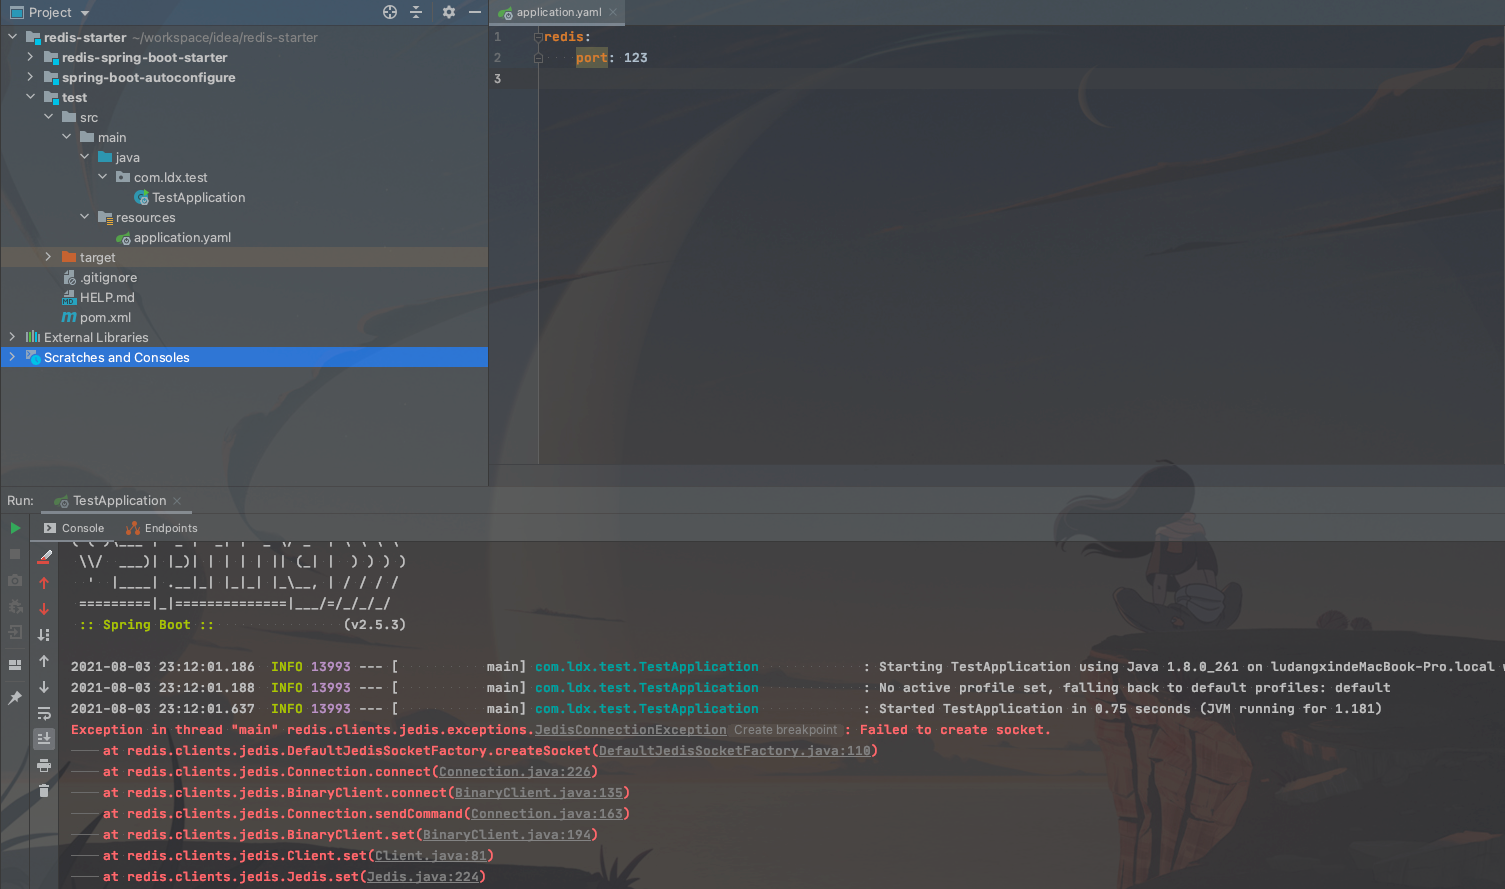
这时我们在test模块的application.yaml文配置redis.port=123测试autoconfigure模块能不能正常的获取配置信息。
启动项目报错如下:
说明配置类正确的获取到了错误的配置信息,符合预期,打完收工。
这时我们再回头看下spring-boot-autoconfigure-processor依赖生产的元信息文件如下:

3. 小结
spring-boot-starter的出现,大大的提升了我们项目的搭建速度和质量(我们仅需导入依赖坐标,然后在配置文件中进行简单的配置即可。再也不用因为依赖找不全,版本对不上,依赖冲突...而烦恼了),并且官方和第三方的starter简化了我们对中间操作(提供了通用的template,整合了对数据库比如jpa或者amqp等操作接口),简直不要太爽。
当我们学习了如何创建自己的starter后,也可以封装我们自己的starter用于项目的建设和使用。
SpringBoot内置Starter
| 名称 | 描述 |
|---|---|
spring-boot-starter |
核心启动器,包括自动配置支持、日志记录和 YAML |
spring-boot-starter-activemq |
使用 Apache ActiveMQ 的 JMS 消息传递入门 |
spring-boot-starter-amqp |
使用 Spring AMQP 和 Rabbit MQ 的入门者 |
spring-boot-starter-aop |
使用 Spring AOP 和 AspectJ 进行面向方面编程的入门者 |
spring-boot-starter-artemis |
使用 Apache Artemis 进行 JMS 消息传递的入门者 |
spring-boot-starter-batch |
使用 Spring Batch 的启动器 |
spring-boot-starter-cache |
使用 Spring Framework 的缓存支持的 Starter |
spring-boot-starter-data-cassandra |
Starter 使用 Cassandra 分布式数据库和 Spring Data Cassandra |
spring-boot-starter-data-cassandra-reactive |
Starter 使用 Cassandra 分布式数据库和 Spring Data Cassandra Reactive |
spring-boot-starter-data-couchbase |
使用 Couchbase 面向文档的数据库和 Spring Data Couchbase 的入门者 |
spring-boot-starter-data-couchbase-reactive |
Starter 使用 Couchbase 面向文档的数据库和 Spring Data Couchbase Reactive |
spring-boot-starter-data-elasticsearch |
使用 Elasticsearch 搜索和分析引擎以及 Spring Data Elasticsearch 的入门者 |
spring-boot-starter-data-jdbc |
使用 Spring Data JDBC 的入门者 |
spring-boot-starter-data-jpa |
将 Spring Data JPA 与 Hibernate 结合使用的入门者 |
spring-boot-starter-data-ldap |
使用 Spring Data LDAP 的入门者 |
spring-boot-starter-data-mongodb |
使用 MongoDB 面向文档的数据库和 Spring Data MongoDB 的入门者 |
spring-boot-starter-data-mongodb-reactive |
Starter 使用 MongoDB 面向文档的数据库和 Spring Data MongoDB Reactive |
spring-boot-starter-data-neo4j |
使用 Neo4j 图形数据库和 Spring Data Neo4j 的入门者 |
spring-boot-starter-data-r2dbc |
使用 Spring Data R2DBC 的启动器 |
spring-boot-starter-data-redis |
将 Redis 键值数据存储与 Spring Data Redis 和 Lettuce 客户端一起使用的入门者 |
spring-boot-starter-data-redis-reactive |
将 Redis 键值数据存储与 Spring Data Redis 反应式和 Lettuce 客户端一起使用的入门者 |
spring-boot-starter-data-rest |
使用 Spring Data REST 在 REST 上公开 Spring Data 存储库的启动器 |
spring-boot-starter-freemarker |
使用 FreeMarker 视图构建 MVC Web 应用程序的入门者 |
spring-boot-starter-groovy-templates |
使用 Groovy 模板视图构建 MVC Web 应用程序的入门者 |
spring-boot-starter-hateoas |
使用 Spring MVC 和 Spring HATEOAS 构建基于超媒体的 RESTful Web 应用程序的入门者 |
spring-boot-starter-integration |
使用 Spring Integration 的入门者 |
spring-boot-starter-jdbc |
将 JDBC 与 HikariCP 连接池一起使用的 Starter |
spring-boot-starter-jersey |
使用 JAX-RS 和 Jersey 构建 RESTful Web 应用程序的初学者。替代方案spring-boot-starter-web |
spring-boot-starter-jooq |
使用 jOOQ 访问 SQL 数据库的入门者。spring-boot-starter-data-jpa或的替代品spring-boot-starter-jdbc |
spring-boot-starter-json |
读写json的Starter |
spring-boot-starter-jta-atomikos |
使用 Atomikos 的 JTA 事务入门 |
spring-boot-starter-mail |
使用 Java Mail 的 Starter 和 Spring Framework 的电子邮件发送支持 |
spring-boot-starter-mustache |
使用 Mustache 视图构建 Web 应用程序的入门者 |
spring-boot-starter-oauth2-client |
使用 Spring Security 的 OAuth2/OpenID Connect 客户端功能的入门者 |
spring-boot-starter-oauth2-resource-server |
使用 Spring Security 的 OAuth2 资源服务器功能的入门者 |
spring-boot-starter-quartz |
使用 Quartz 调度器的启动器 |
spring-boot-starter-rsocket |
用于构建 RSocket 客户端和服务器的 Starter |
spring-boot-starter-security |
使用 Spring Security 的入门者 |
spring-boot-starter-test |
Starter 用于使用包括 JUnit Jupiter、Hamcrest 和 Mockito 在内的库测试 Spring Boot 应用程序 |
spring-boot-starter-thymeleaf |
使用 Thymeleaf 视图构建 MVC Web 应用程序的初学者 |
spring-boot-starter-validation |
将 Java Bean 验证与 Hibernate Validator 结合使用的入门工具 |
spring-boot-starter-web |
使用 Spring MVC 构建 Web(包括 RESTful)应用程序的入门者。使用 Tomcat 作为默认的嵌入式容器 |
spring-boot-starter-web-services |
使用 Spring Web 服务的入门者 |
spring-boot-starter-webflux |
使用 Spring Framework 的 Reactive Web 支持构建 WebFlux 应用程序的 Starter |
spring-boot-starter-websocket |
使用 Spring Framework 的 WebSocket 支持构建 WebSocket 应用程序的 Starter |
除了应用程序启动器之外,以下启动器还可用于添加生产就绪功能:
| 名称 | 描述 |
|---|---|
spring-boot-starter-actuator |
使用 Spring Boot 的 Actuator 的 Starter,它提供了生产就绪的特性来帮助你监控和管理你的应用程序 |
最后,Spring Boot 还包括以下启动器,如果您想排除或交换特定的技术方面,可以使用它们:
| 名称 | 描述 |
|---|---|
spring-boot-starter-jetty |
使用 Jetty 作为嵌入式 servlet 容器的启动器。替代方案spring-boot-starter-tomcat |
spring-boot-starter-log4j2 |
使用 Log4j2 进行日志记录的启动器。替代方案spring-boot-starter-logging |
spring-boot-starter-logging |
使用 Logback 进行日志记录的启动器。默认日志记录启动器 |
spring-boot-starter-reactor-netty |
使用 Reactor Netty 作为嵌入式响应式 HTTP 服务器的启动器。 |
spring-boot-starter-tomcat |
使用 Tomcat 作为嵌入式 servlet 容器的启动器。使用的默认 servlet 容器启动器spring-boot-starter-web |
spring-boot-starter-undertow |
使用 Undertow 作为嵌入式 servlet 容器的启动器。替代方案spring-boot-starter-tomcat |
__EOF__

本文链接:https://www.cnblogs.com/ludangxin/p/15096970.html
关于博主:评论和私信会在第一时间回复。或者直接私信我。
版权声明:本博客所有文章除特别声明外,均采用 BY-NC-SA 许可协议。转载请注明出处!
声援博主:如果您觉得文章对您有帮助,可以点击文章右下角【推荐】一下。您的鼓励是博主的最大动力!


【推荐】国内首个AI IDE,深度理解中文开发场景,立即下载体验Trae
【推荐】编程新体验,更懂你的AI,立即体验豆包MarsCode编程助手
【推荐】抖音旗下AI助手豆包,你的智能百科全书,全免费不限次数
【推荐】轻量又高性能的 SSH 工具 IShell:AI 加持,快人一步
· Linux系列:如何用heaptrack跟踪.NET程序的非托管内存泄露
· 开发者必知的日志记录最佳实践
· SQL Server 2025 AI相关能力初探
· Linux系列:如何用 C#调用 C方法造成内存泄露
· AI与.NET技术实操系列(二):开始使用ML.NET
· 无需6万激活码!GitHub神秘组织3小时极速复刻Manus,手把手教你使用OpenManus搭建本
· C#/.NET/.NET Core优秀项目和框架2025年2月简报
· 什么是nginx的强缓存和协商缓存
· 一文读懂知识蒸馏
· Manus爆火,是硬核还是营销?