转文:https://blog.csdn.net/zxwu_1993/article/details/86080297
纯java:
本人在做项目中需要用到图片压缩功能,进行图片快速加载显示及读取,同时记录下来后在此分享给大家,希望对有需要的同行有一定的帮助
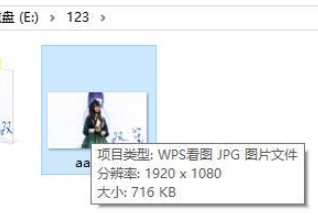
首先给大家看一下压缩前后的效果图:
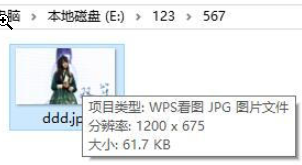
图片压缩后:
具体实现代码如下:
import java.awt.Color;
import java.awt.Graphics;
import java.awt.Image;
import java.awt.image.BufferedImage;
import java.awt.image.ConvolveOp;
import java.awt.image.Kernel;
import java.io.File;
import java.io.FileOutputStream;
import java.io.IOException;

import javax.swing.ImageIcon;

import com.sun.image.codec.jpeg.JPEGCodec;
import com.sun.image.codec.jpeg.JPEGEncodeParam;
import com.sun.image.codec.jpeg.JPEGImageEncoder;

public class imagesFiler {
    /**
     * 缩放图片(压缩图片质量,改变图片尺寸)
     * 若原图宽度小于新宽度,则宽度不变!
     * @param originalFile 原图片路径地址
     * @param resizedFile 压缩后输出路径地址
     * @param maxWidth 最大宽度
     * @param maxHeight 最大高度
     * @param newWidth 新的宽度
     * @param quality 图片质量参数 0.7f 相当于70%质量
     */
    public static void imageResize(File originalFile, File resizedFile,
                              int maxWidth,int maxHeight, float quality) throws IOException {

        if (quality > 1) {
            throw new IllegalArgumentException(
                    "图片质量需设置在0.1-1范围");
        }

        ImageIcon ii = new ImageIcon(originalFile.getCanonicalPath());
        Image i = ii.getImage();
        Image resizedImage = null;

        int iWidth = i.getWidth(null);
        int iHeight = i.getHeight(null);

        int newWidth = maxWidth;
        if(iWidth < maxWidth){
            newWidth = iWidth;
        }


        if (iWidth >= iHeight) {
            resizedImage = i.getScaledInstance(newWidth, (newWidth * iHeight)
                    / iWidth, Image.SCALE_SMOOTH);
        }


        int newHeight = maxHeight;
        if(iHeight < maxHeight){
            newHeight = iHeight;
        }

        if(resizedImage==null && iHeight >= iWidth){
            resizedImage = i.getScaledInstance((newHeight * iWidth) / iHeight,
                    newHeight, Image.SCALE_SMOOTH);
        }

        //此代码确保加载图像中的所有像素
        Image temp = new ImageIcon(resizedImage).getImage();

        //创建缓冲图像
        BufferedImage bufferedImage = new BufferedImage(temp.getWidth(null),
                temp.getHeight(null), BufferedImage.TYPE_INT_RGB);

        //将图像复制到缓冲图像
        Graphics g = bufferedImage.createGraphics();

       //清除背景并绘制图像。
        g.setColor(Color.white);
        g.fillRect(0, 0, temp.getWidth(null), temp.getHeight(null));
        g.drawImage(temp, 0, 0, null);
        g.dispose();


        float softenFactor = 0.05f;
        float[] softenArray = { 0, softenFactor, 0, softenFactor,
                1 - (softenFactor * 4), softenFactor, 0, softenFactor, 0 };
        Kernel kernel = new Kernel(3, 3, softenArray);
        ConvolveOp cOp = new ConvolveOp(kernel, ConvolveOp.EDGE_NO_OP, null);
        bufferedImage = cOp.filter(bufferedImage, null);

        //将jpeg写入文件
        FileOutputStream out = new FileOutputStream(resizedFile);

         //将图像编码为jpeg数据流
        JPEGImageEncoder encoder = JPEGCodec.createJPEGEncoder(out);

        JPEGEncodeParam param = encoder
                .getDefaultJPEGEncodeParam(bufferedImage);

        param.setQuality(quality, true);

        encoder.setJPEGEncodeParam(param);
        encoder.encode(bufferedImage);
    }

}

原文链接:https://blog.csdn.net/zxwu_1993/article/details/86080297
进行测试:
public class demo {
    public static void main(String[] args) throws Exception{
        //需要压缩的图片地址     aaa.jpg为需要压缩的图片
        File customaryFile = new File("E://123//aaa.jpg");
        //压缩过后输出的路径地址    ddd.jpg 可进行设置为任意名称
        File compressAfter = new File("E://123//567//ddd.jpg");

        imagesFiler.imageResize(customaryFile,compressAfter,1200,2500,0.8f);
    }
}

原文链接:https://blog.csdn.net/zxwu_1993/article/details/86080297

 浙公网安备 33010602011771号