nginx安装配置
CentOS 7.5服务器 或者 CentOS 8虚拟机
Xshell (免费版) 下载链接
Xftp (免费版) 下载链接
libfastcommon-mastar.zip 下载链接
FastDFS_v5.08.tar.gz 下载链接
fastdfs-nginx-module_v1.16.tar.gz 下载链接
nginx-1.16.1.tar.gz 下载链接
>> yum -y install gcc gcc-c++ make automake autoconf libtool pcre* zlib openssl-devel perl*
>> yum -y install mlocate
使用方法和作用: 链接
注: locate命令无法检索到最近变动得文件,可先使用updatedb命令更新数据
>> mkdir /usr/local/fastdfs
由于FastDFS依赖libfastcommon,需先安装libfastcommon:
>> cd /usr/local/fastdfs
>> unzip libfastcommon-master.zip
>> cd libfastcommon-master
>>./make.sh
>> ./make.sh install
安装完毕如下图:

头文件: /usr/include/fastcommon
库文件: /usr/lib64
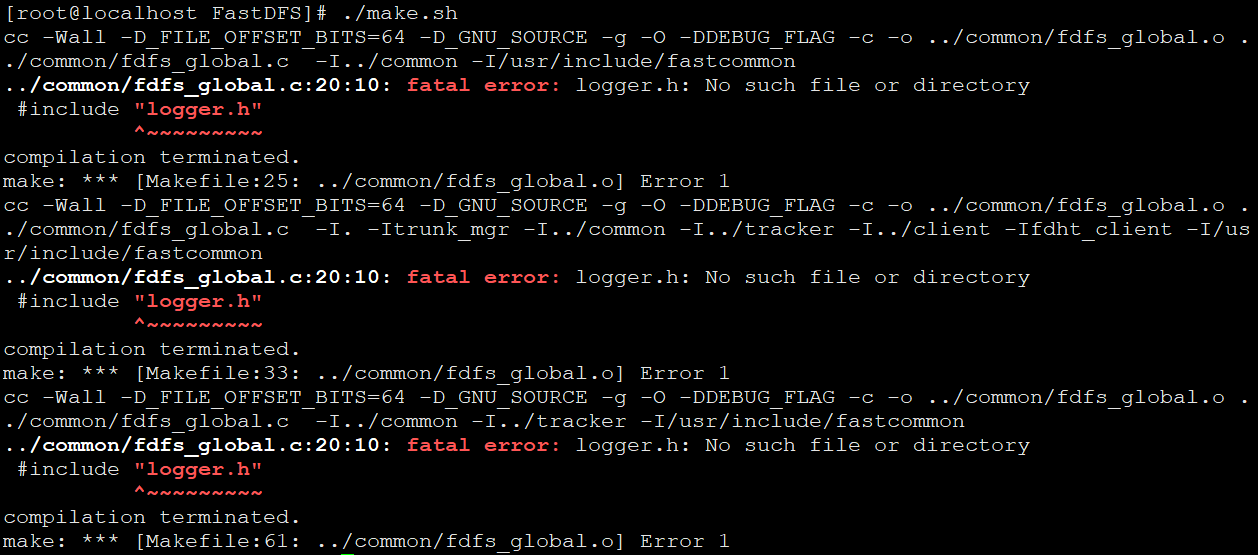
编译FastDFS时,FastDFS中指定的头文件位置为/usr/include/fastcommon
如果libfastcommon的安装位置不同则需要进行创建软链接。
比如: 前面的路径为你的libfastcommon头文件位置
>> ln -s /usr/local/include/fastcommon /usr/include/fastcommon
否则编译FastDFS时可能会看到如下错误:
>> cd /usr/local/fastdfs
>> tar -zxvf FastDFS_v5.08.tar.gz
>> cd FastDFS
>> ./make.sh
>> ./make.sh install
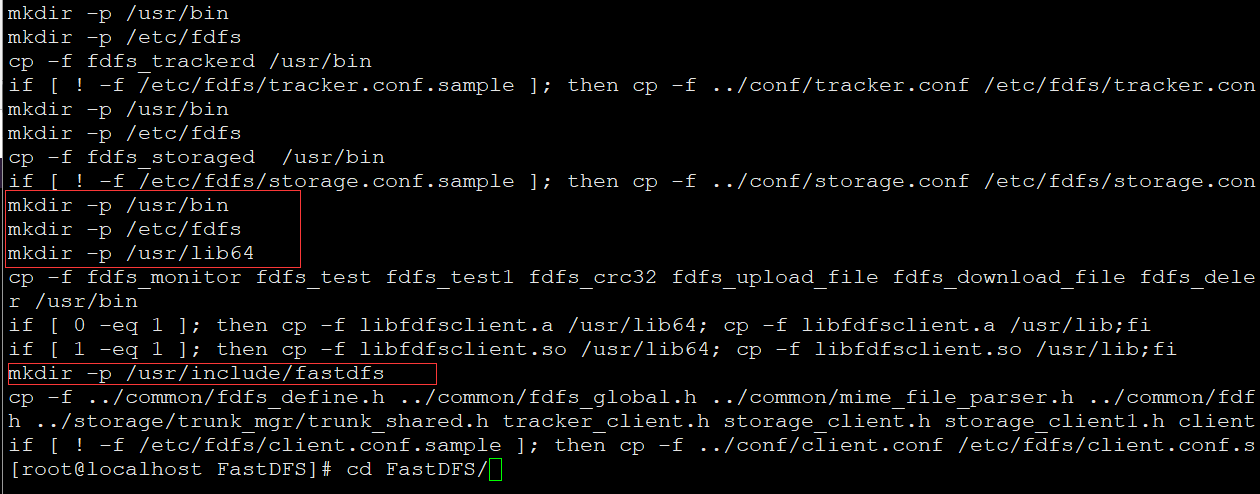
安装完成如下图:
 如图所示:
如图所示:
配置文件: /etc/fdfs
执行程序: /usr/bin
头文件: /usr/include/fastdfs
库文件: /usr/lib64
>> cd /etc/fdfs
>> ll 
tracker.conf.sample: 服务端tracker示例配置文件
storage.conf.sample: 服务端storage示例配置文件
client.conf.sample: client客户端示例配置文件
cp /etc/fdfs/tracker.conf.sample /etc/fdfs/tracker.conf
cp /etc/fdfs/storage.conf.sample /etc/fdfs/storage.conf
cp /etc/fdfs/client.conf.sample /etc/fdfs/client.conf
>> mkdir /usr/local/fastdfs/tracker
>> vi /etc/fdfs/tracker.conf
port=22122 # tracker server端口 默认为22122
base_path=/usr/local/fastdfs/tracker # tracker server数据目录
http.server_port=8089
# tracker server下载文件的端口 该处配合nginx进行配置 默认为8080
# storage 数据目录 建议命名方式为storage + 组名
>> mkdir /usr/local/fastdfs/fdfs_storage_mygroup
# storage 存储目录
>> mkdir /usr/local/fastdfs/fdfs_storage_mygroup_data
>> vi /etc/fdfs/storage.conf
group_name=mygroup #组名
port=23000 # storage端口号 默认23000
# storage数据目录
base_path=/usr/local/fastdfs/fdfs_storage_mygroup
store_path_count=1 # 对应store_path个数
# store_path storage存储目录,可指定多个如store_path0 以下标定义
# store_path0 第一个storage存储目录 如果不指定默认为base_path值
store_path0=/usr/local/fastdfs/fdfs_storage_mygroup_data
# tracker 服务器地址(局域网IP) 端口 可指定多个
tracker_server=192.168.175.110:22122 # 本地ip + 端口
http.server_port=8089 # 配合nginx配置端口
>> vi /etc/fdfs/client.conf
# storage数据目录
base_path=/usr/local/fastdfs/fdfs_storage_mygroup
tracker_server=192.168.175.110:22122 # tracker服务器地址
将 FastDFS目录中的http.conf、mime.types复制到/etc/fdfs目录
>> cp /usr/local/fastdfs/FastDFS/conf/http.conf /etc/fdfs
>> cp /usr/local/fastdfs/FastDFS/conf/mime.types /etc/fdfs
注:如果缺少这两个文件,nginx在集成ngx_fastdfs_module后,将只能启动master process,而不能启动worker process,导致无法正常使用
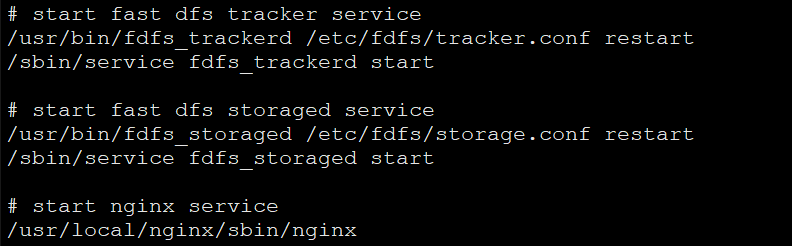
启动顺序为先tracker 后 storage
启动tracker
>> /usr/bin/fdfs_trackerd /etc/fdfs/tracker.conf restart
>> /sbin/service fdfs_trackerd start
启动storage
>> /usr/bin/fdfs_storaged /etc/fdfs/storage.conf restart
>> /sbin/service fdfs_storaged start
>> ps -ef|grep -v grep|grep fdfs

>> /usr/bin/fdfs_moniter /etc./fdfs/storage.conf
如下图所示:ACTIVE即为正常通信

# 后面的路径为需要上传的文件路径 必须提前存在
>> /usr/bin/fdfs_upload_file /etc/fdfs/client.conf
>> /usr/local/fastdfs/test.txt
如下图所示返回存储地址即为成功:

>> cd /usr/local/fastdfs
>> tar -zxvf fastdfs-nginx-module_v1.16.tar.gz
>> vi /usr/local/fastdfs/fastdfs-nginx-module/src/config
修改前如下如所示:
/usr/local/include/fastdfs:FastDFS文件头位置
/usr/local/include/fastcommon:libfastcommon文件头位置
/usr/local/lib 库文件位置

按照实际文件位置情况,修改后如下图:

将fastdfs-nginx-module配置文件复制到/etc/fdfs
>> cp /usr/local/fastdfs/fastdfs-nginx-module/src/mod_fastdfs.conf /etc/fdfs
# storage数据目录
base_path=/usr/local/fastdfs/fdfs_storage_mygroup
tracker_server=192.168.175.110:22122 # tracker服务器ip
storage_server_port=23000 # storage服务端口
group_name=mygroup # 组名
url_have_group_name_true=true
store_path_count=1
store_path0=/usr/local/fastdfs/fdfs_storage_mygroup_data
>> cd /usr/local/fastdfs
>> tar -zxvf nginx-1.16.1.tar.gz
>> cd nginx-1.16.1
# 加载fastdfs-nginx-module模块
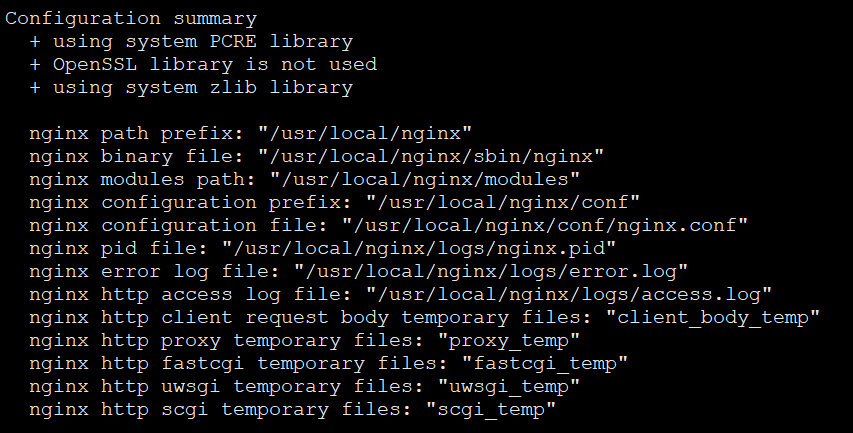
>> ./configure --add-module=/usr/local/fastdfs/fastdfs-nginx-module/src
如下图所示,即为成功:
>> cd /usr/local/fastdfs/nginx-1.16.1
>> make
>> make install
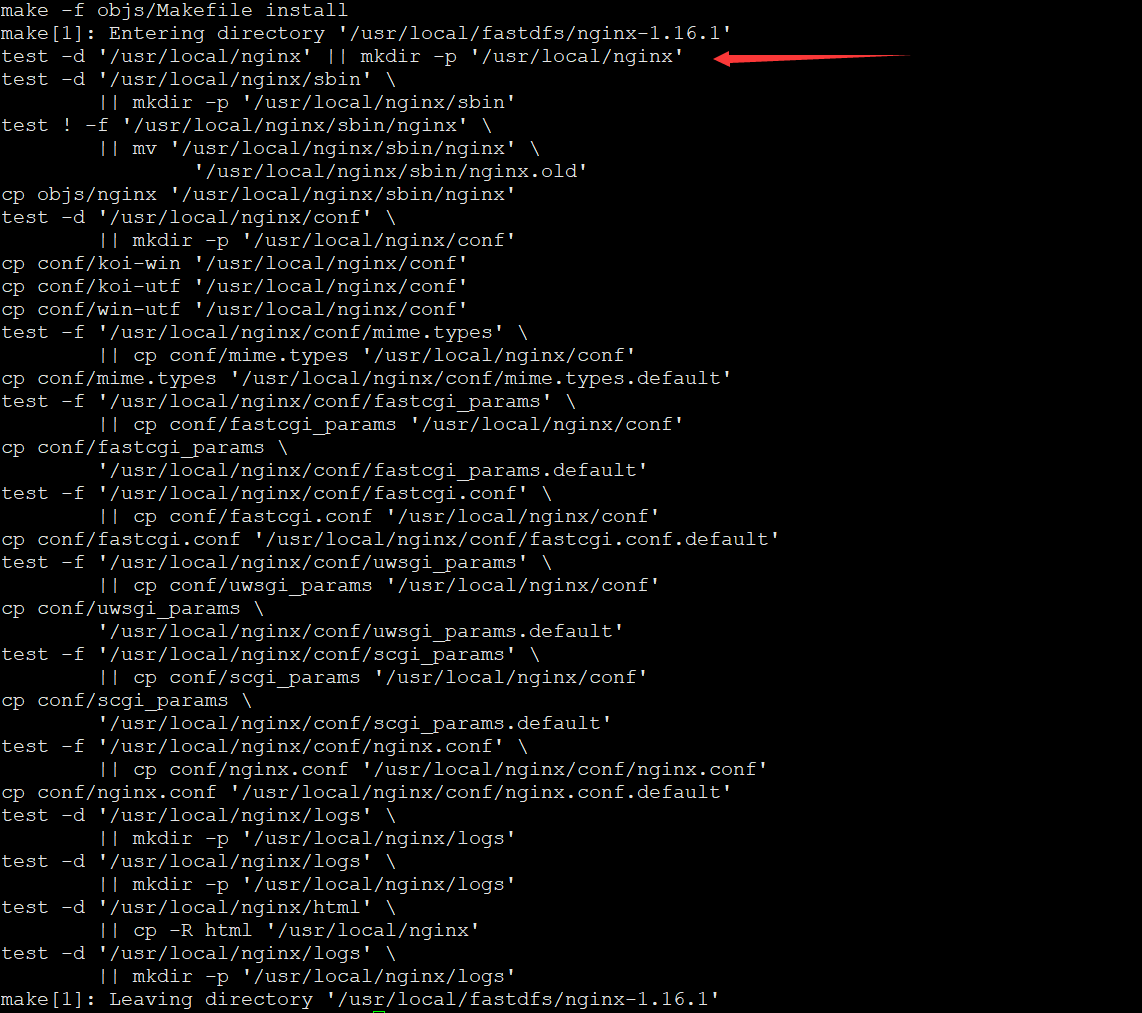
安装位置为:/usr/local/nginx
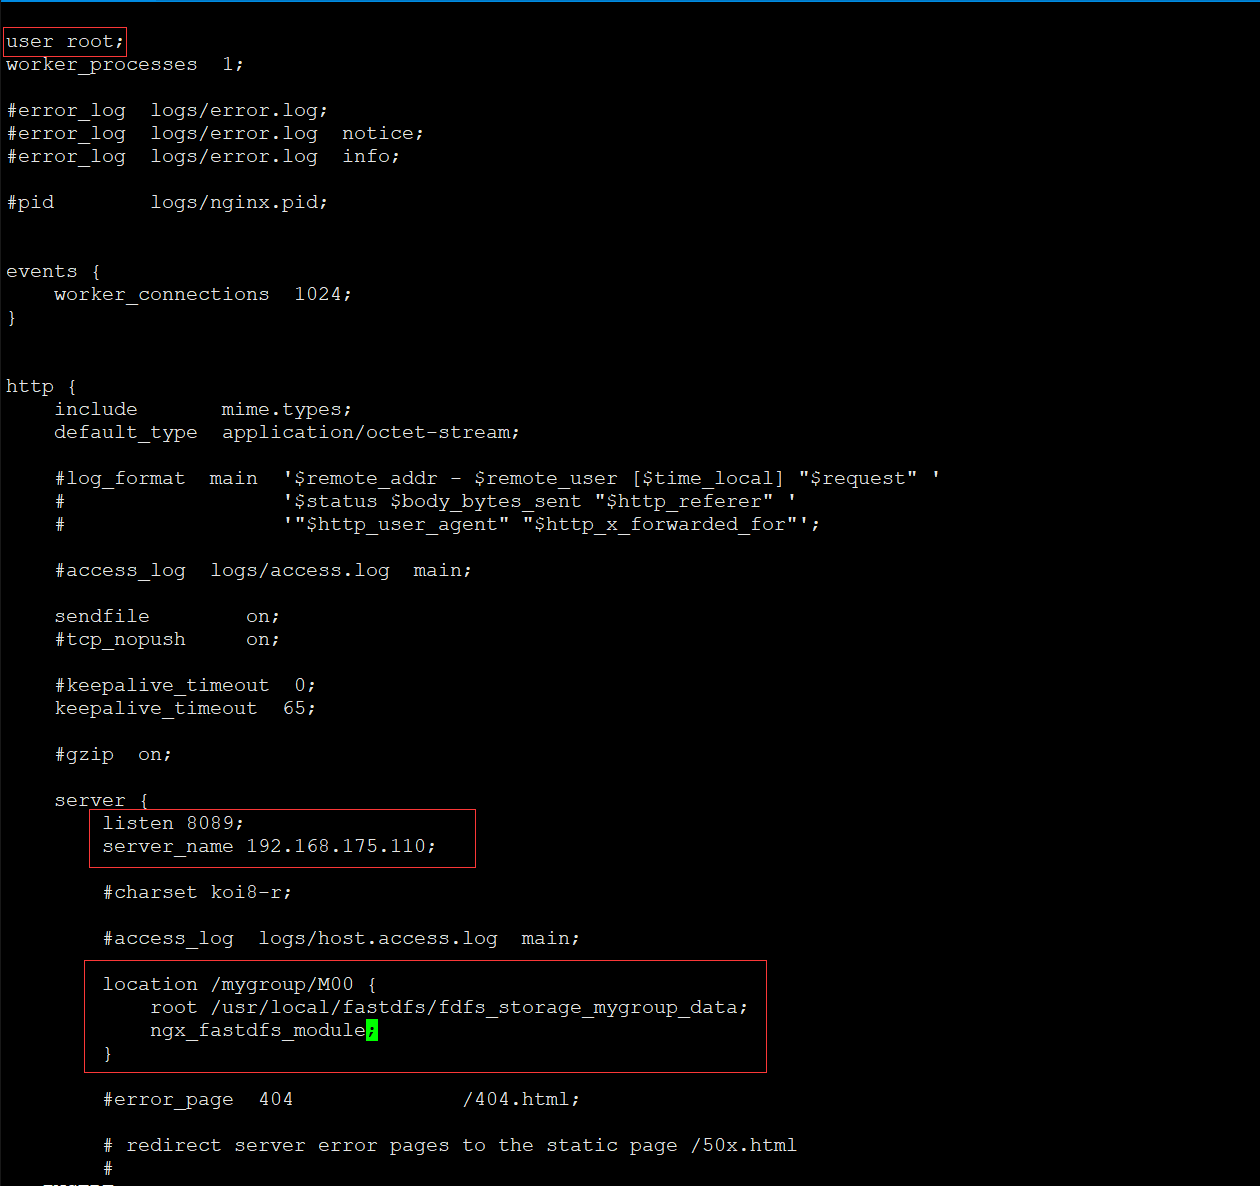
>> vi /usr/local/nginx/conf/nginx.conf
修改如下图所示内容:
>> /usr/local/nginx/sbin/nginx

>> ps -ef|grep nginx|grep -v grep

如遇到网络无法访问的:进行防火墙端口释放
>> firewall-cmd –zone=public –add-port=22122/tcp –permanent
>> firewall-cmd –zone=public –add-port=23000/tcp --permanent
>> firewall-cmd –zone=public –add-port=8089/tcp --permanent
>> firewall-cmd –reload
如遇到400 Bad Request 请查看启动日志 自行解决
>> vi /usr/local/nginx/logs/error.log

访问之前文件上传测试的地址即可看到如下效果 (图示为文件内容)

>> vi /etc/rc.d/rc.local
为保证启动服务正常运行 给启动配置文件加入可执行权限
>> chmod +x /etc/rc.d/rc.local

 浙公网安备 33010602011771号