OpenCV - 滑动拼图验证码自动识别与匹配
OpenCV - 滑动拼图验证码自动识别与匹配
CentOS7安装Ansible
协议:CC BY-SA 4.0 https://creativecommons.org/licenses/by-sa/4.0/
版权声明:本文为原创文章,遵循 CC 4.0 BY-SA 版权协议,转载请附上原文出处链接及本声明。

在线体验
体验地址:https://www.fengkongcloud.com/trial/captcha.html

技术分析
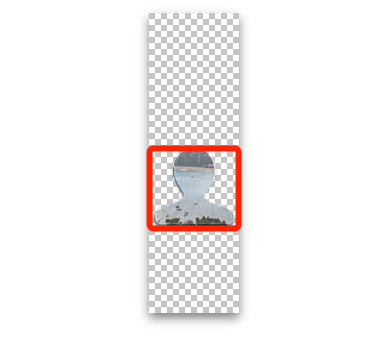
1、抓包获取前景图和背景图

前景

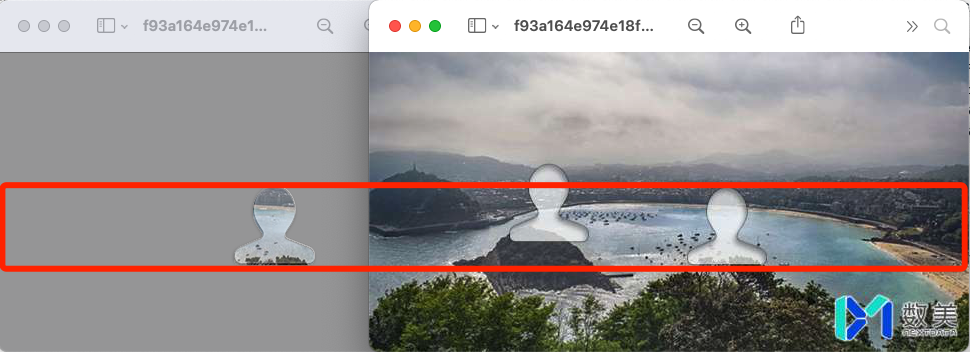
背景
2、计算前景图非透明区域的边界
计算方法:Python 图像处理:计算 PNG 非透明区域最小外接矩形

3、裁切前景图和背景图
背景图中两个相似块,以前景图的非透明边界去横切背景图,能排除干扰项

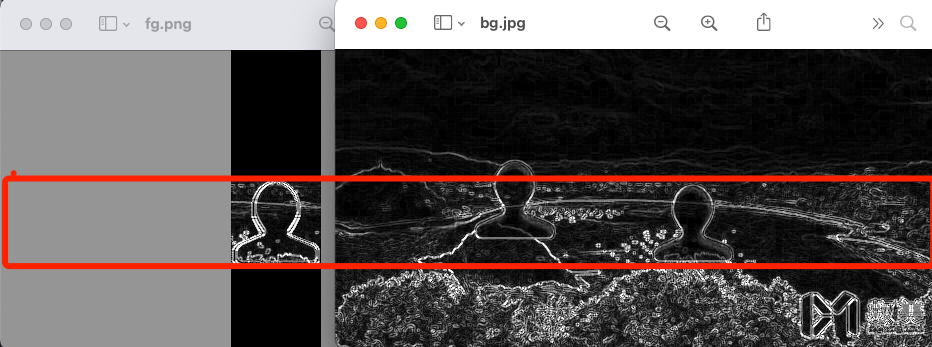
4、高斯滤波与边缘检测
为了提升图像匹配的准确性,使用高斯滤波与边缘检测算法,对图像预处理

5、模板匹配
使用 OpenCV 的 matchTemplate 匹配相似位置

实现源码
import cv2
import numpy as np


def template_match(image_bg, image_fg):
    res = cv2.matchTemplate(image_bg, image_fg, cv2.TM_CCOEFF)
    min_val, max_val, min_loc, max_loc = cv2.minMaxLoc(res)
    top_left = max_loc
    return top_left[0]


def sobel_edge(image):
    image_x = cv2.Sobel(image, cv2.CV_64F, 1, 0, ksize=3)
    abs_x = cv2.convertScaleAbs(image_x)
    image_y = cv2.Sobel(image, cv2.CV_64F, 0, 1, ksize=3)
    abs_y = cv2.convertScaleAbs(image_y)
    dst = cv2.addWeighted(abs_x, 0.5, abs_y, 0.5, 0)
    return np.asarray(dst, dtype=np.uint8)


def edge(img):
    np_data = np.array(img)
    rr = np.where(np_data != 0)
    xmin = min(rr[1])
    ymin = min(rr[0])
    xmax = max(rr[1])
    ymax = max(rr[0])
    return xmin, ymin, xmax, ymax


def read(path):
    image = cv2.imread(path, cv2.IMREAD_GRAYSCALE)
    image = cv2.GaussianBlur(image, (1, 1), 0)
    return sobel_edge(image)


if __name__ == '__main__':
    fg_image = read('f93a164e974e18fb3d9f35fc67d7c11d_bg.jpg')
    bg_image = read('f93a164e974e18fb3d9f35fc67d7c11d_fg.png')
    xmin, ymin, xmax, ymax = edge(fg_image)
    fg_image = fg_image[ymin:ymax, :]
    bg_image = bg_image[ymin:ymax, :]
    print(template_match(bg_image, fg_image))
Java版本
package com.p6spy.p6spy.controller.opencv;

import org.opencv.core.Core;
import org.opencv.core.Core.MinMaxLocResult;
import org.opencv.highgui.HighGui;
import org.opencv.core.CvType;
import org.opencv.core.Mat;
import org.opencv.core.Point;
import org.opencv.core.Size;
import org.opencv.imgcodecs.Imgcodecs;
import org.opencv.imgproc.Imgproc;
/***
 * @ClassName: Good-Good-Good-Good-Good-Good
 * @Description:
 * @Author liuren
 * @DateTime 2022年8月17日 下午3:35:50
 */
public class Good {

	private static String bigFilePath = "D:\\imageimage\\example\\003_big.png";
	private static String littleFilePath = "D:\\imageimage\\example\\003_little.png";
	public static String dllPath = "C://Windows//System32//opencv_java460.dll";

	public static void main(String[] args) {
		System.load(dllPath);
		Mat big_mat  = read(bigFilePath);
		Mat little_mat  = read(littleFilePath);
		double dist = template_match(big_mat, little_mat);
		System.out.println(dist);
	}

	public static Mat read(String path) {
		Mat img = Imgcodecs.imread(path);
		Mat grayImg = new Mat();
		/**
		 * 将图像img由BGR转为灰度图,结果保存到tempImg
		 */
		Imgproc.cvtColor(img, grayImg, Imgproc.COLOR_BGR2GRAY);

		/**
		 * 高斯滤波降噪
		 */
		Mat blurImg = new Mat();
		Imgproc.GaussianBlur(grayImg, blurImg, new Size(1,1), 0);
		return sobel_edge(blurImg);
	}

	public static Mat sobel_edge(Mat fileMat) {
		Mat dst = new Mat();
		Imgproc.Sobel(fileMat, dst, CvType.CV_64F, 1, 0, 3);
		Mat dst_new = new Mat();
		Core.convertScaleAbs(dst, dst_new);

		Mat dst_t = new Mat();
		Imgproc.Sobel(fileMat, dst_t, CvType.CV_64F, 1, 0, 3);
		Mat dst_f = new Mat();
		Core.convertScaleAbs(dst_t, dst_f);

		Mat dst_s = new Mat();
		Core.addWeighted(dst_new, 0.5, dst_f, 0.5, 0, dst_s);
		// 调用方法
		edge(dst_s);
		HighGui.imshow("title-1", dst_s);
		HighGui.waitKey(10);
		return dst_s;
	}

	public static void edge(Mat fileMat) {

	}

	public static double template_match(Mat image_bg, Mat image_fg) {
		Mat result = new Mat();
		Imgproc.matchTemplate(image_bg, image_fg, result, Imgproc.TM_CCOEFF); // 归一化平方差匹配法
		MinMaxLocResult  minMaxLocResult = Core.minMaxLoc(result);
		double min_val = minMaxLocResult.minVal;
		double max_val = minMaxLocResult.maxVal;
		Point min_loc = minMaxLocResult.minLoc;
		Point max_loc = minMaxLocResult.maxLoc;
		return max_loc.x;
	}


}
=====================================================================
 不定期会发布一些实用的Java开发文章


【推荐】国内首个AI IDE,深度理解中文开发场景,立即下载体验Trae
【推荐】编程新体验,更懂你的AI,立即体验豆包MarsCode编程助手
【推荐】抖音旗下AI助手豆包,你的智能百科全书,全免费不限次数
【推荐】轻量又高性能的 SSH 工具 IShell:AI 加持,快人一步
· 无需6万激活码!GitHub神秘组织3小时极速复刻Manus,手把手教你使用OpenManus搭建本
· C#/.NET/.NET Core优秀项目和框架2025年2月简报
· 什么是nginx的强缓存和协商缓存
· 一文读懂知识蒸馏
· Manus爆火,是硬核还是营销?