WPF之动画基础
之前的总结
动画部分的内容比较多,会分几个部分总结,年后会分享高级动画部分,2019年希望能养成写博客总结的好习惯,还有之前在印象笔记中总结的东西也陆续写到博客中,感兴趣的小伙伴可以关注下,希望对你有所帮助!
理解WPF动画
在许多用户框架中,开发人员必须从头构建自己的动画系统。最常用的技术是结合使用计时器和一些自定义的绘图逻辑。WPF通过自带的基于属性的动画系统,改变了这种状况。
基于时间的动画
例如需要旋转Windows窗体应用程序中的About对话框中的一块文本。下面是构建改解决方案的传统方法。
- 创建周期性触发的计时器。
- 当触发器出发时,使用事件处理程序计算一些与动画相关的细节,如新的旋转角度。然后使窗口的一部分或整个窗口无效。
- 不久后,Windows将要求窗口重新绘制自身,触发自定义的绘图代码。
- 在自定义绘图代码中,渲染旋转后的文本。
尽管整个基于计时器的解决方案不难实现。但将它集成到普通的应用程序窗口中却非常麻烦,存在如下问题
- 绘制像素而不是控件。为选择Windows窗体中的文本,需要低级的GDI+绘图支持。GDI+易于使用,但却不能与普通的窗口元素很好的相互协调。
- 假定单一动画。如果需要运行两个动画。就需要重新编写所有动画代码,变得更复杂。
- 动画帧率是固定的。计时器决定了帧率,想修改,还可能修改代码。
- 复杂动画需要指数级增长的更复杂的代码。
基于属性的动画
WPF提供了一个更高级的模型,通过该模型可以只关注动画的定义,而不必考虑他们的渲染方式。这个模型基于依赖项属性基础架构。本质上,WPF动画只不过是在一段时间间隔内修改依赖项属性值的一种方式。
例如,为了增大和缩小按钮,可在动画中修改按钮的宽度。为使按钮闪烁,可修改用于按钮背景的LinearGradientBrush属性。创建动画的秘密在于决定需要修改什么样的属性。
Animotion类
动画种类,在System.Windows.Media.Animation名称控件中将发现以下内容。
- 17个“类型名+Animation”类,这些类使用插值。(在开始值和结束值之间以逐步增加的方式。)
- 22个“类型名+AnimationUsingKeyFrames”类,这些类使用关键帧动画。(从一个值突然变成另一个值。)
- 3个“类型名+AnimationUsingPath”类,这些类使用基于路径的动画。
使用代码创建动画
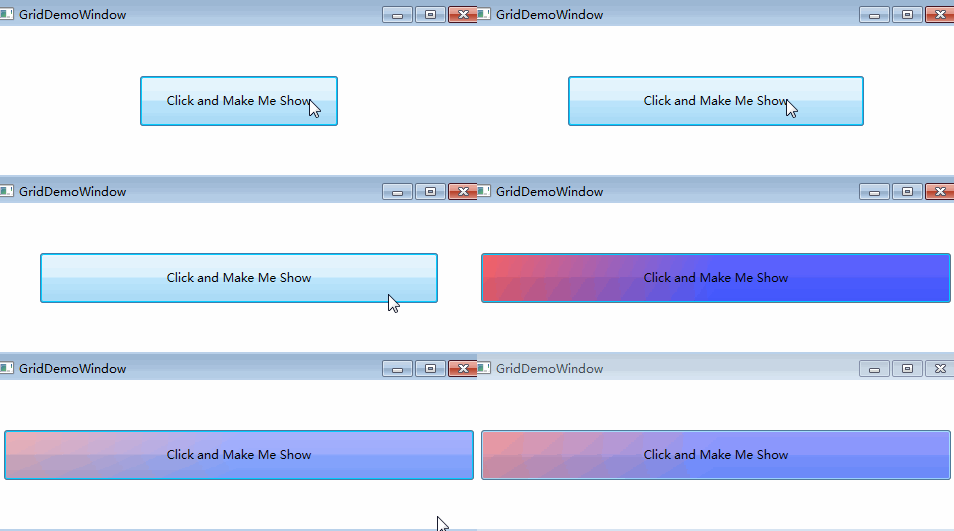
<Grid>
        <Button Name="btnShow"  Width="300" Height="50" VerticalAlignment="Center" HorizontalAlignment="Center" Click="Button_Click">
            <Button.Background>
                <LinearGradientBrush>
                    <GradientStop Color="Red" Offset="0"></GradientStop>
                    <GradientStop Color="Blue" Offset="0.5"></GradientStop>
                </LinearGradientBrush>
            </Button.Background>
            Click and Make Me Show</Button>
    </Grid>
 DoubleAnimation withAnimation = new DoubleAnimation();
            withAnimation.From =btnShow.ActualWidth;
            withAnimation.To = this.Width - 30;
            withAnimation.Duration = TimeSpan.FromSeconds(5);
            btnShow.BeginAnimation(Button.WidthProperty, withAnimation);

1.From属性
Form值是Width属性的开始值。如果多次单击按钮,每次单击的时,都会将Width属性重新设置为160.并且重新开始运行动画。
在许多情况下可能不希望动画从最初的From值开始。有两个常见的原因。
-
创建能够被触发多次,并逐次累加的动画效果。例如,可能希望创建每次点击都增大一点的按钮。
-
创建可能相互重叠的动画。例如,可使用MouseEnter事件触发扩展按钮的动画,并使用MouseLeave事件触发将按钮缩小为原尺寸的互补动画(这通常称为"鱼眼"效果)。
如上面的效果可以不指定初始值。
DoubleAnimation withAnimation = new DoubleAnimation();
            withAnimation.To = this.Width - 30;
            withAnimation.Duration = TimeSpan.FromSeconds(5);
            btnShow.BeginAnimation(Button.WidthProperty, withAnimation);
ActualWidth和Width属性的区别,Width属性反应的是选择的期望宽度,而AcutalWidth值指示的是最终使用的渲染宽度。如果使用自动布局,可能根本就没有设置硬编码的Width值,所Width属性只会返回Double.NaN值,开始动画时会抛异常。
2.To属性
就像可省略From属性一样也可省略To属性。
3.By属性
By属性用于创建按钮设置的数量改变值的动画,而不是目标改变值。
  DoubleAnimation withAnimation = new DoubleAnimation();
            withAnimation.By = 10;
            withAnimation.Duration = TimeSpan.FromSeconds(5);
            btnShow.BeginAnimation(Button.WidthProperty, withAnimation);
4.Duration属性
在动画开始时刻和结束时刻之间的时间间隔。
Timeline类
动画类继承自Timeline抽象类,有三个主要子类,播放音频或视频文件时使用的MediaTimeline类,基于属性的AnimationTimeline类,允许同步时间线并控制他们的播放速度的TimelineGroup类。
Timeline类属性
|
名称
|
说明
|
| BeginTime | 设置被添加到动画开始之前的延迟时间(TimeSpan类型)。这一延迟被加到总时间,所以具有5秒延迟的5秒动画,总时间是10秒。当按顺序应用效果不同的动画时,BeginTime属性是很有用的。 |
| Duration | 使用Duration对象设置动画从开始到结束的时间。 |
| SpeedRadio | 提高或减慢动画速度。通常,SpeedRadio属性值是1。如果增加该属性值,动画会加快(例如,如果SpeedRadio属性的值为5,动画的速度会变为原来的5倍);如果减小该属性的值,动画会变慢。可通过改变动画的Duration属性值得到相同的结果。当应用BeginTime延迟时,不考虑SpeedRadio属性的值。 |
|
AccelerationRadio
DecelerationRadio
|
使动画不是线性的,从开始时较慢,然后增速(通过增加AccelarationRadio属性值);或者结束时降低速度(通过增加Decelaration属性值。)这两个值都在0到1之间。初始值都是0. |
| AutoReverse | 如果为True,当动画完成时会自动反向播放,返回到原始值。这也会使动画的运行时间加倍。如果增加SpeedRatio属性值,就会应用到最初的动画播放以及反向的动画播放。BeginTime属性值只应用于动画的开始-不延迟反向动画。 |
| FillBehavior | 决定当动画结束时如何操作。通常,可将属性值保持为固定的结算值(FillBehavior.HoldEnd),但是也可以选择将属性值返回原来的数值(FillBehavior.Stop) |
| RepeatBehavior | 通过该属性,可以使用指定的次数或时间间隔重复动画。 |
withAnimation.RepeatBehavior = new RepeatBehavior(3);//重复3个
withAnimation.RepeatBehavior = new RepeatBehavior(TimeSpan.FromSeconds(13));//重复13秒
withAnimation.RepeatBehavior = RepeatBehavior.Forever;//一直重复
故事板
WPF动画使用了极少数的属性设置信息,如开始值、结束值以及持续时间。非常适合于XAML。不是很清晰的是如何为特定的事件和属性关联动画,以及如何在正确的时间触发动画。
在所有声明式动画中都会用到如下两个要素:
-
故事板。故事板是BeginAnimation()方法的XAML等价物。通过故事板将动画指定到合适的元素和属性。
-
事件触发器。时间触发器相应属性变化或事件,并控制故事板。
故事板是增强的时间线,可用来分组多个动画,具有控制动画播放的能力,暂停、停止以及改变播放位置。通过TargetProperty和TargetName属性值指向某个元素和特定属性。
 <Button Padding="10" Name="cmdGrow" Height="40" Width="160" HorizontalAlignment="Center" VerticalAlignment="Center">
            <Button.Triggers>
                <EventTrigger RoutedEvent="Button.Click">
                    <EventTrigger.Actions>
                        <BeginStoryboard>
                            <Storyboard>
                                <DoubleAnimation AutoReverse="True" Storyboard.TargetName="cmdGrow" Storyboard.TargetProperty="Width" Duration="0:0:5" To=" 300"></DoubleAnimation>
                            </Storyboard>
                        </BeginStoryboard>
                    </EventTrigger.Actions>
                </EventTrigger>
            </Button.Triggers>
            <Button.Content>
                Click Me And Make Me Grow
            </Button.Content>
        </Button>
Storyboard.TargetProperty 如果没有提供类的名称,故事板使用父元素。如果希望设置附加属性,用如下语法。
Storyboard.TargetProperty="(Canvas.Left)"
样式触发器
<Window.Resources>
        <Style x:Key="GrowButtonStyle">
            <Style.Triggers>
                <Trigger Property="Button.IsPressed" Value="True">
                    <Trigger.EnterActions>
                        <BeginStoryboard>
                            <Storyboard>
                                <DoubleAnimation AutoReverse="True"  Storyboard.TargetProperty="Width" Duration="0:0:5" To=" 300"></DoubleAnimation>
                            </Storyboard>
                        </BeginStoryboard>
                    </Trigger.EnterActions>
                </Trigger>
            </Style.Triggers>
        </Style>
    </Window.Resources>
    <Grid>
        <Button Padding="10"  Style="{StaticResource GrowButtonStyle}" Name="cmdGrow" Height="40" Width="160" HorizontalAlignment="Center" VerticalAlignment="Center">
            <Button.Content>
                Click Me And Make Me Grow
            </Button.Content>
        </Button>
    </Grid>
</Window>
同步的动画
<EventTrigger RoutedEvent="Button.Click">
                    <EventTrigger.Actions>
                        <BeginStoryboard>
                            <Storyboard>
                                <DoubleAnimation AutoReverse="True" Storyboard.TargetName="cmdGrow" Storyboard.TargetProperty="Width" Duration="0:0:5" To=" 300"></DoubleAnimation>
                                <DoubleAnimation AutoReverse="True" Storyboard.TargetName="cmdGrow" Storyboard.TargetProperty="Height" Duration="0:0:5" To=" 300"></DoubleAnimation>
                            </Storyboard>
                        </BeginStoryboard>
                    </EventTrigger.Actions>
                </EventTrigger>
控制播放
一旦创建故事板,就可以用其他动作控制故事板。这些动作都继承自ControllableStoryboardAction类。
|
名称
|
说明
|
| PauseStoryboard | 停止播放动画并且保持其当前位置。 |
| ResumeStroyboard | 恢复播放暂停的动画。 |
| StopStoryboard | 停止播放动画,并将动画时钟重新设置到开始位置。 |
| SeekStoryboard | 跳到动画线中的特定位置。如果动画正在播放,就继续从新位置播放。如果动画是暂停的,就继续保持暂停。 |
| SetStoryboardSpeedRadio | 改变整个故事板的SpeedRatio属性值。 |
| SkipStoryboardToFill | 讲故事板移到时间线的终点。 |
| RemoveStoryboard | 移除故事板,停止所有在运行的动画并将属性返回原来的、最后一次设置的值。 |
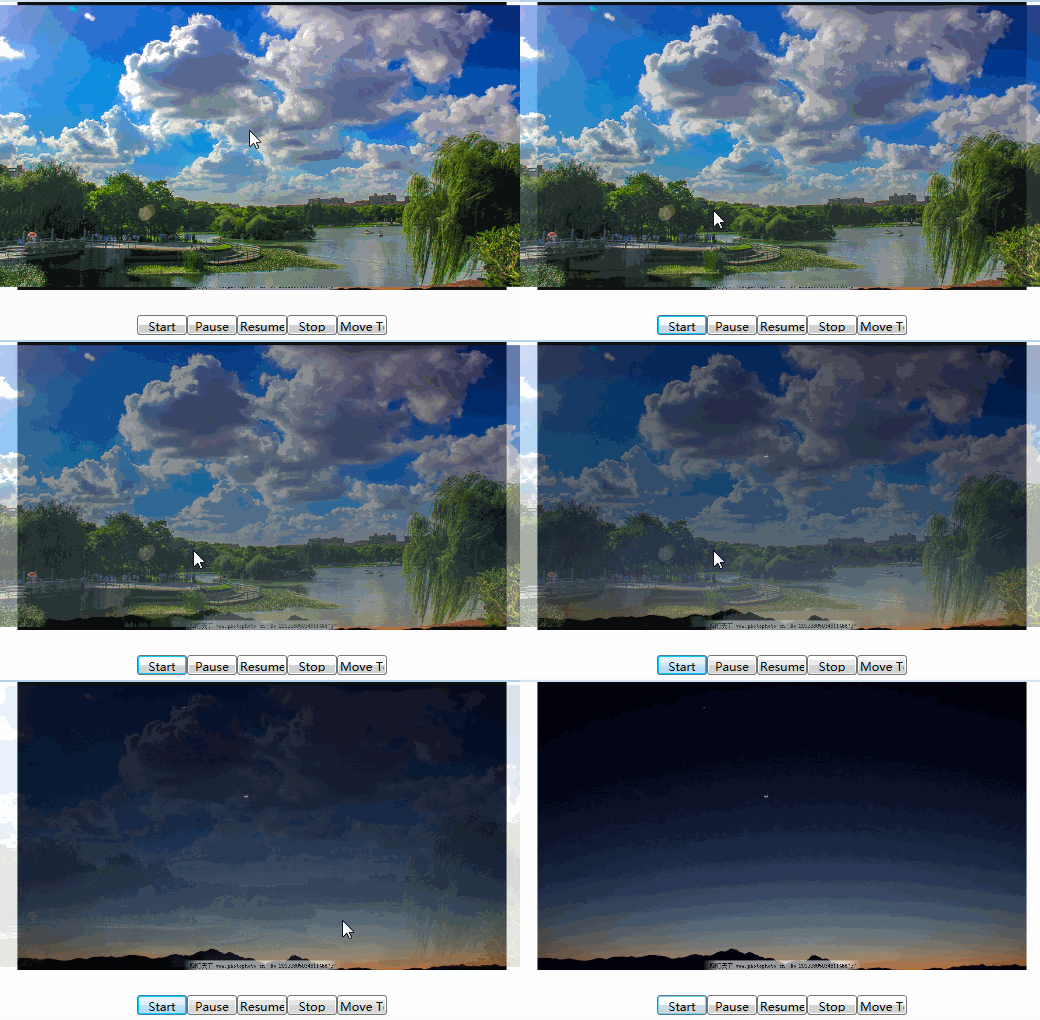
白天过度到黑夜动画效果

    <Window.Triggers>
        <EventTrigger SourceName="cmdStart" RoutedEvent="Button.Click">
            <BeginStoryboard Name="fadeStoryboardBegin">
                <Storyboard>
                    <DoubleAnimation Storyboard.TargetName="imgDay" Storyboard.TargetProperty="Opacity" From="1" To="0" Duration="0:0:10"></DoubleAnimation>
                </Storyboard>
            </BeginStoryboard>
        </EventTrigger>
        <EventTrigger SourceName="cmdPause" RoutedEvent="Button.Click">
            <PauseStoryboard BeginStoryboardName="fadeStoryboardBegin"></PauseStoryboard>
        </EventTrigger>
        <EventTrigger SourceName="cmdResume" RoutedEvent="Button.Click">
            <RemoveStoryboard BeginStoryboardName="fadeStoryboardBegin"></RemoveStoryboard>
        </EventTrigger>
        <EventTrigger SourceName="cmdStop" RoutedEvent="Button.Click">
            <StopStoryboard BeginStoryboardName="fadeStoryboardBegin"></StopStoryboard>
        </EventTrigger>
        <EventTrigger SourceName="cmdMiddle" RoutedEvent="Button.Click">
            <SeekStoryboard BeginStoryboardName="fadeStoryboardBegin" Offset="0:0:5"></SeekStoryboard>
        </EventTrigger>
    </Window.Triggers>
    <Grid>
        <Grid.RowDefinitions>
            <RowDefinition Height="*"></RowDefinition>
            <RowDefinition Height="60"></RowDefinition>
        </Grid.RowDefinitions>
        <Image Source="http://pic28.photophoto.cn/20130805/0034034811466737_b.jpg"></Image>
        <Image Source="http://img.pconline.com.cn/images/upload/upc/tx/itbbs/1608/11/c3/25402170_1470872089662_mthumb.jpg" Name="imgDay"></Image>
        <StackPanel Orientation="Horizontal" HorizontalAlignment="Center" Margin="5" Grid.Row="1" Height="60">
            <Button Name="cmdStart" Height="20" Width="50">Start</Button>
            <Button Name="cmdPause" Height="20" Width="50">Pause</Button>
            <Button Name="cmdResume" Height="20" Width="50">Resume</Button>
            <Button Name="cmdStop" Height="20" Width="50">Stop</Button>
            <Button Name="cmdMiddle" Height="20" Width="50">Move To Middle</Button>
        </StackPanel>
    </Grid>


