简洁好用的数据库表结构文档生成工具
1、pom依赖
创建springboot项目,勾选依赖
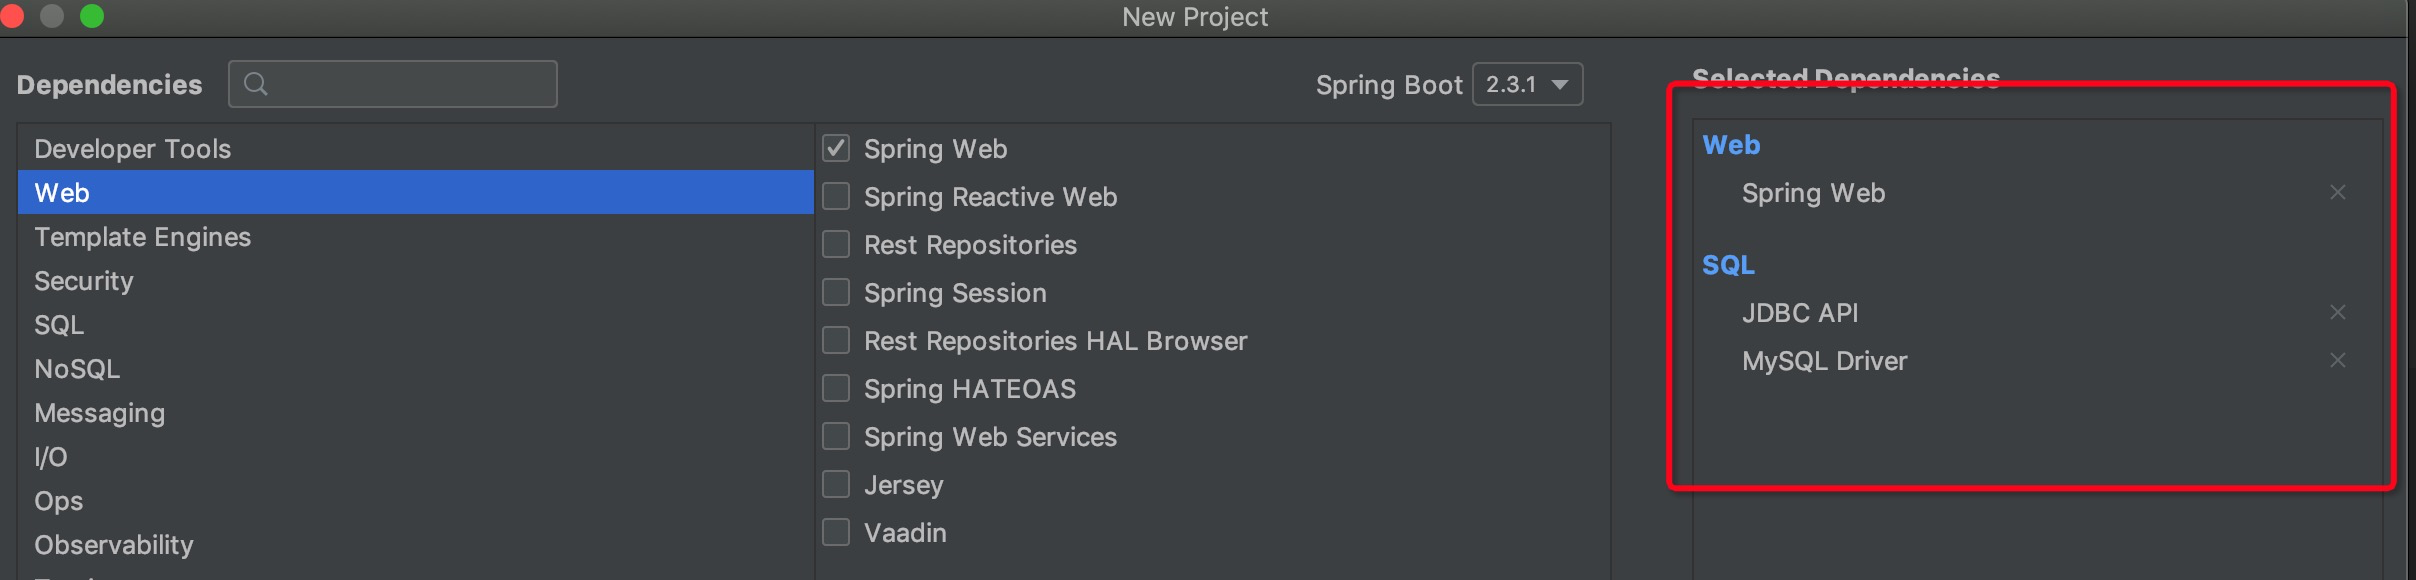
添加screw需要的依赖,检查是否最新版本,链接地址->最新版本
<dependency\>
 <groupId\>org.freemarker</groupId\>
 <artifactId\>freemarker</artifactId\>
 <version\>2.3.30</version\> </dependency\>
<dependency\>
 <groupId\>cn.smallbun.screw</groupId\>
 <artifactId\>screw-core</artifactId\>
 <version\>1.0.3</version\>
</dependency\>
2、测试类
下面填写自己的mysql账号密码
spring.datasource.url=
spring.datasource.username=
spring.datasource.password=
spring.datasource.driver-class-name=com.mysql.cj.jdbc.Driver
spring.datasource.xa.properties.useInformationSchema=true
3、生成文档测试类
/Users/mac/Desktop 这个是自己电脑的路径,我的是mac,windows需要更换路径
import cn.smallbun.screw.core.Configuration;
import cn.smallbun.screw.core.engine.EngineConfig;
import cn.smallbun.screw.core.engine.EngineFileType;
import cn.smallbun.screw.core.engine.EngineTemplateType;
import cn.smallbun.screw.core.execute.DocumentationExecute;
import cn.smallbun.screw.core.process.ProcessConfig;
import org.junit.jupiter.api.Test;
import org.springframework.beans.factory.annotation.Autowired;
import org.springframework.boot.test.context.SpringBootTest;
import org.springframework.context.ApplicationContext;

import javax.sql.DataSource;
import java.util.ArrayList;
import java.util.Arrays;
import java.util.List;

@SpringBootTest
class ScrewApplicationTests {

   @Autowired
   ApplicationContext applicationContext;

   @Test
   void contextLoads() {
      DataSource dataSourceMysql = applicationContext.getBean(DataSource.class);

      // 生成文件配置
      EngineConfig engineConfig = EngineConfig.builder()
            // 生成文件路径,自己mac本地的地址,这里需要自己更换下路径
            .fileOutputDir("/Users/mac/Desktop")
            // 打开目录
            .openOutputDir(false)
            // 文件类型
            .fileType(EngineFileType.HTML)
            // 生成模板实现
            .produceType(EngineTemplateType.freemarker).build();

      // 生成文档配置(包含以下自定义版本号、描述等配置连接)
      Configuration config = Configuration.builder()
            .version("1.0.3")
            .description("生成文档信息描述")
            .dataSource(dataSourceMysql)
            .engineConfig(engineConfig)
            .produceConfig(getProcessConfig())
            .build();

      // 执行生成
      new DocumentationExecute(config).execute();
   }


   /**
    * 配置想要生成的表+ 配置想要忽略的表
    * @return 生成表配置
    */
   public static ProcessConfig getProcessConfig(){
      // 忽略表名
      List<String> ignoreTableName = Arrays.asList("aa","test_group");
      // 忽略表前缀,如忽略a开头的数据库表
      List<String> ignorePrefix = Arrays.asList("a","t");
      // 忽略表后缀
      List<String> ignoreSuffix = Arrays.asList("_test","czb_");

      return ProcessConfig.builder()
            //根据名称指定表生成
            .designatedTableName(new ArrayList<>())
            //根据表前缀生成
            .designatedTablePrefix(new ArrayList<>())
            //根据表后缀生成
            .designatedTableSuffix(new ArrayList<>())
            //忽略表名
            .ignoreTableName(ignoreTableName)
            //忽略表前缀
            .ignoreTablePrefix(ignorePrefix)
            //忽略表后缀
            .ignoreTableSuffix(ignoreSuffix).build();
   }
}
4、启动
点击test启动,运行结果,如下


很方便的结合公司的业务需求来使用。
5、链接
文档工具screw:https://gitee.com/leshalv/screw
艾欧尼亚,昂扬不灭,为了更美好的明天而战(#^.^#)

 浙公网安备 33010602011771号