基于SpringBoot实现一个可扩展的事件总线
前言
在日常开发中,我们经常会用到事件总线,SpringBoot通过事件多播器的形式为我们提供了一个事件总线,但是在开发中我们经常会用到其他的实现,比如Guava、Disruptor的。我们将基于SpringBoot封装一套底层驱动可扩展的,统一api的事件驱动组件。
环境准备
jdk1.8
spring-boot-autoconfigure
Guava
Disruptor
pom文件如下
<?xml version="1.0" encoding="UTF-8"?>
<project xmlns="http://maven.apache.org/POM/4.0.0" xmlns:xsi="http://www.w3.org/2001/XMLSchema-instance"
         xsi:schemaLocation="http://maven.apache.org/POM/4.0.0 https://maven.apache.org/xsd/maven-4.0.0.xsd">
    <modelVersion>4.0.0</modelVersion>
    <parent>
        <groupId>org.springframework.boot</groupId>
        <artifactId>spring-boot-starter-parent</artifactId>
        <version>2.7.5</version>
        <relativePath/> <!-- lookup parent from repository -->
    </parent>
    <groupId>com.billetsdoux</groupId>
    <artifactId>eventBus</artifactId>
    <version>1.0.0</version>
    <name>eventBus</name>
    <description>eventBus</description>
    <properties>
        <java.version>1.8</java.version>
    </properties>
    <dependencies>
        <dependency>
            <groupId>org.springframework.boot</groupId>
            <artifactId>spring-boot-starter</artifactId>
        </dependency>

        <dependency>
            <groupId>com.google.guava</groupId>
            <artifactId>guava</artifactId>
            <version>31.1-jre</version>
        </dependency>

        <dependency>
            <groupId>cn.hutool</groupId>
            <artifactId>hutool-all</artifactId>
            <scope>compile</scope>
            <version>5.8.9</version>
        </dependency>

        <dependency>
            <groupId>com.lmax</groupId>
            <artifactId>disruptor</artifactId>
            <version>3.4.4</version>
        </dependency>

        <dependency>
            <groupId>org.projectlombok</groupId>
            <artifactId>lombok</artifactId>
        </dependency>

        <dependency>
            <groupId>org.springframework.boot</groupId>
            <artifactId>spring-boot-autoconfigure</artifactId>
        </dependency>
    </dependencies>


</project>
组件介绍
整体架构
目录结构如下:
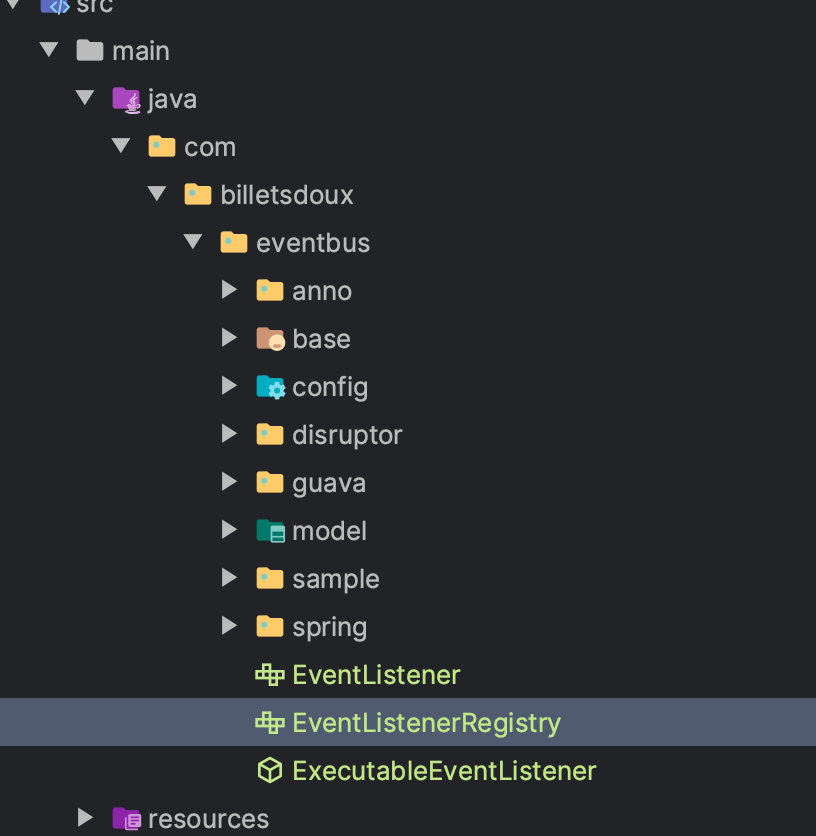
我们的核心是一个EventListenerRegistry,它便是我们提供统一api的入口,它有两个方法,一个是init方法,在SpringBoot容器启动的时候会去注册我们所有的事件监听器,publish 方法则为事件发布的方法。这里我为它提供了3种实现,Guava,Spring,Disruptor

EventModel
这是我们定义的事件模型,topic为事件主题,我们通过不同的topic对应不同的事件处理器,entity为具体的事件对象模型
package com.billetsdoux.eventbus.model;

import lombok.Data;
import lombok.NoArgsConstructor;

import java.io.Serializable;

@Data
@NoArgsConstructor
public class EventModel<T> implements Serializable {

    /**
     *  事件发布主题
     */
    private String topic;

    /**
     *  事件对象模型
     */
    private T entity;
}
EventListener
EventListener 为事件消费接口,定义了2个方法,topic() 为监听的事件topic,onMessage()为事件的回调接口。
package com.billetsdoux.eventbus;

/**
 *  消费接口
 */
public interface EventListener<T> {

    String topic();

    void onMessage(T message);
}
EventListenerRegistry
这边是我们之前介绍的事件核心接口,它提供两个接口 initRegistryEventListener 负责注册我们所定义的所有事件监听器,publish 负责发送消息,我们底层的驱动需要继承这个接口。
public interface EventListenerRegistry<P> {
    void initRegistryEventListener(List<EventListener> eventConsumerList);

    void publish(P param);
}
SpringEventListenerRegistry
这是我们通过Spring为我们提供的消息多播器来实现的一个事件驱动。这个类被@Component标记,那么它会在容器启动的时候,通过构造器为我们注入 eventListeners ,applicationContext 。eventListeners 为所有实现了EventListener接口,并被注入到容器里面的类。
initRegistryEventListener 这是一个空方法,因为他们本身已经在容器中了,所以不需要注册了
publish: 直接调用applicationContext.publishEvent就可以了。
package com.billetsdoux.eventbus.spring;
import com.billetsdoux.eventbus.EventListener;
import com.billetsdoux.eventbus.EventListenerRegistry;
import com.billetsdoux.eventbus.model.EventModel;
import lombok.RequiredArgsConstructor;
import lombok.extern.slf4j.Slf4j;
import org.springframework.context.ApplicationContext;
import org.springframework.stereotype.Component;

import javax.annotation.PostConstruct;
import java.util.List;

@RequiredArgsConstructor
@Slf4j
@Component
public class SpringEventListenerRegistry implements EventListenerRegistry<EventModel> {


    final ApplicationContext applicationContext;

    final List<EventListener> eventListeners;


    @Override
    public void initRegistryEventListener(List<EventListener> eventConsumerList) {

    }

    @Override
    public void publish(EventModel param) {
        applicationContext.publishEvent(param);
    }

    @PostConstruct
    public void init(){
        log.info("开始初始化Spring事件监听器的组件服务");
        initRegistryEventListener(eventListeners);
        log.info("完成初始化Spring事件监听器的组件服务");
    }
}
GuavaEventListenerRegistry
基于Guava来实现的事件总线,我们首先还是需要容器帮我们注入eventListeners。相较于Spring我们需要自己定义一个Guava的EventBus,然后把我们的Listener注册到这个EventBus中。
publish方法则是调用EventBus的post方法到。
package com.billetsdoux.eventbus.guava;

import cn.hutool.core.thread.ThreadUtil;

import com.billetsdoux.eventbus.EventListener;
import com.billetsdoux.eventbus.EventListenerRegistry;
import com.billetsdoux.eventbus.model.EventModel;
import com.google.common.eventbus.AsyncEventBus;
import com.google.common.eventbus.EventBus;
import lombok.extern.slf4j.Slf4j;
import org.springframework.objenesis.instantiator.util.ClassUtils;
import org.springframework.stereotype.Component;

import javax.annotation.PostConstruct;
import java.util.List;
import java.util.concurrent.ExecutorService;

@Component("guava")
@Slf4j
public class GuavaEventListenerRegistry implements EventListenerRegistry<EventModel> {

    EventBus eventBus;

    final List<EventListener> eventListeners;

    public GuavaEventListenerRegistry(List<EventListener> eventListeners) {
        this.eventListeners = eventListeners;
    }

    @Override
    public void initRegistryEventListener(List<EventListener> eventConsumerList) {
        final ExecutorService executor = ThreadUtil.newExecutor(10, 20, 300);
        eventBus = new AsyncEventBus(GuavaEventListenerRegistry.class.getName(),executor);
        eventConsumerList.forEach(param->{
            log.info("注册监听器:{}",param.getClass().getName());
            eventBus.register(ClassUtils.newInstance(param.getClass()));
        });
    }

    @Override
    public void publish(EventModel param) {
        eventBus.post(param);
    }

    @PostConstruct
    public void init(){

        log.info("开始初始化Guava事件监听器的组件服务");
        initRegistryEventListener(eventListeners);
        log.info("完成初始化Guava事件监听器的组件服务");
    }

}
DisruptorEventListenerRegistry
Disruptor的实现相对来说麻烦一点,它首先需要一个实现了EventFactory接口的类,它提供一个newInstance接口来创建事件对象模型。
具体的使用方式可以参考我这篇博文:Disruptor入门
EventModelFactory
我们首先还是需要注入我们的Listener,只是这里在init的时候是将我们的Listener交给我们的Disruptor去处理,我们先将Listener转成EventHandler,所以我们的监听器接口具体实现的时候除了实现我们定义的EventListener接口外还需要继承Disruptor的EventHandler接口。 调用disruptor.handleEventsWith(dataListener); 把我们的Listener交给Disruptor去管理。最后再启动Disruptor。
publish:调用Disruptor的RingBuffer来进行消息的发送。
/**
 *  事件工厂
 *  Disruptor 通过EventFactory在RingBuffer中预创建Event的实例
 * @param <T>
 */
public class EventModelFactory<T> implements EventFactory<EventModel<T>> {
    @Override
    public EventModel<T> newInstance() {
        return new EventModel<>();
    }
}
@Slf4j
@RequiredArgsConstructor
@Component("disruptor")
@Scope("prototype") // 线程安全问题
public class DisruptorEventListenerRegistry implements EventListenerRegistry<EventModel>,AutoCloseable {

    /**
     *  disruptor事件处理器
     */
    @Getter
    @Setter
    private Disruptor<EventModel> disruptor;

    @NonNull
    final List<EventListener> eventListeners;


    /**
     *  RingBuffer的大小
     */
    private final int DEFAULT_RING_SIZE = 1024 * 1024;

    /**
     *  事件工厂
     */
    private EventFactory<EventModel> eventFactory = new EventModelFactory();

    @Override
    public void initRegistryEventListener(List<EventListener> eventConsumerList) {

        disruptor = new Disruptor<>(eventFactory, DEFAULT_RING_SIZE, createThreadFactory(), ProducerType.SINGLE, new BlockingWaitStrategy());
        EventHandler[] dataListener = eventConsumerList.stream().map(param -> {
            EventListener<EventModel> eventModelEventListener = param;
            return eventModelEventListener;
        }).collect(Collectors.toList()).toArray(new EventHandler[eventConsumerList.size()]);
        log.info("注册服务信息接口:{}",dataListener);

        disruptor.handleEventsWith(dataListener);
        disruptor.start();
    }

    @Override
    public void publish(EventModel param) {
        publishEvent(param);
    }

    public void publishEvent(EventModel... eventModels){
        Objects.requireNonNull(disruptor, "当前disruptor核心控制器不可以为null");
        Objects.requireNonNull(eventModels, "当前eventModels事件控制器不可以为null");

        // 发布事件
        final RingBuffer<EventModel> ringBuffer = disruptor.getRingBuffer();
        try {
            final List<EventModel> dataList = Arrays.stream(eventModels).collect(Collectors.toList());

            for (EventModel element : dataList) {

                // 请求下一个序号
                long sequence = ringBuffer.next();

                // 获取该序号对应的事件对象
                EventModel event =  ringBuffer.get(sequence);
                event.setTopic(element.getTopic());
                event.setEntity(element.getEntity());
                ringBuffer.publish(sequence);

            }
        }catch (Exception e) {
            log.error("error",e);
        }

    }


    /**
     *  关闭处理机制
     * @throws Exception
     */
    @Override
    public void close() throws Exception {
        if (Objects.nonNull(disruptor)) disruptor.shutdown();

    }

    @PostConstruct
    public void init(){
        log.info("开始初始化Disruptor事件监听器的组件服务");
        initRegistryEventListener(eventListeners);
        log.info("完成初始化Disruptor事件监听器的组件服务");
    }

    private static ThreadFactory createThreadFactory(){
        AtomicInteger integer = new AtomicInteger();

        return r-> new Thread(r,"disruptor-"+integer.incrementAndGet());
    }


}
至此我们已经实现了我们的目标三个EventListenerRegistry,我们接下来看看我们Listener如何实现。
BaseEventListener
我们刚说过我们的Listener需要同时实现EventHandler跟EventListener,所以我们定义一个抽象类,注意这个EventListener是我们定义的,EventHandler是Disruptor定义的。
public abstract class BaseEventListener<T> implements EventListener<T>, EventHandler<T> {

}
ExecutableEventListener
我们定义一个抽象类ExecutableEventListener 我们来实现一下里面的方法。
对于Spring跟Guava来说只需要在方法上添加注解便可以在事件发生的时候回调过来,而对于Disruptor来说它的回调是继承EventHandler里面的onEvent方法。所以我们在onEvent里面手动调用onMessage方法,让所有的消息都转发给onMessage处理。
@org.springframework.context.event.EventListener Spring的回调注解
@Subscribe 的回调注解
onMessage:我们先调用topic()方法获取Listener方法的topic,这个方法我们这里先不实现,交给具体的实现类去实现这个方法。我们再定义一个handle的抽象方法,则是我们具体的消息处理逻辑的方法,也交给具体的实现类去实现。
@Slf4j
public abstract class ExecutableEventListener extends BaseEventListener<EventModel<?>> {

    @org.springframework.context.event.EventListener
    @Subscribe
    @Override
    public void onMessage(EventModel<?> message) {
        log.info("收到消息:{}",message);

        if (topic().equals(message.getTopic())){
            handle(message);
        }
    }

    @Override
    public void onEvent(EventModel<?> event, long sequence, boolean endOfBatch) throws Exception {
        onMessage(event);
    }

    /**
     *  具体消息处理方法
     * @param message
     */
    protected abstract void handle(EventModel<?> message);

}
至此我们的核心代码就开发完成了,现在定义两个注解,让我们能够在项目中启用它。
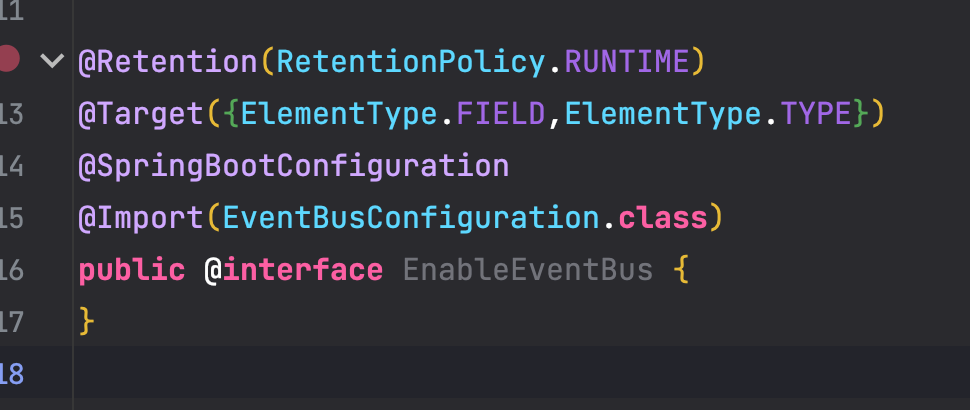
EnableEventBus:在启动类上添加这个注解以启用EventBus
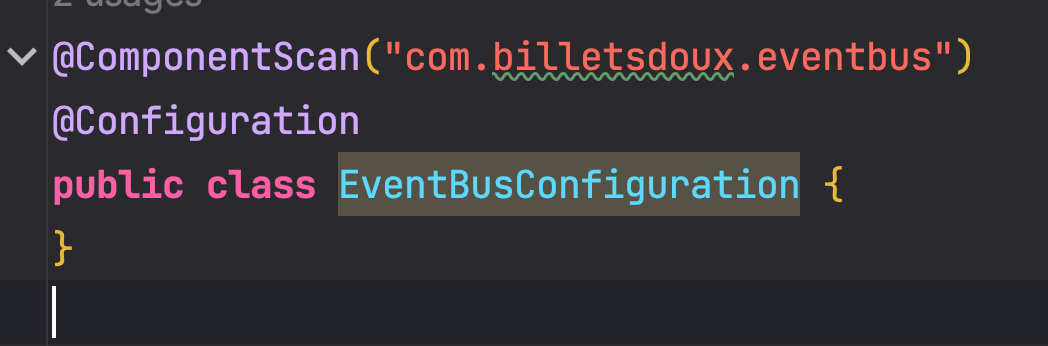
EventBusConfiguration:配置一下Spring的包扫描路径
测试
我们把我们刚写的项目install到本地maven仓库,以便我们在项目中能够引用它。我们新建一个SpringBootWeb项目添加这个依赖测试下
在pom中添加
  <dependency>
            <groupId>com.billetsdoux</groupId>
            <artifactId>eventBus</artifactId>
            <version>1.0.0</version>
        </dependency>
        <dependency>
            <groupId>org.springframework.boot</groupId>
            <artifactId>spring-boot-starter-web</artifactId>
        </dependency>
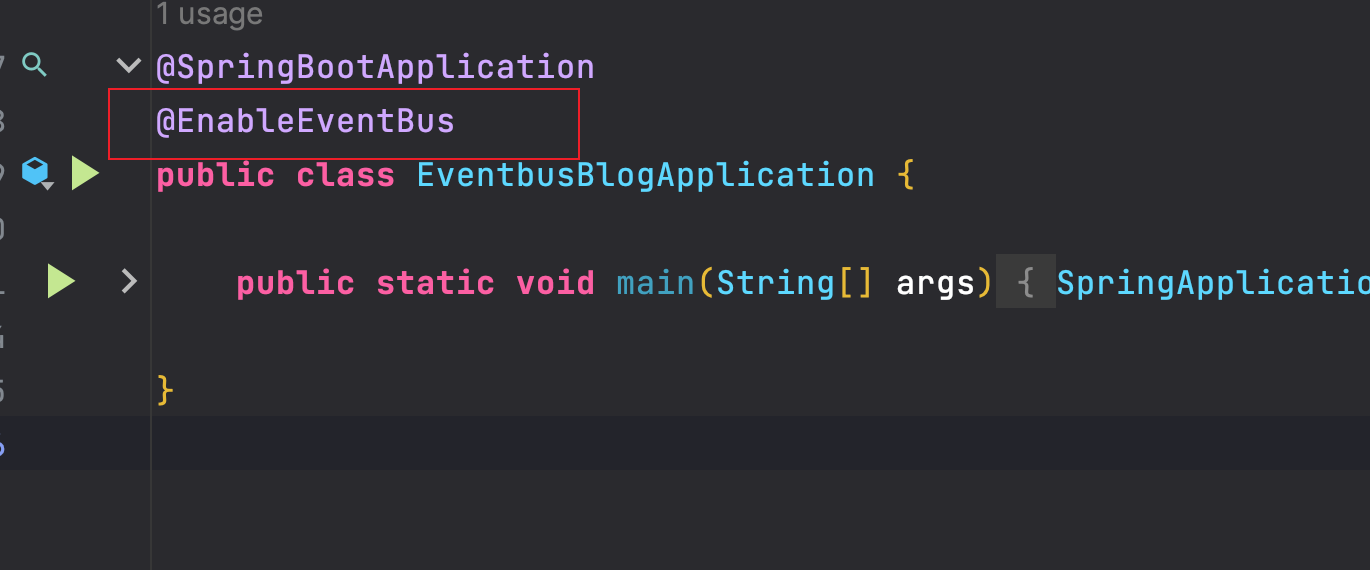
在启动类上添加这个注解启用
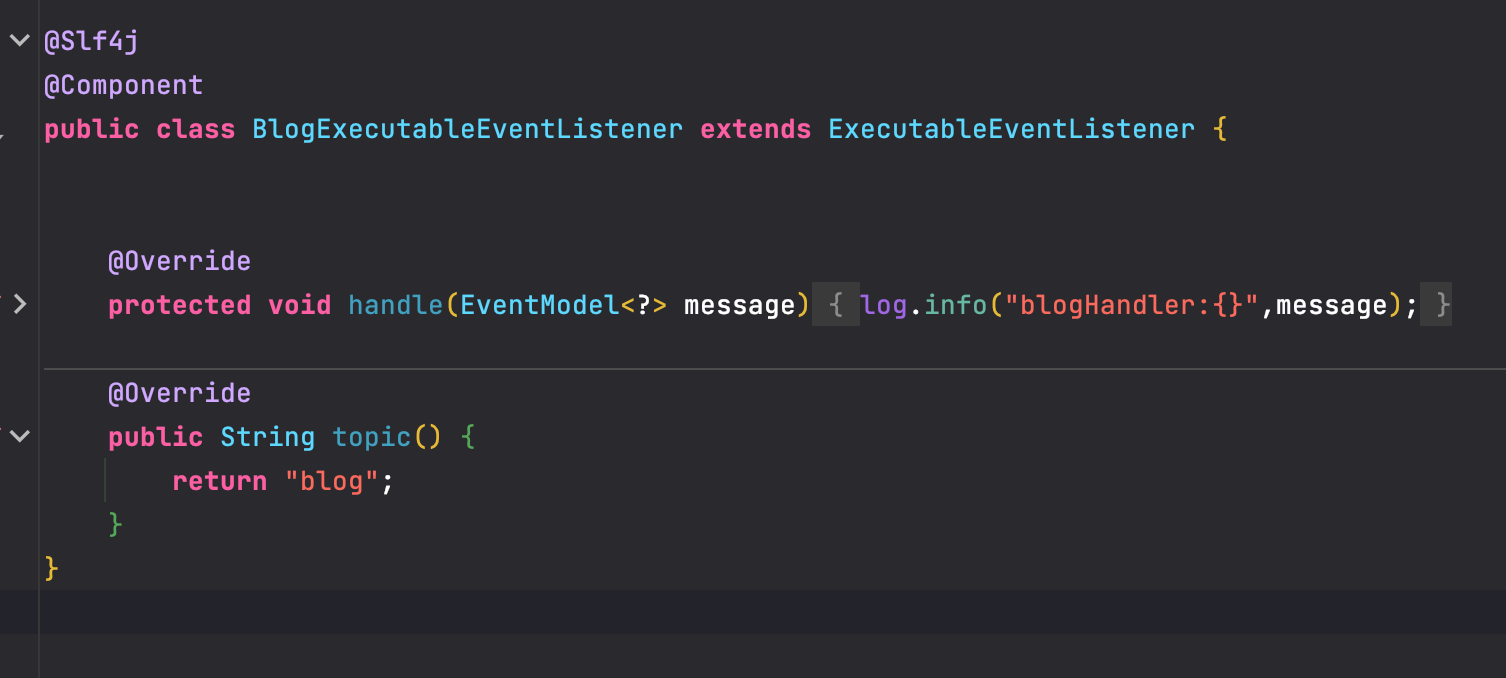
添加一个事件监听器,继承ExecutableEventListener,监听”blog“消息的主题。
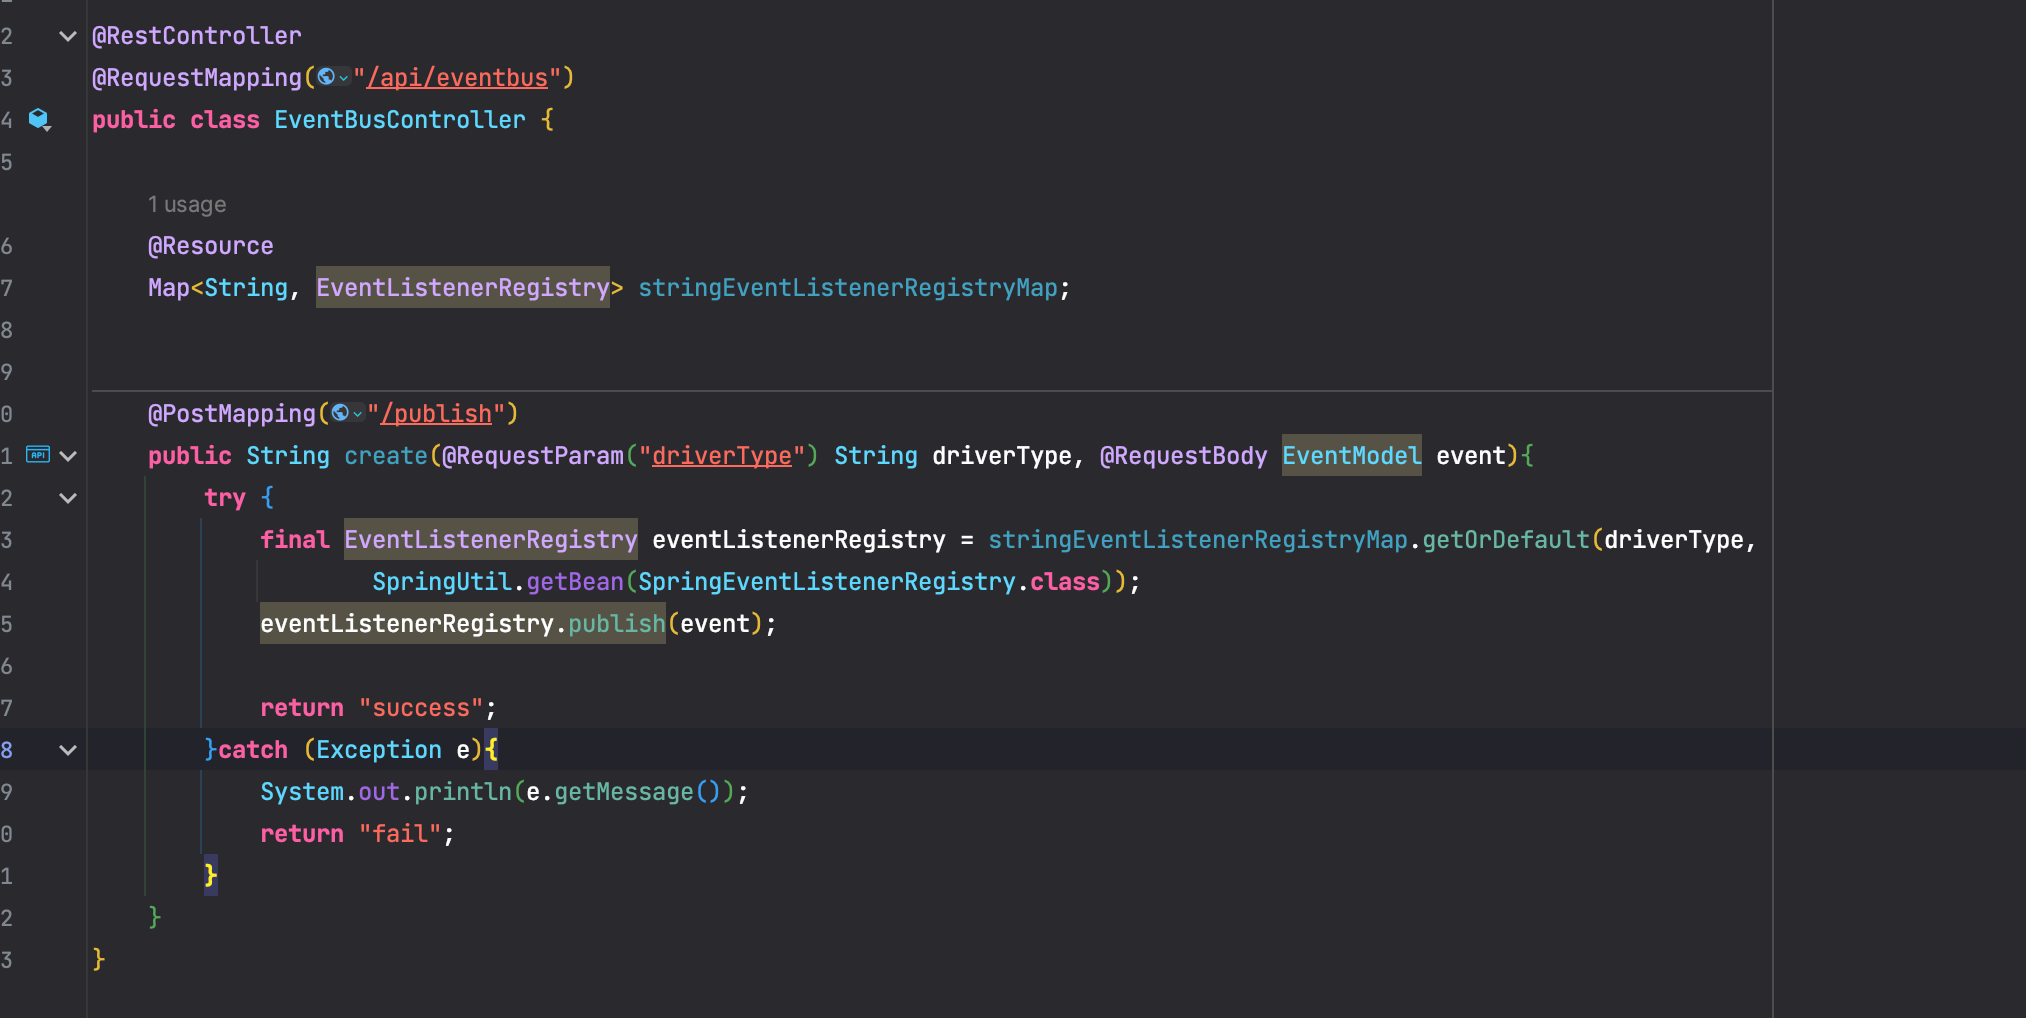
添加一个Controller来测试一下我们的事件总线。它根据我们的type来选择不同的底层驱动:spring,guava,disruptor
我们打包成docker镜像然后启动。
Dockerfile如下:
FROM openjdk:8-jre-slim
MAINTAINER billtsdoux

WORKDIR /app

ADD target/eventbus_blog*.jar app.jar

EXPOSE 8080

ENV JVM_OPTS="-Xmx256m -Xms256m" \
    TZ=Asia/Shanghai

RUN ln -sf /usr/share/zoneinfo/$TZ /etc/localtime \
    && echo $TZ > /etc/timezone

ENTRYPOINT ["sh","-c","java -jar $JVM_OPTS app.jar"]
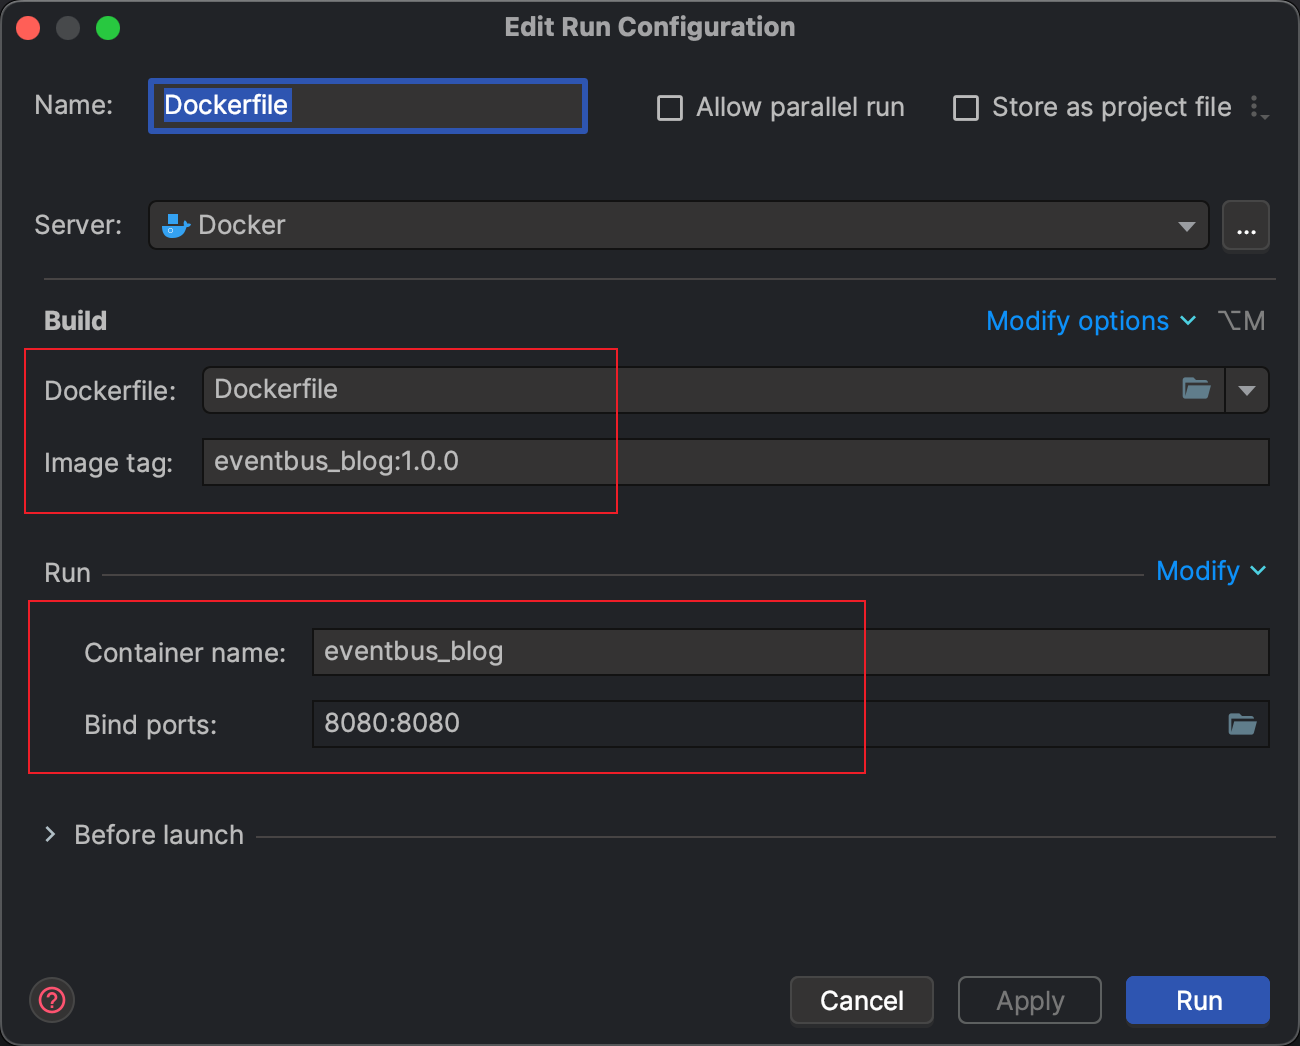
我们这里配置一下打包后镜像的名称,已经启动的容器名称跟监听的端口。
构建成功
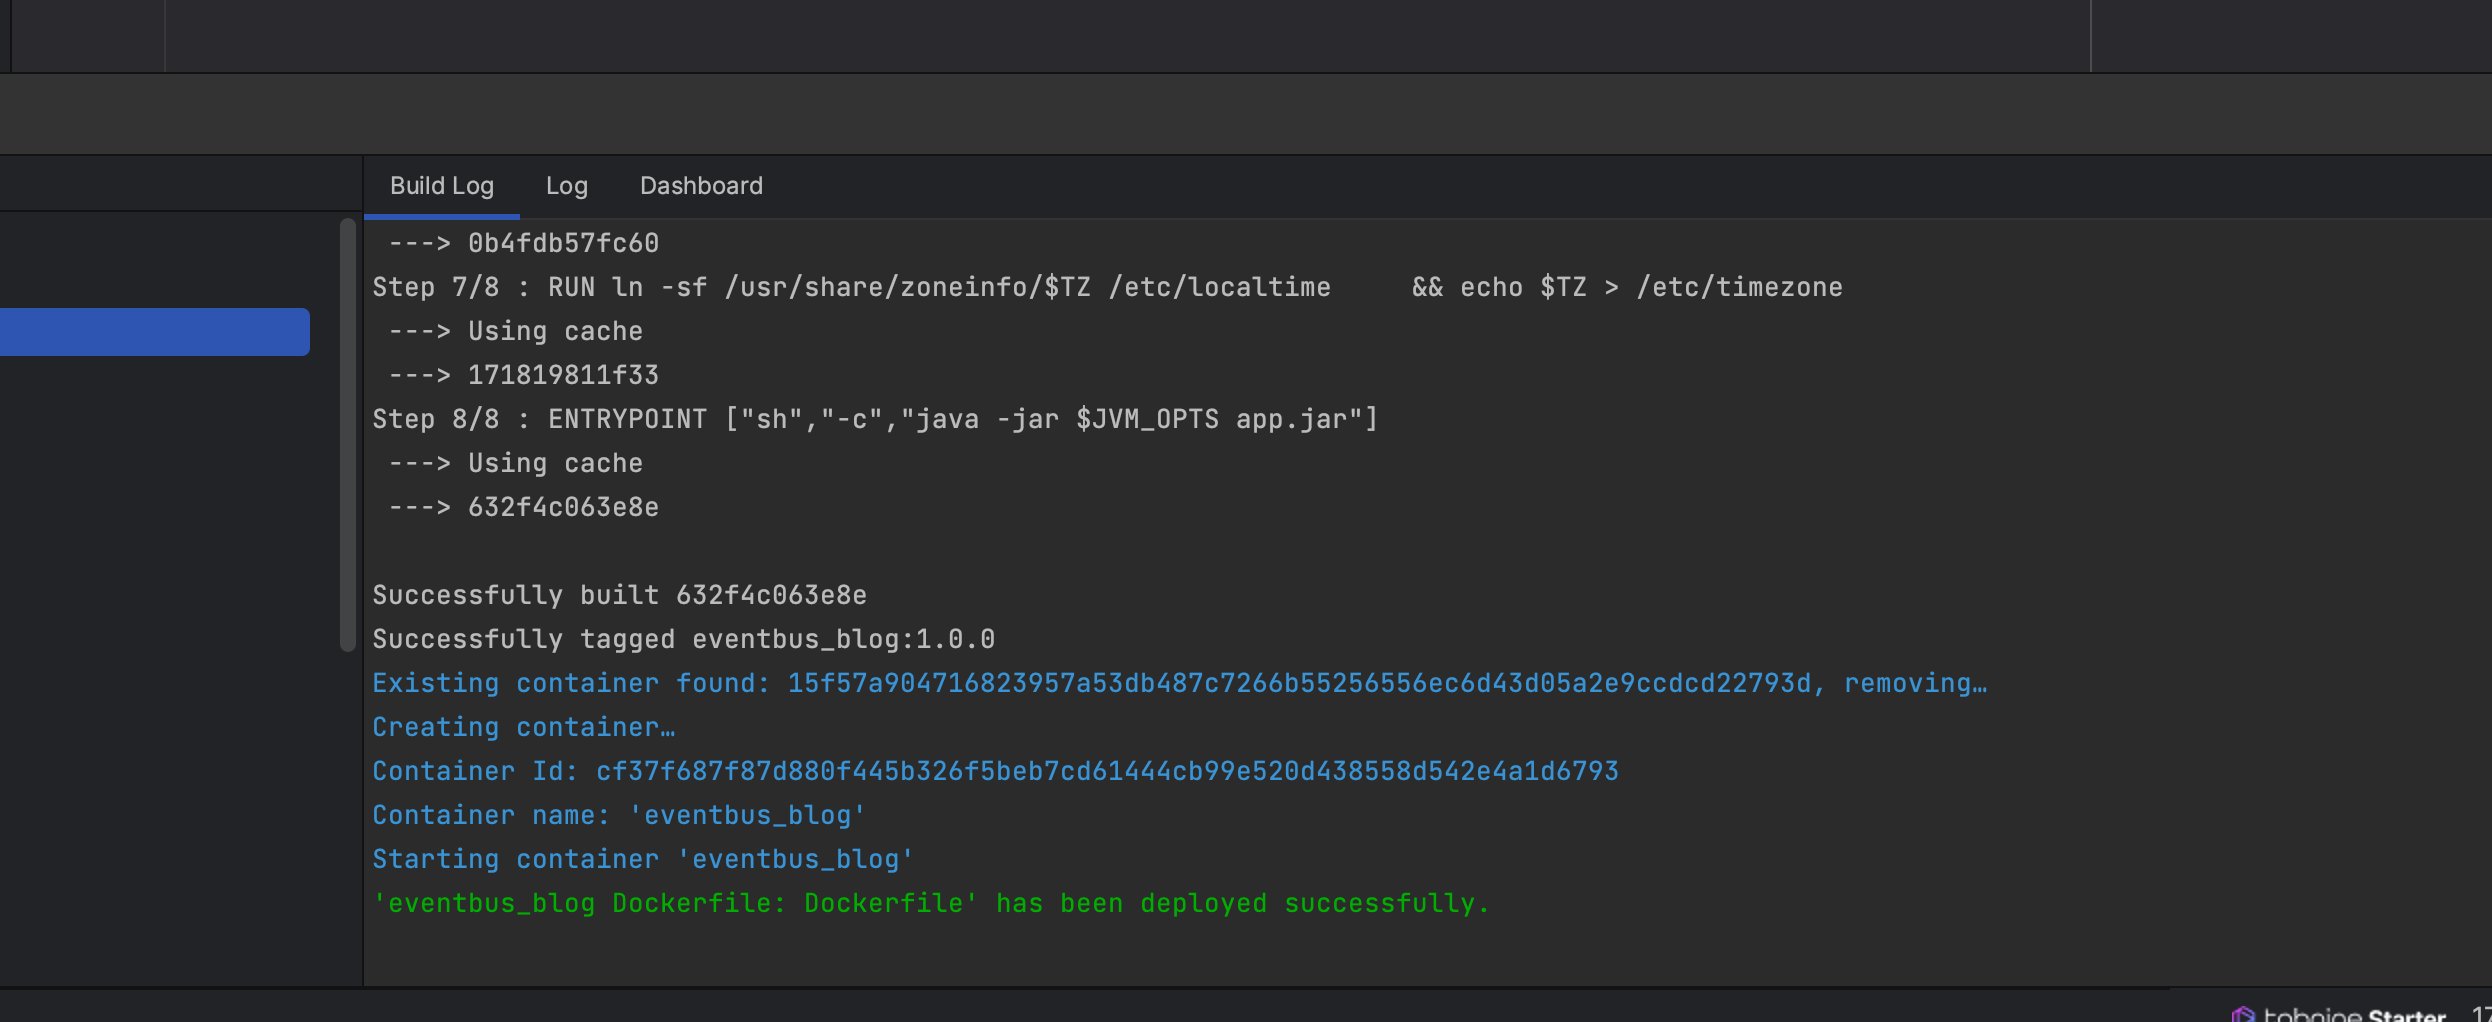
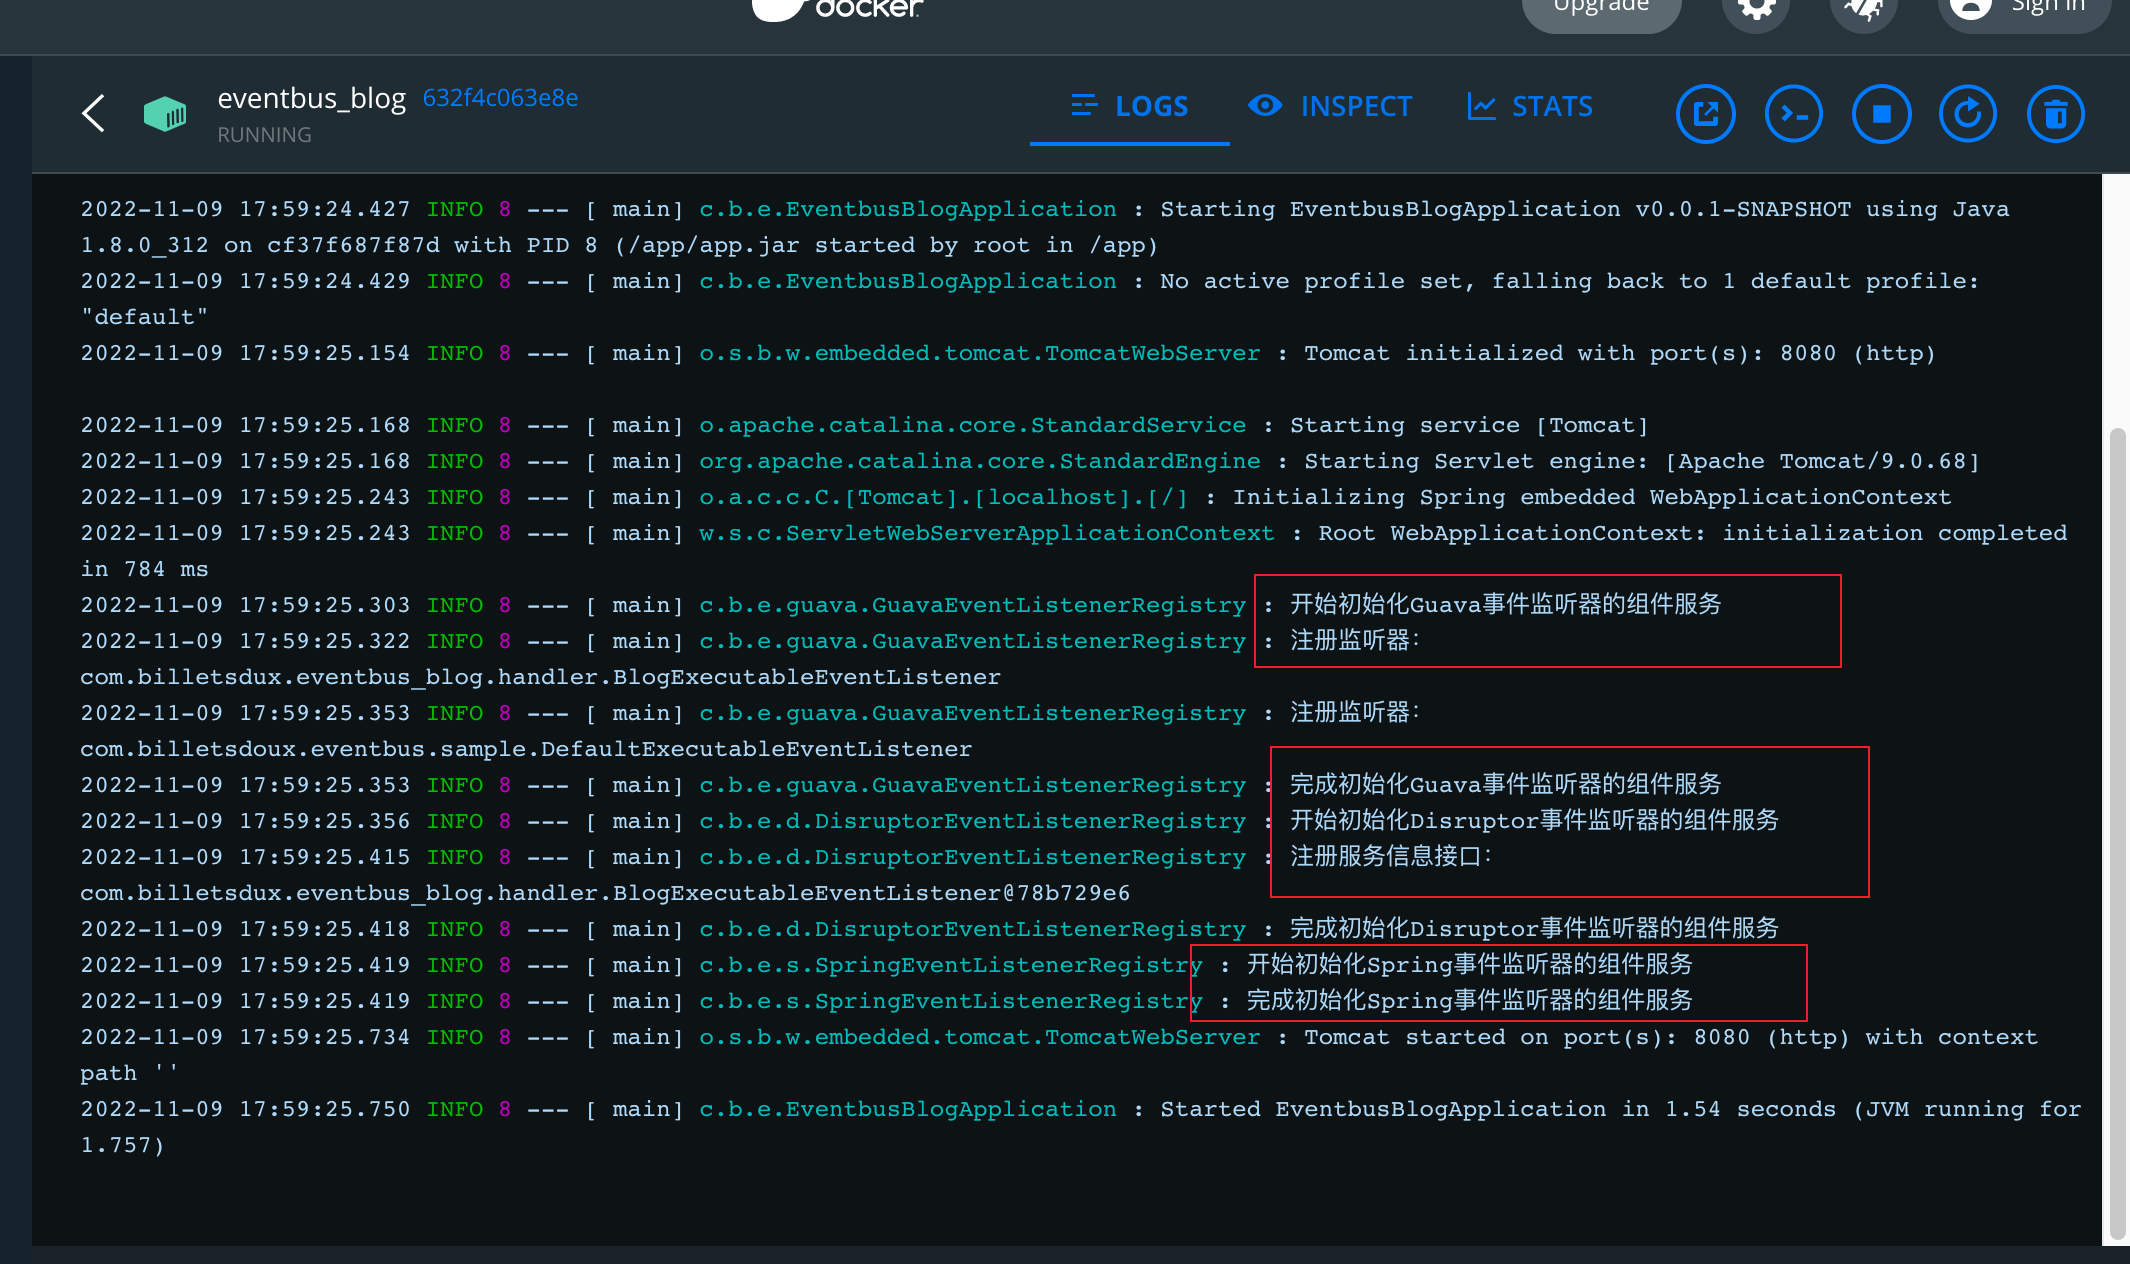
并且也启动一个容器:

查看日志可以看到我们内置的三个监听器注册器已经成功启动了。
我们测试一下接口:可以看到根据我们选择的不同类型我们可以选择不同的实现。


后言
如果提供这个三个不够用,我们还可以通过实现这个接口EventListenerRegistry来扩展我们的事件总线组件,再注入到容器中,在调用的时候选择具体的实现就好了。

 浙公网安备 33010602011771号