clickhouse分布式集群
| 主机 | 系统 | 应用 | ip |
|---|---|---|---|
| ckh-01 | centos 8 | jdk,zookeeper,clickhouse | 192.168.205.190 |
| ckh-02 | centos 8 | jdk,zookeeper,clickhouse | 192.168.205.191 |
| ckh-03 | centos 8 | jdk,zookeeper,clickhouse | 192.168.205.192 |
| ckh-04 | centos 8 | jdk,clickhouse | 192.168.205.193 |
| ckh-05 | centos 8 | jdk,clickhouse | 192.168.205.194 |
| ckh-06 | centos 8 | jdk,clickhouse | 192.168.205.195 |
java环境和zookeeper集群安装省略
yum -y  install yum-utils
rpm --import https://repo.clickhouse.tech/CLICKHOUSE-KEY.GPG
yum-config-manager --add-repo https://repo.clickhouse.tech/rpm/stable/x86_64
dnf -y install clickhouse-server clickhouse-client
二.集群配置:(这里用原有配置文件/etc/clickhouse-server/config.xml)
在配置文件/etc/clickhouse-server/config.xml找到
<!-- <listen_host>::</listen_host> -->取消掉注释
<listen_host>::</listen_host>
使用3节点2副本6台服务器配置(以一台为例子,配置完成拷贝至其他节点。然后将副本改成唯一)
在<remote_servers></remote_servers>标签中加入如下配置
<!--<perftest_3shards_1replicas>可以改成自定义名-->
<perftest_3shards_1replicas>
<shard>
<internal_replication>true</internal_replication>
<replica>
<host>ckh-01</host>
<port>9000</port>
<user>admin</user>
<password>111111</password>
</replica>
<replica>
<host>ckh-02</host>
<port>9000</port>
<user>admin</user>
<password>111111</password>
</replica>
</shard>
<shard>
<internal_replication>true</internal_replication>
<replica>
<host>ckh-03</host>
<port>9000</port>
<user>admin</user>
<password>111111</password>
</replica>
<replica>
<host>ckh-04/host>
<port>9000</port>
<user>admin</user>
<password>111111</password>
</replica>
</shard>
<shard>
<internal_replication>true</internal_replication>
<replica>
<host>ckh-05</host>
<port>9000</port>
<user>admin</user>
<password>111111</password>
</replica>
<replica>
<host>ckh-06</host>
<port>9000</port>
<user>admin</user>
<password>111111</password>
</replica>
</shard>
</perftest_3shards_1replicas>
将如下配置加入到<yandex></yandex>标签中
<!--zookeeper相关配置-->
<zookeeper>
<node>
<host>ckh-01</host>
<port>2181</port>
</node>
<node>
<host>ckh-02</host>
<port>2181</port>
</node>
<node >
<host>ckh-03</host>
<port>2181</port>
</node>
</zookeeper>
<macros>
<shard>01</shard>
<replica>ckh-01-01</replica>
</macros>
<networks>
<ip>::/0</ip>
</networks>
<clickhouse_compression>
<case>
<min_part_size>10000000000</min_part_size>
<min_part_size_ratio>0.01</min_part_size_ratio>
<method>lz4</method>
</case>
</clickhouse_compression>
在<macros></macros>标签中接入对应分片和副本信息,确保每台副本唯一
| 主机名 | 分片 | 副本(主机名+副本编号) |
|---|---|---|
| ckh-01 | 01 | ckh-01-01 |
| ckh-02 | 01 | ckh-02-02 |
| ckh-03 | 02 | ckh-03-01 |
| ckh-04 | 02 | ckh-04-02 |
| ckh-05 | 03 | ckh-05-01 |
| ckh-06 | 03 | ckh-06-02 |
修改以下文件,以便在一个节点上执行语句其他节点也同步执行
vim /etc/clickhouse-server/config.xml

三:用户密码配置
vim /etc/clickhouse-server/users.xml
如果配置密文加密请参照注释说明
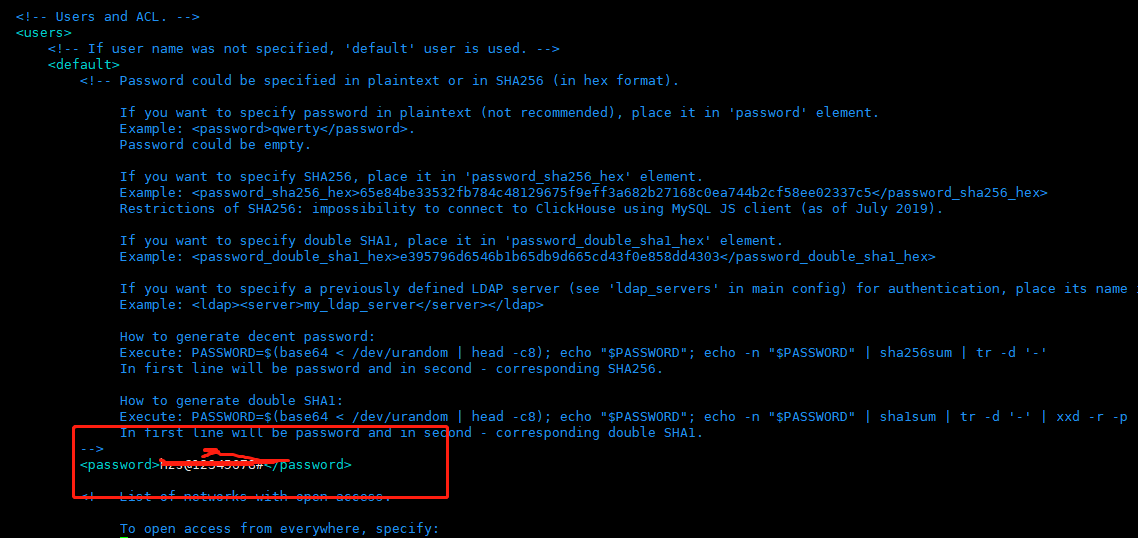
clickhouse 默认用户为default 无密码可以登录,我们可以改成其他用户 或禁用default
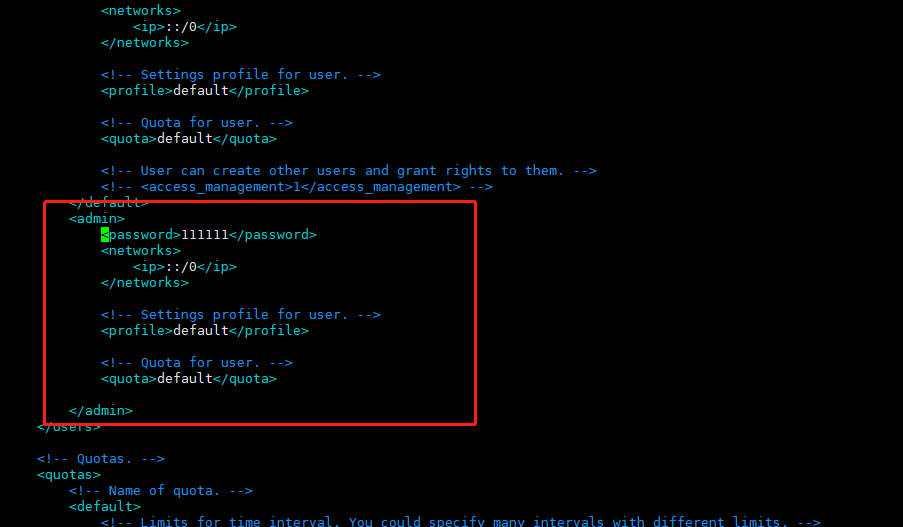
在<users></users>标签里添加其他用户配置
        <admin>
            <password>111111</password>
            <networks incl="networks" replace="replace">
                <ip>::/0</ip>
            </networks>
            <!-- Settings profile for user. -->
            <profile>default</profile>
            <!-- Quota for user. -->
            <quota>default</quota>
        </admin>
注 <networks incl="networks" replace="replace"> 此处需要加上 incl="networks" replace="replace"
高版本已取消 ,在使用flink运行任务时会出现连接clickhouse超时现象
四.进入clickhouse-client:(注意如果需要外部访问需要将vim /etc/clickhouse-server/config.xml配置文件listen_host改成如下设置)

各节点启动服务:
systemctl start clickhouse-server
然后连接通过以下命令连接(-m为多行命令操作)
clickhouse-client -h 192.168.205.190 --port 9000 -m -u admin --password 111111

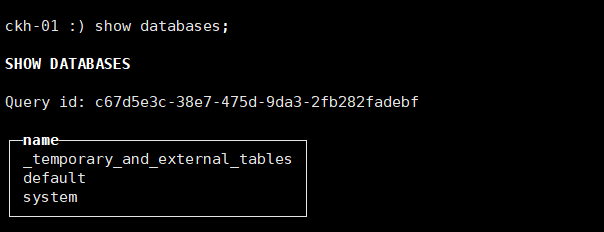
查看数据库信息:
show databases;
五.查看集群信息(任意一节点均可查看):
select * from system.clusters;

-------------------------------------------------------------------------------------------------------------------------------------
创建本地表及分布式表:
在各个节点分表创建数据库test(在一个节点执行即可)
create database test ON CLUSTER perftest_3shards_1replicas;
下面给出ReplicatedMergeTree引擎的完整建表DDL语句。
创建本地表及表引擎
Replicated Table & ReplicatedMergeTree Engines
CREATE TABLE IF NOT EXISTS test.events_local ON CLUSTER perftest_3shards_1replicas ( ts_date Date, ts_date_time DateTime, user_id Int64, event_type String, site_id Int64, groupon_id Int64, category_id Int64, merchandise_id Int64, search_text String ) ENGINE = ReplicatedMergeTree('/clickhouse/tables/{shard}/test/events_local','{replica}') PARTITION BY ts_date ORDER BY (ts_date,toStartOfHour(ts_date_time),site_id,event_type) SETTINGS index_granularity = 8192;
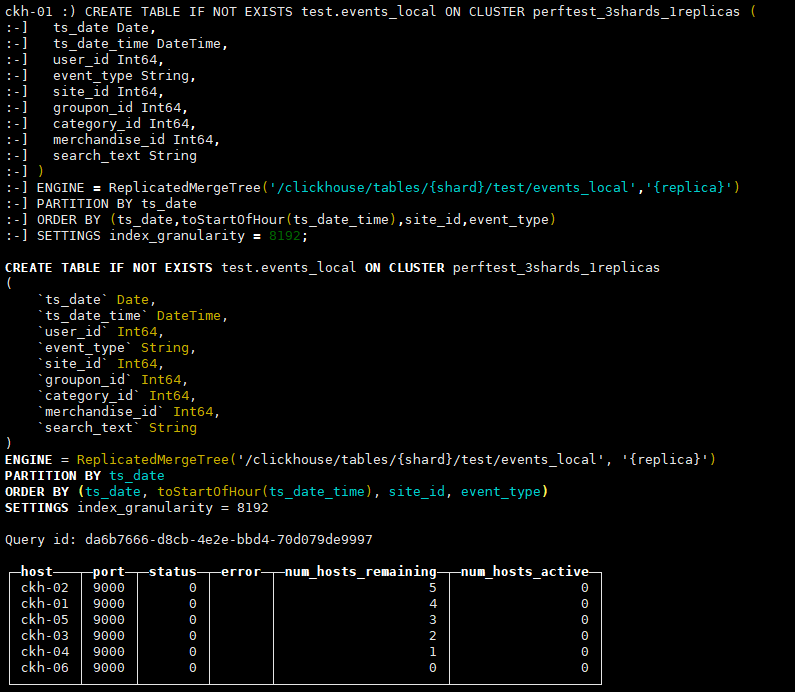
其中,ON CLUSTER语法表示分布式DDL,即执行一次就可在集群所有实例上创建同样的本地表。集群标识符{cluster}、分片标识符{shard}和副本标识符{replica}来自之前提到过的复制表宏配置,即config.xml中<macros>一节的内容,配合ON CLUSTER语法一同使用,可以避免建表时在每个实例上反复修改这些值。
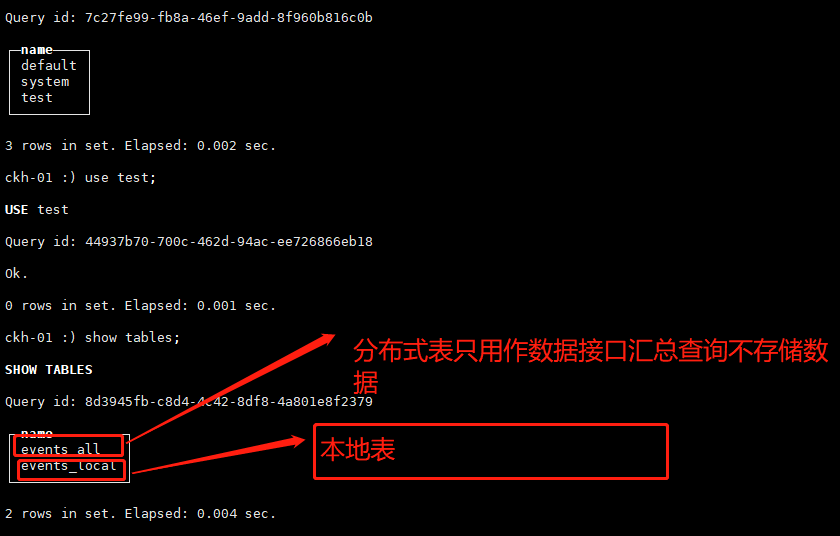
分布式表及分布式表引擎
Distributed Table & Distributed Engine
ClickHouse分布式表的本质并不是一张表,而是一些本地物理表(分片)的分布式视图,本身并不存储数据。
支持分布式表的引擎是Distributed,建表DDL语句示例如下,_all只是分布式表名比较通用的后缀而已。
CREATE TABLE IF NOT EXISTS test.events_all ON CLUSTER perftest_3shards_1replicas AS test.events_local ENGINE = Distributed(perftest_3shards_1replicas,test,events_local,rand());

任意节点插入数据:
insert into test.events_all values('2021-03-03','2021-03-03 16:10:00',1,'ceshi1',1,1,1,1,'test1'),('2021-03-03','2021-03-03 16:20:01',2,'ceshi2',2,2,2,2,'test2'),('2021-03-03','2021-03-03 16:30:02',3,'ceshi2',3,3,3,3,'test3'),('2021-03-03','2021-03-03 16:40:03',4,'ceshi4',4,4,4,4,'test4'),('2021-03-03','2021-03-03 16:50:04',5,'ceshi5',5,5,5,5,'test5'),('2021-03-03','2021-03-03 17:00:05',6,'ceshi6',6,6,6,6,'test6');
查询各分片数据:
select * from test.events_all;

查看副本节点也复制了一份同样的数据
-------------------------------------------------------------------------------------
clickhouse基本操作:
查询clickhouse集群信息
select * from system.clusters;
创建数据库命令(一个节点上执行,多个节点同时创建)
create database test ON CLUSTER perftest_3shards_1replicas
删除数据库命令(一个节点上执行,多个节点同时删除)
drop database test ON CLUSTER perftest_3shards_1replicas
删除本地表数据(分布式表无法删除表数据)
alter table test.events_local ON CLUSTER perftest_3shards_1replicas delete where 1=1;
1=1表示删除所有数据,可以接字段名删除满足某个条件的数据
查看zookeeper下目录
select * from system.zookeeper WHERE path='/'


 浙公网安备 33010602011771号