
Swagger
背景
相信无论是前端还是后端开发,或多或少地被接口文档折磨过。前端经常抱怨后端给的接口文档与实际情况不一致。后端又觉得编写及维护接口文档会耗费不少精力,经常来不及更新。其实无论是前端调用后端,还是后端调用后端,都期望有一个好的接口文档。
swagger官方网站的介绍
Simplify API development for users, teams, and enterprises with the Swagger open source and professional toolset. Find out how Swagger can help you design and document your APIs at scale.
Swagger是一款RESTful接口的文档在线自动生成、功能测试功能框架。一个规范和完整的框架,用于生成、描述、调用和可视化RESTful风格的Web服务,加上swagger-ui,可以有很好的呈现。
当我们在后台的接口修改了后,swagger可以实现自动的更新,而不需要人为的维护这个接口进行测试。
一句话就是:帮助开发人员自动生成接口文档,修改代码的同时自动更新接口文档,以便于日后代码与接口文档的保持一致。提高接口联调效率。
Springboot整合swagger3
需要两步就可完成springboot整合swagger3:
1、Springboot添加依赖
<dependency>
   <groupId>io.springfox</groupId>
   <artifactId>springfox-boot-starter</artifactId>
   <version>3.0.0</version>
</dependency>
2、(必选)启动类添加注解

@EnableOpenApi
@SpringBootApplication
@MapperScan("edu.xidian.boot.dao")
public class BootTestApplication {

    public static void main(String[] args) {
        SpringApplication.run(BootTestApplication.class, args);
    }

}
启动项目进入Swagger UI页面
访问路径:http://localhost:8080/swagger-ui/index.html
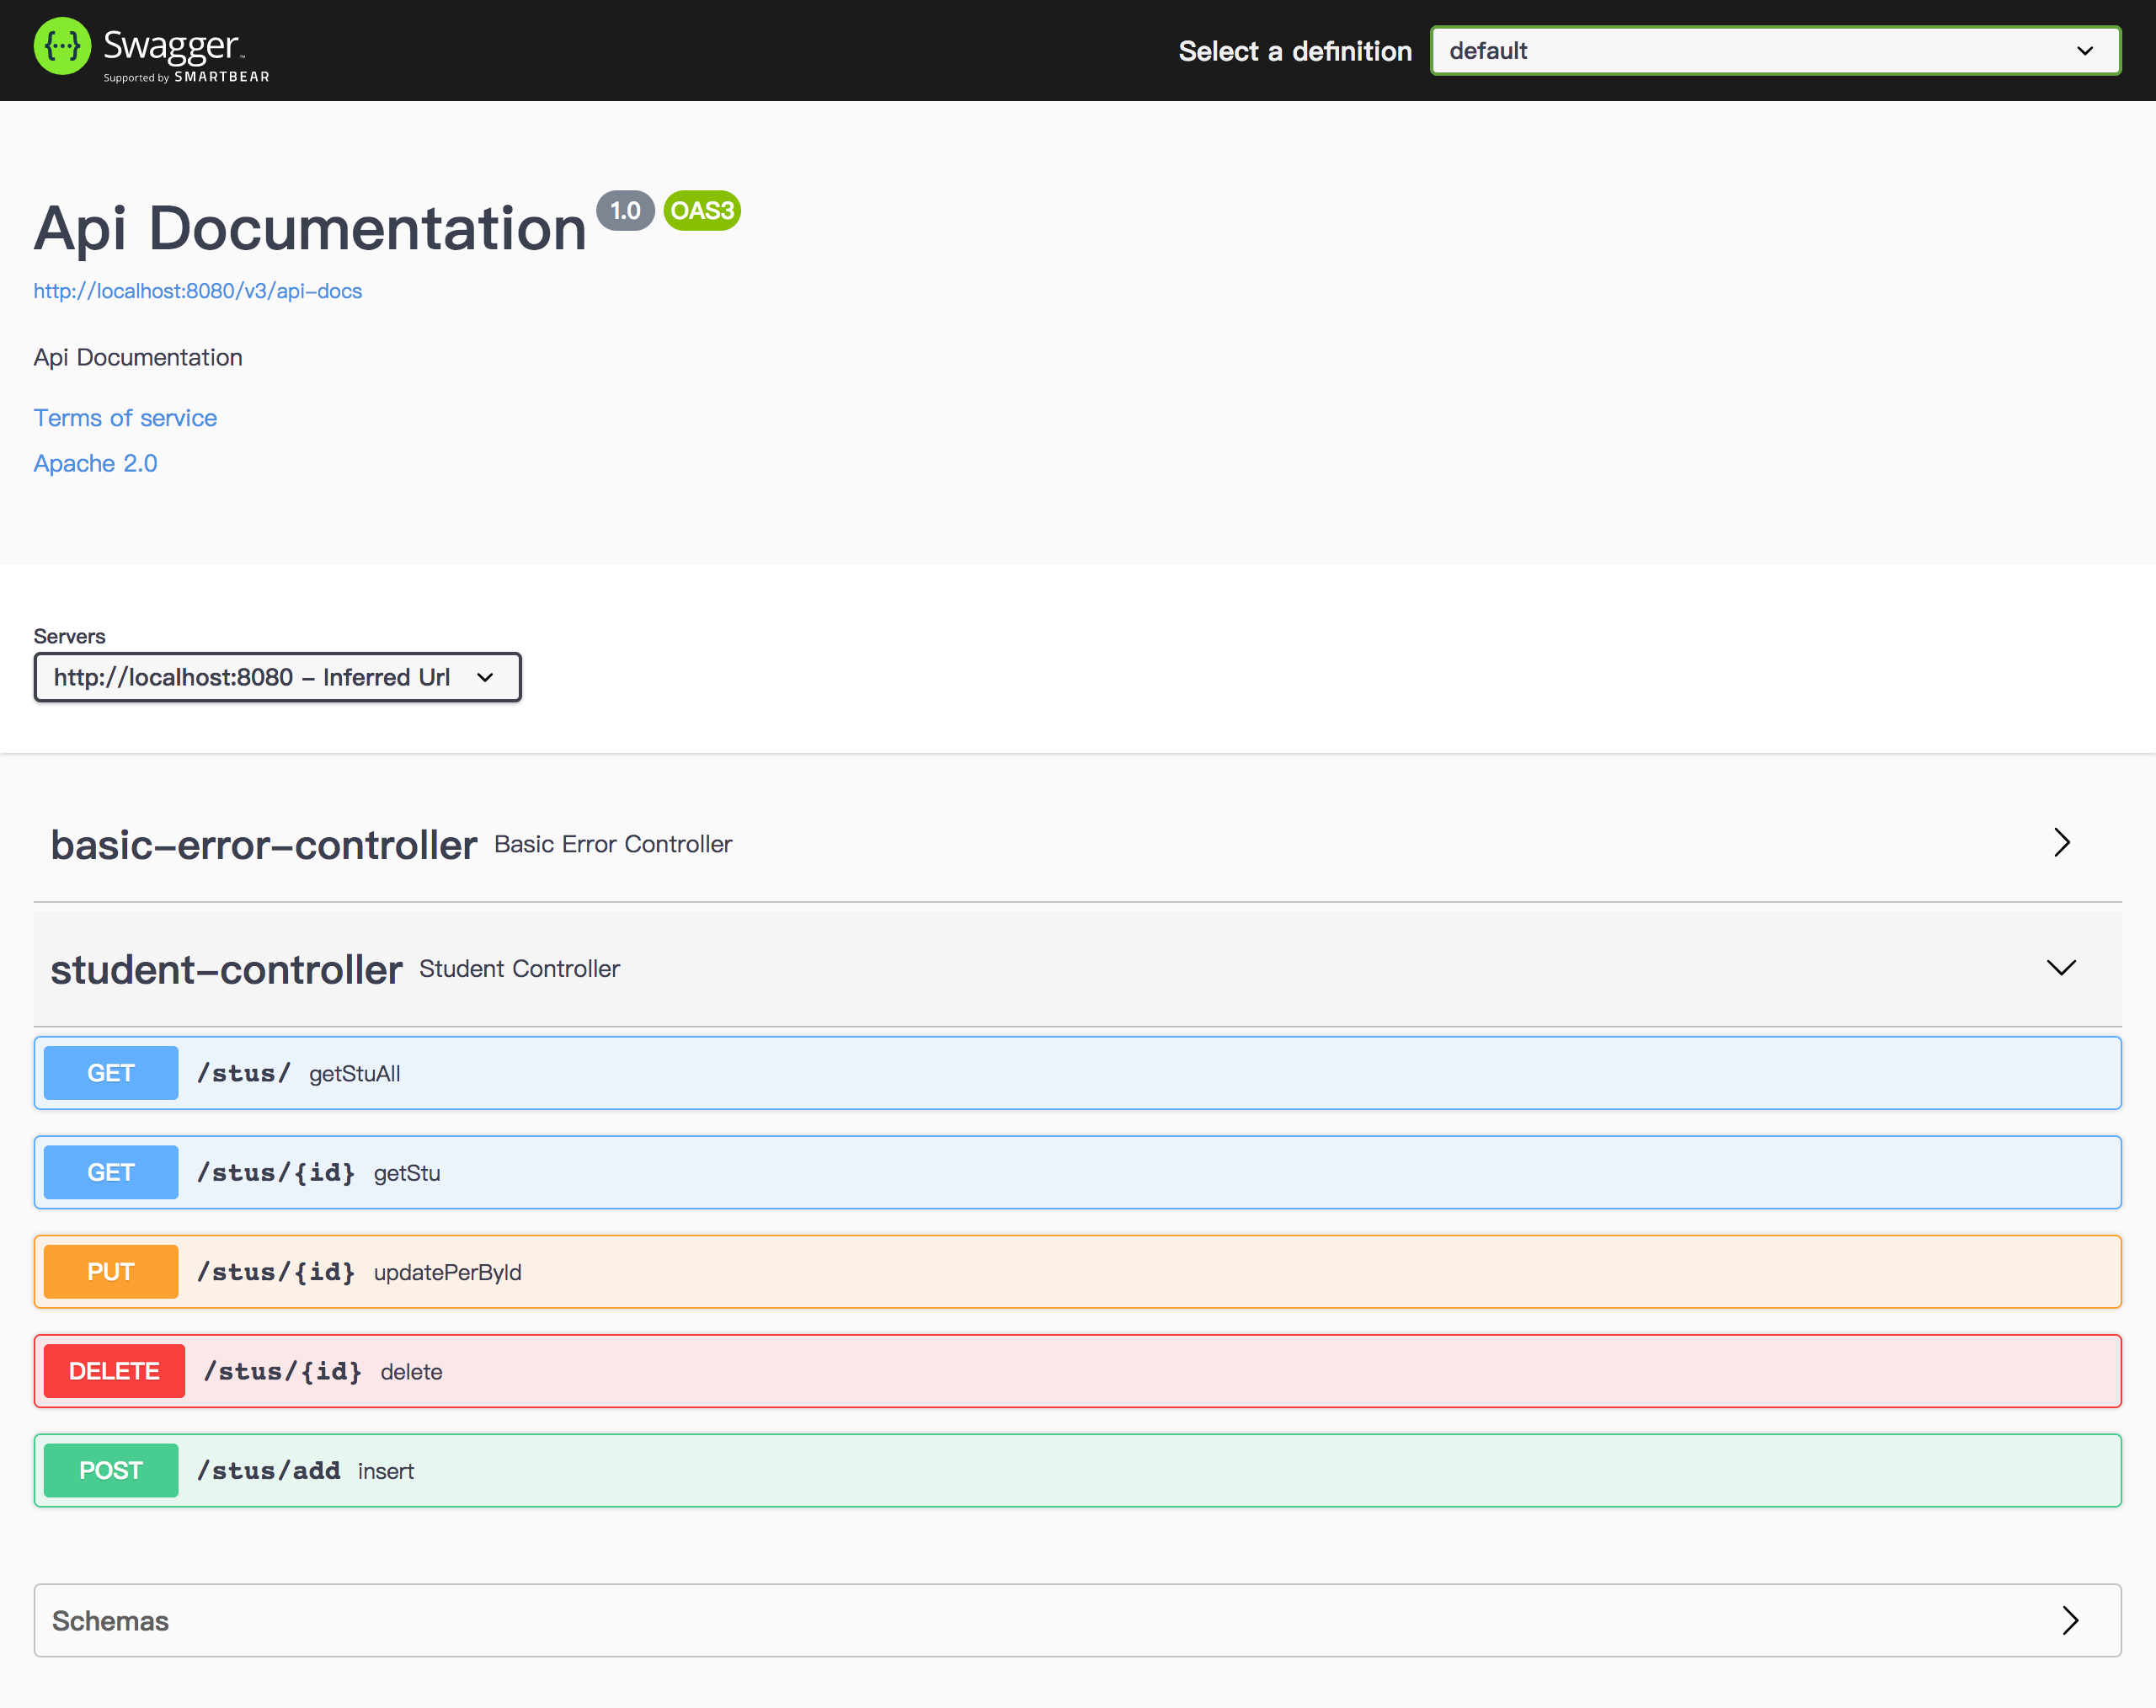
点击即可查看里面接口详情
(可选)自定义首页属性 Docket配置
package edu.xidian.boot.config;

import org.springframework.context.annotation.Bean;
import org.springframework.context.annotation.Configuration;
import springfox.documentation.builders.ApiInfoBuilder;
import springfox.documentation.service.Contact;
import springfox.documentation.spi.DocumentationType;
import springfox.documentation.spring.web.plugins.Docket;

@Configuration
public class Swagger3 {

    @Bean
    public Docket docket() {
        return new Docket(DocumentationType.OAS_30).apiInfo(
                new ApiInfoBuilder()
                        .contact(new Contact("longan", "", "***@qq.com"))
                        .title("Swagger3 demo")
                        .build()
        );
    }
}
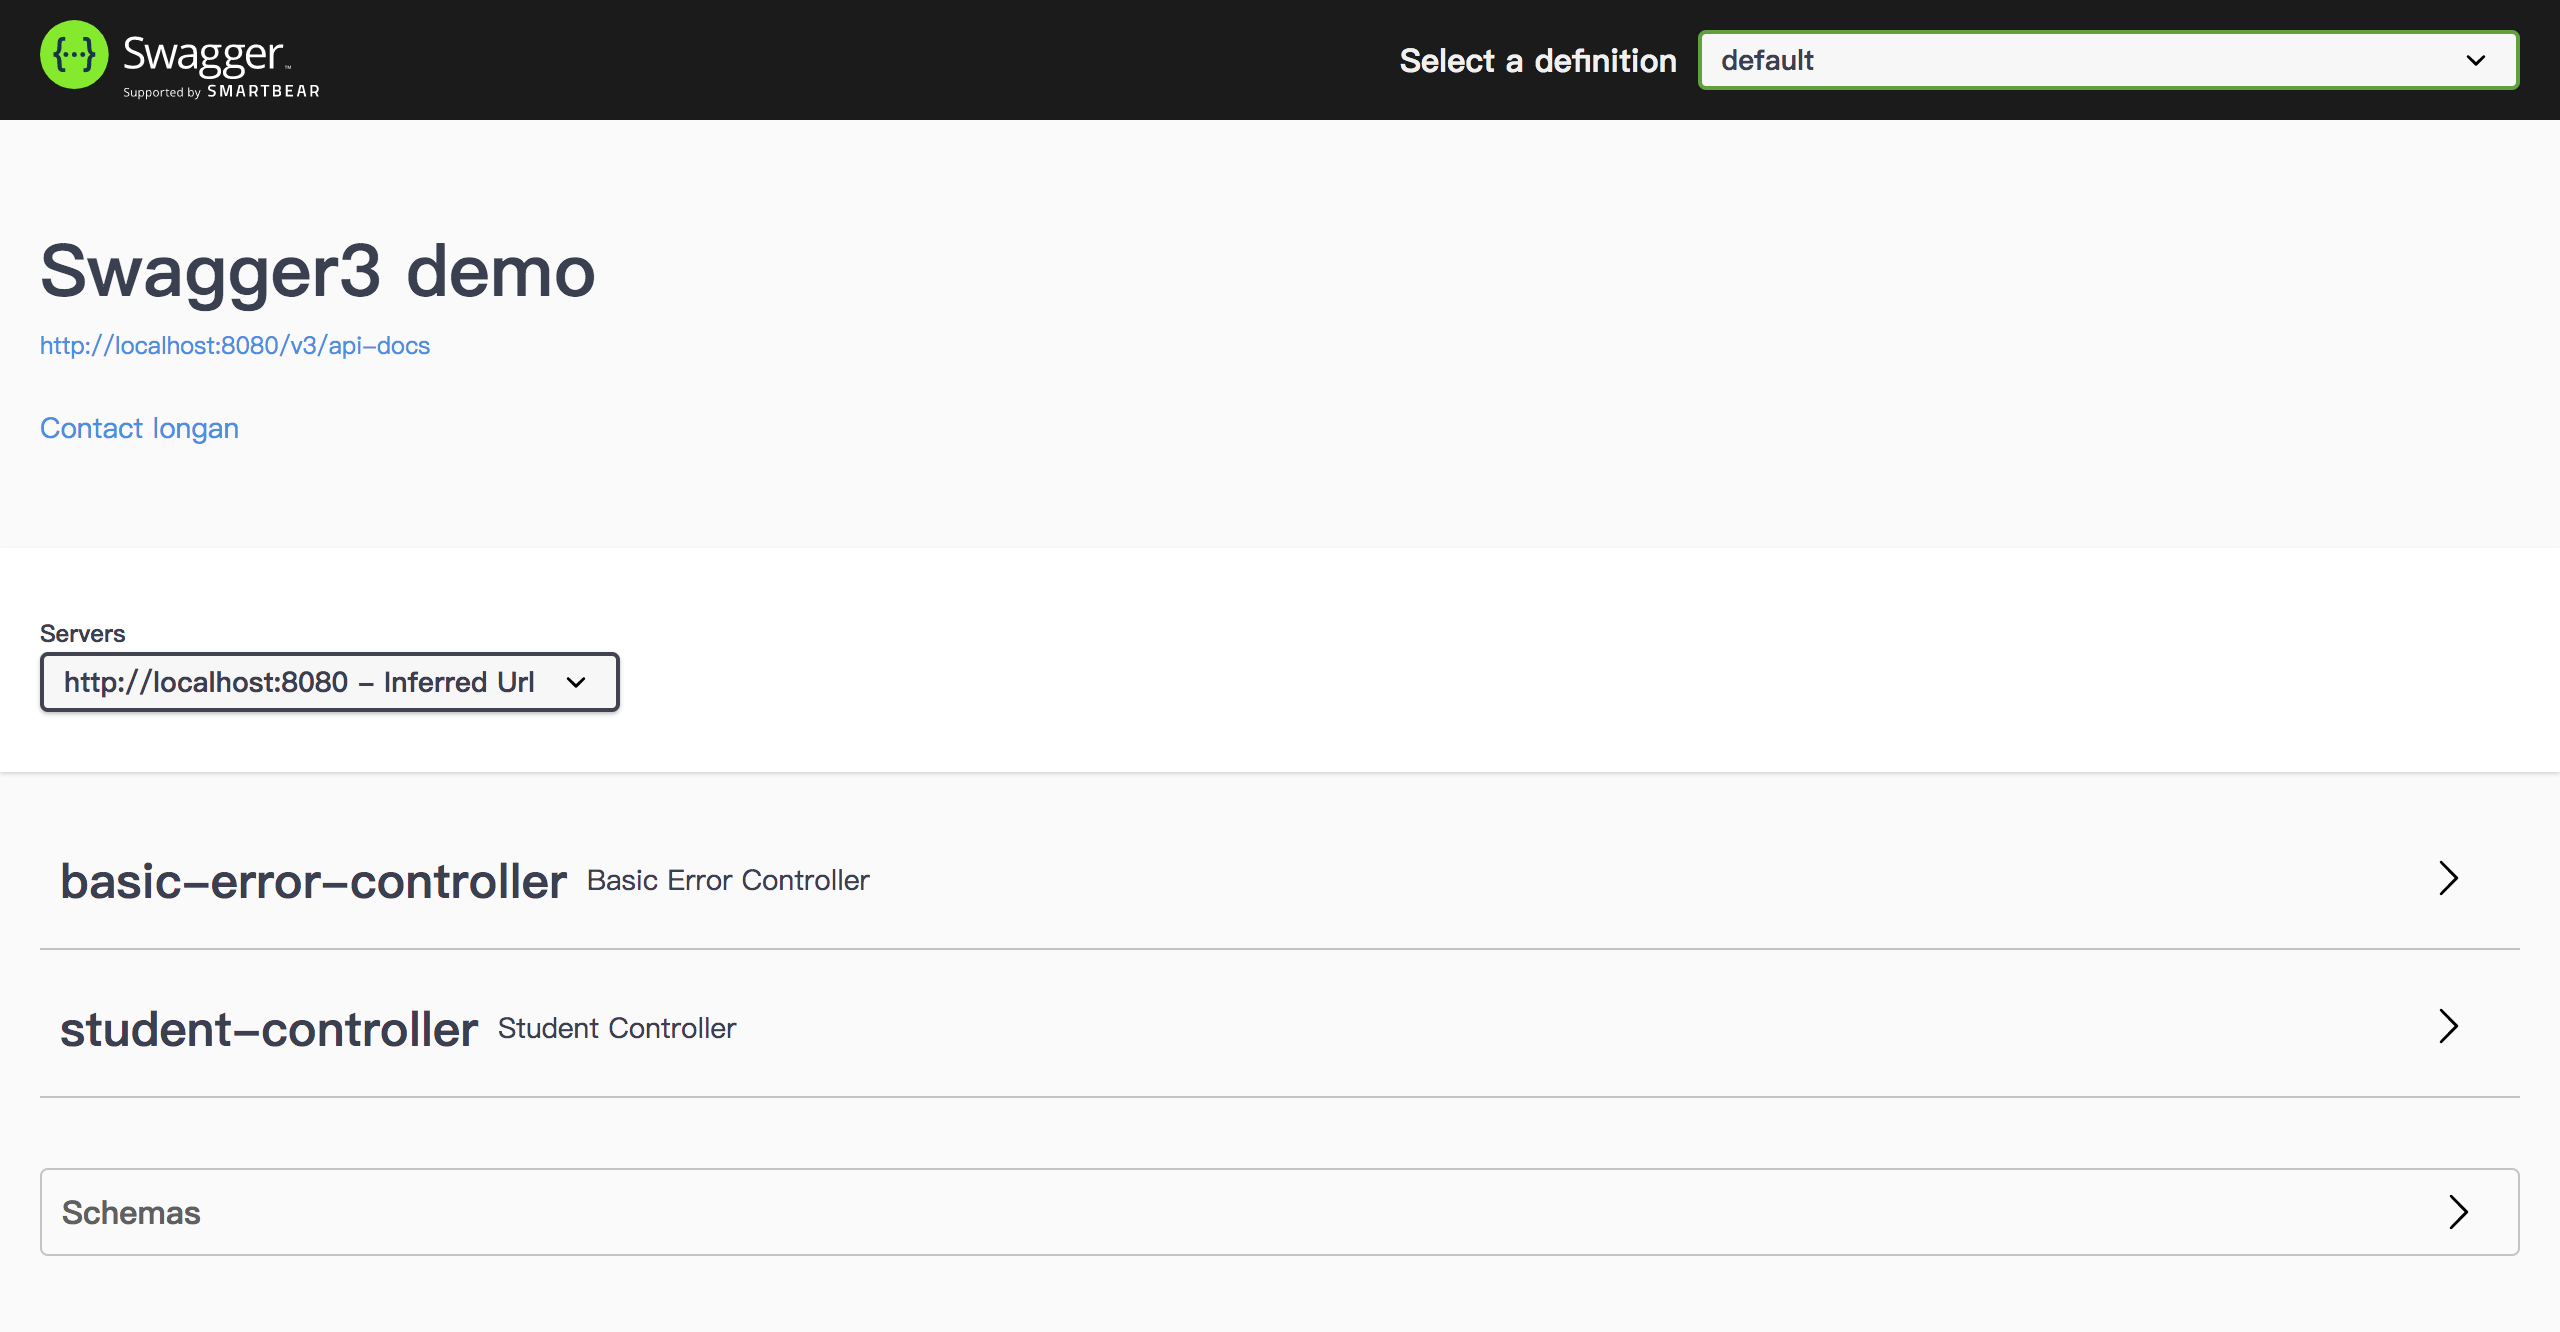
可以看到首页已经改变为自定义内容了
(可选)使用第三方UI
添加依赖:
<dependency>
    <groupId>com.github.xiaoymin</groupId>
    <artifactId>swagger-bootstrap-ui</artifactId>
    <version>1.9.6</version>
</dependency>
然后访问http://localhost:8080/doc.html即可
效果如下图:
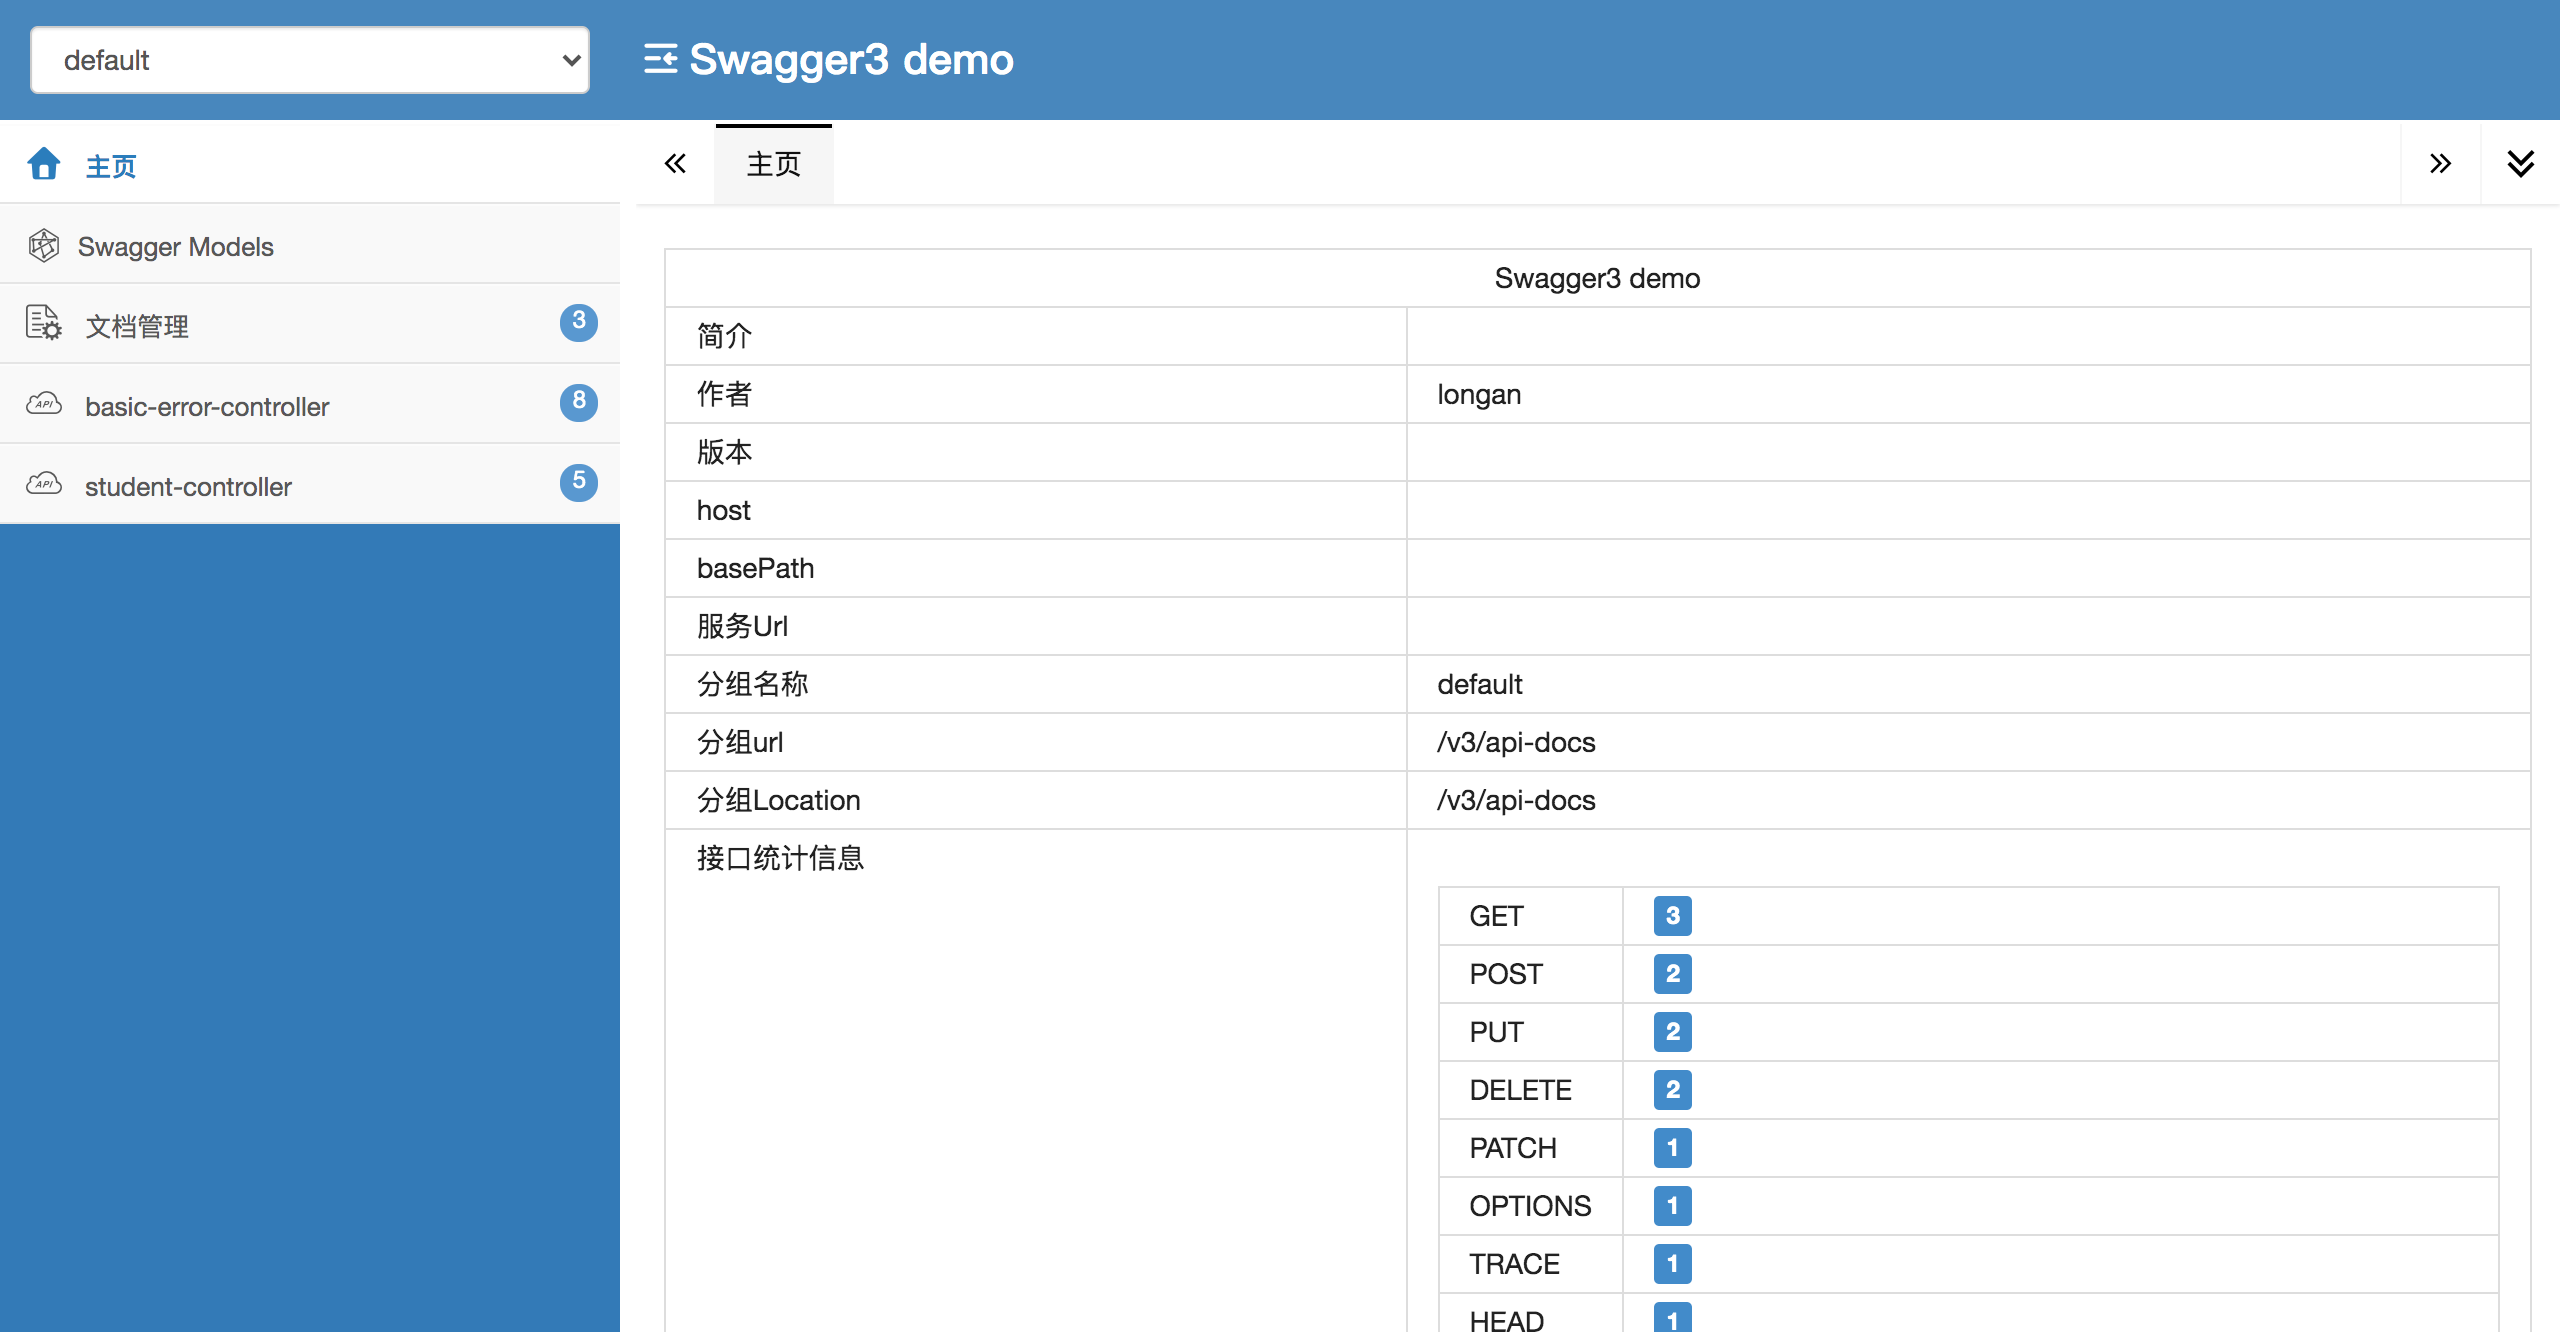
和原始UI相比方便了很多
Swagger注解
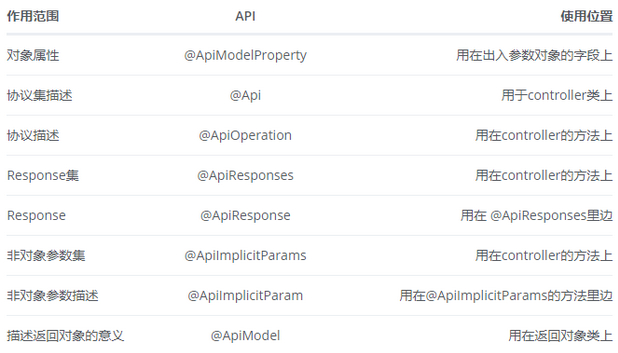
- @Api()用于类; 表示标识这个类是swagger的资源
- @ApiOperation()用于方法; 表示一个http请求的操作
- @ApiParam()用于方法,参数,字段说明; 表示对参数的添加元数据(说明或是否必填等)
- @ApiModel()用于类 表示对类进行说明,用于参数用实体类接收
- @ApiModelProperty()用于方法,字段 表示对model属性的说明或者数据操作更改
- @ApiIgnore()用于类,方法,方法参数 表示这个方法或者类被忽略
- @ApiImplicitParam() 用于方法 表示单独的请求参数
- @ApiImplicitParams() 用于方法,包含多个 @ApiImplicitParam
本文作者:wang_longan
本文链接:https://www.cnblogs.com/longan-wang/p/14863913.html
版权声明:本作品采用知识共享署名-非商业性使用-禁止演绎 2.5 中国大陆许可协议进行许可。


【推荐】国内首个AI IDE,深度理解中文开发场景,立即下载体验Trae
【推荐】编程新体验,更懂你的AI,立即体验豆包MarsCode编程助手
【推荐】抖音旗下AI助手豆包,你的智能百科全书,全免费不限次数
【推荐】轻量又高性能的 SSH 工具 IShell:AI 加持,快人一步