httpd(二)之 httpd-2.2安装及配置简述
一、基于CentOS的自带的rpm包安装httpd
对于httpd来讲,其安装使用对于CentOS 6和CentOS 7是不一样的,对于CentOS 6而言,默认提供的RPM包是2.2的,而CentOS 7默认提供的安装包是2.4的;
一般而言,httpd在CentOS上的安装配置方式分为两种:
- 通过系统自带的rpm包进行安装,以下演示此种方式;
- 源码编译安装:因为通过rpm包安装在某些时候是有局限性的,如有些我们需要的功能可能并未编译进rpm包,而有些不需要的功能编译了,以及还可能有版本落后,漏洞等问题;那此时系统自带的rpm包已然无法满足需求,就需要我们自行编译源码安装,此种方式我们之后再进行演示;
1、安装前的注意事项
因为httpd本身是受SELinux控制的,而如果我们目前处于学习阶段,建议事先设置SELinux处于permisive或disabled状态,否则之后的很多配置可能都无法正常进行。
[root@VM_0_2_centos ~]# getenforce
Disabled
设置SELinux为permisive或disabled的方法有两种:
- 直接通过命令行设置,此种方式在设置完成之后即时生效,但在用户登出shell时会失效:
[root@VM_0_2_centos ~]# setenforce 0
setenforce: SELinux is disabled
[root@VM_0_2_centos ~]# getenforce
Disabled
- 通过修改配置文件设置,此种方式不会即时生效,但一经修改,之后登录永久有效:
[root@VM_0_2_centos ~]# vim /etc/selinux/config

2、httpd的安装及程序环境简介
我们以CentOS 6,httpd 2.2为例进行说明:
[root@VM_0_2_centos ~]# yum install httpd
[root@VM_0_2_centos ~]# rpm -ql httpd
/etc/httpd
/etc/httpd/conf
/etc/httpd/conf.d
/etc/httpd/conf.d/README
/etc/httpd/conf.d/autoindex.conf
/etc/httpd/conf.d/userdir.conf
/etc/httpd/conf.d/welcome.conf
/etc/httpd/conf.modules.d
/etc/httpd/conf.modules.d/00-base.conf
/etc/httpd/conf.modules.d/00-dav.conf
/etc/httpd/conf.modules.d/00-lua.conf
/etc/httpd/conf.modules.d/00-mpm.conf
/etc/httpd/conf.modules.d/00-proxy.conf
/etc/httpd/conf.modules.d/00-systemd.conf
/etc/httpd/conf.modules.d/01-cgi.conf
/etc/httpd/conf/httpd.conf
/etc/httpd/conf/magic
/etc/httpd/logs
/etc/httpd/modules
/etc/httpd/run
/etc/logrotate.d/httpd
/etc/sysconfig/htcacheclean
/etc/sysconfig/httpd
/run/httpd
/run/httpd/htcacheclean
/usr/lib/systemd/system/htcacheclean.service
/usr/lib/systemd/system/httpd.service
/usr/lib/tmpfiles.d/httpd.conf
/usr/lib64/httpd
/usr/lib64/httpd/modules
/usr/lib64/httpd/modules/mod_access_compat.so
......
各位可以看到,httpd在安装完成之后生成了许多文件,我们接下来对这些文件做一个简要说明:
- 配置文件:
- /etc/httpd/conf/httpd.conf:httpd 的主配置文件;
- /etc/httpd/conf.d/*.conf:此目录下的配置文件被主配置文件引用时会生效,这样的设计提升了配置时的灵活性;
-
配置文件大体上由三段组成:
- Section 1:全局环境,定义程序工作特性的;
- Section 2:主服务器配置;
- Section 3:虚拟主机的配置,通过虚拟主机可以实现一个物理服务器上的同一个Web服务器应用程序可以提供多个站点;
建议:Section 2和Section 3不要同时使用!
配置格式为:directive value(即:指令 值)
注意:directive:不区分字符大小写;当value为路径时,其格式取决于文件系统;
- 脚本服务:
- /etc/rc.d/init.d/httpd
- 配置文件:/etc/sysconfig/httpd
- 主程序文件:
- /usr/sbin/httpd
- /usr/sbin/httpd.event
- /usr/sbin/httpd.worker
- 日志文件目录:
- /var/log/httpd
- access_log:访问日志
- error_log:错误日志
- /var/log/httpd
- 站点文档目录:
- /var/www/html:这就是我们httpd 默认的 站点文档存放目录,例如当用户输入http://www.test.com时默认所访问的文件这个目录当中的首页文件 (预设为 index.html)。
- 模块文件路径:
- /usr/lib64/httpd/modules:httpd的一个特点是模块化,它支持很多模块,不同的模块会提供不同的功能,例如 php 以及 ssl ,所有的模块文件默认是放置在这个目录当中的;
到此为止,我们就可以启动Web服务了:
[root@VM_0_2_centos ~]# systemctl start httpd.service
[root@VM_0_2_centos ~]# systemctl status httpd.service
● httpd.service - The Apache HTTP Server
Loaded: loaded (/usr/lib/systemd/system/httpd.service; disabled; vendor preset: disabled)
Active: active (running) since Sun 2020-05-10 19:49:43 CST; 1s ago
Docs: man:httpd(8)
man:apachectl(8)
Main PID: 32657 (httpd)
Status: "Processing requests..."
CGroup: /system.slice/httpd.service
├─32657 /usr/sbin/httpd -DFOREGROUND
├─32664 /usr/sbin/httpd -DFOREGROUND
├─32665 /usr/sbin/httpd -DFOREGROUND
├─32666 /usr/sbin/httpd -DFOREGROUND
├─32667 /usr/sbin/httpd -DFOREGROUND
└─32668 /usr/sbin/httpd -DFOREGROUND
May 10 19:49:42 VM_0_2_centos systemd[1]: Starting The Apache HTTP Server...
May 10 19:49:43 VM_0_2_centos httpd[32657]: AH00558: httpd: Could not reliably determine the server's fully qualified domain name, using 127.... message
May 10 19:49:43 VM_0_2_centos systemd[1]: Started The Apache HTTP Server.
Hint: Some lines were ellipsized, use -l to show in full.
启动完成,我们也可以看到此时80端口依然被httpd进程监听:
[root@VM_0_2_centos ~]# ss -tnlp
State Recv-Q Send-Q Local Address:Port Peer Address:Port
LISTEN 0 128 *:80 *:*
users:(("httpd",pid=32668,fd=3),("httpd",pid=32667,fd=3),("httpd",pid=32666,fd=3),("httpd",pid=32665,fd=3),("httpd",pid=32664,fd=3),("httpd",pid=32657,fd=3),("httpd",pid=302,fd=3))
LISTEN 0 128 *:22 *:* users:(("sshd",pid=20972,fd=3))
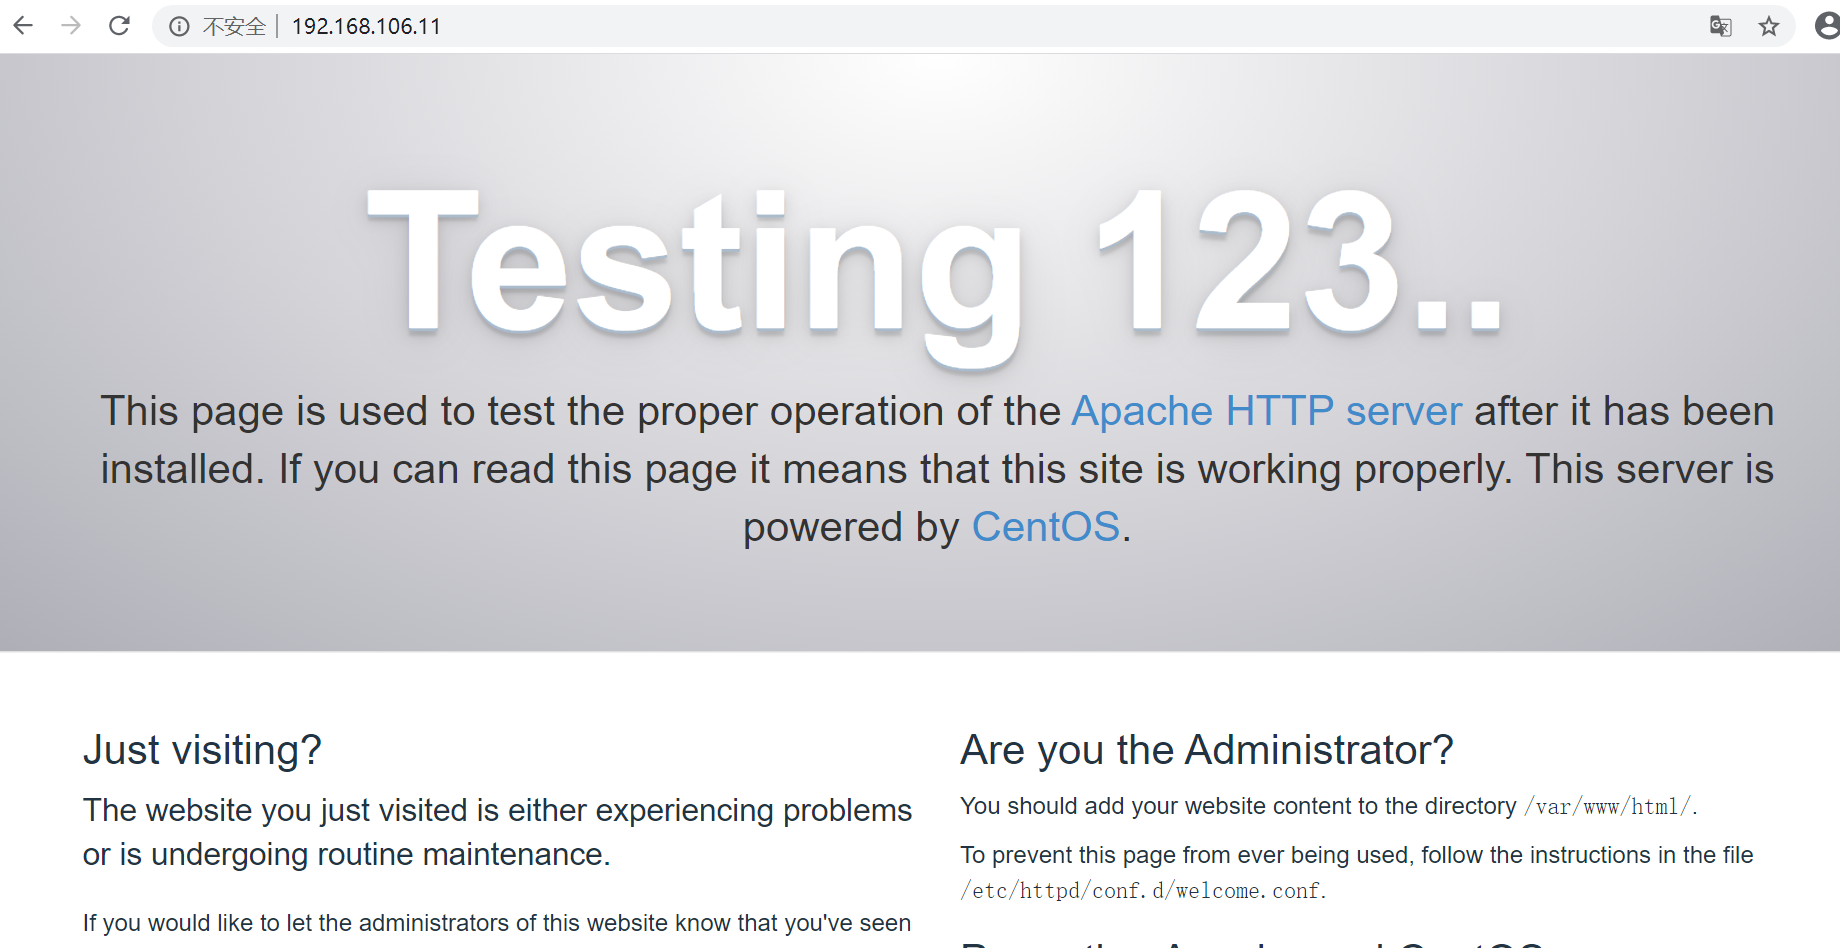
在浏览器中访问Web服务器地址:
3、常用配置简介
我们所谓的对httpd进行配置也无非就是对/etc/httpd/conf/httpd.conf文件及其子文件的内容进行修改,而之前也提到过,这个文件是由各指令组成的,因此本质上来讲,配置httpd也无非就是对其配置文件中的各个文件进行修改而已,此处我们会提及一些常用的配置指令。需要强调的是,每个httpd的发行版(distribution) 的配置格式可能都不尽相同,若需参考,请前往官方站点:http://httpd.apache.org/docs/查阅对应版本的帮助文档;
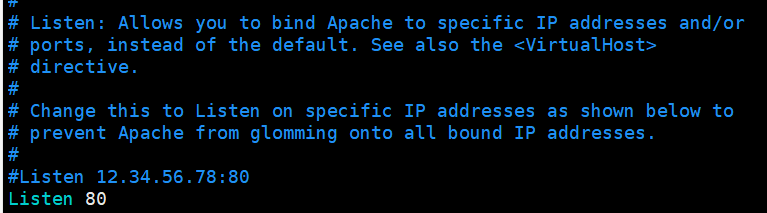
3.1 修改IP和Port
指令格式:
Listem [IP:] Port
注意:
- IP地址省略时表示监听本机上的所有地址;
- Listen指令可以出现多次,用于指明监听多个不同的端口或套接字;
例如:
3.2 持久连接(Persistent Connection)
持久连接,又称长连接,即连接(会话)建立后,客户端所请求的资源获取完成后不会立即断开连接,而是继续等待此客户端的其它请求完成。
这样做的好处是显而易见的,因为相较于短连接每次请求资源完成即断开,下一次请求则需要重新建立连接,如果客户端需要请求大量网页资源的话,这每一次的连接建立与断开所造成的性能损耗是非常大的。持久连接很好的弥补了短连接的不足。
那么,客户端请求资源后应该什么时候断开连接呢?一般来讲,有两种控制标准:
- 数量限制:例如限制当同一客户端请求的资源数量超过100个,即断开;
- 时间限制:例如,客户端连接时间超过60s,即断开,而持久连接的时间一般不建议太长;
当然,持久连接也可能会带来副作用,例如对于并发访问量较大的服务器而言,持久连接功能会使得有些请求得不到响应。
因此,我们考虑的折衷方案是使用较短的持久连接时间,例如5s,连接时长超过5s,即断开连接。而httpd-2.4已然可以支持毫秒级持久时间。
配置指令格式:
KeepAlive On|Off
# 是否开启持久连接。
MaxKeepAliveRequests #
# 当 KeepAlive 设定为 On 时,则这个数值可决定, 该次连接能够传输的最大传输数量。为了增进服务器性能则可以改大一点,如500个,0 表示不限制。
KeepAliveTimeOut #
# 当 KeepAlive 设定为 On 时,该次连接为同一客户端两次请求之间等待的秒数,即当超过上述设定的秒数此客户的还没有再次发送请求则本次连接将中断。一般设定为 15左右即可,如果设定太高 (等待时间较长),在较忙碌的系统上面将会有较多的httpdd程序占用资源,性能可能不升反降。
下面我们使用telnet测试连接:
使用格式为:
telnet HOST PORT
GET /URL HTTP/1.1
Host: HOSTNAME or IP
示例:
[root@node1 ~]# vim /etc/httpd/conf/httpd.conf #修改配置文件,开启长连接
KeepAlive On
MaxKeepAliveRequests 500
KeepAliveTimeOut 15
[root@node1 ~]# httpd -t #校验配置文件语法
Syntax OK
[root@node1 ~]# systemctl restart httpd #重启Web服务使配置生效
[D:\~]$ telnet 192.168.106.11 80 # 在本机终端使用telnet连接Web服务
Connecting to 192.168.106.11:80...
Connection established.
To escape to local shell, press 'Ctrl+Alt+]'.
HEAD / HTTP/1.1 # 输入请求头部信息
Host: 192.168.106.11 # 输入header信息
HTTP/1.1 403 Forbidden
Date: Sun, 10 May 2020 13:42:24 GMT
Server: Apache/2.4.6 (CentOS)
Last-Modified: Thu, 16 Oct 2014 13:20:58 GMT
ETag: "1321-5058a1e728280"
Accept-Ranges: bytes
Content-Length: 4897
Content-Type: text/html; charset=UTF-8
Connection closing...Socket close.
Connection closed by foreign host.
Disconnected from remote host(192.168.106.11:80) at 21:42:48.
Type `help' to learn how to use Xshell prompt.
[D:\~]$
我们可以发现,若KeepAlive为Off,在响应完成之后会立即断开,若KeepAlive为On,则不会退出连接,而是等达到KeepAliveTimeOut的超时时长之后,才会自动断开;
注意:所有的明文文本格式的协议都支持使用telnet做测试,如http协议;
3.3 MPM(Multipath Process Module,多道处理模块)
当多个用户向同一个Web服务器发起请求时,Web服务器有多种处理方式可供选择,而MPM就是定义用于响应多个用户的工作模型的;大致可分为mpm winnt、prefork、worker、event四种;
-
mpm winnt
专用于Windows NT,因为Windows是原生支持线程的,mpm winnt是Windows上使用的一种特殊处理机制;
-
prefork
预先生成进程,一个请求用一个进程响应,好处在于稳定可靠,任何一个进程崩溃了不会影响其它请求,但性能比较差,尤其是多个用户请求并发量很大的时候性能很差,因为它对资源消耗量非常多,而且会涉及的大量的进程切换;
配置项:
StartServers:服务启动时启动的服务器进程数;
MinSpareServers:最小空闲进程数;
MaxSpareServers:最大空闲进程数;
MaxClients:最大并发请求数,或者服务器端的最大启动的进程数量,即最多可允许多少个客户端同时连接到httpd;
ServerLimit:为MaxClient所准备的在其服务器生命周期内所允许的进程数量最大值;
一般而言,MaxClients = ServerLimit * 进程的线程数,因为prefork的每一个工作进程同一时间点只能响应一个请求,因此可以将prefork模型看作一个进程下只有一个线程。因此,对于prefork模型,一般可设置:MaxClients = ServerLimit;
MaxRequestsPerChild:一个服务器进程最多能够响应的请求的次数;
- worker
基于线程工作,一个进程响应多个用户请求,但真正直接响应用户请求的是一个进程下的多个线程,一个请求用一个线程响应。
首先,Web服务器会生成两个工作进程,线程是进程的子单位,因此线程一定是处于多个进程当中的,所以在worker模型下,Web服务器会生成多个进程(一般而言,默认可能启动两个),但进程不是用来响应用户请求的,每一个进程会生成多个线程,用一个线程响应一个用户请求。这种好处在于对于Thread而言,由于多个线程共享同一个进程的资源,所以如果某一个线程曾经访问过某一个文件而且已经打开了的话,那么第二个线程访问同一个文件就不用再次打开了直接访问即可,这样效率比较高;但是多个线程在共享资源时,如果要对同一个资源进行写操作的话是会导致资源争用的;所以为了避免资源竞争,必须要实现加锁,因此如果不能有良好的方案避免锁竞争的话,事实上线程是否比进程效率更高,这个很难说的清楚;尤其是Linux不是原生态支持线程的,所以worker模型经测试发现在Linux上还不如prefork模型性能好,这也是为什么httpd默认使用prefork而不是worker模型的原因。
-
event
基于事件的驱动,一个进程处理多个用户请求,注意是同时处理多个请求,而不是使用线程响应的。一个进程处理多个请求,在Apache2.4后才原生支持event,并且默认就使用event,前提是只要系统库(I/O)支持;因为event是最强大的,Nginx就是使用event机制。但在Apache2.2中默认使用的是prefork的模型。
注意:httpd-2.2不支持同时编译多个模块,所以只能在编译时选定一个;使用rpm方式安装的程序提供了三个二进制程序文件,分别用于实现对不同MPM机制的支持;
查看模块列表:
[root@node1 ~]# httpd -l #列出当前服务器进程编译的时候所支持的模块
Compiled in modules:
core.c
prefork.c
http_core.c
mod_so.chttp_core、core:不仅包括httpd的基本功能还包括反向代理等各种额外的功能,还包括缓存;
mod_so:支持动态模块加载
[root@node1 ~]# httpd.event -l
Compiled in modules:
core.c
event.c
http_core.c
mod_so.c
[root@node1 ~]# httpd -M
httpd: apr_sockaddr_info_get() failed for node1.zua.com.CentOS6.5
httpd: Could not reliably determine the server's fully qualified domain name, using 127.0.0.1 for ServerName
Loaded Modules:
core_module (static)
mpm_prefork_module (static)
http_module (static)
so_module (static)
auth_basic_module (shared)
auth_digest_module (shared)
authn_file_module (shared)
authn_alias_module (shared)
authn_anon_module (shared)
authn_dbm_module (shared)
authn_default_module (shared)
authz_host_module (shared)
authz_user_module (shared)
authz_owner_module (shared)
authz_groupfile_module (shared)
authz_dbm_module (shared)
authz_default_module (shared)
ldap_module (shared)
authnz_ldap_module (shared)
include_module (shared)
log_config_module (shared)
logio_module (shared)
env_module (shared)
ext_filter_module (shared)
mime_magic_module (shared)
expires_module (shared)
deflate_module (shared)
headers_module (shared)
usertrack_module (shared)
setenvif_module (shared)
mime_module (shared)
dav_module (shared)
status_module (shared)
autoindex_module (shared)
info_module (shared)
dav_fs_module (shared)
vhost_alias_module (shared)
negotiation_module (shared)
dir_module (shared)
actions_module (shared)
speling_module (shared)
userdir_module (shared)
alias_module (shared)
substitute_module (shared)
rewrite_module (shared)
proxy_module (shared)
proxy_balancer_module (shared)
proxy_ftp_module (shared)
proxy_http_module (shared)
proxy_ajp_module (shared)
proxy_connect_module (shared)
cache_module (shared)
suexec_module (shared)
disk_cache_module (shared)
cgi_module (shared)
version_module (shared)
Syntax OK
更换使用的MPM模块:
[root@node1 ~]# vim /etc/sysconfig/httpd
# Configuration file for the httpd service.
#
# The default processing model (MPM) is the process-based
# 'prefork' model. A thread-based model, 'worker', is also
# available, but does not work with some modules (such as PHP).
# The service must be stopped before changing this variable.
#
HTTPD=/usr/sbin/httpd.worker
[root@node1 ~]# service httpd restart
停止 httpd: [确定]
正在启动 httpd:httpd.worker: apr_sockaddr_info_get() failed for node1.zua.com.CentOS6.5
httpd.worker: Could not reliably determine the server's fully qualified domain name, using 127.0.0.1 for ServerName
[确定]
[root@node1 ~]# ps aux | grep httpd
root 4082 0.0 0.2 175192 2768 ? Ss 19:31 0:00 /usr/sbin/httpd.worker
root 4085 0.0 0.0 103256 836 pts/0 R+ 19:31 0:00 grep httpd
3.4、DSO(Dynamic Shared Object,动态共享对象)
DSO是类Unix 操作系统中存在的一种动态连接机制, 在程序运行时将需要的部分从外部调入内存执行;httpd使用模块来扩展功能,并在内部使用一个调度机制链接扩展模块到核心模块;
配置指令实现模块加载:
LoadModule <mod_name> <mod_path> # 模块路径可使用相对地址,相对于ServerRoot(在RHEL 6或CentOS 6上默认为/etc/httpd)指向的路径而言;/etc/httpd/modules/指向了/usr/lib64/modules;
3.5、定义'Main' server的文档页面路径(DocumentRoot)
文档路径映射,DocumentRoot指向的路径为URL路径的起始位置:
DocumentRoot "/var/www/html"
例如:/var/www/html/test/index.html 所对应的URL为:http://HOST:PORT/test/index.html
示例:
[root@node1 ~]# vim /etc/httpd/conf/httpd.conf
#
# DocumentRoot: The directory out of which you will serve your
# documents. By default, all requests are taken from this directory, but
# symbolic links and aliases may be used to point to other locations.
#
#DocumentRoot "/var/www/html"
DocumentRoot "/www/htdoc"
[root@node1 ~]# mkdir -pv /www/htdoc
mkdir: 已创建目录 "/www"
mkdir: 已创建目录 "/www/htdoc"
[root@node1 ~]# cd /www/htdoc/
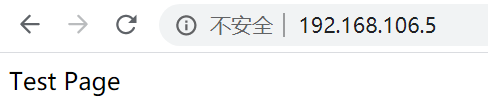
[root@node1 htdoc]# vim index.htmlTest Page
[root@node1 ~]# service httpd reload
重新载入 httpd:
访问,查看效果:
httpd提供了两种访问控制机制:
- 基于来源地址
- 基于账号
3.6 站点访问控制
可基于两种类型的路径指明对哪些资源进行访问控制:
文件系统路径:
<Directory ""></Directory>
<File ""></File>
<FileMatch ""></FileMatch>
URL路径:
<Location ""></Location>
...
- Directory中“基于来源地址”实现访问控制
<Directory "/var/www/html">
#
# Possible values for the Options directive are "None", "All",
# or any combination of:
# Indexes Includes FollowSymLinks SymLinksifOwnerMatch ExecCGI MultiViews
#
# Note that "MultiViews" must be named *explicitly* --- "Options All"
# doesn't give it to you.
#
# The Options directive is both complicated and important. Please see
# http://httpd.apache.org/docs/2.2/mod/core.html#options
# for more information.
#
Options Indexes FollowSymLinks#
# AllowOverride controls what directives may be placed in .htaccess files.
# It can be "All", "None", or any combination of the keywords:
# Options FileInfo AuthConfig Limit
#
AllowOverride None#
# Controls who can get stuff from this server.
#
Order allow,deny
Allow from all</Directory>
(1) Options
定义这个目录下的所有网页文档能够在被访问时候的访问属性,其后可以跟多个值,如果有多个的话彼此之间用空格隔开,每一个值叫一个选项;
可用选项:
-
- Indexes:允许索引目录,即如果没有主页会把DocumentRoot路径下的所有文件列出来供选择。此做法非常不安全,因此在生产环境中一定不要允许Indexs。但在将Web服务器作为下载站用的时候可以将它启用起来;
- Includes:允许执行服务器端包含的SSI格式的文件,也是不安全的;
- FollowSymLinks:允许访问符号链接指向的源文件,如果在网页路径下有一个文件是符号链接,那么此项设置是否允许访问符号链接真正指向的那个文件;
- SymLinksifOwnerMatch:当符号链接文件与源文件的属主匹配时才允许访问;
- ExecCGI:是否允许执行CGI脚本;
- MultiViews:内容协商机制,是否允许多视图,能够根据客户端来源的语言或文字判断应该显示哪一种网页给客户端,如:发现客户的操作系统是汉语的,就返回汉语的页面,很消耗资源,一般不显示;
- None:默认值,不支持任何选项;
- All:启用所有选项;
(2) AllowOverride
是否允许覆盖访问,覆盖AllowOverride下面的两项(即Order),下面两项定义服务器的访问控制列表;
AllowOverride值可选:
None:不让下面两项失效;
AuthConfig:用的最多,使用认证配置去覆盖用户请求,意味着需要基于一个文件用户名的账号密码需要认证后才运行访问;
注意:httpd的账号密码不是/etc/passwd中的账号密码,而是自己建立的一个文件中的账号密码,如在/etc/httpd/conf下建一个口令文件,这个文件中存有用户的账号密码,建完后只允许这个文件中的某个账号访问,我们在访问的时候输入密码才能访问,因此可以限定某些敏感的站点只能让那些可以通过访问认证的用户才能访问;
- 基于来源地址的访问控制机制
Order:用于定义基于主机的访问控制功能的,能够实现基于IP地址、网络地址或主机定义,但Order本身并不是定义访问控制机制的,Order只是说明谁是默认原则的;
Order allow,deny:默认法则为deny,只有明确allow的才允许,白名单;
Order deny,allow:默认法则为allow,只有明确deny的才允许,黑名单;
Allow from
Deny from
Order地址的表示方式:
-
- IP
- network/netmask
- HOSTNAME:www.a.com
- DOMAINNAME:magedu.com
- Partial IP:(部分IP)172.16,172.16.0.0/16
例如:
仅允许192.168.0.0/24这个网络访问:(此时deny是默认法则)
Order allow,deny
Allow from 192.168.0.0/24
如:不允许192.168.0,0/24这个网络访问时:(此时allow是默认法则)
Order allow,deny
Deny from 192.168.0.0/24
如:拒绝192.168.0.1和172.16.100.177这两个主机的访问:
Order deny,allow
Deny from 192.168.0.1 172.16.100.177
注意:在httpd2.4中,不再使用AllowOverride机制了;
3.7 基于用户的访问控制
认证质询:
WWW-Authenticate:响应码为401,拒绝客户端请求,并说明要求客户端提供账号和密码;
认证:
Authorization:客户端用户填入账号和密码后再次发送请求报文;认证通过,则服务器发送响应的资源;
认证类型:
basic:明文
digest:消息摘要
安全域:需要用户认证后方能访问的路径,应该通过名称对其进行标识,并用于告知用户认证的原因;
存储:
文本文件
SQL数据库
ldap(轻量目录访问协议)
nis
basic认证:
(1) 定义安全域
<Directory "">
Options None
AllowOverride No
AuthType Basic
AuthName "STRING"
AuthUserFile "/PATH/TO/HTTPD_USER_PASSWD_FILE"
Require user username1 username2 ...
</Directory>
允许账号文件中的所有用户登录访问:
Require valid-user
(2) 提供账号和密码存储(文本文件)
使用htpasswd命令进行管理
htpasswd [options] passwordfile username
-c:自动创建passwordfile,因此,仅应该在添加第一个用户时使用;
-m:md5加密用户密码;
-s:sha1加密用户密码
-D:删除指定用户;
(3) 实现基于组进行认证
<Directory "">
Options None
AllowOverride No
AuthType Basic
AuthName "STRING"
AuthUserFile "/PATH/TO/HTTPD_USER_PASSWD_FILE"
AuthGroupFile "/PATH/TO/HTTPD_GROUP_PASSWD_FILE"
Require group GROUP1 GROUP2 ...
</Directory>
需提供:用户账号文件和组文件;
组文件:每一行定义一个组
格式:
GRP_NAME: user1 user2 user3 ... (注意:此处的user一定是在以上用户文件只用定义的用户才行;)
示例:
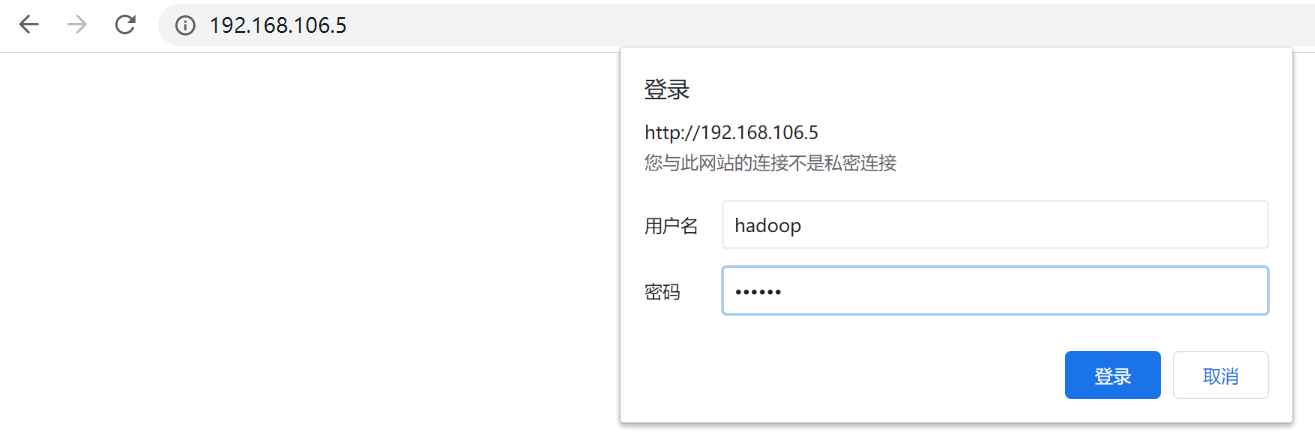
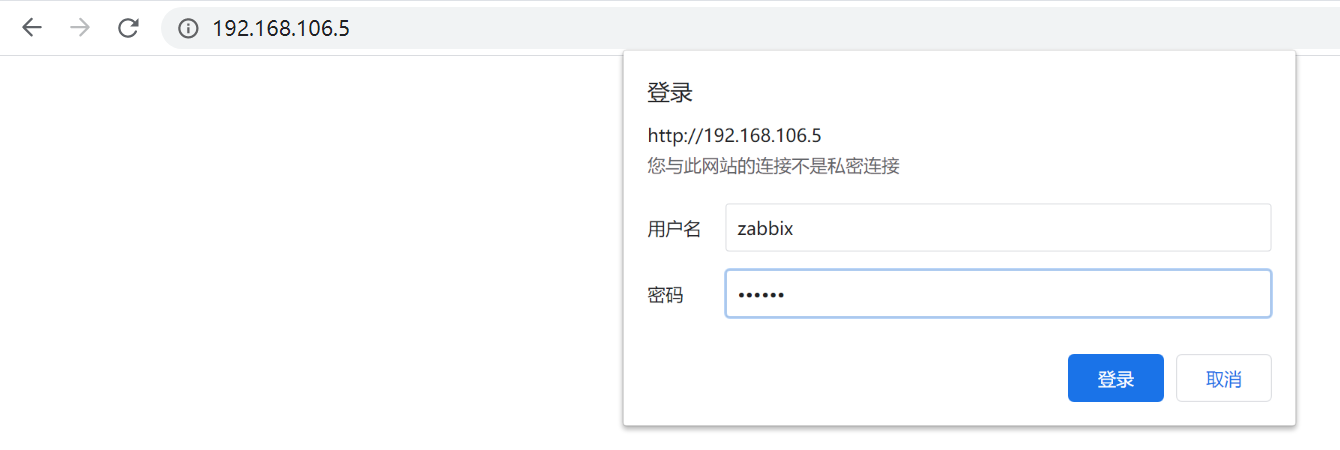
基于用户认证:
[root@node1 ~]# vim /etc/httpd/conf/httpd.conf
<Directory "/www/htdoc">
AllowOverride AuthConfig
AuthType Basic
AuthName "Restricted Site..."
AuthUserFile "/etc/httpd/conf/htpasswd"
Require valid-user
</Directory>[root@node1 ~]# htpasswd -c -m /etc/httpd/conf/htpasswd hadoop
New password:
Re-type new password:
Adding password for user hadoop
[root@node1 ~]# htpasswd -m /etc/httpd/conf/htpasswd zabbix
New password:
Re-type new password:
Adding password for user zabbix
[root@node1 ~]# httpd -t
Syntax OK
[root@node1 ~]# service httpd restart
停止 httpd: [确定]
正在启动 httpd:httpd.worker: apr_sockaddr_info_get() failed for node1.zua.com.CentOS6.5
httpd.worker: Could not reliably determine the server's fully qualified domain name, using 127.0.0.1 for ServerName
[确定]
基于组认证:
[root@node1 ~]# vim /etc/httpd/conf/httpd.conf
<Directory "/www/htdoc">
AllowOverride AuthConfig
AuthType Basic
AuthName "Restricted Site..."
AuthUserFile "/etc/httpd/conf/htpasswd"
AuthGroupFile "/etc/httpd/conf/htgroup"
Require group myusers
</Directory>[root@node1 ~]# vim /etc/httpd/conf/htgroup
myusers: hadoop zabbix # 注意:其中的用户必须在密码文件中已创建
[root@node1 ~]# httpd -t
Syntax OK
[root@node1 ~]# service httpd restart
停止 httpd: [确定]
正在启动 httpd: [确定]
3.8 定义默认主页面
DerectoryIndex index.html index.html.var
示例:
[root@node1 ~]# vim /www/htdoc/myCustom.html
DirectoryIndex myCustom.html index.html.var
[root@node1 ~]# vim /www/htdoc/myCustom.html
<h1>MyCustom.html</h1>
[root@node1 ~]# !ser
service httpd restart
停止 httpd: [确定]
正在启动 httpd: [确定]

3.9 日志设定
- 错误日志:
ErrorLog logs/error_log
LogLevel warn
debug、info、notice、warn、error、crit、alert、emerg
- 访问日志
CustomLog logs/access_log combined
LogFormat "%h %l %u %t \"%r\" %>s %b \"%{Referer}i\" \"%{User-Agent}i\"" combined # %h、%l、%i...等都有其特殊含义,都能够替换成具体的请求过程中的相关信息,因此称为特殊的宏,这些宏的具体信息可参见官方文档
%h:客户端IP地址;
%l:Remote logname(from identd,if supplied),-表示为空;
%u:Remote user,(from auth;may be bogus if return status (%s) is 401);
%t:Time the request was received (stantrand english format),服务器收到请求的时间;
%r:First line of request,请求报文的首行信息(method url version);
%>s:响应状态码;表示响应状态码中最后那个数值格式的响应状态码信息而不包括原因短语;
%b:响应报文的大小,单位是字节,不包含响应报文首部;
%{Referer}i:请求报文当中"referer"首部的值;referer表示当前页面的访问入口,即来自于哪个页面中的超链接跳转而来;
%{User-Agent}i:请求报文当中"User-Agent"首部的值;即发出请求用到的应用程序;
详情请见:http://httpd.apache.org/docs/2.2/mod/mod_log_config.html#formats
3.10 路径别名
Alias /URL/ "/PATH/TO/SOMEDIR/"
注意:若在/URL后加了/,/PATH/TO/SOMEDIR后也需要加/,若不加/则/PATH/TO/SOMEDIR也不能加/;
需要注意Alias与DocumentRoot的区别:
DocumentRoot "/www/htdoc"
访问http://www.test.com/download/zabbix.rpm 对应于访问Web服务器下的绝对路径:/www/htdoc/download/zabbix.rpm
Alias /download/ "/file/htdoc/"
访问http://www.test.com/download/index.html 对应于访问Web服务器下的绝对路径:/www/file/htdoc/index.html
示例:
[root@node1 ~]# vim /etc/httpd/conf/httpd.conf
Alias /testAlias/ "/site/htdoc/"
[root@node1 ~]# vim /site/htdoc/index.htmltestAlias
[root@node1 ~]# mkdir /site/htdoc -pv
mkdir: 已创建目录 "/site"
mkdir: 已创建目录 "/site/htdoc"[root@node1 ~]# vim /site/htdoc/index.html

[root@node1 ~]# tail /var/log/httpd/access_log
192.168.106.1 - - [26/May/2020:01:02:36 +0800] "GET /testAlias/index.html HTTP/1.1" 200 11 "-" "Mozilla/5.0 (Windows NT 10.0; Win64; x64) AppleWebKit/537.36 (KHTML, like Gecko) Chrome/80.0.3987.116 Safari/537.36"
3.11 设定默认字符集
AddDefaultCharset UTF-8 # 字符集可选:GBK、GB2312、GB18030
3.12 虚拟主机
虚拟主机可实现在一台物理主机上虚拟出来多个可以同时运行的站点(主机)。
虚拟有三种实现方案:
- 基于Ip
为每个虚拟主机准备至少一个ip地址;
- 基于Port
为每个虚拟主机准备至少一个专用port;实践中很少使用;
- 基于Hostname
为每个虚拟主机准备至少一个专用hostname;
可混合使用上述三种方式中任意方式;
注意:一般虚拟主机莫与中心主机混用,所以,要使用虚拟主机,先禁用中心主机;
禁用中心主机方法:注释DocumentRoot即可;
每个虚拟主机都有专用配置:
<VirtualHost "IP:PORT">
ServerName
DocumentRoot ""
</VirtualHost>
ServerAlias #虚拟主机的别名;
ErrorLog
CustomLog
<Directory "">
</Directory>
示例:
[root@node1 ~]# vim /etc/httpd/conf/httpd.conf
#
# DocumentRoot: The directory out of which you will serve your
# documents. By default, all requests are taken from this directory, but
# symbolic links and aliases may be used to point to other locations.
#
#DocumentRoot "/var/www/html"
#DocumentRoot "/www/htdoc"
#基于IP的虚拟主机
<VirtualHost 192.168.106.5:80>
DocumentRoot "/vhosts/web2/htdocs"
ServerName web2.zua.com
</VirtualHost>
<VirtualHost 192.168.106.6:80>
DocumentRoot "/vhosts/web1/htdocs"
ServerName web1.zua.com
</VirtualHost>
# 基于端口的虚拟主机
<VirtualHost 192.168.106.5:80>
DocumentRoot "/vhosts/web2/htdocs"
ServerName web2.zua.com
</VirtualHost>
<VirtualHost 192.168.106.6:80>
DocumentRoot "/vhosts/web1/htdocs"
ServerName web1.zua.com
</VirtualHost>
<VirtualHost 192.168.106.5:8080>
DocumentRoot "/vhosts/web3/htdocs"
ServerName web3.zua.com
</VirtualHost>
#基于主机名的虚拟主机
NameVirtualHost 192.168.105.5:80 # 注意:httpd2.2基于主机名的虚拟主机需要开启此项,而httpd2.4则不用
<VirtualHost 192.168.106.5:80>
DocumentRoot "/vhosts/web2/htdocs"
ServerName web2.zua.com
</VirtualHost>
<VirtualHost 192.168.106.5:80>
DocumentRoot "/vhosts/web1/htdocs"
ServerName web1.zua.com
</VirtualHost>
<VirtualHost 192.168.106.5:80>
DocumentRoot "/vhosts/web3/htdocs"
ServerName web3.zua.com
</VirtualHost>
3.13 httpd内置的status页面
[root@node1 ~]# vim /etc/httpd/conf/httpd.conf
<Location /server-status>
SetHandler server-status
Order deny,allow
Deny from all
Allow from 192.168
</Location>[root@node1 ~]# service httpd reload
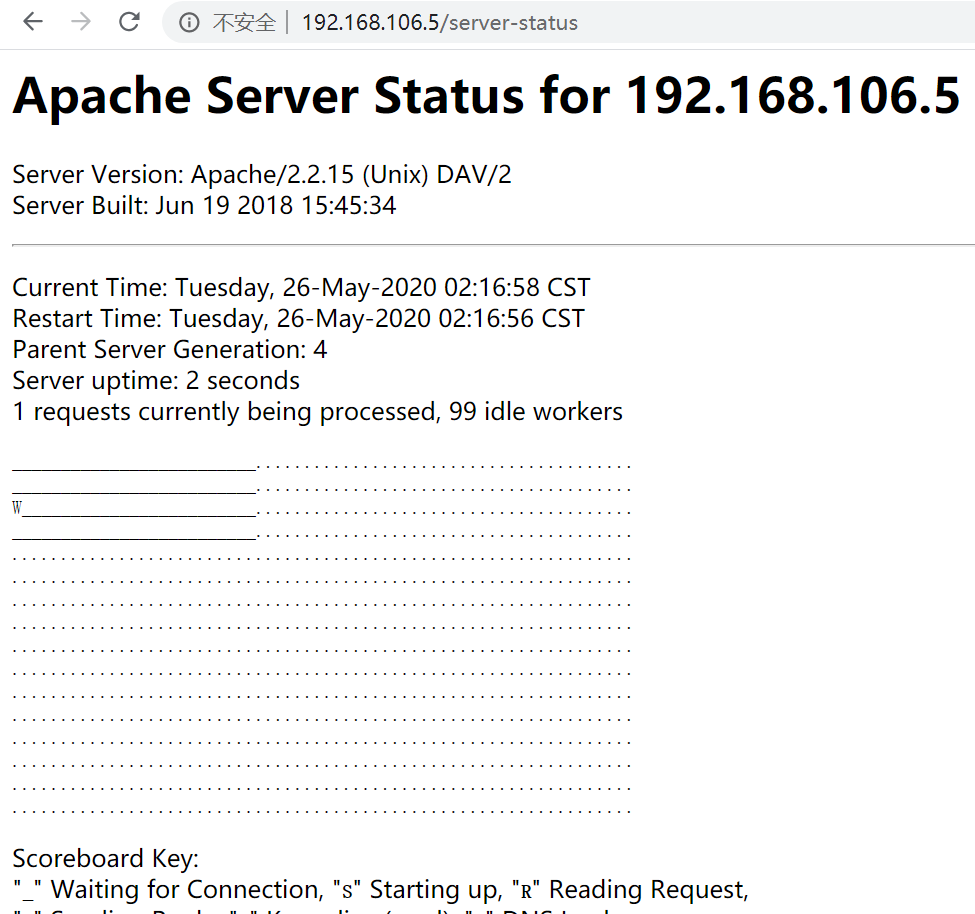
显示更详细的信息:
[root@node1 ~]# vim /etc/httpd/conf/httpd.conf
ExtendedStatus On
[root@node1 ~]# service httpd reload
重新载入 httpd:
![]()
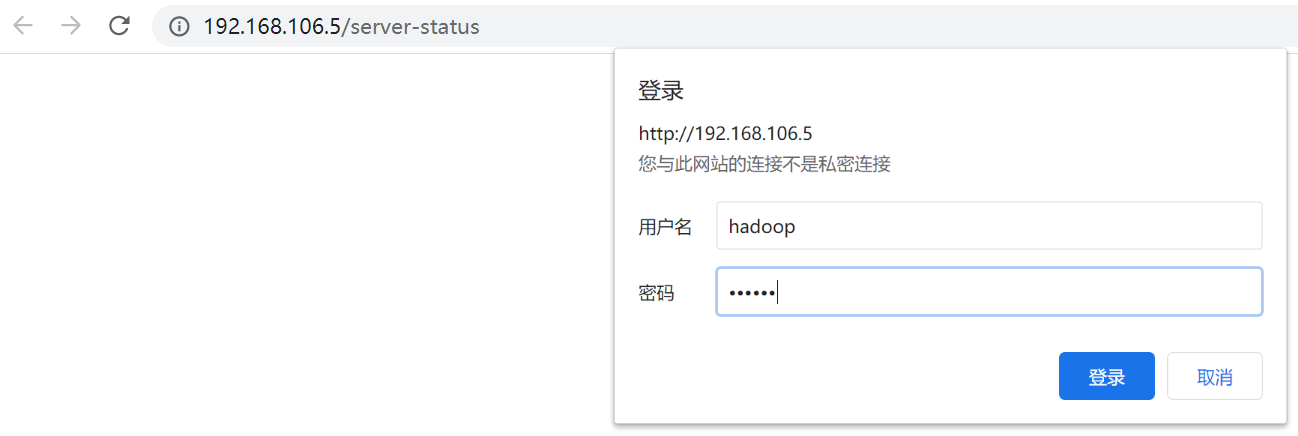
实现:基于账号实现对server-status页面访问控制
<Location /server-status>
SetHandler server-status
AllowOverride AuthConfig
AuthType Basic
AuthName "Require Auth..."
AuthUserFile "/etc/httpd/conf/htpasswd"
Require User hadoop
</Location>
4、介绍两个工具:curl、elinks
4.1 curl
curl是基于命令行方式工作的文件传输工具,它支持FTP, FTPS, HTTP, HTTPS, GOPHER, TELNET, DICT, FILE及LDAP等协议。curl支持HTTPS认证,并且支持HTTP的POST、PUT等方法, FTP上传, kerberos认证,HTTP上传,代理服务器, cookies, 用户名/密码认证, 下载文件断点续传,上载文件断点续传,,http代理服务器管道( proxy tunneling), 甚至它还支持IPv6, socks5代理服务器,,通过http代理服务器上传文件到FTP服务器等等,功能十分强大。
命令格式:
curl [options] [URL...]
常用选项:
-A/--user-agent <string> #设置用户代理发送给服务器
--basic #使用HTTP基本认证
--tcp-nodelay #使用TCP_NODELAY选项
-e/--referer <URL> #设置来源网址
--cacert <file> #CA证书 (SSL)
--compressed #要求返回压缩的格式
-H/--header <line> #自定义头(首部)信息传递给服务器
-I/--head #只显示响应报文首部信息
--limit-rate <rate> #设置传输速度
-u/--user <user[:password]> #指定用于服务器身份验证的用户名和密码
-0/--http1.0 #使用HTTP 1.0
4.2 elinks
elinks是纯文本的浏览器,在纯文本界面下,浏览网页的工具;
格式:
elinks URL
如:elinks http://172.16.100.1,通过交互式模式打开一个网页,消去了所有图片的浏览器界面,以纯文本方式浏览界面;
在远程连接的模式下,由于语言不匹配可能会显示成乱码
选项:
--dump #把网页内容显示出来之后立即退出,不再进入交互式模式
--source #显示网页的源码
5、使用mod_deflate模块压缩页面优化速度
我们需要明确的是,对于web服务器而言,从本地磁盘加载内容称为输入,而加载后的内容响应给客户端时为输出;而对于我们而言,web服务器的输入通常不是从磁盘加载内容,而是从客户端读取请求;
[root@node1 ~]# vim /etc/httpd/conf/httpd.conf
LoadModule deflate_module modules/mod_deflate.so
SetOutputFilter DEFLATE #定义输出过滤器
# mod_deflate configuration
# Restrict compression to these MIME types
#向输出过滤器根据类型添加内容;都添加到DEFLATE这个过滤器上;明确说明哪些类型是过滤器能够过滤进来允许支持使用压缩功能的文件类型,基于类型做过滤;
AddOutputFilterByType DEFLATE text/plain
AddOutputFilterByType DEFLATE text/html
AddOutputFilterByType DEFLATE application/xhtml+xml
AddOutputFilterByType DEFLATE text/xml
AddOutputFilterByType DEFLATE application/xml
AddOutputFilterByType DEFLATE application/x-javascript
AddOutputFilterByType DEFLATE text/javascript
AddOutputFilterByType DEFLATE text/css
# Level of compression (Highest 9 - Lowest 1),指定压缩比,默认是6,9是最大压缩比,但会消耗更多的CPU使用周期;
DeflateCompressionLevel 9
# Netscape 4.x has some problems.
#基于User-Agent做模式匹配;
BrowserMatch ^Mozilla/4 gzip-only-text/html
# Netscape 4.06-4.08 have some more problems
BrowserMatch ^Mozilla/4\.0[678] no-gzip
# MSIE masquerades as Netscape, but it is fine
BrowserMatch \bMSI[E] !no-gzip !gzip-only-text/html
[root@node1 vhosts]# curl --compressed -I http://192.168.106.5
HTTP/1.1 403 Forbidden
Date: Mon, 25 May 2020 20:35:08 GMT
Server: Apache/2.2.15 (CentOS)
Accept-Ranges: bytes
Vary: Accept-Encoding
Content-Encoding: gzip
Content-Length: 1995
Connection: close
Content-Type: text/html; charset=UTF-8
6、httpd自带的工具程序简介
- httpd
apache服务器程序
-t: #测试配置文件的语法正确性
-l # 列出静态模块
-D DUMP_MODULES #列出DSO模块
-M #列出被装载的模块
-D DUMP_VHOSTS # 列出所有虚拟主机
- htpasswd
为基于文件的basic认证创建和更新用户认证文件
- apachectl
脚本,httpd服务控制工具;
- ab: apache benchmark
httpd的基准性能测试工具;
- apxs
由httpd-devel包提供,httpd得以扩展使用第三方模块的工具;
- htcacheclean
磁盘缓存清理工具;
- htdigest
为digest认证创建和更新用户认证文件;
- httxt2dbm
为rewrite map创建dbm格式的文件;
- rotatelogs
日志滚动工具;
access_log -->
access_log,access_log.1
access_log,access_log.1,access_log.2
- suexec
当httpd进程需要以另外的用户的身份去访问某些资源时,可以以suexec作临时切换;
7、httpd压力测试工具
- ab
ab [OPTIONS] URL
-n #总的请求数
-c #模拟的并发数
-k #以持久连接模式测试
注:
ulimit -n # #调整当前用户所同时打开的文件数;
- webbench
- http_load
- jmeter
- loadrunner
- tcpcopy
建议:上述几款压测工具自行了解其基本使用;

 浙公网安备 33010602011771号