Cobbler 自动安装 配置
自动化安装适用于IDC机房批量安装服务器;
现在我们的自动化安装的方法有两种;今天我们来实现一下Cobbler的配置;
1.PXE,这种配置起来比较麻烦;

2.Cobbler,这种批量安装的方法,也是基于PEX结构执行的,但是Cobbler省去了我们配置文件的步骤,都交给了Cobbler来完成;

1)安装软件;查看服务是否启动
[root@host1 ~]# yum install tftp-server rsync xinetd httpd dhcp

[root@host1 ~]# systemctl enable xinetd
[root@host1 ~]# systemctl enable tftp
[root@host1 ~]# systemctl start xinetd

[root@host1 ~]# yum install cobbler

[root@host1 ~]# systemctl start cobblerd
[root@host1 ~]# systemctl restart httpd
[root@host1 ~]# cobbler check
The following are potential configuration items that you may want to fix:

1 : The 'server' field in /etc/cobbler/settings must be set to something other than localhost, or kickstarting featuresot server as reachable by all machines that will use it.
2 : For PXE to be functional, the 'next_server' field in /etc/cobbler/settings must be set to something other than 127.
3 : SELinux is enabled. Please review the following wiki page for details on ensuring cobbler works correctly in your S
    https://github.com/cobbler/cobbler/wiki/Selinux
4 : change 'disable' to 'no' in /etc/xinetd.d/tftp
5 : some network boot-loaders are missing from /var/lib/cobbler/loaders, you may run 'cobbler get-loaders' to download sure that you have installed a *recent* version of the syslinux package installed and can ignore this message entirely.s, should include pxelinux.0, menu.c32, elilo.efi, and yaboot. The 'cobbler get-loaders' command is the easiest way to
6 : enable and start rsyncd.service with systemctl
7 : debmirror package is not installed, it will be required to manage debian deployments and repositories
8 : ksvalidator was not found, install pykickstart
9 : The default password used by the sample templates for newly installed machines (default_password_crypted in /etc/co"openssl passwd -1 -salt 'random-phrase-here' 'your-password-here'" to generate new one
10 : fencing tools were not found, and are required to use the (optional) power management features. install cman or fe

Restart cobblerd and then run 'cobbler sync' to apply changes.
2)挂载光盘镜像
[root@host1 ~]# mount /dev/cdrom /mnt/

[root@host1 ~]# cobbler import --path=/mnt --name=CentOS_7
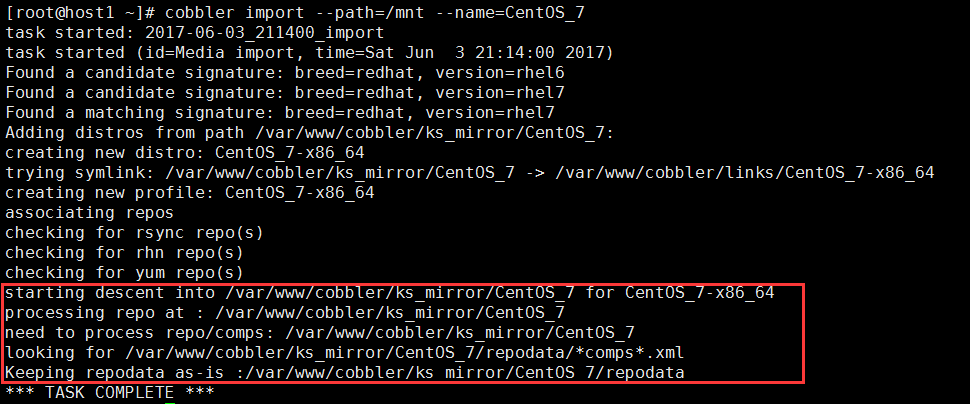
从上面显示信息所知,cobbler会将镜像中的内容拷贝到本地一份,放在/var/www/cobbler/ks_mirror下的CentOS_7目录下。同时会创建一个名字为CentOS_7-x86_64的一个发布版本
3)配置cobbler配置文件
首先修改cobbler配置,让cobbler来管理dhcp服务,编辑文件/etc/cobbler/settings
[root@host1 ~]# vim /etc/cobbler/settings


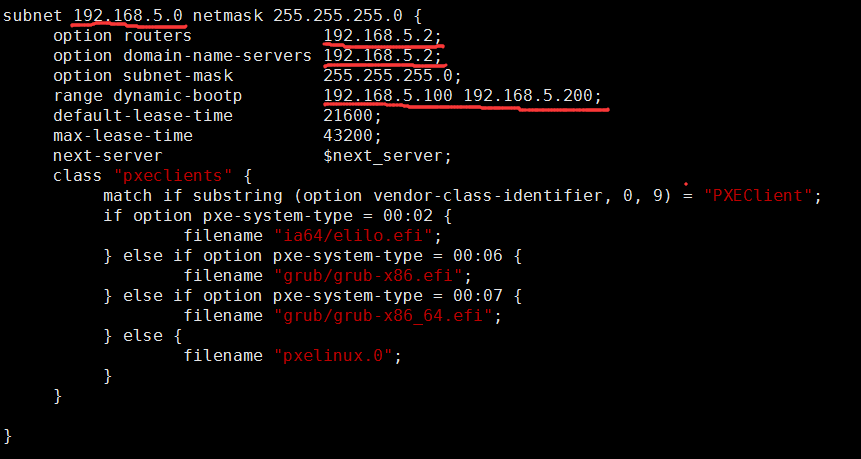
4)修改cobbler中的dhcp配置文件;
[root@host1 ~]# systemctl restart cobblerd

同步cobbler配置
5)配置完成
[root@host1 ~]# cobbler sync
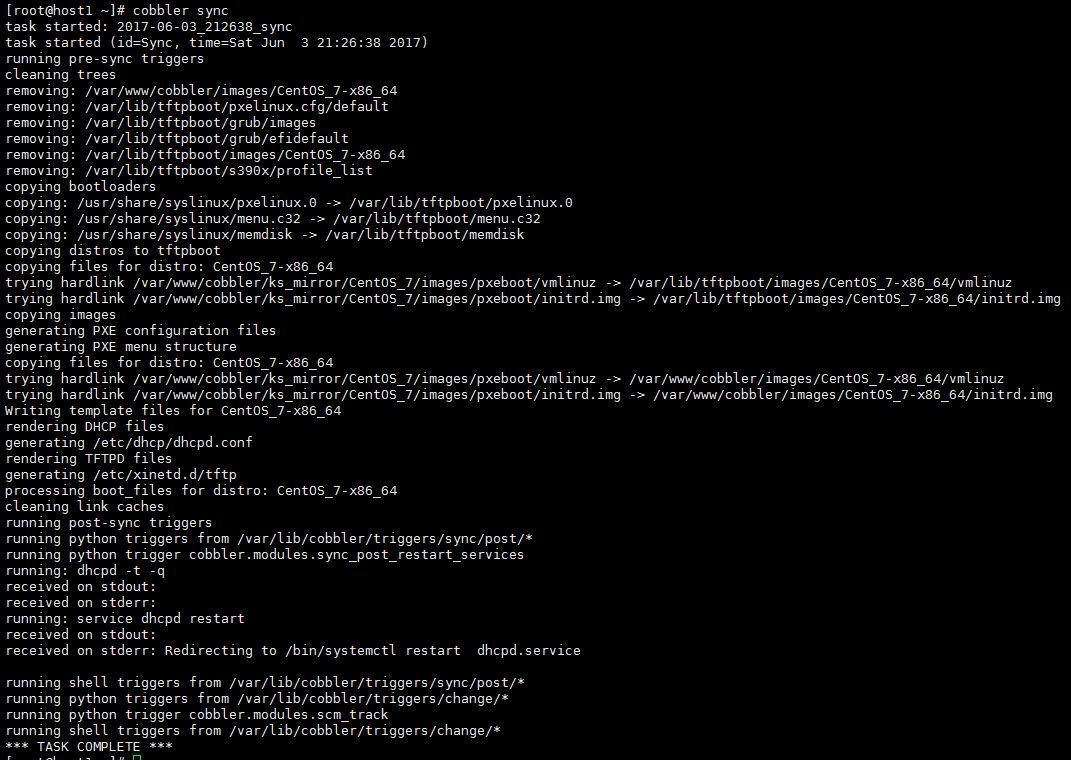
cobbler会自动进行初始化工作,移除已经存在的启动项,然后根据模板拷贝loader文件。之后再生成pxe的配置文件,生成dhcp的配置文件,最后再重启dhcp服务。接下来,就可以测试cobbler安装了。
6)配置安装文件,到这里我们自动安装就配置完成了,初始化密码为:cobbler
[root@host1 ~]# vim /var/lib/tftpboot/pxelinux.cfg/default

这个命令可以让我们自定义ks文件
[root@host1 ~]# cobbler profile edit --name=CentOS_7-x86_64 --distro=CentOS_7-x86_64 --kickstart=/var/lib/cobbler/kickstarts/sample_end.ks
Web页面配置
Web界面
web 界面的管理是一个非常简便的方法, 只需要安装cobbler_web 软件包即可

[root@host1 ~]# yum install cobbler-web

[root@host1 ~]# systemctl restart cobblerd

[root@host1 ~]# systemctl restart httpd

注意:地址是 https://192.168.88.101/cobbler
错误解决办法:
[root@host1 ~]# yum install python-pip
[root@host1 ~]# pip install Django==1.8.9
[root@host1 ~]# systemctl restart httpd


 浙公网安备 33010602011771号