JUnit 简史及 JUnit3 设计思路
JUnit Introduction
JUnit 是一套 Java Unit Test 单元测试框架,是 TDD(test-driven development)的有力支持者。
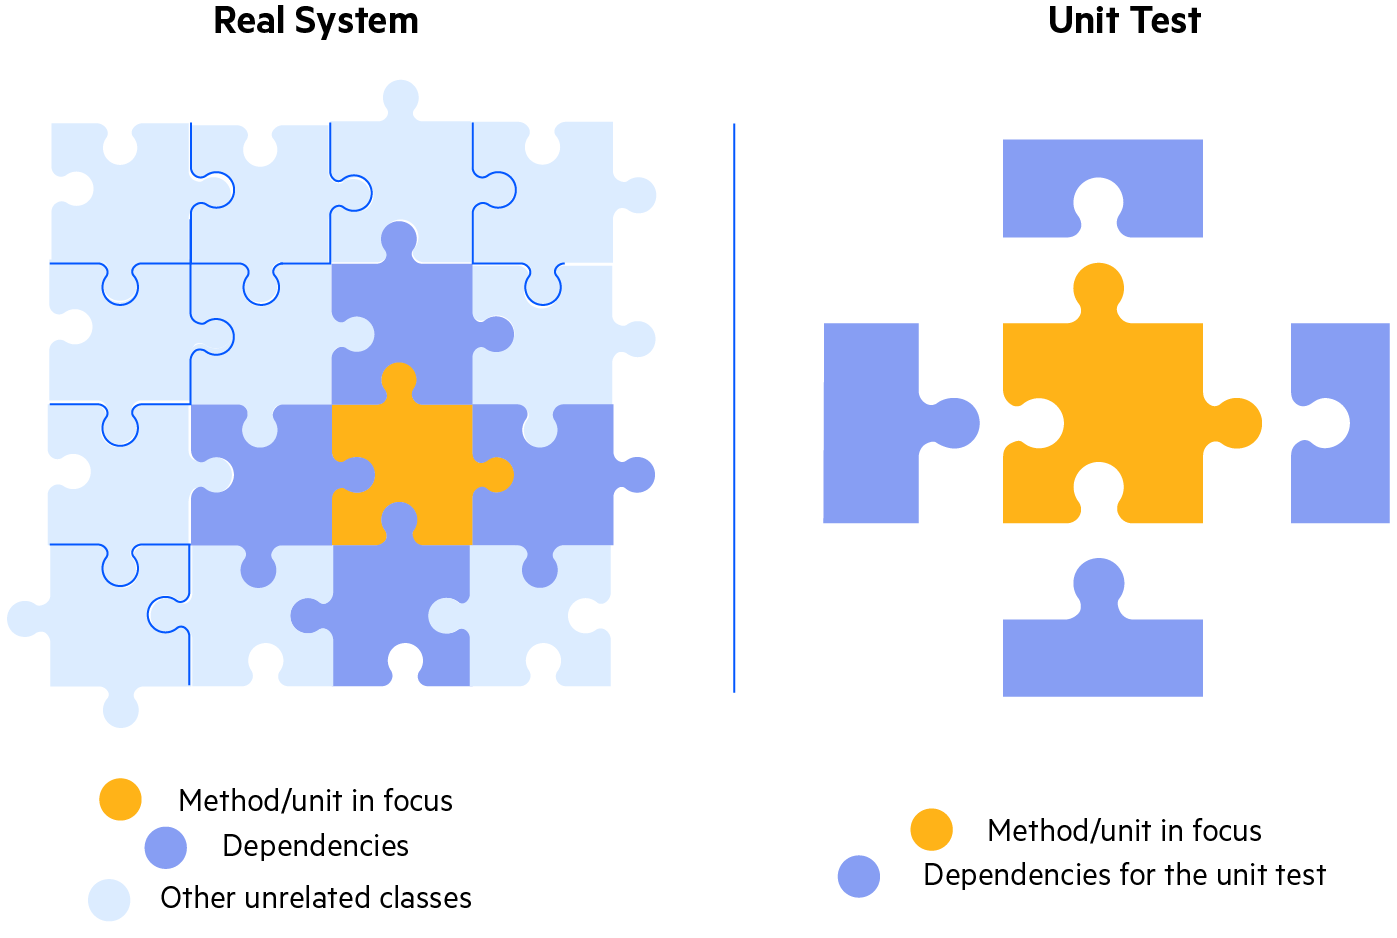
Unit Test
TDD
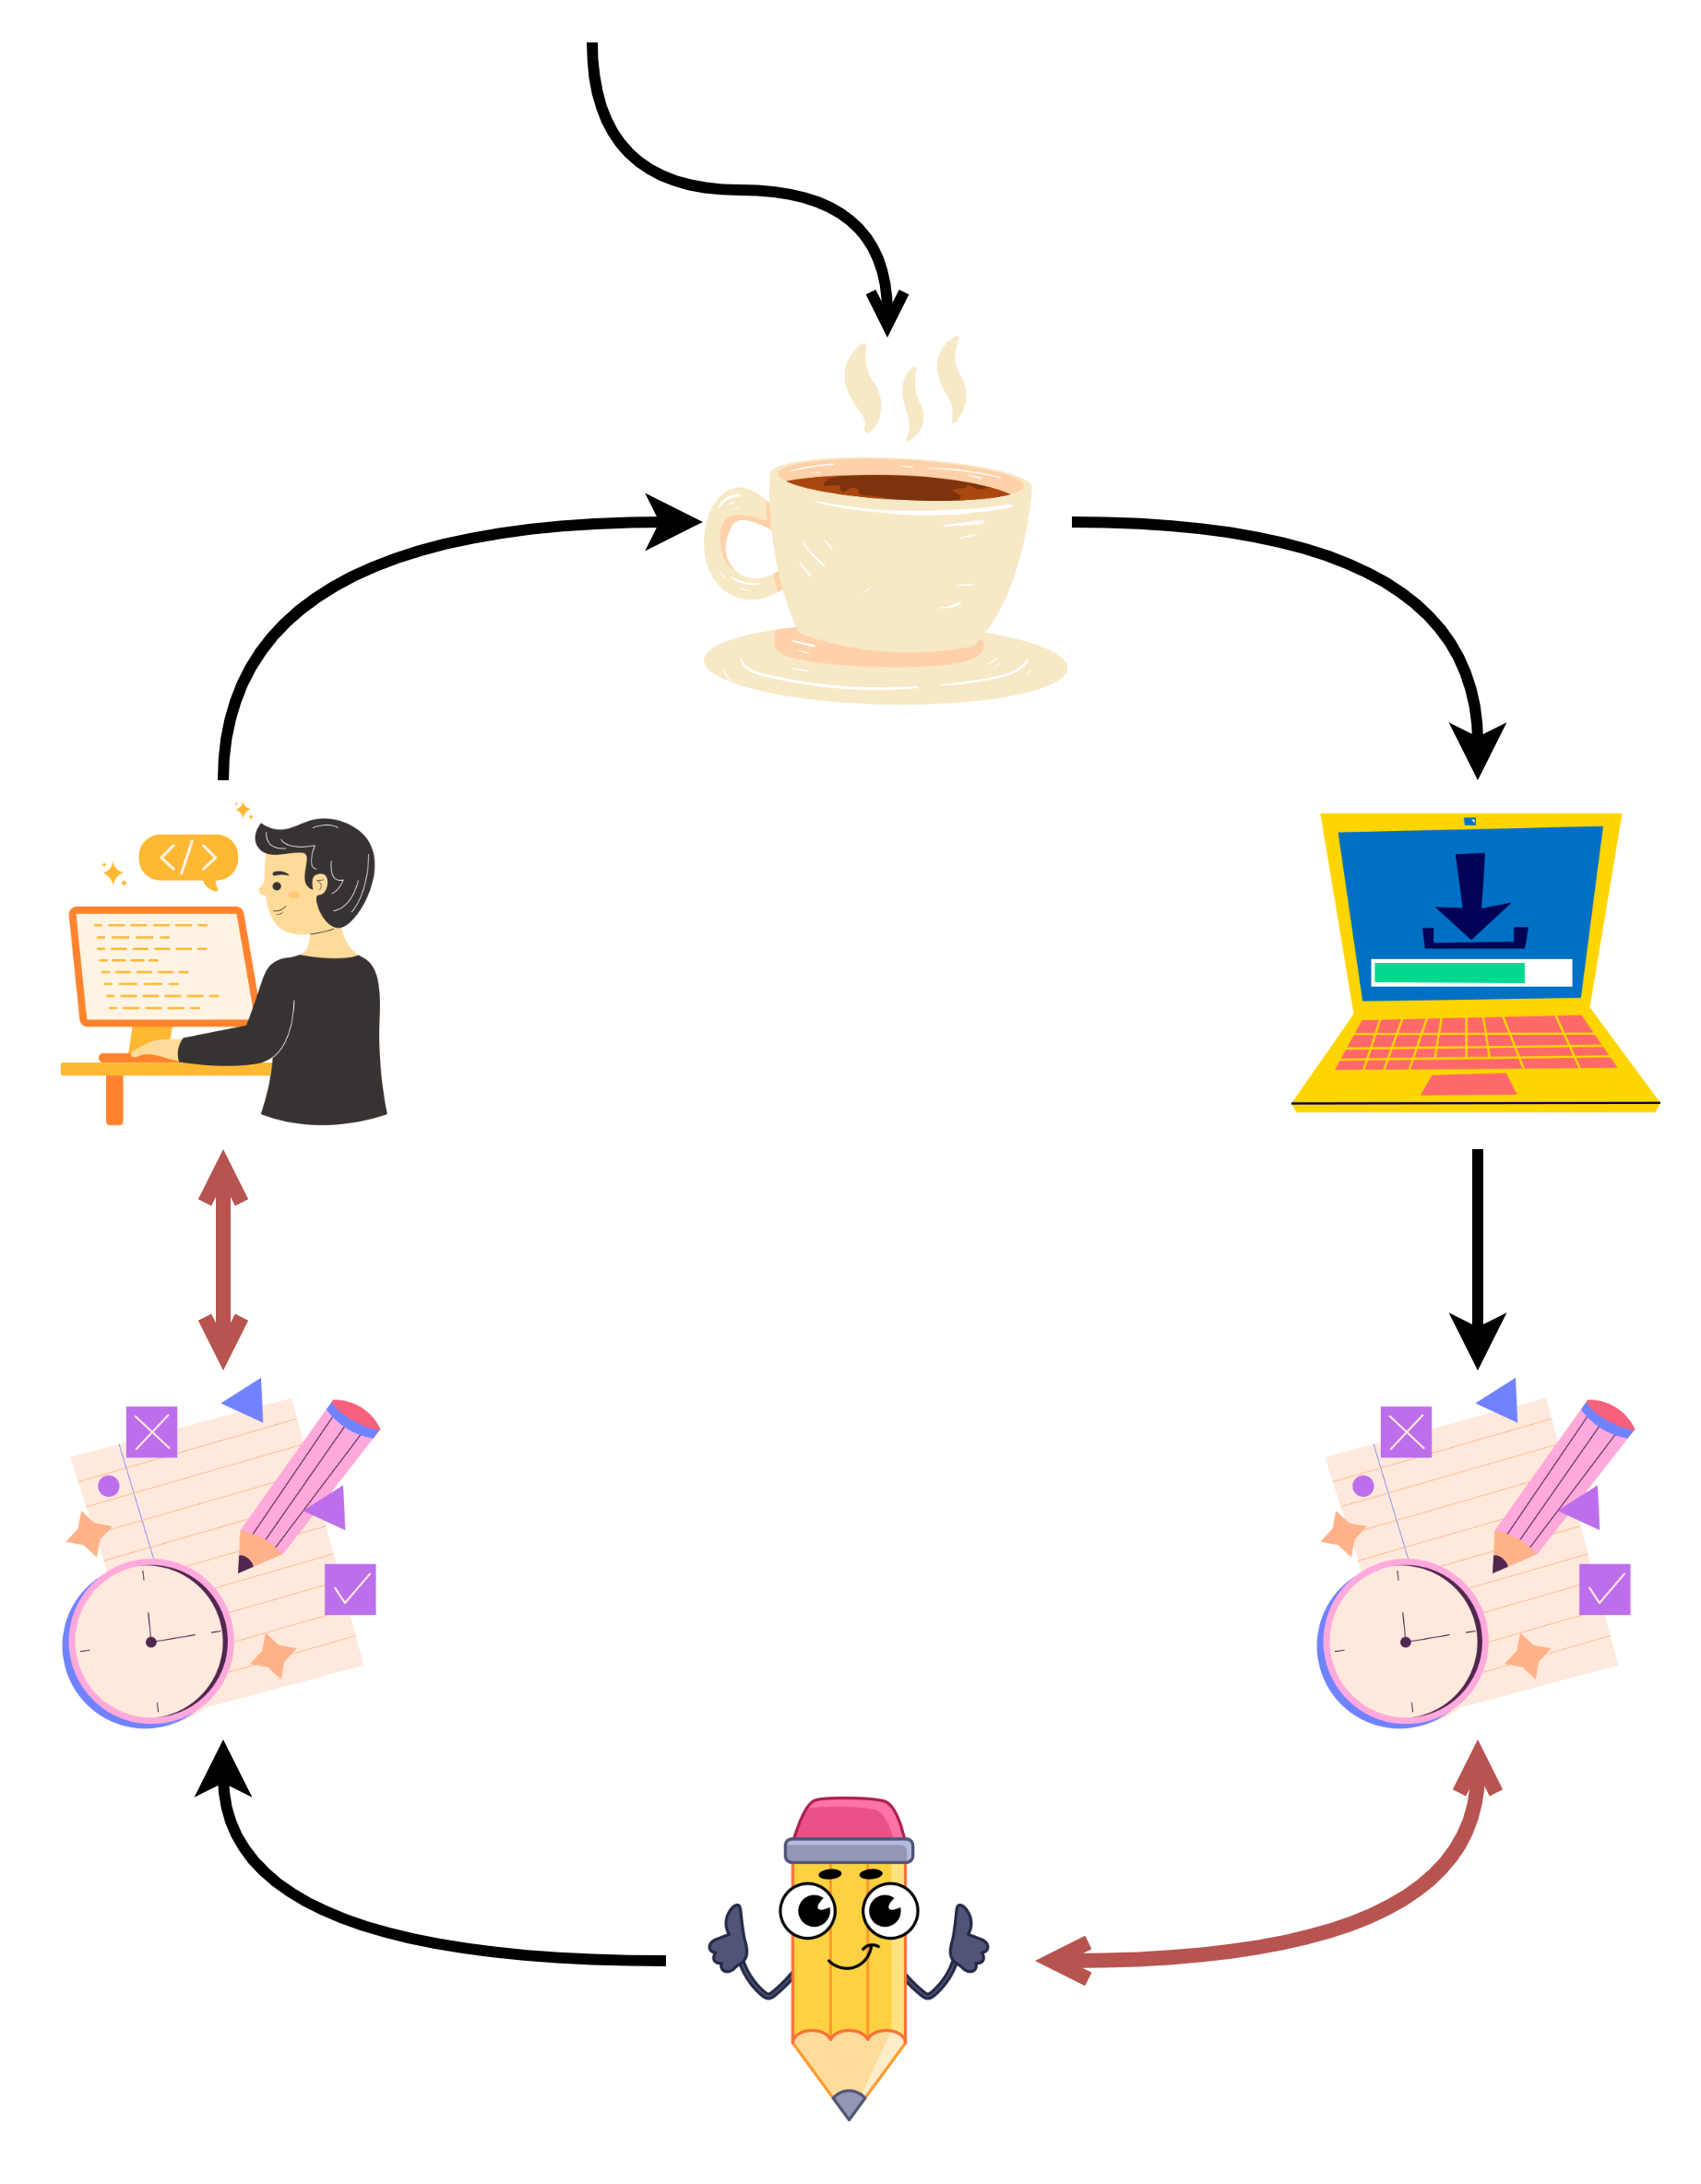
经典的工作流:
- 早上来到工位喝一杯咖啡;
- Download 最新代码;
- 运行当前需求中的单测;
- 修改单测中出现的问题并重复执行单测进行验证;
- 为新的需求编写单测;
- 需求开发、单测循环;
- 下班。
JUnit
History
Offical Site
Versions
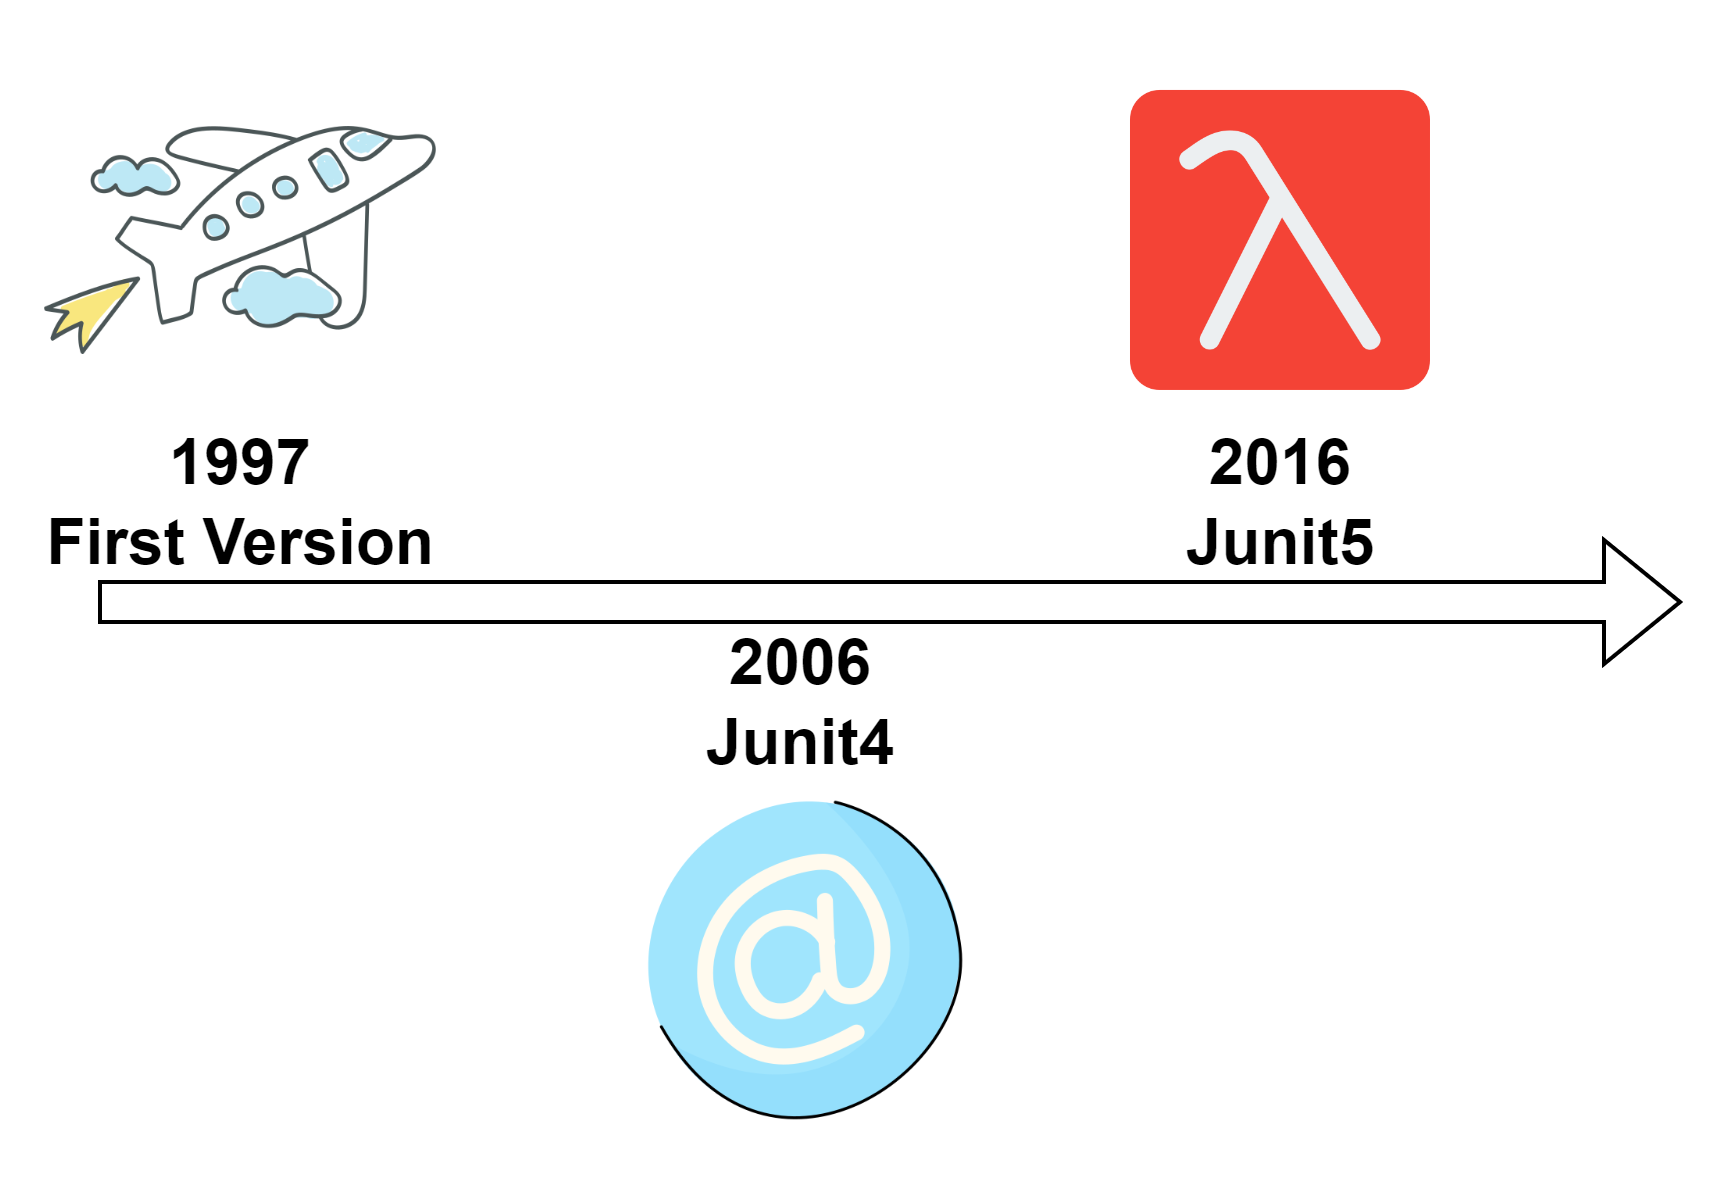
3.7 以前的版本已经很难考证获取,JUnit4 Github 上的源码最早的版本为 3.8.2,Maven 仓库中的最早版本为 3.7。
可以大体将 JUnit 分为 3 个版本,3.0 之前、JUnit4 和 JUnit5,后两个版本从 Java 编程语言中获取的特性都在图中一目了然。
Design Of JUnit3
以下出现的名词定义或许与学术领域中的定义有所出入。
TestCase
什么是测试用例(TestCase)?在 JUnit 中,TestCase 被定义为一组待测试的行为的集合,只需一个命令,所有行为都会按照预定的方式执行。
为了更加抽象地表示,可以借取 Command Pattern 概念的一部分,使其暴露出一个抽象的接口:
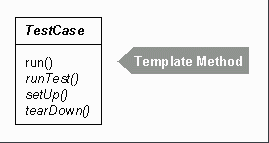
接下来需要定义接口内的行为,Template Method 将 TestCase 的具体行为交由子类实现:
- runTest 方法执行具体的待测试的行为;
- setUp 方法执行测试之前的准备工作;
- tearDown 方法执行测试之后的收尾工作;
- run 方法将上述三个方法组合起来,成为模板。
class TestCase {
    public void run(TestResult result) {
        result.startTest(this);
        setUp();
        runTest();
        tearDown();
    }
}
一个 TestCase 泛化完成,后续所有的概念将围绕其展开。
TestResult
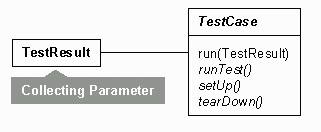
测试必须要有结果,而且理想化的测试一定是批量运行的,而我们对这一个批次的测试整体成功与否的结果并不感兴趣,重要的是每一个 TestCase 的运行情况,因此,我们需要收集每一个 TestCase 运行的结果。
Collecting Parameter pattern 能够很好地满足需求,当需要收集许多个方法的运行结果时,应该给需要被要收集结果的方法设置一个参数来接收该方法运行的结果。这这个参数就是 TestResult。
public class TestResult extends Object {
    // 记录这个对象存储了多少个 TestCase 的结果
    protected int fRunTests;
    public TestResult() {
        fRunTests= 0;
    }

    public synchronized void startTest(Test test) {
        fRunTests++;
    }
}


class TestCase {
    public void run(TestResult result) {
        result.startTest(this);
        setUp();
        runTest();
        tearDown();
    }
}
为了维持 TestCase 的 run 方法接口的简单性,封装一个新的不需要传入参数收集器的接口:
class TestCase {
    public TestResult run() {
        TestResult result = createResult();
        run(result);
        return result;
    }

    protected TestResult createResult() {
        return new TestResult();
    }
}
Assert
泛化好了 TestCase,接下来业务要对测试中的错误进行泛化。这里引出两个概念:Fail 和 Error。Fail 是我们可以预料的,当 TestCase 正常进行,但是结果不符合预期的时候,称 Fail;Error 则是指这个 TestCase 根本无法正常进行。
class TestCase {
    public void run(TestResult result) {
        result.startTest(this);
        setUp();
        try {
            runTest();
        }
        catch (AssertionFailedError e) { // Fail
            result.addFailure(this, e);
        }
        catch (Throwable e) { // Error
            result.addError(this, e);
        }
        finally {
            tearDown();
        }
    }
}
我们编写的 assertXXX 语句在 runTest() 中被执行,当结果不符合预期时,就会抛出 AssertionFailedError 异常:
protected void assertTrue(boolean condition) {
    if (!condition)
        throw new AssertionFailedError();
}
为了方便 assertXXX 的执行,TestCase 继承了含有大量 assertXXX 方法的 Assert 类。
No stupid subclasses
目前为止,一个简单的测试可以这样进行:
- XxxTest继承 TestCase 类;
- 重写 runTest、setUp、tearDown 方法,并在 runTest 方法中加入 assertXxx 判断;
- 执行 XxxTest 实例的 run 方法,得到 TestResult 的实例,通过该实例观察测试结果。
Free test case from runTest
很显然,对于一个 test case 来说,上述过程是完美的,但是我们对一个类的测试显然不止一个 test case,如果要测试多个 test case,就要为每一个 test case 创建一个继承自 TestCase 的类,重写 runTest 方法,执行 run 方法获取测试结果,这是荒谬的,主要的问题在于:
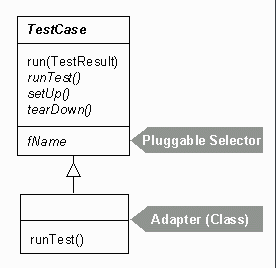
显然,runTest 是一个非常棒的 API,但是我们并不想在这个 API 中直接编写测试逻辑,那样的话,一个 TestCase 类就永远只能对应一个 test case。那就加一个 Adapter 来让我们编写的所有方法适配这个 API:
public class MoneyTest extends TestCase {
    public void testMoneyEquals1() {
        // 具体的测试代码
    }

    public void testMoneyEquals2() {
            // 具体的测试代码
        }
}

public class MoneyEqualsTest extends MoneyTest{
    public MoneyEqualsTest() {super("testMoneyEquals")}
    protected runTest() {testMoneyEquals1/2);} // 选择一个 test case

}
使用子类适配属于硬编码,虽然可以在 MoneyTest 中编写很多 test case,但是如果想要更换要 test case,那么仍然需要编码一个子类来选择要执行的 test case。
可以使用匿名类减少类的编写,并且可以随时替换 test case:
public class MoneyTest extends TestCase {
    public void testMoneyEquals1() {
        // 具体的测试代码
    }

    public void testMoneyEquals2() {
            // 具体的测试代码
        }
}


TestCase test = new MoneyTest("testMoneyEquals") {
    protected void runTest() { testMoneyEquals1/2(); }
};
Free test case from SubClass
Adapter 解决了方法名绑定的问题,让所有的 test case 都能灵活适配 runTest 接口。但是一个 test case 仍然和 TestCase 的一个子类唯一绑定。
为了解除绑定,让我们不用再创造那么多的子类,需要用上反射,将 runTest 方法改写成这样:
protected void runTest() throws Throwable {
    Method runMethod= null;
    try {
        runMethod= getClass().getMethod(fName, new Class[0]);
    } catch (NoSuchMethodException e) {
        assertTrue("Method \""+fName+"\" not found", false);
    }
    try {
        runMethod.invoke(this, new Class[0]);
    }
}
如此一来,我们就不必要为每一个 test case 创建一个 TestCase 的子类,只需要为不同的 test case 创建不同的TestCase 子类的实例。现在,我们测试的流程是这样的:
- 编写 TestXxxYyy 类继承 TestCase,并且在 TestXxxYyy 中编写测试方法 testMethod1、testMethod2……
- 创建 TestCase 实例,每一个实例对应一个 test case:
- TestCase test1 = new TestXxxYyy("testMethod1")
- TestCase test2 = new TestXxxYyy("testMethod2")
- ……
- 执行每一个 TestCase 的 run 方法得到 TestResult 实例
TestSuite
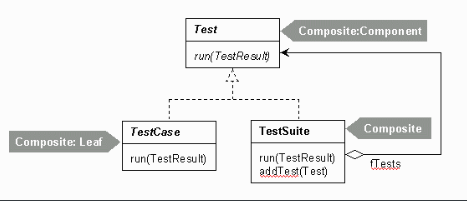
虽然我们不用再为每一个 test case 编写一个 TestCase 类了,但是我们一次仍然只能运行一个 test case,我们需要用一个集合将 TestCase 们组合起来,试试复合模式:很显然,使用 Composite pattern 屏蔽整体和局部的差别,但因此也需要引入两个新的概念。
TestSuite 和 Test,按照复合模式的特征,首先需要抽象出一个接口来统一表示整体和部分:
public interface Test {
    public abstract int countTestCases();
    public abstract void run(TestResult result);
}
接着需要一个类来表示整体:
public class TestSuite implements Test {
    private String fName;
    private Vector fTests= new Vector(10);// 存储部分的容器

    public int countTestCases() {
       int count= 0;
       for (Enumeration e= tests(); e.hasMoreElements(); ) {
          Test test= (Test)e.nextElement();
          count= count + test.countTestCases();
       }
       return count;
    }

    public void run(TestResult result) {
       for (Enumeration e= tests(); e.hasMoreElements(); ) {
          if (result.shouldStop() )
             break;
          Test test = (Test)e.nextElement();
          runTest(test, result);
       }
    }
}
部分则是是 TestCase:
public abstract class TestCase extends Assert implements Test {
    public int countTestCases() {
       return 1;
    }

    public void run(TestResult result) {
       result.run(this);
    }
}
TestSuite 可以从一个 Test 的实现类中构建:
public class TestSuite implements Test {
    public TestSuite() {}

    public TestSuite(Class theClass, String name) {
		this(theClass);
		setName(name);
	}

    public TestSuite(String name) {
		setName(name);
	}

    public TestSuite (Class[] classes) {
		for (int i= 0; i < classes.length; i++)
			addTest(new TestSuite(classes[i]));
	}

    public TestSuite(Class[] classes, String name) {
		this(classes);
		setName(name);
	}

    // 扫描一个实现了 Test 的类中所有以 testXxx 开头并且返回 void 的方法
    // 为这些方法一一创建对应的实例并且添加到当前的 Tesuite 中
    public TestSuite(final Class theClass) {
		fName= theClass.getName();
		try {
			getTestConstructor(theClass); // Avoid generating multiple error messages
		} catch (NoSuchMethodException e) {
			addTest(warning("Class "+theClass.getName()+" has no public constructor TestCase(String name) or TestCase()"));
			return;
		}

		if (!Modifier.isPublic(theClass.getModifiers())) {
			addTest(warning("Class "+theClass.getName()+" is not public"));
			return;
		}

		Class superClass= theClass;
		Vector names= new Vector();
		while (Test.class.isAssignableFrom(superClass)) {
			Method[] methods= superClass.getDeclaredMethods();
			for (int i= 0; i < methods.length; i++) {
				addTestMethod(methods[i], names, theClass);
			}
			superClass= superClass.getSuperclass();
		}
		if (fTests.size() == 0)
			addTest(warning("No tests found in "+theClass.getName()));
	}
}
有了 TestSuite,就可以非常容易地创建 test case 的层次结构,TestSuite 中可以包含 TestSuite 和 TestCase,统一使用 Test 引用。
执行起来也非常方便,只需要执行最外层的 TestSuite 的 run 方法即可。
Summary
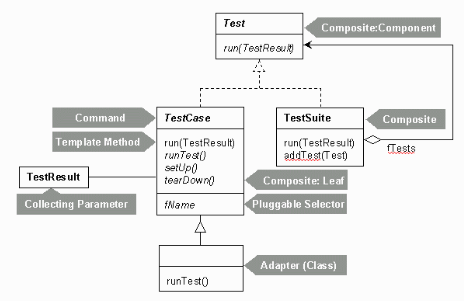
经过设计模式的堆叠,JUnit3 的 framework 浮出水面:
My Environment for Testing Mapper
本节只针对 Mapper 测试提出我目前践行的 Best Practice。
Focus
专注于 Mapper 的测试,意味着 spring context 中不需要装那么多的 bean,因此,要保证测试尽可能地干净,不依赖不必要的依赖,不创建不必要的实例。
Dependency
因为要保证不使用整个项目的 ApplicationContext(不使用 @SpringBootTest),因此引入 mybatis-spring-boot-starter-test 来构建测试时的小范围 context。
<dependency>
    <groupId>org.springframework.boot</groupId>
    <artifactId>spring-boot-starter</artifactId>
</dependency>

<dependency>
    <groupId>org.mybatis.spring.boot</groupId>
    <artifactId>mybatis-spring-boot-starter</artifactId>
    <version>2.3.0</version>
</dependency>

<dependency>
    <groupId>xxx</groupId>
    <artifactId>XXX-connector-java</artifactId>
    <scope>runtime</scope>
</dependency>

<dependency>
    <groupId>org.springframework.boot</groupId>
    <artifactId>spring-boot-starter-test</artifactId>
    <scope>test</scope>
</dependency>

<dependency>
    <groupId>org.mybatis.spring.boot</groupId>
    <artifactId>mybatis-spring-boot-starter-test</artifactId>
    <version>2.3.0</version>
    <scope>test</scope>
</dependency>
Profile
创建一套测试配置,放置在 test/resources 目录下,名为 application-test.yml,避免直接使用主项目配置:
spring:
  datasource:
    url: jdbc:dbms_name://hose:port/db_name
    username: xxx
    password: xxx
    type: xxx
    driver-class-name: xxx

mybatis:
  configuration:
    log-impl: org.apache.ibatis.logging.stdout.StdOutImpl
Annotation
使用 JUnit5 和 Mybatis-Test 进行测试,因此相关的注解可能会和网络上的资料有所不同。
首先创建一个 BaseTest 用于指定测试配置,后续所有的测试都可以继承它,避免重复配置:
@MybatisTest	// 替代 @SpringBootTest,它也会启动容器,但是只会配置一些和 mybatis 相关的类
@AutoConfigureTestDatabase(replace = AutoConfigureTestDatabase.Replace.NONE)	// 使用本地数据库进行测试,而非嵌入数据库
@ActiveProfiles("test")	// 选择项目的配置,使用测试配置,避免加载主项目配置
class BaseTest {
}
使用 @MybatisTest 后注意在测试类的同包路径下设置一个启动类,用来初始化扫描位置,避免加载整个项目的 ApplicationContext,
@SpringBootApplication
public class A {
}
TestCase
class FruitMapperTest extends BaseTest {

    @Autowired
    private FruitMapper fruitMapper;

    @Test
    @DisplayName("根据 tag 查询水果")
    void contextLoads() {
        Tag tag = new Tag();
        tag.setName("name");
        tag.setWeight(BigDecimal.valueOf(41));
        List<FruitDO> fruitDOS = fruitMapper.listAllByTag(tag);
        assertEquals(0, fruitDOS.size());
    }
}
More
JUnit5 为单测提供的工具非常之多,你能想象到的,它几乎都能提供,因此,可以常常去翻阅官方文档 get 一些 tips or tricks。
除此之外,spring-test 也提供了非常多的测试工具,可以看官方的文档了解。
References
作者:locustree
出处:https://www.cnblogs.com/locustree/p/17120592.html
版权:本作品采用「署名-非商业性使用-相同方式共享 4.0 国际」许可协议进行许可。





【推荐】国内首个AI IDE,深度理解中文开发场景,立即下载体验Trae
【推荐】编程新体验,更懂你的AI,立即体验豆包MarsCode编程助手
【推荐】抖音旗下AI助手豆包,你的智能百科全书,全免费不限次数
【推荐】轻量又高性能的 SSH 工具 IShell:AI 加持,快人一步
· 没有Manus邀请码?试试免邀请码的MGX或者开源的OpenManus吧
· 无需6万激活码!GitHub神秘组织3小时极速复刻Manus,手把手教你使用OpenManus搭建本
· C#/.NET/.NET Core优秀项目和框架2025年2月简报
· DeepSeek在M芯片Mac上本地化部署
· 葡萄城 AI 搜索升级:DeepSeek 加持,客户体验更智能