vue中websocket的使用---详解
一、什么是webscoket
WebSockets 是一种先进的技术,它可以在用户的浏览器和服务器之间打开交互式通信会话。使用此 API,可以向服务器发送消息并接收事件驱动的响应,而无需通过轮询服务器的方式以获得响应。
WebSockets 这种技术中有一个接口名为WebSocket,它是一个用于连接 WebSocket 服务器的主要接口,之后可以在这个连接上发送和接受数据。接下来的案例则是使用该接口创建一个WebSocket对象来进行管理。
二、创建对象
使用WebSocket接口创建对象,在创建对象之前,判断当前使用的浏览器是否支持该技术,不支持则无法进行一下步操作。
使用WebSocket接口中的构造器创建对象,构造器中传入要连接的 URL,也就是WebSocket 服务器将响应的 URL。其中ws表示使用的是WebSocket协议;还有一种wss相较于ws更为安全,他们类似于http和https。
if ("WebSocket" in window) {
    const resRole = await getUserInfo();
    //这里对路径进行了配置,关于.env请看上一篇文章
    const wsUrl = process.env.VUE_APP_WEBSOCKET_API + `userCount/${resRole.user.userName}`;
    socket = new WebSocket(wsUrl);
    //上面两行等价于
    socket = new WebSocket("ws://localhost:8080/webSocketServer"); //直接写路径

  } else {
    Notification.error({
      title: "错误",
      message: "您的浏览器不支持websocket,请更换Chrome或者Firefox",
    });
  }
三、处理事件
在上面对象创建成功的基础上,就可以使用该对象的处理事件了,主要分为以下四种:
| 事件 | 事件监听器 | 描述 |
| open | webSocket.onopen | 用于指定链接成功后的回调函数 |
| message | webSocket.onmessage | 用于指定当从服务器接受到信息时的回调函数 |
| error | webSocket.onerror | 用于指定连接失败后的回调函数 |
| close | webSocket.onclose | 用于指定链接关闭后的回调函数 |
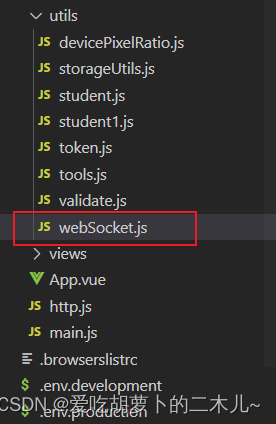
四、webSocket基本已经了解,废话不多说直接上完整代码(我写了个js文件)

import { Notification } from "element-ui";
import { getToken } from "../utils/token";

var socket = null;//实例对象
var lockReconnect = false; //是否真正建立连接
var timeout = 20 * 1000; //20秒一次心跳
var timeoutObj = null; //心跳倒计时
var serverTimeoutObj = null; //服务心跳倒计时
var timeoutnum = null; //断开 重连倒计时

const initWebSocket = async () => {
  if ("WebSocket" in window) {
    const wsUrl = '链接地址';
    socket = new WebSocket(wsUrl);
    socket.onerror = webSocketOnError;
    socket.onmessage = webSocketOnMessage;
    socket.onclose = closeWebsocket;
    socket.onopen = openWebsocket;
  } else {
    Notification.error({
      title: "错误",
      message: "您的浏览器不支持websocket,请更换Chrome或者Firefox",
    });
  }
}

//建立连接
const openWebsocket = (e) => {
  start();
}

const start = ()=> {
  //开启心跳
  timeoutObj && clearTimeout(timeoutObj);
  serverTimeoutObj && clearTimeout(serverTimeoutObj);
  timeoutObj = setTimeout(function() {
    //这里发送一个心跳,后端收到后,返回一个心跳消息
    if (socket.readyState == 1) {
      //如果连接正常
      // socket.send("heartbeat");
    } else {
      //否则重连
      reconnect();
    }
    serverTimeoutObj = setTimeout(function() {
      //超时关闭
      socket.close();
    }, timeout);
  }, timeout);
}

//重新连接
const reconnect =() => {
  if (lockReconnect) {
    return;
  }
  lockReconnect = true;
  //没连接上会一直重连,设置延迟避免请求过多
  timeoutnum && clearTimeout(timeoutnum);
  timeoutnum = setTimeout(function() {
    //新连接
    initWebSocket();
    lockReconnect = false;
  }, 1000);
}

//重置心跳
const reset =() => {
  //清除时间
  clearTimeout(timeoutObj);
  clearTimeout(serverTimeoutObj);
  //重启心跳
  start();
}

const sendWebsocket =(e) =>{
  // socket.send(`我发消息了`);
}

const webSocketOnError =(e) => {
  initWebSocket();
  reconnect();

}

//服务器返回的数据
const webSocketOnMessage=(e) => {
  //判断是否登录
  if (getToken()) {
    //window自定义事件[下面有说明]
    window.dispatchEvent(
      new CustomEvent("onmessageWS", {
        detail: {
          data: JSON.parse(e?.data),
        },
      })
    );
  }
  reset();
}

const closeWebsocket=(e) => {
  reconnect();
}

//断开连接
const close =() => {
//WebSocket对象也有发送和关闭的两个方法,只需要在自定义方法中分别调用send()和close()即可实现。
  socket.close();
}
//具体问题具体分析,把需要用到的方法暴露出去
export default { initWebSocket, sendWebsocket, webSocketOnMessage, close };
window自定义事件
//定义
window.dispatchEvent(new CustomEvent("事件名", {参数key:参数value}))
//监听
window.addEventListener("事件名", 参数key => {})
五、在main.js中挂载到vue原型上
import websocket from './utils/webSocket';
Vue.prototype.$websocket = websocket;
六、在需要建立连接的组件中这样写
  async mounted() {
    this.initWebSocket();
  },

  methods: {
    async initWebSocket() {
      this.$websocket.initWebSocket();
    },
  },
七、在需要从服务器获取的数据进行操作的组件中这样写
  mounted() {
    window.addEventListener("onmessageWS", this.getSocketData);
  },

  methods: {
    getSocketData(res) {
      this.PieValue = Number(res.detail.data.sendInfoStr.onlineUserCount);
      this.userNumValue = Number(res.detail.data.sendInfoStr.totalUserCount);
    },
八、在需要关闭连接的组件(比如退出时需要关闭)中这样写
//退出登录
    logOut() {
      this.$confirm("确定要退出登录吗?", "提示", {
        confirmButtonText: "确定",
        cancelButtonText: "取消",
        type: "warning",
      })
        .then(() => {
          this.$message({
            type: "success",
            message: "退出成功!",
          });
          this.$websocket.close();
          localStorage.removeItem("token");
          this.$router.push("/login");
        }).catch(() => {
          this.$message({
            type: "info",
            message: "已取消退出",
          });
        });
    },
九、除了按钮可以主动关闭WebSocket连接以外,直接关闭浏览器窗口也会关闭连接,故此需要一个窗口监听器,来防止连接还没断开就关闭窗口,服务端出现异常。
//监听窗口关闭事件,当窗口关闭时,主动去关闭websocket连接
    window.onbeforeunload = function () {
        this.$websocket.close();
    }
本文作者:李云蹊
本文链接:https://www.cnblogs.com/liyunxi/p/18141071
版权声明:本作品采用知识共享署名-非商业性使用-禁止演绎 2.5 中国大陆许可协议进行许可。


【推荐】编程新体验,更懂你的AI,立即体验豆包MarsCode编程助手
【推荐】凌霞软件回馈社区,博客园 & 1Panel & Halo 联合会员上线
【推荐】抖音旗下AI助手豆包,你的智能百科全书,全免费不限次数
【推荐】博客园社区专享云产品让利特惠,阿里云新客6.5折上折
【推荐】轻量又高性能的 SSH 工具 IShell:AI 加持,快人一步