
第一:什么是AOP?
AOP是面切面编程,是OOP的补充和增强,在程序开发中主要用来解决一些系统层面上的问题。比如,日志事物,权限等待。利用AOP可以对业务逻辑的各个部分进行分离,比如我们在做控制层的时候有时候会碰到需要一些验证等,而使用AOP可以将这些部分与业务逻辑分开,使我们的代码更加专注于业务逻辑的处理,这样不仅降低了逻辑部分之间的耦合性,还增强了代码的可重用性,同时也提高了开发的效率。
第二:AOP的原理是什么?
在我们学习AOP之前都碰到过这样一个问题,那就是我们设计一个项目的时候,往往这个项目的不同部分都是需要验证的,虽然我们可以把相同的代码复制到需要验证的地方,但是这样不仅增加了类之间的耦合性,还使得业务逻辑代码和验证代码混合在一起,不利于代码的维护和管理,而且还增加了大量的重复性代码。而AOP就可以很好的帮助我们解决这个问题,所谓的面向切面编程就是我们利用spring的IOC管理来告诉我们的业务逻辑代码需要插入一个验证信息了,这个时候就是利用AOP直接插入就可以了,而不需要我们在去关心需要什么样的代码这样的问题了。
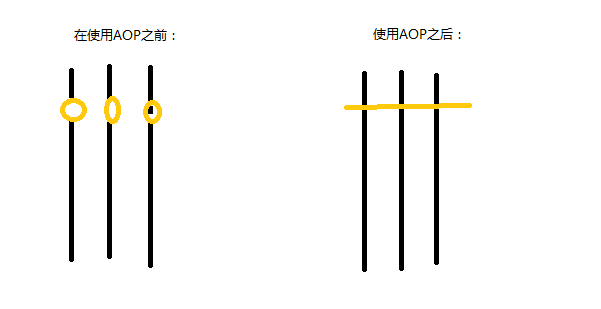
当我们没有使用AOP的时候,我们就需要在每个需要验证的地方添加代码,而如果使用了AOP,我们只需要写一份代码,然后让IOC管理实现我们在需要的地方插入就可以了。
AOP是基于23种设计模式之一的代理模式来实现的,因为在学习AOP之前,我们需要来学习一下代理模式。
第三:代理模式
代理模式可以分为静态代理模式和动态代理模式;其中动态代理又可以分为jdk动态代理和cglib动态代理
先来学习静态代理:下面给出一个静态代理的小案例
静态代理需要有接口以及该接口的实现类
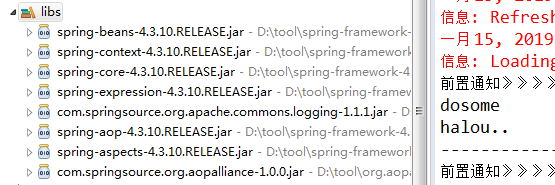
静态代理中需要用到的包:这里除了spring的IOC需要用到的包外还多了一个aop的包,需要注意
代码如下:
接口代码:
1 public interface SomeService {
2     String doSome();
3     void say();
4 }
接口的实现类代码:
 1 public class SomeServiceImpl implements SomeService{
 2     @Override
 3     public String doSome() {
 4         // TODO Auto-generated method stub
 5         System.out.println("dosome");
 6         return "halou..";
 7     }
 8     @Override
 9     public void say() {
10         // TODO Auto-generated method stub
11         System.out.println("say....");
12     }
13 }
代理的实现方式之一:静态代理类需要自己写代理类
 1 public class ProxyFactory implements SomeService{
 2
 3     private SomeService target;
 4
 5     public ProxyFactory(SomeService target) {
 6         super();
 7         this.target = target;
 8     }
 9
10     @Override
11     public String doSome() {
12         System.out.println("---代理1--");
13         // 执行目标对象的方法
14         String doSome = target.doSome();
15         System.out.println("---代理2--");
16         return doSome.toUpperCase();
17     }
18
19 }
测试类的代码:
 1 public class Test {
 2
 3     public static void main(String[] args) {
 4         // 实例化目标对象
 5         SomeService target = new SomeServiceImpl();
 6         // 获取代理类
 7         SomeService proxy = new ProxyFactory(target );
 8         // 通过代理对象调用方法
 9         System.out.println(proxy.doSome());
10
11     }
12
13 }
测试结果如下:

动态代理之jdk代理模式:
接口代码:
1 public interface SomeService {
2     String doSome();
3 }
实现类代码:
1 public class SomeServiceImpl implements SomeService {
2     @Override
3     public String doSome() {
4         System.out.println("dosome....");
5         return "hello..";
6     }
7 }
测试类以及代理类代码:
 1 import java.lang.reflect.InvocationHandler;
 2 import java.lang.reflect.Method;
 3 import java.lang.reflect.Proxy;
 4 import com.sxt.service.SomeService;
 5 import com.sxt.serviceimpl.SomeServiceImpl;
 6
 7 /**
 8  * @author ASUS 这是通过jdk动态代理的方式来测试
 9  *
10  */
11 public class Test {
12     public static void main(String[] args) {
13         //实例化目标对象
14         SomeService service=new SomeServiceImpl();
15         //通过jdk动态代理的方式获取代理对象
16         SomeService proxy=(SomeService) Proxy.newProxyInstance(service.getClass().getClassLoader(),//设置类加载器
17                 service.getClass().getInterfaces(),//获取目标对象的所有实现的接口
18                 new InvocationHandler() {
19                 /**
20                  * proxy 代理对象
21                  * method 需要执行目标对象的方法
22                  * args 目标对象的参数
23                  */
24                     @Override
25                     public Object invoke(Object proxy, Method method, Object[] args) throws Throwable {
26                         System.out.println("方法执行之前");
27                         String  invoke =(String)method.invoke(service, args);
28                         System.out.println("方法执行之后");
29                         return invoke.toUpperCase();
30                     }
31                 });
32         System.out.println(proxy.doSome());
33     }
34 }
运行结果如吓:
动态代理之cglib代理:在cglib代理中需要接口,只需要有对应的目标类就可以了。
目标类代码:
 1 package com.sxt.serviceimpl;
 2 /**
 3  * @author ASUS
 4  * cglib的目标类
 5  *
 6  */
 7 public class SomeServiceImpl  {
 8     public String doSome() {
 9         System.out.println("dosome....");
10         return "hello..";
11     }
12 }
测试类代码:
 1 import com.sxt.cglib.CglibProxy;
 2 import com.sxt.serviceimpl.SomeServiceImpl;
 3
 4 /**
 5  * @author ASUS 这是通过cglib动态代理的方式来测试
 6  *
 7  */
 8 public class Test {
 9     public static void main(String[] args) {
10         //实例化目标对象
11         SomeServiceImpl service=new SomeServiceImpl();
12         //获取代理类
13         SomeServiceImpl proxy=new CglibProxy(service).createProxy();
14         System.out.println(proxy.doSome());
15     }
16 }
cglib代理类代码:
 1 import java.lang.reflect.Method;
 2 import com.sxt.serviceimpl.SomeServiceImpl;
 3 import net.sf.cglib.proxy.Enhancer;
 4 import net.sf.cglib.proxy.MethodInterceptor;
 5 import net.sf.cglib.proxy.MethodProxy;
 6
 7 /**
 8  * @author ASUS
 9  * cglib代理类
10  *
11  */
12 public class CglibProxy implements MethodInterceptor{
13     //目标对象
14     private SomeServiceImpl service;
15     public CglibProxy(SomeServiceImpl service) {
16         super();
17         this.service = service;
18     }
19     /**
20      * 创建代理对象
21      * @return
22      */
23     public SomeServiceImpl createProxy() {
24         //获取Enhancer对象
25         Enhancer e=new Enhancer();
26         // 设置父类对象,设置目标对象的类型
27         e.setSuperclass(SomeServiceImpl.class);
28         //设置callback对象,就是this
29         e.setCallback(this);
30         return (SomeServiceImpl)e.create();
31     }
32     @Override
33     public Object intercept(Object proxy, Method method, Object[] args, MethodProxy methodProxy) throws Throwable {
34         // TODO Auto-generated method stub
35         System.out.println("执行之前");
36         String invoke =(String) method.invoke(service, args);
37         System.out.println("执行之后");
38         return invoke.toUpperCase();
39     }
40 }
注意:在cglib代理中虽然不需要接口,但是要用到一个jar包

我们已经了解了代理模式的原理,现在我们来学习AOP的几种实现方式:
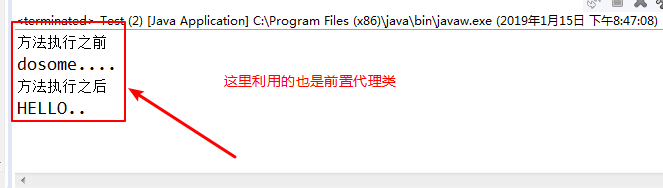
方式一:前置通知,顾名思义就是在目标类的方法执行执行,该前置类的方法会被执行
代码如下:
接口代码:
package com.sxt.service;
/**
 * @author ASUS
 * 静态代理的公共接口
 *
 */
public interface SomeService {
    String doSome();
    void say();
}
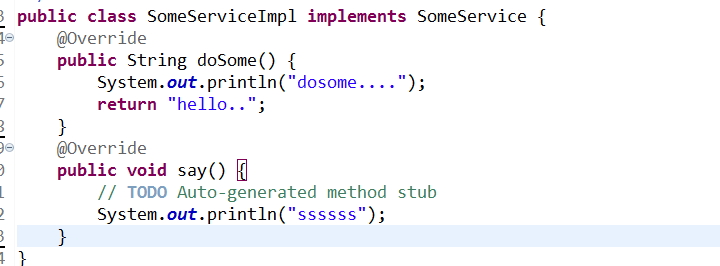
接口的实现类代码:
 1 import com.sxt.service.SomeService;
 2 /**
 3  * @author ASUS
 4  * 前置代理接口的实现类
 5  *
 6  */
 7 public class SomeServiceImpl implements SomeService {
 8     @Override
 9     public String doSome() {
10         System.out.println("dosome....");
11         return "hello..";
12     }
13     @Override
14     public void say() {
15         // TODO Auto-generated method stub
16         System.out.println("ssssss");
17     }
18 }
前置代理类代码:
 1 import java.lang.reflect.Method;
 2 import org.springframework.aop.MethodBeforeAdvice;
 3 /**
 4  * @author ASUS
 5  *
 6  */
 7 public class MyMethodBeforeAdvice implements MethodBeforeAdvice{
 8     @Override
 9     public void before(Method method, Object[] args, Object target) throws Throwable {
10         // TODO Auto-generated method stub
11         System.out.println("前置通知》》》");
12     }
13 }
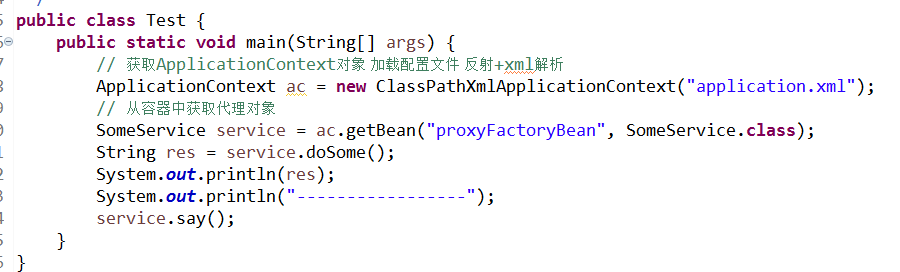
测试类代码:
 1 import org.springframework.context.ApplicationContext;
 2 import org.springframework.context.support.ClassPathXmlApplicationContext;
 3 import com.sxt.service.SomeService;
 4
 5 /**
 6  * @author ASUS 测试类
 7  *
 8  */
 9 public class Test {
10     public static void main(String[] args) {
11         // 获取ApplicationContext对象 加载配置文件 反射+xml解析
12         ApplicationContext ac = new ClassPathXmlApplicationContext("application.xml");
13         // 从容器中获取代理对象
14         SomeService service = ac.getBean("proxyFactoryBean", SomeService.class);
15
16         String res = service.doSome();
17         System.out.println(res);
18         System.out.println("-----------------");
19         service.say();
20     }
21 }
配置文件代码:
 1 <?xml version="1.0" encoding="UTF-8"?>
 2 <beans xmlns="http://www.springframework.org/schema/beans"
 3     xmlns:xsi="http://www.w3.org/2001/XMLSchema-instance"
 4     xmlns:p="http://www.springframework.org/schema/p"
 5     xsi:schemaLocation="http://www.springframework.org/schema/beans http://www.springframework.org/schema/beans/spring-beans.xsd">
 6     <!-- 注册目标对象 -->
 7     <bean class="com.sxt.serviceimpl.SomeServiceImpl" id="someServiceImpl"/>
 8     <!-- 注册前置通知 -->
 9     <bean class="com.sxt.aspect.MyMethodBeforeAdvice" id="myMethodBeforeAdvice"/>
10     <!-- AOP 配置代理类 -->
11     <bean class="org.springframework.aop.framework.ProxyFactoryBean" id="proxyFactoryBean">
12         <!-- 配置代理类 -->
13         <property name="target" ref="someServiceImpl"/>
14         <!-- 配置代理类实现的接口 -->
15         <property name="interfaces" value="com.sxt.service.SomeService"/>
16         <!-- 配置通知 -->
17         <property name="interceptorNames">
18             <list>
19                 <!-- 配置前置通知 -->
20                 <value>myMethodBeforeAdvice</value>
21             </list>
22         </property>
23     </bean>
24 </beans>
测试结果如下:

需要用到的jar包如下:

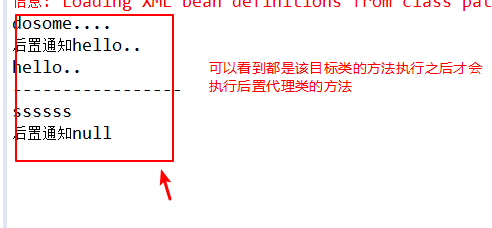
AOP实现之后置通知:也就是在目标类的方法执行之后才会执行的
接口代码:
 1 package com.sxt.service;
 2 /**
 3  * @author ASUS
 4  * 静态代理的公共接口
 5  *
 6  */
 7 public interface SomeService {
 8     String doSome();
 9     void say();
10 }
实现类代码:
 1 import com.sxt.service.SomeService;
 2 /**
 3  * @author ASUS
 4  * 后置代理接口的实现类
 5  *
 6  */
 7 public class SomeServiceImpl implements SomeService {
 8     @Override
 9     public String doSome() {
10         System.out.println("dosome....");
11         return "hello..";
12     }
13     @Override
14     public void say() {
15         // TODO Auto-generated method stub
16         System.out.println("ssssss");
17     }
18 }
后置代理类的代码:
 1 package com.sxt.aspect;
 2
 3 import java.lang.reflect.Method;
 4 import org.springframework.aop.AfterReturningAdvice;
 5 /**
 6  * @author ASUS
 7  *
 8  */
 9 public class MyAfterReturningAdvice implements AfterReturningAdvice{
10     @Override
11     public void afterReturning(Object returnValue, Method method, Object[] args, Object target) throws Throwable {
12         // TODO Auto-generated method stub
13         System.out.println("后置通知"+returnValue);
14         //returnValue=((String)returnValue).toUpperCase();
15     }
16 }
测试类代码:
 1 import org.springframework.context.ApplicationContext;
 2 import org.springframework.context.support.ClassPathXmlApplicationContext;
 3 import com.sxt.service.SomeService;
 4 /**
 5  * @author ASUS 测试类
 6  *
 7  */
 8 public class Test {
 9     public static void main(String[] args) {
10         // 获取ApplicationContext对象 加载配置文件 反射+xml解析
11         ApplicationContext ac = new ClassPathXmlApplicationContext("application.xml");
12         // 从容器中获取代理对象
13         SomeService service = ac.getBean("proxyFactoryBean", SomeService.class);
14         String res = service.doSome();
15         System.out.println(res);
16         System.out.println("-----------------");
17         service.say();
18     }
19 }
配置文件代码:
 1 <?xml version="1.0" encoding="UTF-8"?>
 2 <beans xmlns="http://www.springframework.org/schema/beans"
 3     xmlns:xsi="http://www.w3.org/2001/XMLSchema-instance"
 4     xmlns:p="http://www.springframework.org/schema/p"
 5     xsi:schemaLocation="http://www.springframework.org/schema/beans http://www.springframework.org/schema/beans/spring-beans.xsd">
 6
 7     <!-- 注册目标对象 -->
 8     <bean class="com.sxt.serviceimpl.SomeServiceImpl" id="someServiceImpl"/>
 9     <!-- 注册前置通知 -->
10     <!-- <bean class="com.sxt.aspect.MyMethodBeforeAdvice" id="myMethodBeforeAdvice"/> -->
11     <!-- 注册后置通知 -->
12     <bean class="com.sxt.aspect.MyAfterReturningAdvice" id="myAfterReturningAdvice"/>
13     <!-- AOP 配置代理类 -->
14     <bean class="org.springframework.aop.framework.ProxyFactoryBean" id="proxyFactoryBean">
15         <!-- 配置代理类 -->
16         <property name="target" ref="someServiceImpl"/>
17         <!-- 配置代理类实现的接口 -->
18         <property name="interfaces" value="com.sxt.service.SomeService"/>
19         <!-- 配置通知 -->
20         <property name="interceptorNames">
21             <list>
22                 <!-- 配置前置通知 -->
23                 <!-- <value>myMethodBeforeAdvice</value> -->
24                 <!-- 配置后置通知 -->
25                 <value>myAfterReturningAdvice</value>
26             </list>
27         </property>
28     </bean>
29 </beans>
测试结果如下:
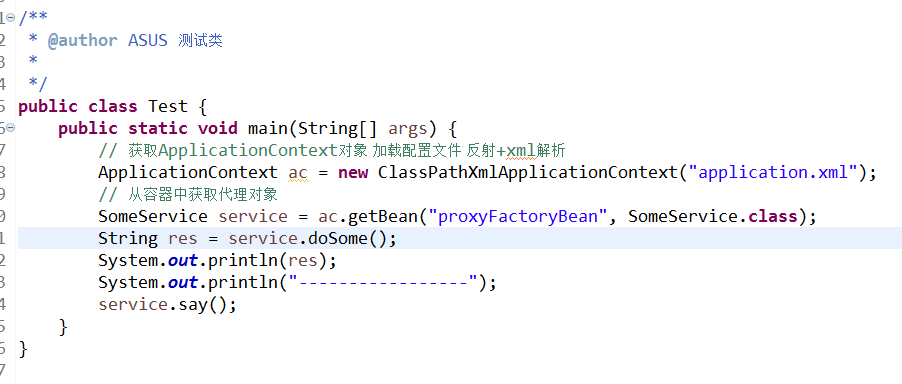
AOP实现之环绕代理通知:就是在整个目标类方法执行的前后都会执行该环绕代理类的方法
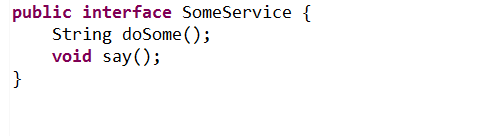
接口代码:
1 public interface SomeService {
2     String doSome();
3     void say();
4 }
实现类代码:
 1 public class SomeServiceImpl implements SomeService {
 2     @Override
 3     public String doSome() {
 4         System.out.println("dosome....");
 5         return "hello..";
 6     }
 7     @Override
 8     public void say() {
 9         // TODO Auto-generated method stub
10         System.out.println("ssssss");
11     }
12 }
环绕代理通知代码:

测试类代码:
配置文件代码:

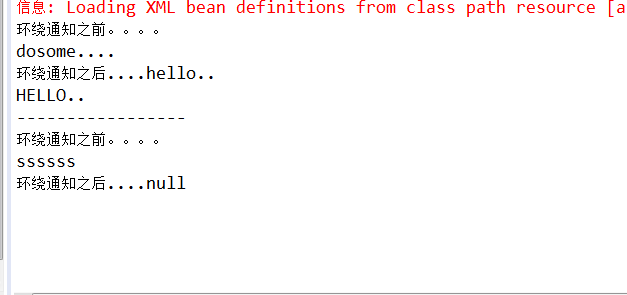
测试结果如下:
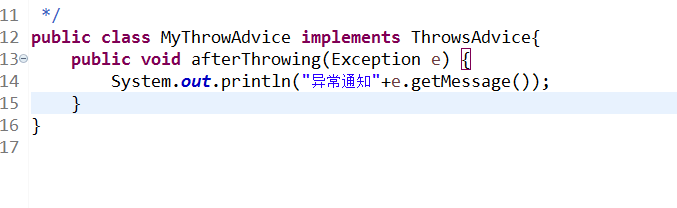
异常代理:
异常代理类代码:
接口代码:
实现类代码:
测试类代码:
配置文件代码参考上面的。这里需要自己随便创造一个异常。
由于在配置文件中配置代理类太麻烦了,下面我们来介绍使用注解的方式实现代理
利用注解的方式需要用到的jar包与上面的配置文件的方式不一样;这里需要用到一个aspectj-tools的jar包
这里一共要用到6个注解《比上面多了一个最终代理类》
注解一:@Aspect这个是用在代理类的前面的,与配置文件相结合
注解二:@Before这个是前置代理类的注解,用在前置代理方法的前面
注解三:@AfterReturning后置代理类的注解
注解四:@Around环绕注解
注解五:@AfterThrowing异常代理类注解
注解六:@After最终代理类注解
这里还要在注解的后面指明代理类方法切入的位置,前面的代理实现只能指明切入的类,不能指明具体的方法,而使用注解的方式则可以指明切入的具体的方法
因此,这个最为常用
代理类代码:
 1 import org.aspectj.lang.ProceedingJoinPoint;
 2 import org.aspectj.lang.annotation.After;
 3 import org.aspectj.lang.annotation.AfterReturning;
 4 import org.aspectj.lang.annotation.AfterThrowing;
 5 import org.aspectj.lang.annotation.Around;
 6 import org.aspectj.lang.annotation.Aspect;
 7 import org.aspectj.lang.annotation.Before;
 8 /**
 9  * @author ASUS
10  * @ASPECT表示该类就是一个切面
11  *
12  */
13 @Aspect
14 public class MyAspect {
15     /**
16      * execution切入点表达式:定位该通知的切入点
17      * execution(* com.dpb.service.*.doSome(..))
18      */
19     @Before("execution(* com.sxt.serviceimpl..*(..))")
20     public void before() {
21         System.out.println("前置通知");
22     }
23     /**
24      * 后置通知
25      */
26     @AfterReturning(value="execution(* com.sxt.service.*.doSome(..))",returning="msg")
27     public void afterReturn(Object msg) {
28         System.out.println("后置通知"+msg);
29     }
30     /**
31      * 环绕通知
32      * @param pjp
33      * @return
34      * @throws Throwable
35      */
36     @Around(value="execution(* com.sxt.service.*.doSome(..))")
37     public Object around(ProceedingJoinPoint pjp) throws Throwable {
38         System.out.println("环绕通知之前");
39         String  proceed =(String) pjp.proceed();
40         System.out.println("环绕通知之后"+proceed);
41         return proceed.toUpperCase();
42     }
43     /**
44      * 异常通知
45      * @param e
46      */
47     @AfterThrowing(value="execution(* com.sxt.service.*.doSome(..)",throwing="e")
48     public void throwing(Exception e) {
49         System.out.println("异常通知"+e.getMessage());
50     }
51     /**
52      * 最终通知
53      */
54     @After("execution(* com.sxt.service.*.doSome(..))")
55     public void after() {
56         System.out.println("最终通知---");
57     }
58 }
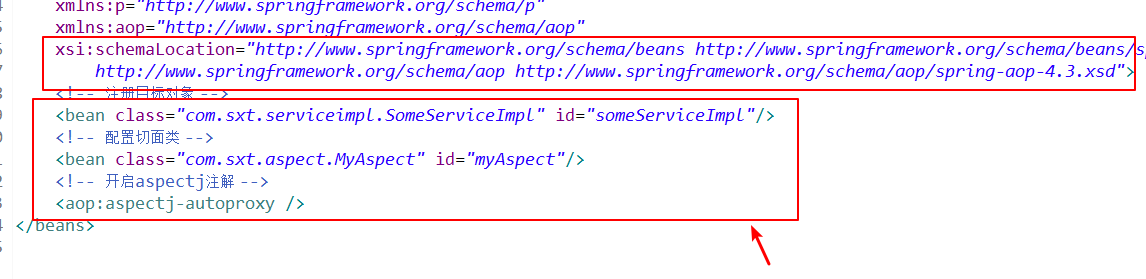
配置文件代码:在配置文件中需要指明目标对象,代理类对象以及开启aspectj注解
接口,实现类,测试类代码参照上面的代理通知类代码
在这里我们还介绍一种使用配置文件的实现方式
就是将前面分散的代理方式的代码的配置文件合在一起就可以了。
