

day02-Spring基本介绍02
Spring基本介绍02
5.简单模拟Spring基于XML配置的程序
5.1需求说明
-
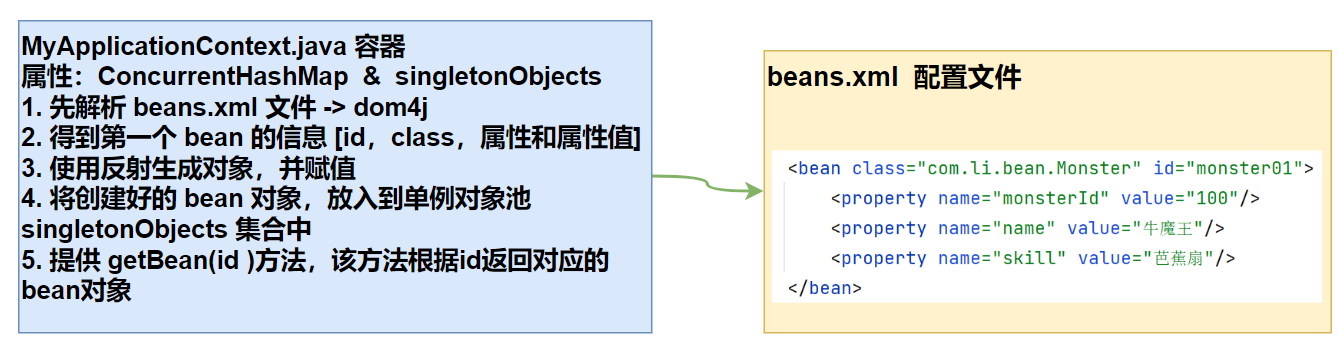
自己写一个简单的Spring容器,通过读取beans.xml,获取第一个Javabean:Monster的对象,给该对象属性赋值,放入到容器中,并输出该对象信息
-
也就是说,不使用spring原生框架,我们自己简单模拟实现,目的是了解Spring容器的简单机制
5.2思路分析
5.3代码实现
引入dom4j.jar包

MyApplicationContext.java:
package com.li.myapplicationcontext; import com.li.bean.Monster; import org.dom4j.Document; import org.dom4j.Element; import org.dom4j.io.SAXReader; import java.io.File; import java.lang.reflect.Method; import java.util.List; import java.util.concurrent.ConcurrentHashMap; /** * @author 李 * @version 1.0 * 1. 这个程序用于实现Spring的一个简单容器机制 * 2. 后面还会详细的实现 * 3. 这里我们主要实现的是如何将beans.xml文件进行解析,并生成对象,放入容器中 * 4. 然后提供一个getBean(id) 返回对应的对象 */ public class MyApplicationContext { private ConcurrentHashMap<String, Object> singletonObjects = new ConcurrentHashMap<>(); //构造器 //接收一个容器的配置文件,如 beans.xml,默认路径在src下 public MyApplicationContext(String iocBeanXMLFile) throws Exception { //1.得到配置文件的类加载路径 String path = this.getClass().getResource("/").getPath(); //2.创建 saxReader SAXReader saxReader = new SAXReader(); //3.得到document对象 Document document = saxReader.read(new File(path + iocBeanXMLFile)); //4.得到rootDocument Element rootElement = document.getRootElement(); //5.得到第一个bean-monster01 Element bean = (Element) rootElement.elements("bean").get(0); //6.获取到第一个bean的相关属性(真实的情况下会把属性保存到beanDefinitionMap中) String id = bean.attributeValue("id");//bean的id String classFullPath = bean.attributeValue("class");//类的全路径 List<Element> property = bean.elements("property"); //原本是遍历,这里为了简化,就直接获取 //property的value值 Integer monsterId = Integer.parseInt(property.get(0).attributeValue("value")); String name = property.get(1).attributeValue("value"); String skill = property.get(2).attributeValue("value"); //7.反射创建对象 Class<?> aClass = Class.forName(classFullPath); //这里的 o对象就是Monster对象 Monster o = (Monster) aClass.newInstance(); //给对象赋值-这里为了简化,直接赋值(真实情况下会使用反射) o.setMonsterId(monsterId); o.setName(name); o.setSkill(skill); //8.将创建好的对象放到singletonObjects单例对象池中 singletonObjects.put(id, o); } public Object getBean(String id) { return singletonObjects.get(id); } }
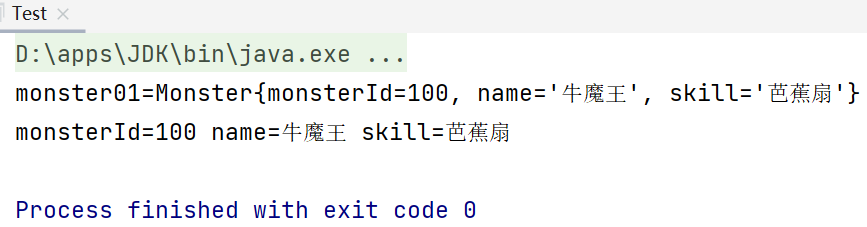
Test.java用于测试:
package com.li.myapplicationcontext; import com.li.bean.Monster; /** * @author 李 * @version 1.0 */ public class Test { public static void main(String[] args) throws Exception { MyApplicationContext ioc = new MyApplicationContext("beans.xml"); Monster monster01 = (Monster) ioc.getBean("monster01"); System.out.println("monster01=" + monster01); System.out.println("monsterId=" + monster01.getMonsterId() + " name=" + monster01.getName() + " skill=" + monster01.getSkill()); } }
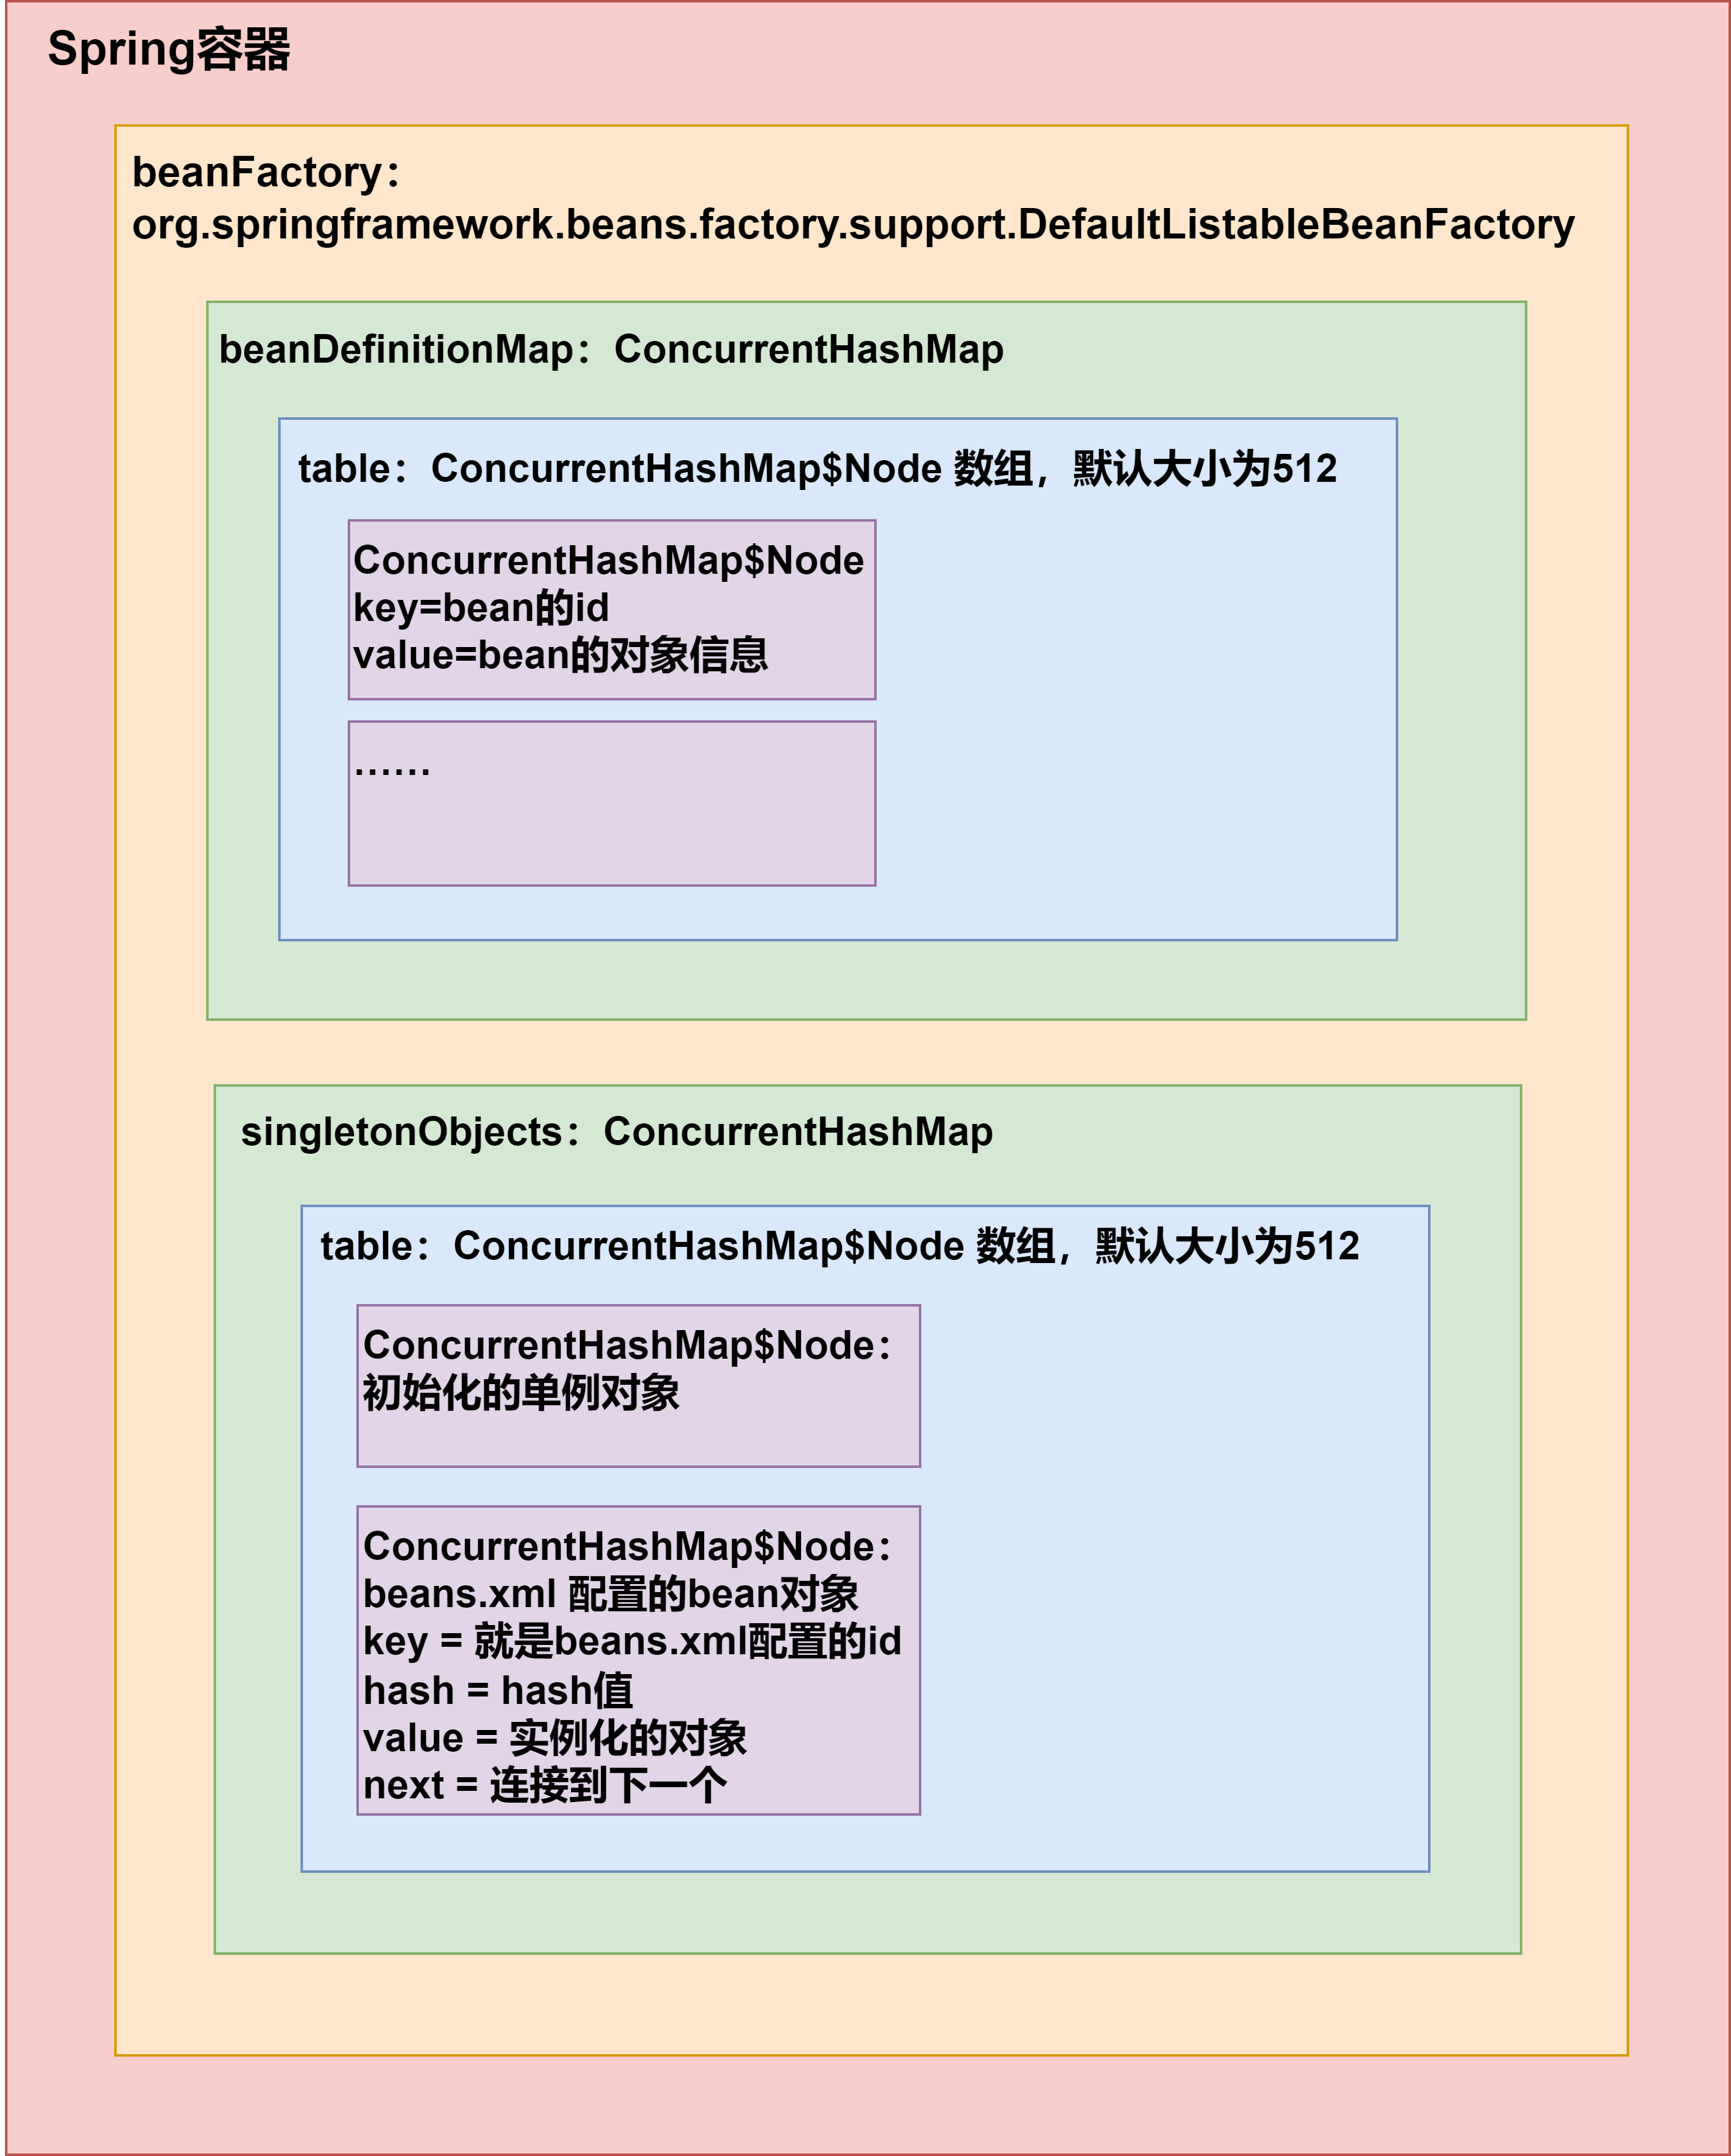
6.Spring原生容器底层结构梳理
我们之前在Spring基本介绍01--4.5Spring容器的结构/机制有一些基础的分析,现在来梳理一下:
7.练习
7.1关于bean的id
如下,在beans.xml中,我们注入2个Monster对象,但是不指定bean的id
<bean class="com.li.bean.Monster"> <property name="monsterId" value="100"/> <property name="name" value="牛魔王"/> <property name="skill" value="芭蕉扇"/> </bean> <bean class="com.li.bean.Monster"> <property name="monsterId" value="200"/> <property name="name" value="红孩儿"/> <property name="skill" value="三昧真火"/> </bean>
问题1:运行会不会报错?
答:不会报错,可以正常运行。
问题2:如果不报错,你是否能找到分配的id并获取该对象?
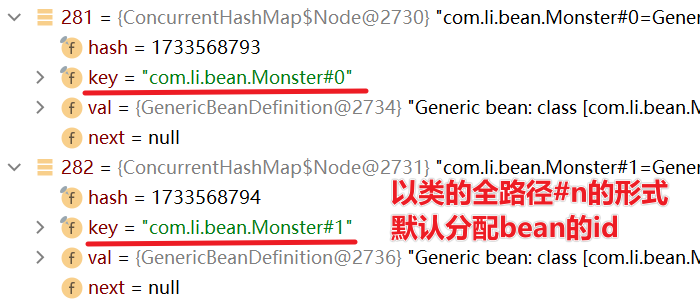
答:系统会默认分配id,分配id的规则是:全类名#0,全类名#1......全类名#n,这样的规则来分配id
我们可以通过debug的方式来查看:
beanFactory.beanDefinitionMap.table:
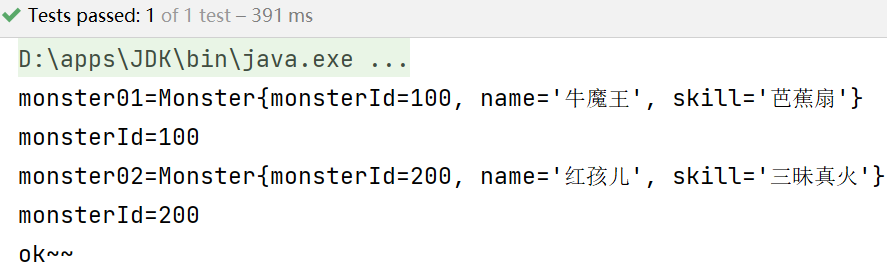
package com.li.homework; import com.li.bean.Monster; import org.springframework.context.ApplicationContext; import org.springframework.context.support.ClassPathXmlApplicationContext; import org.testng.annotations.Test; /** * @author 李 * @version 1.0 */ public class Homework01 { @Test public void getMonster() { ApplicationContext ioc = new ClassPathXmlApplicationContext("beans.xml"); Monster monster01 = ioc.getBean("com.li.bean.Monster#0", Monster.class); System.out.println("monster01=" + monster01); System.out.println("monsterId=" + monster01.getMonsterId()); Monster monster02 = ioc.getBean("com.li.bean.Monster#1", Monster.class); System.out.println("monster02=" + monster02); System.out.println("monsterId=" + monster02.getMonsterId()); System.out.println("ok~~"); } }
在实际开发中不会省略bean的id
7.2练习2
创建一个Car类(属性:id,name,price),具体要求如下:
- 创建ioc容器文件(即配置文件),并配置一个Car对象(bean)
- 通过java程序到ioc容器获取该bean对象,并输出
Car:
package com.li.bean; /** * @author 李 * @version 1.0 */ public class Car { private Integer id; private String name; private Double price; public Car() { } public Car(Integer id, String name, Double price) { this.id = id; this.name = name; this.price = price; } public Integer getId() { return id; } public void setId(Integer id) { this.id = id; } public String getName() { return name; } public void setName(String name) { this.name = name; } public Double getPrice() { return price; } public void setPrice(Double price) { this.price = price; } @Override public String toString() { return "Car{" + "id=" + id + ", name='" + name + '\'' + ", price=" + price + '}'; } }
beans2.xml:
<?xml version="1.0" encoding="UTF-8"?> <beans xmlns="http://www.springframework.org/schema/beans" xmlns:xsi="http://www.w3.org/2001/XMLSchema-instance" xsi:schemaLocation="http://www.springframework.org/schema/beans http://www.springframework.org/schema/beans/spring-beans.xsd"> <bean class="com.li.bean.Car" id="car01"> <property name="id" value="10001"/> <property name="name" value="宝马"/> <property name="price" value="1230000"/> </bean> </beans>
Homework02:
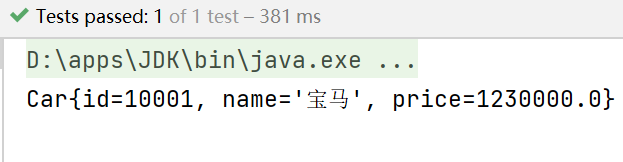
package com.li.homework; import com.li.bean.Car; import org.springframework.context.ApplicationContext; import org.springframework.context.support.ClassPathXmlApplicationContext; import org.testng.annotations.Test; /** * @author 李 * @version 1.0 */ public class Homework02 { @Test public void getCart() { ApplicationContext ioc = new ClassPathXmlApplicationContext("beans2.xml"); Car car = ioc.getBean("car01", Car.class); System.out.println(car); } }


【推荐】国内首个AI IDE,深度理解中文开发场景,立即下载体验Trae
【推荐】编程新体验,更懂你的AI,立即体验豆包MarsCode编程助手
【推荐】抖音旗下AI助手豆包,你的智能百科全书,全免费不限次数
【推荐】轻量又高性能的 SSH 工具 IShell:AI 加持,快人一步
· 阿里最新开源QwQ-32B,效果媲美deepseek-r1满血版,部署成本又又又降低了!
· 单线程的Redis速度为什么快?
· SQL Server 2025 AI相关能力初探
· AI编程工具终极对决:字节Trae VS Cursor,谁才是开发者新宠?
· 展开说说关于C#中ORM框架的用法!