
Hexo博客搭建记录
Hexo博客搭建记录
参考视频:手把手教你从0开始搭建自己的个人博客 |无坑版视频教程
以下命令操作建议使用管理员权限完成
1. nodejs & hexo 安装
1.首先下载node.js,并安装(安装node时,会自动安装npm),安装完毕后在控制台输入node -v,如果显示版本则说明安装成功。
D:\>node -v v16.18.1 D:\>npm -v 8.19.2
2.安装cnpm,命令为npm install -g cnpm --registry=https://registry.npm.taobao.org
(因为这里我已经下过了,所以显示可能不准确)
D:\>npm install -g cnpm --registry=https://registry.npm.taobao.org npm WARN deprecated @npmcli/move-file@2.0.1: This functionality has been moved to @npmcli/fs added 4 packages, removed 6 packages, and changed 415 packages in 1m 11 packages are looking for funding run `npm fund` for details
输入cnpm -v,如果出现下面的字样说明安装cnpm成功
D:\>cnpm -v cnpm@9.0.1 (D:\apps\nodejs16.18.1\node_global\node_modules\cnpm\lib\parse_argv.js) npm@8.19.3 (D:\apps\nodejs16.18.1\node_global\node_modules\cnpm\node_modules\npm\index.js) node@16.18.1 (D:\apps\nodejs16.18.1\node.exe) npminstall@7.3.1 (D:\apps\nodejs16.18.1\node_global\node_modules\cnpm\node_modules\npminstall\lib\index.js) prefix=D:\apps\nodejs16.18.1\node_global win32 x64 10.0.19044 registry=https://registry.npmmirror.com
3.使用cnpm安装hexo,命令cnpm install -g hexo-cli,安装完毕后使用命令hexo -v,如果出现以下字样说明安装hexo成功。
D:\>hexo -v hexo-cli: 4.3.0 os: win32 10.0.19044 node: 16.18.1 v8: 9.4.146.26-node.22 uv: 1.43.0 zlib: 1.2.11 brotli: 1.0.9 ares: 1.18.1 modules: 93 nghttp2: 1.47.0 napi: 8 llhttp: 6.0.10 openssl: 1.1.1q+quic cldr: 41.0 icu: 71.1 tz: 2022b unicode: 14.0 ngtcp2: 0.8.1 nghttp3: 0.7.0
2.使用hexo搭建博客
1.首先使用命令hexo init <yourBlogName>:创建你的站点目录,并使用hexo初始化该文件夹
如果在搭建博客的过程中有问题,只要把文件夹删掉重来即可
D:\>hexo init blog INFO Cloning hexo-starter https://github.com/hexojs/hexo-starter.git INFO Install dependencies INFO Start blogging with Hexo!
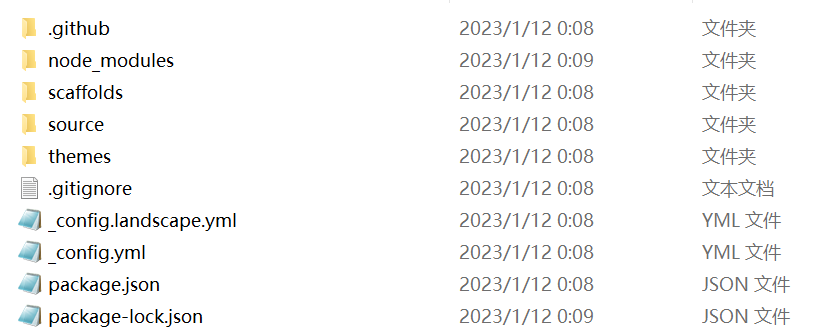
初始化成功后,站点目录下生成的文件:
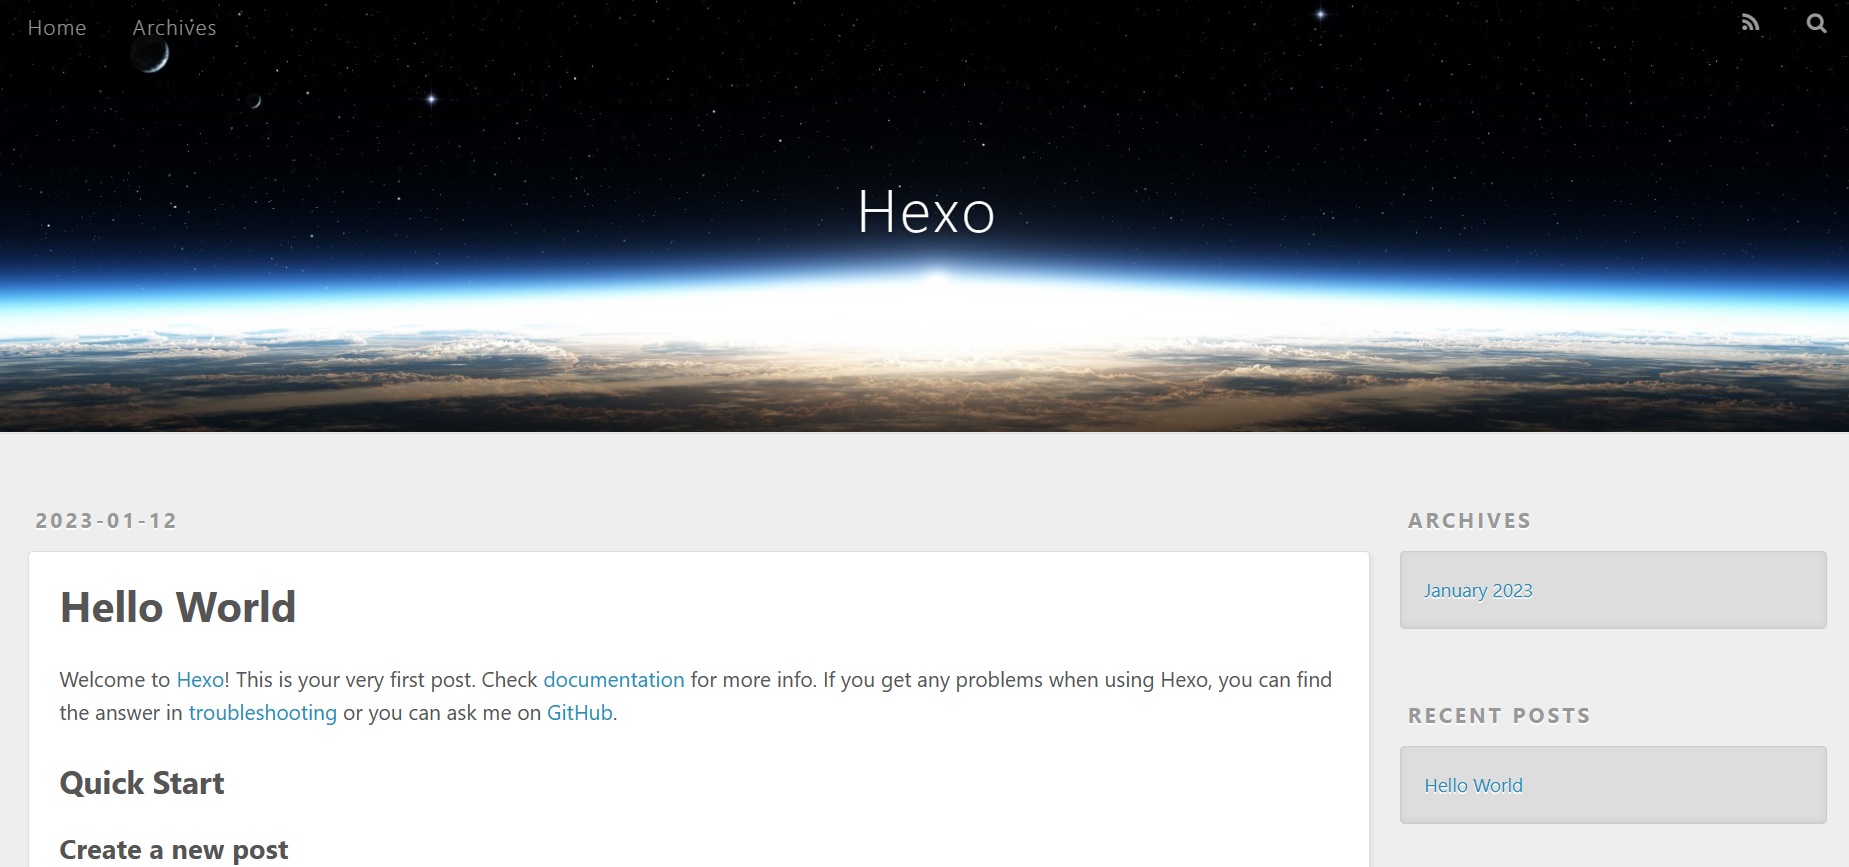
2.使用命令hexo s,启动博客(注意要之前的目录下运行),博客在本地的4000端口启动,访问http://localhost:4000/ 即可以看到
D:\blog>hexo s INFO Validating config INFO Start processing INFO Hexo is running at http://localhost:4000/ . Press Ctrl+C to stop.
3.使用命令hexo n "文章名",创建博客文章。
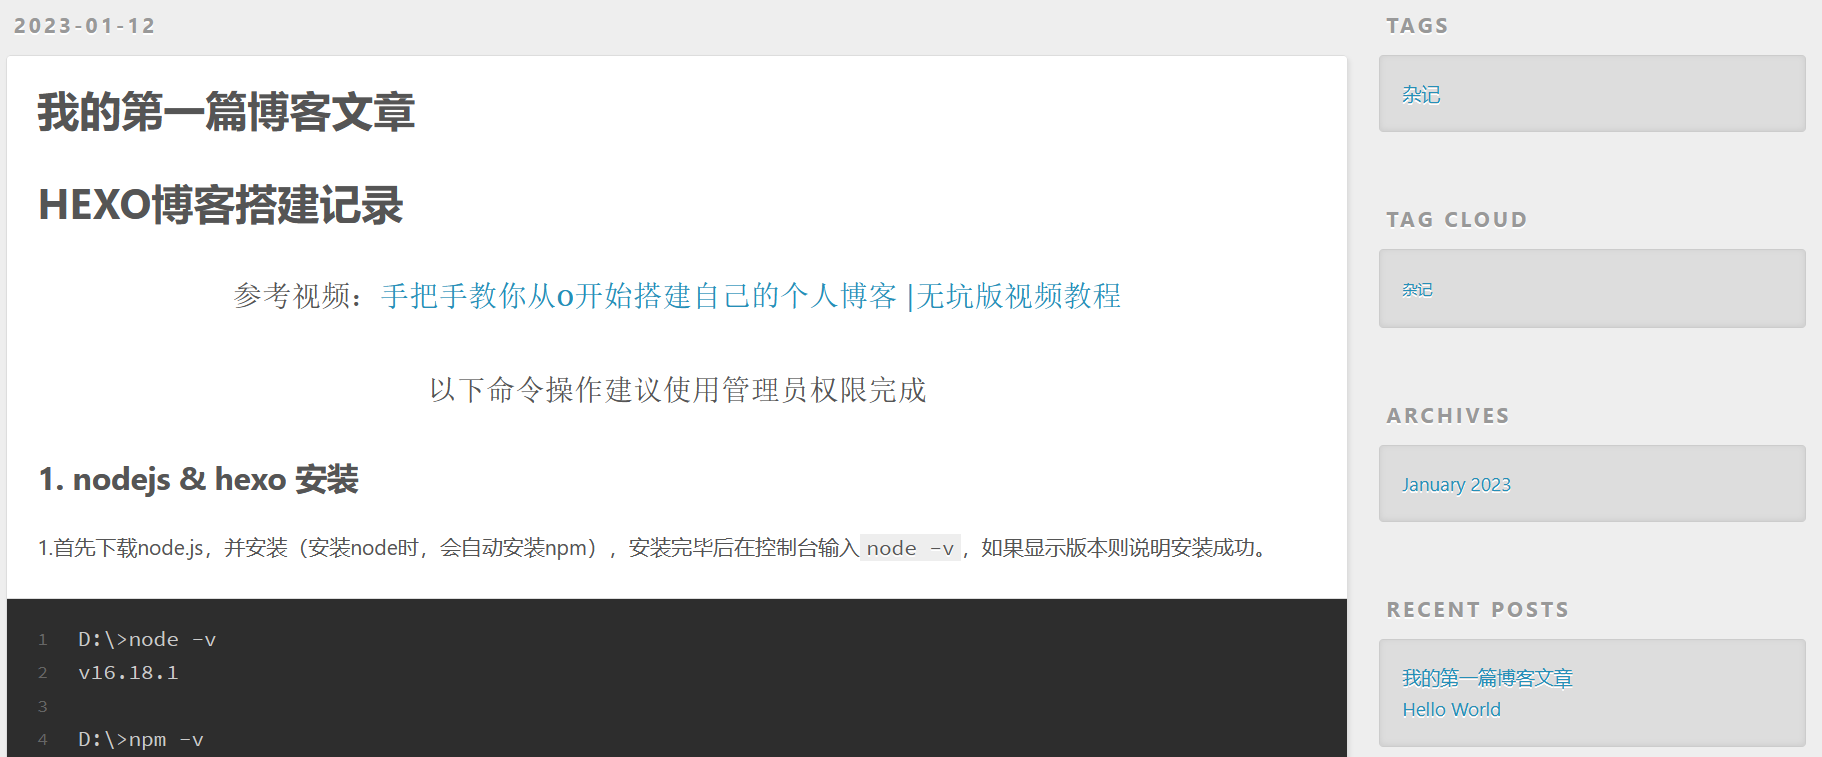
D:\blog>hexo n "我的第一篇博客文章" INFO Validating config INFO Created: D:\blog\source\_posts\我的第一篇博客文章.md
进入对应的目录下,可以看到已经成功生成md文件,然后就可以在该文件中写博客了
D:\blog>cd D:\blog\source\_posts\ D:\blog\source\_posts>dir 驱动器 D 中的卷是 Data 卷的序列号是 8A15-B825 D:\blog\source\_posts 的目录 2023/01/12 00:48 <DIR> . 2023/01/12 00:48 <DIR> .. 2023/01/12 00:08 876 hello-world.md 2023/01/12 00:48 75 我的第一篇博客文章.md 2 个文件 951 字节 2 个目录 1,724,429,172,736 可用字节
4.返回博客目录,使用命令hexo clean清理一下缓存文件,使用命令hexo g在hexo站点根目录下生成public文件夹
D:\blog\source\_posts>cd ../.. D:\blog>hexo clean INFO Validating config INFO Deleted database. D:\blog>hexo g INFO Validating config INFO Start processing INFO Files loaded in 157 ms INFO Generated: archives/index.html INFO Generated: index.html INFO Generated: tags/杂记/index.html INFO Generated: archives/2023/01/index.html INFO Generated: js/jquery-3.4.1.min.js INFO Generated: fancybox/jquery.fancybox.min.css INFO Generated: css/fonts/fontawesome-webfont.woff INFO Generated: fancybox/jquery.fancybox.min.js INFO Generated: archives/2023/index.html INFO Generated: js/script.js INFO Generated: css/style.css INFO Generated: css/fonts/fontawesome-webfont.ttf INFO Generated: css/images/banner.jpg INFO Generated: css/fonts/fontawesome-webfont.eot INFO Generated: css/fonts/FontAwesome.otf INFO Generated: css/fonts/fontawesome-webfont.woff2 INFO Generated: 2023/01/12/hello-world/index.html INFO Generated: 2023/01/12/我的第一篇博客文章/index.html INFO Generated: css/fonts/fontawesome-webfont.svg INFO 19 files generated in 360 ms D:\blog>
5.然后hexo s重新启动服务,浏览器访问端口,成功生成新的文章。
3.将博客部署到github
1.登录github,创建新仓库,仓库名必须如下:
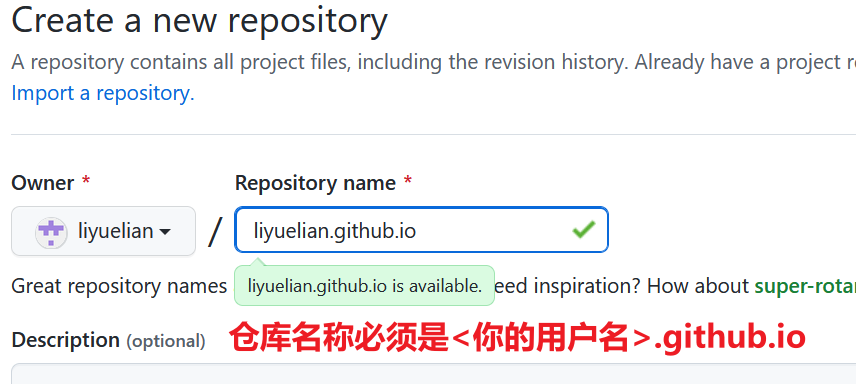
其他选项默认,然后点击创建仓库。
2.当前站点目录下,使用命令npm install hexo-deployer-git --save,安装git。
注意设置用户名和邮件:(随意)
git config --global user.name <你的用户名>
git config --global user.email <你的邮箱>
3.在hexo博客目录下的 _config.yml 文件,最后几行改为如下形式,然后保存。
注意:每个冒号后面要加空格

4.使用命令hexo d,将博客部署到github中
D:\blog>hexo d INFO Validating config INFO Deploying: git INFO Setting up Git deployment... Initialized empty Git repository in D:/blog/.deploy_git/.git/ ... ... Enumerating objects: 39, done. Counting objects: 100% (39/39), done. Delta compression using up to 8 threads Compressing objects: 100% (29/29), done. Writing objects: 100% (39/39), 886.59 KiB | 1.82 MiB/s, done. Total 39 (delta 5), reused 0 (delta 0), pack-reused 0 remote: Resolving deltas: 100% (5/5), done. To github.com:liyuelian/liyuelian.github.io.git * [new branch] HEAD -> master branch 'master' set up to track 'git@github.com:liyuelian/liyuelian.github.io.git/master'. INFO Deploy done: git
这里没有设置ssh免密登录的要输入github账号密码
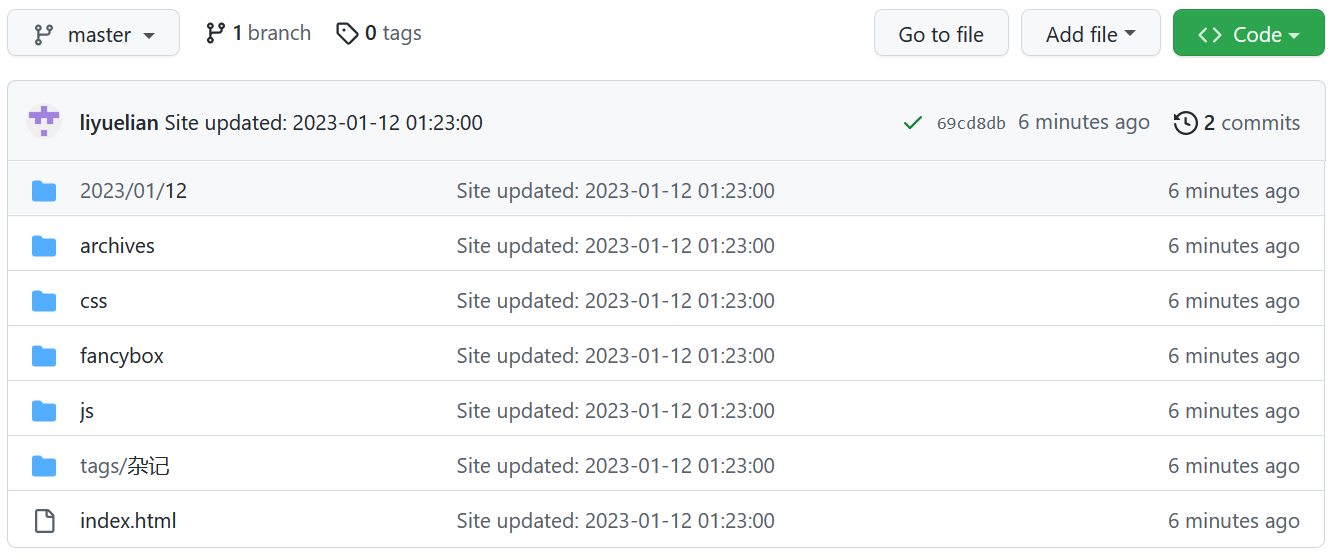
5.在github仓库刷新,可以看到所有hexo文件已经上传到仓库中。
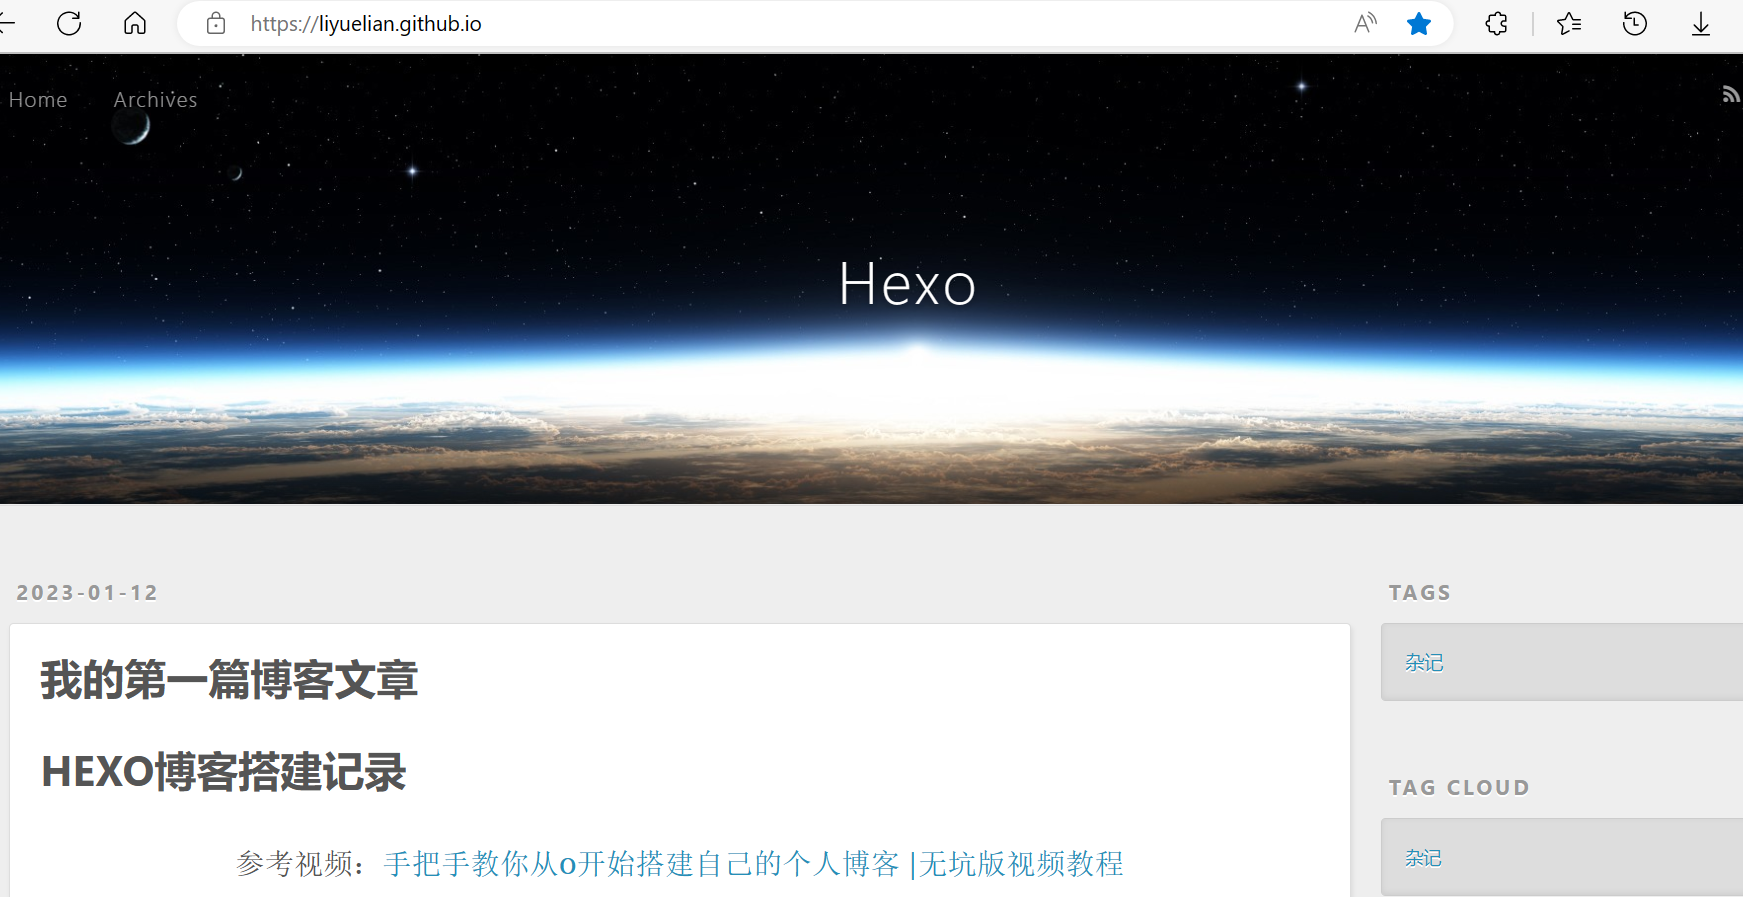
6.在地址栏中访问<你的github用户名>.github.io,即可看到个人博客网站。
4.如何发布新文章
1.首先使用命令hexo new <title>创建新文章,然后到hexo目录/source/_posts下去编写文章。
使用该命令创建的md文件头会有一个前置信息Front-matter,用于给hexo渲染md文档。
| 配置项 | 意义 |
|---|---|
| title | 文章标题 |
| date | 文章创建日期 |
| comments | 是否启动文章评论功能 |
| tags | 文章标签 |
| categories | 文章分类 |
| keywords | 文章关键字 |
2.使用命令hexo clean,清除掉旧的数据
这个命令会清除掉之前生成的网页,即站点根目录下的
public文件夹。
3.使用命令hexo g
这个命令会将
source文件夹下所有的md文件进行渲染,生成HTML页面,存放在public文件夹下。
特别提醒! 每次修改文章后,都要执行这两条命令,清除掉旧的数据,然后重新生成页面。
4.使用命令hexo d,将文件上传到你的远程仓库中即可。
可以先使用hexo s,先在本地预览一下
5.如何更换博客主题
以yilia主题为例:litten/hexo-theme-yilia: A simple and elegant theme for hexo. (github.com)
1.在你的hexo目录下运行:git clone https://github.com/litten/hexo-theme-yilia.git themes/yilia
D:\blog>git clone https://github.com/litten/hexo-theme-yilia.git themes/yilia Cloning into 'themes/yilia'... remote: Enumerating objects: 2037, done. remote: Counting objects: 100% (1/1), done. remote: Total 2037 (delta 0), reused 0 (delta 0), pack-reused 2036 Receiving objects: 100% (2037/2037), 10.53 MiB | 398.00 KiB/s, done. Resolving deltas: 100% (1079/1079), done.

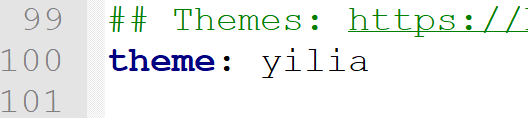
2.在_config.yml文件中修改主题,保存。
注意冒号后面有空格

3.在hexo目录下使用hexo clean,然后使用hexo g重新生成public文件
D:\blog>hexo clean INFO Validating config INFO Deleted database. INFO Deleted public folder. D:\blog>hexo g INFO Validating config INFO Start processing INFO Files loaded in 285 ms ... INFO 20 files generated in 64 ms
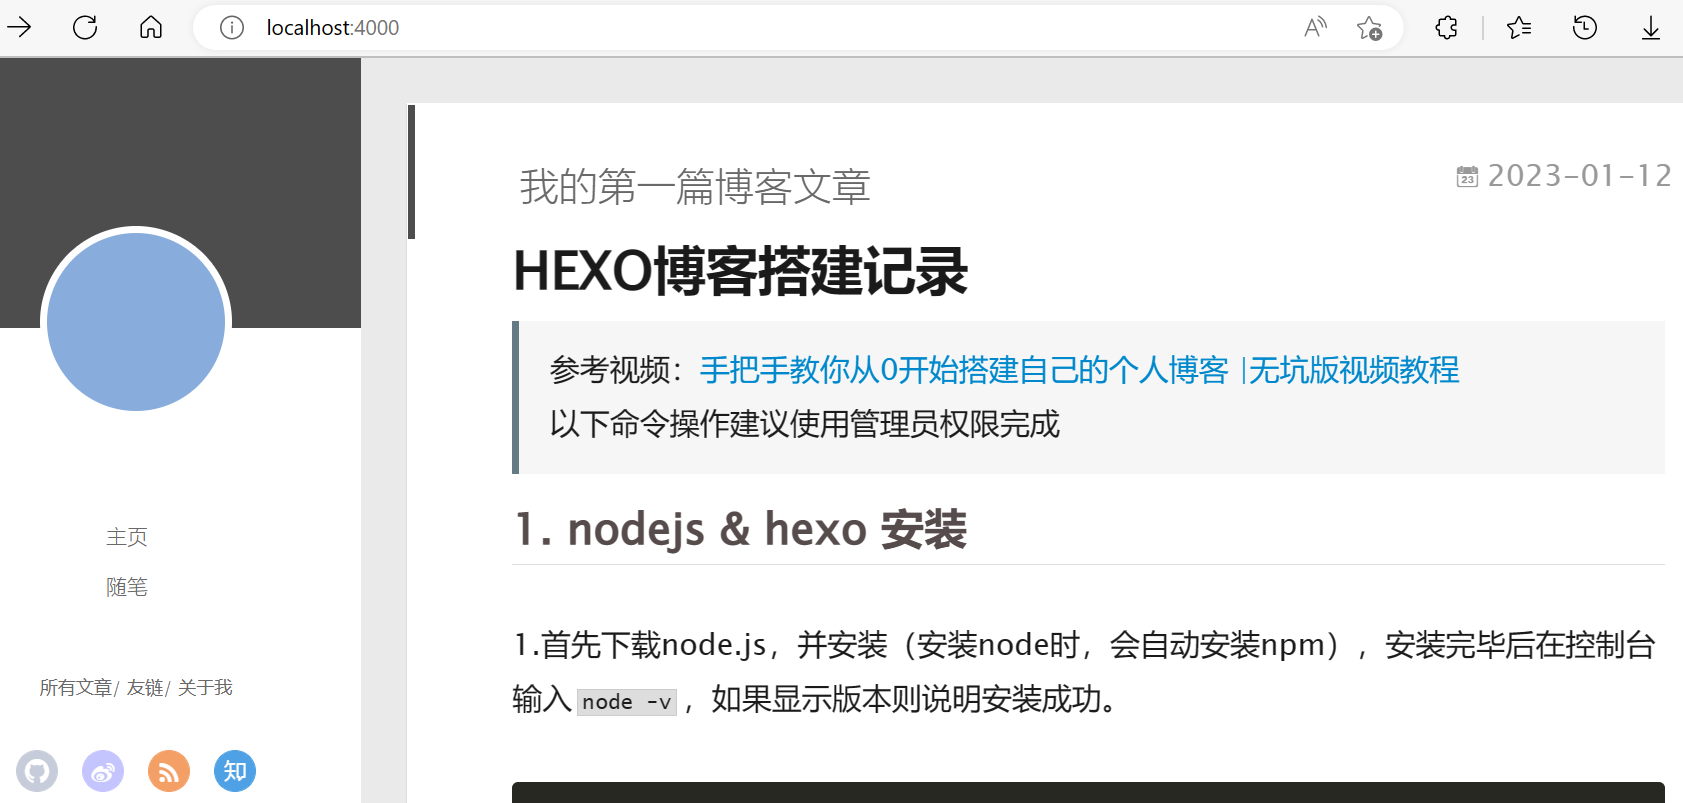
4.使用hexo s在本地启动,预览一下
5.觉得没问题了,就在hexo目录下使用hexo d,将新的博客文件发布到你的远程仓库中。
D:\blog>hexo d INFO Validating config INFO Deploying: git ... INFO Deploy done: git
然后在你的<github个人用户名>.github.io上就可以看到新的博客主题了
有时候会延迟一会才能更新
6.nexT主题
!!!注意:如果是旧的6.0以前的next主题:hexo使用next主题,location:4000显示不对问题。 · Issue #2253 · iissnan/hexo-theme-next (github.com)


【推荐】编程新体验,更懂你的AI,立即体验豆包MarsCode编程助手
【推荐】凌霞软件回馈社区,博客园 & 1Panel & Halo 联合会员上线
【推荐】抖音旗下AI助手豆包,你的智能百科全书,全免费不限次数
【推荐】博客园社区专享云产品让利特惠,阿里云新客6.5折上折
【推荐】轻量又高性能的 SSH 工具 IShell:AI 加持,快人一步
· 微软正式发布.NET 10 Preview 1:开启下一代开发框架新篇章
· 没有源码,如何修改代码逻辑?
· PowerShell开发游戏 · 打蜜蜂
· 在鹅厂做java开发是什么体验
· WPF到Web的无缝过渡:英雄联盟客户端的OpenSilver迁移实战