
centos 安装解压版本的msyql,以及遇到的问题
下载
- 访问www.mysql.com
- 点击DOWNLOADS-->Community-->MySQL Community Server
- 选择要下载的版本,目前可选择的有:
5.5、5.6、5.7、8.0,这里以5.7为例,所以选择的是5.7。 - 操作系统选择
Red Hat Enterprise Linux / Oracle Linux,操作系统版本选择Red Hat Enterprise Linux 7 / Oracle Linux 7 (x86, 64-bit),下面列表过滤的找到Compressed TAR Archivetar压缩文件下载即可,这里选择的是mysql-5.7.25-el7-x86_64.tar.gz。
将文件下载到CentOS服务器上,或者通过Windows下载后上传到CentOS服务器上。
(这里将文件放到/opt/soft/mysql-5.7.25-el7-x86_64.tar.gz)
安装配置
1、添加组和用户
[root@localhost ~]: groupadd mysql
[root@localhost ~]: useradd -r -g mysql mysql
2、解压到指定位置
这里准备将mysql放到/opt/program/mysql目录中。
- 创建
/opt/program/目录。 - 进入到
/opt/program/目录。 - 解压
/opt/soft/mysql-5.7.25-el7-x86_64.tar.gz文件,不指定目录的话,会解压到用户所在的目录(也就是/opt/program/)。 - 重新命名文件夹名为
mysql。 - 创建数据库目录
data。
[root@localhost ~]: mkdir /opt/program
[root@localhost ~]: cd /opt/program
[root@localhost program]: tar -zxvf /opt/soft/mysql-5.7.25-el7-x86_64.tar.gz
mysql-5.7.25-el7-x86_64/bin/myisam_ftdump
mysql-5.7.25-el7-x86_64/bin/myisamchk
mysql-5.7.25-el7-x86_64/bin/myisamlog
mysql-5.7.25-el7-x86_64/bin/myisampack
mysql-5.7.25-el7-x86_64/bin/mysql
…………
[root@localhost program]: mv mysql-5.7.25-el7-x86_64 mysql
[root@localhost program]: mkdir mysql/data
3、给用户和组赋权
[root@localhost ~]: chown -R mysql:mysql /opt/program/mysql
4、初始化mysql数据库
初始化需要指定mysql程序的目录以及数据库的目录
[root@localhost ~]: /opt/program/mysql/bin/mysqld  --initialize  --user=mysql  --basedir=/opt/program/mysql  --datadir=/opt/program/mysql/data
2019-03-16T14:28:52.317678Z 0 [Warning] TIMESTAMP with implicit DEFAULT value is deprecated. Please use --explicit_defaults_for_timestamp server option (see documentation for more details).
2019-03-16T14:28:54.382317Z 0 [Warning] InnoDB: New log files created, LSN=45790
2019-03-16T14:28:54.699000Z 0 [Warning] InnoDB: Creating foreign key constraint system tables.
2019-03-16T14:28:54.772198Z 0 [Warning] No existing UUID has been found, so we assume that this is the first time that this server has been started. Generating a new UUID: d3d169f0-47f7-11e9-9ce7-000c291627c9.
2019-03-16T14:28:54.773910Z 0 [Warning] Gtid table is not ready to be used. Table 'mysql.gtid_executed' cannot be opened.
2019-03-16T14:28:54.775717Z 1 [Note] A temporary password is generated for root@localhost: hxwVZi*0-e3<
警告可以先不管,最后的位置是随机生成的root密码hxwVZi*0-e3<
5、配置my.cnf文件
mysql启动时,默认会查找/etc/my.cnf文件作为配置文件。
[root@localhost ~]: vi /etc/my.cnf
配置示例如下:
[mysql]
default-character-set=utf8

[mysqld]
lower_case_table_names=1
basedir=/opt/program/mysql
datadir=/opt/program/mysql/data
port=3306
character-set-server=utf8
max_connections=2000
innodb_buffer_pool_size=128M
log-error=/opt/program/mysql/data/error.log
pid-file=/opt/program/mysql/data/mysql.pid
socket=/opt/program/mysql/mysql.sock
6、为mysql配置环境变量
可以通过/etc/profile文件配置。
[root@localhost ~]: vi /etc/profile
打开该文件,在最末尾的位置加上
PATH=$PATH:/opt/program/mysql/bin
保存退出,再执行
[root@localhost ~]: source /etc/profile
通过# echo $PATH可以查看环境变量信息
7、制作自启动服务
第一种,将mysql.server复制到/etc/ini.d/目录下配置自启动服务
[root@localhost ~]: cp /opt/program/mysql/support-files/mysql.server /etc/ini.d/mysql
[root@localhost ~]: chmod +x /etc/ini.d/mysql
[root@localhost ~]: chkconfig --add mysql
通过# chkconfig --list查看是否添加成功
然后通过service命令控制
[root@localhost ~]: service mysql start
第二种,通过systemd制作自启动服务
[root@localhost ~]: touch /etc/systemd/system/mysql.service
[root@localhost ~]: vi /etc/systemd/system/mysql.service
配置示例如下:
[Unit]
Description=mysql service

[Service]
Type=forking
ExecStart=/opt/program/mysql/support-files/mysql.server start
ExecStop=/opt/program/mysql/support-files/mysql.server stop
User=mysql

[Install]
WantedBy=multi-user.target
然后通过systemctl命令控制即可,启动服务和启用自启动
[root@localhost ~]: systemctl start mysql.service
[root@localhost ~]: systemctl enable mysql.service
第三种,通过systemd制作自启动服务,并且通过mysql/bin/mysqld来启动,my.cnf可以自定义位置。(参照于Windows服务的启动配置)mysql.service配置示例如下:
[Unit]
Description=mysql service

[Service]
ExecStart=/opt/program/mysql/bin/mysqld --defaults-file=/opt/program/mysql/my.cnf --user=mysql
User=mysql

[Install]
WantedBy=multi-user.target
附
- 错误:
error while loading shared libraries: libaio.so.1: cannot open shared object file: No such file or directory
解决方法:
检查是否有libaio库# rpm -qa|grep libaio,如果没有则安装# yum install libaio。
在以上配置好完成的情况下,使用以下命令:
service mysql start
报错:
service mysql start
Starting MySQL. ERROR! The server quit without updating PID file (/usr/local/mysql/logs/mysql.pid).
查看了一下error.log,(error.log的路径查看 /etc/my.cnf 文件的 log-error 配置)
2019-12-08T15:03:57.044822Z 0 [System] [MY-010116] [Server] /usr/local/mysql/bin/mysqld (mysqld 8.0.18) starting as process 8515
2019-12-08T15:03:57.058899Z 1 [ERROR] [MY-011011] [Server] Failed to find valid data directory.
2019-12-08T15:03:57.059056Z 0 [ERROR] [MY-010020] [Server] Data Dictionary initialization failed.
2019-12-08T15:03:57.059122Z 0 [ERROR] [MY-010119] [Server] Aborting
2019-12-08T15:03:57.059611Z 0 [System] [MY-010910] [Server] /usr/local/mysql/bin/mysqld: Shutdown complete (mysqld 8.0.18)  MySQL Community Server - GPL.
说我的数据目录不是一个有效的数据目录,于是初始化一下数据目录
mysqld --no-defaults --initialize
到此,问题得到解决,然后启动数据库:
service mysql start
连接数据库:
mysql
报错:
[root@localhost logs]# mysql
ERROR 2002 (HY000): Can't connect to local MySQL server through socket '/tmp/mysql.sock' (2)
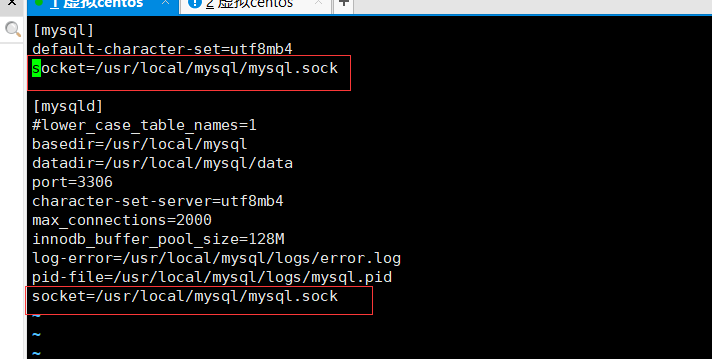
解决方法(socket的配置要保持一致):
再次使用mysql连接数据库,如果报错:
[root@localhost logs]# mysql
ERROR 1045 (28000): Access denied for user 'root'@'localhost' (using password: NO)
接下来修改数据库密码即可,跳过密码验证登录mysql
方法一:在 my.cnf 文件中的[mysqld]中添加 skip-grant-tables ,重启数据库服务

方法二:通过该命令启动mysql服务:
mysqld_safe --user=mysql --skip-grant-tables --skip-networking& 或者直接:mysqld_safe --skip-grant-tables &
进入数据库:输入mysql
且换到mysql数据库: use mysql
查看数据库所有用户:select user,host from user;
mysql> select user,host from user;
+------------------+-----------+
| user | host |
+------------------+-----------+
| mysql.infoschema | localhost |
| mysql.session | localhost |
| mysql.sys | localhost |
| root | localhost |
+------------------+-----------+
添加一个用户(允许本地访问):
create user 'lyh'@'localhost' identified by 'pass';
添加一个用户,允许外网访问:
create user 'root'@'%' identified by 'pass';
#授予用户管理员权限:
grant all PRIVILEGES on *.* to 'root'@'%';
刷新权限:
flush privileges;
重启数据库,通过:
mysql -u root -ppass
即可登录该数据库了
