


Android 7.0以上的版本更新采用系统自带的DownloadManager更新
DOWNLOADPATH ="/download/"

https://www.jianshu.com/p/55eae30d133c
<external-path name="name" path="path" />
物理路径相当于Environment.getExternalStorageDirectory() + /path/。
<external-files-path name="name" path="path" />
<external-files-path name="name" path="path" />
物理路径相当于**Context.getExternalFilesDir(String) **+ /path/。
https://www.cnblogs.com/fengfenghuifei/p/9870143.html

这个博主的原文
Manifest里声明provider ,xml设置文件目录,代码里获取uri,intent里设置uri,然后使用
我这里要说的是我们如何设置二级目录
因为xml里各种path的构建只允许出现一级目录的如 TestAPKPath,这样的
不允许出现TestAPKPath/Img这样
所以方法就是在构建文件的时候,在文件的目录上写上二级域名
File file = new File(“xxxx/TestApkPath/Img”);
Uri uri = FileProvider.getUri("xxx.xxx.provider",file);
这样我们就完成了将file存储到二级目录的效果
我这里遇到的问题就是,之前将更新apk包下载到了/jingyeapp/downloadApk 文件夹下了,但是在xml配置时,添加二级目录,就会合并在一块,出现解析失败的问题。
上面博客的方法,自己未测试。直接修改了新apk包的下载路径到手机系统的/download/文件夹下。
private void initDownManager() {
        LogUtil.d(TAG, "initDownManager");
        manager = (DownloadManager) getSystemService(DOWNLOAD_SERVICE);
        receiver = new DownloadCompleteReceiver();
        //设置下载地址
        DownloadManager.Request down = new DownloadManager.Request(Uri.parse(url));
        // 设置允许使用的网络类型,这里是移动网络和wifi都可以
        down.setAllowedNetworkTypes(DownloadManager.Request.NETWORK_MOBILE
                | DownloadManager.Request.NETWORK_WIFI);
        down.setAllowedOverRoaming(false);
        MimeTypeMap mimeTypeMap = MimeTypeMap.getSingleton();
        String mimeString = mimeTypeMap.getMimeTypeFromExtension(MimeTypeMap.getFileExtensionFromUrl(url));
        down.setMimeType(mimeString);
        // 下载时,通知栏显示途中
        down.setNotificationVisibility(DownloadManager.Request.VISIBILITY_VISIBLE);
        // 显示下载界面
        down.setVisibleInDownloadsUi(true);
        // 设置下载后文件存放的位置
        down.setDestinationInExternalPublicDir(DOWNLOADPATH, "jingye.apk");
        down.setTitle("敬业升级");
        // 将下载请求放入队列
        manager.enqueue(down);
        //注册下载广播
        registerReceiver(receiver, new IntentFilter(DownloadManager.ACTION_DOWNLOAD_COMPLETE));
    }

    public int onStartCommand(Intent intent, int flags, int startId) {
        LogUtil.d(TAG, "onStartCommand");
        url = intent.getStringExtra("downloadurl");
        String path = Environment.getExternalStorageDirectory().getAbsolutePath() + DOWNLOADPATH + "jingye.apk";
        File file = new File(path);
        if (file.exists()) {
            file.delete();
        }
        try {
            // 调用下载
            initDownManager();
            Toast.makeText(getApplicationContext(), "升级中,可以在通知栏查看进度", Toast.LENGTH_SHORT).show();
        } catch (Exception e) {
            e.printStackTrace();
            Toast.makeText(getApplicationContext(), "下载失败", Toast.LENGTH_SHORT).show();
        }
        return Service.START_NOT_STICKY;
    }
public void install(Context context) {
            File file = new File(Environment.getExternalStoragePublicDirectory(Environment.DIRECTORY_DOWNLOADS) ,"jingye.apk");
            Intent intent = new Intent(Intent.ACTION_VIEW);
            //参数1 上下文, 参数2 Provider主机地址 和配置文件中保持一致   参数3  共享的文件
            Uri apkUri =
                    FileProvider.getUriForFile(context, BuildConfig.APPLICATION_ID+".fileprovider",file);

            intent.addCategory("android.intent.category.DEFAULT");
            // 由于没有在Activity环境下启动Activity,设置下面的标签
            intent.setFlags(Intent.FLAG_ACTIVITY_NEW_TASK);
            //添加这一句表示对目标应用临时授权该Uri所代表的文件
            intent.addFlags(Intent.FLAG_GRANT_READ_URI_PERMISSION);
            intent.setDataAndType(apkUri, "application/vnd.android.package-archive");

            LogUtil.d(TAG, "install -apkUri:"+apkUri);
            context.startActivity(intent);

        }

第一开始,更新时,总提示:安装包解析失败,发现路径跟期望设置的不同。

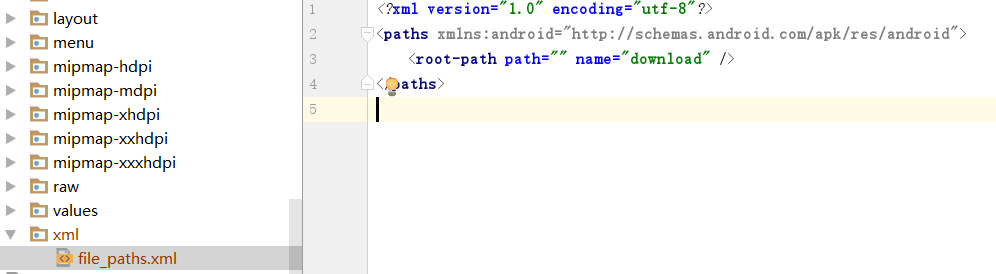
正确的路径

