2017年11月最新Nagios4.3.4部署
一 ,需下载的安装包 2017-11-22
1,nagios-4.3.4.tar.gz, 2, nagios-plugins-2.2.1.tar.gz 3,nrpe-2.15.tar.gz ,4,pnp4nagios-head.tar.gz
我的安装目录为/nagios /magios/pnp4nagios /nagios/nrpe
二,安装环境
yum install -y wget httpd php php-devel php-gd gcc glibc glibc-common gd gd-devel make net-snmp
三,添加 用户 创建 nagios安装目录
useradd nagios
mkdir /nagios
chown -R nagios.nagios /nagios
四,安装nagios4.3.4
./configure --prefix=/nagios --with-command-group=nagios --with-nagios-group=nagios
make all
make install
make install-init
make install-config
make install-commandmode
make install-webconf
2,把文件复制到安装目录
cp -R contrib/eventhandlers/ /nagios/libexec/
chown -R nagios.nagios /nagios/
3,检测配置文件是否正常
/nagios/bin/nagios -v /nagios/etc/nagios.cfg
Total Warnings: 0 #警告0个
Total Errors: 0 #错误0个 没有问题
五,配置httpd
htpasswd -c /nagios/etc/htpasswd.users nagiosadmin #添加登录用户名 和回车后输入两次密码 #这里一定要用nagiosadmin(超级)用户 可以使用其他用户 以后再说
修改/etc/httpd/conf/httpd.conf 如下:
User =nagios Group=nagios
#ServerName www.example.com:80 #解释掉#号 修改端口号 使其大于1024 使普通用户nagios可以启动
Listen 8080 #这个也要修改 和上面使用一样的端口
六,安装 nagios-plugins
./configure --prefix=/nagios --with-nagios-user=nagios --with-nagios-group=nagios
make
make install
七,设置开机自启并启动服务
chkconfig nagios on
service nagios start
chkconfig httpd on
service httpd start
service nagios start #启动nagios 或者 /nagios/bin/nagios -d /nagios/etc/nagios.cfg 启动 #ps -ef|grep nagios 可以过滤出nagios进程
访问: nagios http://IP:port/nagios
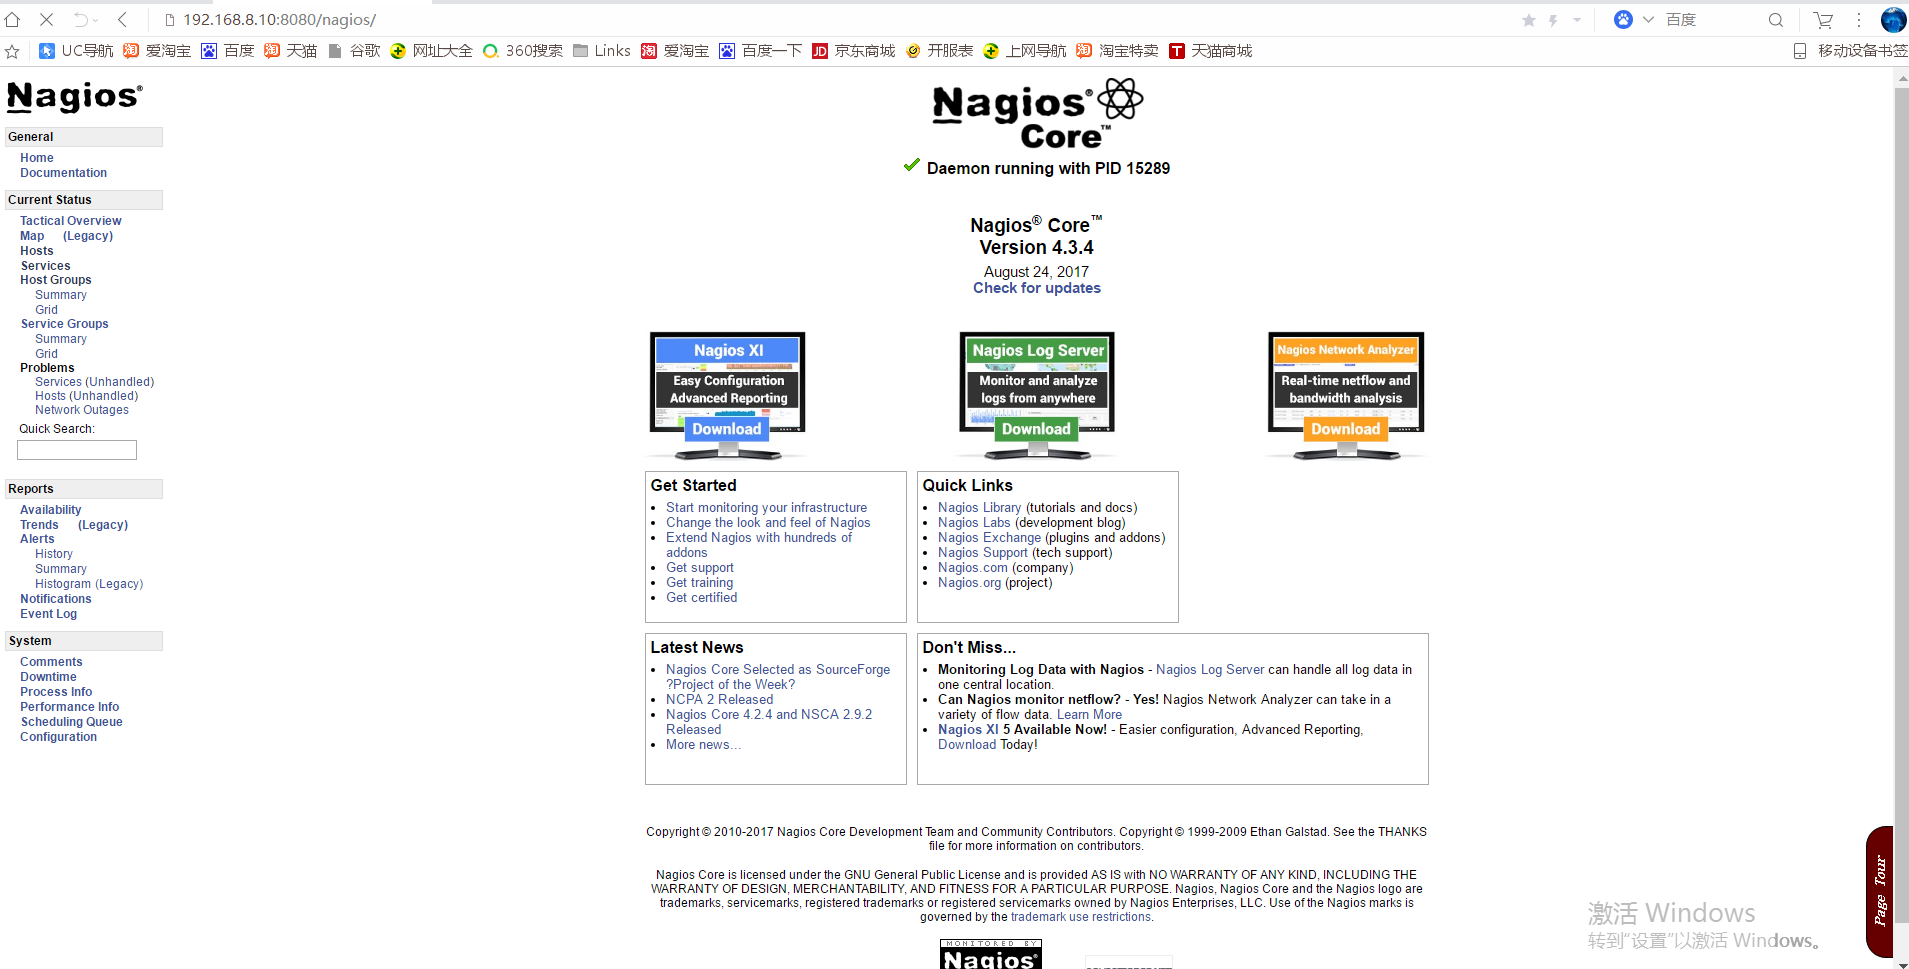
默认有一个localhost.cfg 监控本地 我的httpd_prot:8080 所以爆错

二、为nagios安装图标pnp4nagios
1,安装组件
yum install perl-Time-HiRes rrdtool rrdtool-perl
2,安装pnp4nagios
mkdir /nagios/pnp4nagios #创建pnp4nagios 目录
./configure --prefix=/nagios/pnp4nagios --with-nagios-user=nagios --with-nagios-group=nagios
下方为输出信息

make all #编译
make install
make install-webconf
make install-config
make install-init
3、启用配置文件
cp /nagios/pnp4nagios/contrib/ssi /nagios/pnp4nagios/share/ -R #将ssi目录复制到share下面,不然后面图片显示会报错
cd /nagios/pnp4nagios/etc/
mv misccommands.cfg-sample misccommands.cfg
mv nagios.cfg-sample nagios.cfg
mv rra.cfg-sample rra.cfg
cd pages/
mv web_traffic.cfg-sample web_traffic.cfg
cd ../check_commands/
mv check_all_local_disks.cfg-sample check_all_local_disks.cfg
mv check_nrpe.cfg-sample check_nrpe.cfg
mv check_nwstat.cfg-sample check_nwstat.cfg
4,启动npcd
service npcd start # 或者 /nagios/pnp4nagios/bin/npcd -d -f /nagios/pnp4nagios/etc/npcd.cfg 启动
chconfig npcd on #开机自启
三,nagios配置修改文档 其中npn4nagios是图片绘图显示可以查看历史数据
1,vi /nagios/etc/nagios.cfg #需要时请备份源文件
将process_performance_data=0 修改为 process_performance_data=1
将以下两项的#去掉
host_perfdata_command=process-host-perfdata
service_perfdata_command=process-service-perfdata
2,vi /nagios/etc/objects/commands.cfg #命令文件 可以自己添加命令
注释掉末尾两个配置项 新添加两个
# 'process-host-perfdata' command definition
#define command{
# command_name process-host-perfdata
# command_line /usr/bin/printf "%b" "$LASTHOSTCHECK$\t$HOSTNAME$\t$HOSTSTATE$\t$HOSTATTEMPT$\t$HOSTSTATETYPE$\t$HOSTEXECUTIONTIME$\t$HOSTOUTPUT$\t$HOSTPERFDATA$\n" >> /nagios/var/host-perfdata.out
# }
# 'process-service-perfdata' command definition
#define command{
# command_name process-service-perfdata
# command_line /usr/bin/printf "%b" "$LASTSERVICECHECK$\t$HOSTNAME$\t$SERVICEDESC$\t$SERVICESTATE$\t$SERVICEATTEMPT$\t$SERVICESTATETYPE$\t$SERVICEEXECUTIONTIME$\t$SERVICELATENCY$\t$SERVICEOUTPUT$\t$SERVICEPERFDATA$\n" >> /nagios/var/service-perfdata.out
# }
define command{
command_name process-service-perfdata-file
command_line /bin/mv /nagios/pnp4nagios/var/service-perfdata /nagios/pnp4nagios/var/spool/service-perfdata.$TIMET$
}
define command{
command_name process-host-perfdata-file
command_line /bin/mv /nagios/pnp4nagios/var/host-perfdata /nagios/pnp4nagios/var/spool/host-perfdata.$TIMET$
}
3,编辑vi /nagios/etc/objects/templates.cfg 添加两个url
define service{
name generic-service ; The 'name' of this service template
active_checks_enabled 1 ; Active service checks are enabled
passive_checks_enabled 1 ; Passive service checks are enabled/accepted
parallelize_check 1 ; Active service checks should be parallelized (disabling this can lead to major performance problems)
obsess_over_service 1 ; We should obsess over this service (if necessary)
check_freshness 0 ; Default is to NOT check service 'freshness'
notifications_enabled 1 ; Service notifications are enabled
event_handler_enabled 1 ; Service event handler is enabled
flap_detection_enabled 1 ; Flap detection is enabled
process_perf_data 1 ; Process performance data
retain_status_information 1 ; Retain status information across program restarts
retain_nonstatus_information 1 ; Retain non-status information across program restarts
is_volatile 0 ; The service is not volatile
check_period 24x7 ; The service can be checked at any time of the day
max_check_attempts 3 ; Re-check the service up to 3 times in order to determine its final (hard) state
check_interval 5 ; Check the service every 10 minutes under normal conditions
retry_interval 2 ; Re-check the service every two minutes until a hard state can be determined
contact_groups admins ; Notifications get sent out to everyone in the 'admins' group
notification_options w,u,c,r ; Send notifications about warning, unknown, critical, and recovery events
notification_interval 60 ; Re-notify about service problems every hour
notification_period 24x7 ; Notifications can be sent out at any time
register 0 ; DONT REGISTER THIS DEFINITION - ITS NOT A REAL SERVICE, JUST A TEMPLATE!
action_url /pnp4nagios/index.php/graph?host=$HOSTNAME$&srv=$SERVICEDESC$ 添加内容
}
# Local service definition template - This is NOT a real service, just a template!
define service{
name local-service ; The name of this service template
use generic-service ; Inherit default values from the generic-service definition
max_check_attempts 4 ; Re-check the service up to 4 times in order to determine its final (hard) state
check_interval 5 ; Check the service every 5 minutes under normal conditions
retry_interval 1 ; Re-check the service every minute until a hard state can be determined
register 0 ; DONT REGISTER THIS DEFINITION - ITS NOT A REAL SERVICE, JUST A TEMPLATE!
action_url /pnp4nagios/index.php/graph?host=$HOSTNAME$&srv=$SERVICEDESC$ 添加内容
}
4,编辑vi /nagios/etc/nagios.cfg
# Values: 1 = process performance data, 0 = do not process performance data
process_performance_data=1
host_perfdata_file=/nagios/pnp4nagios/var/host-perfdata #指定路径
service_perfdata_file=/nagios/pnp4nagios/var/service-perfdata #指定路径
host_perfdata_file_template=DATATYPE::HOSTPERFDATA\tTIMET::$TIMET$\tHOSTNAME::$HOSTNAME$\tHOSTPERFDATA::$HOSTPERFDATA$\tHOSTCHECKCOMMAND::$HOSTCHECKCOMMAND$\tHOSTSTATE::$HOSTSTATE$\tHOSTSTATETYPE::$HOSTSTATETYPE$ #解释
service_perfdata_file_template=DATATYPE::SERVICEPERFDATA\tTIMET::$TIMET$\tHOSTNAME::$HOSTNAME$\tSERVICEDESC::$SERVICEDESC$\tSERVICEPERFDATA::$SERVICEPERFDATA$\tSERVICECHECKCOMMAND::$SERVICECHECKCOMMAND$\tHOSTSTATE::$HOSTSTATE$\tHOSTSTATETYPE::$HOSTSTATETYPE$\tSERVICESTATE::$SERVICESTATE$\tSERVICESTATETYPE::$SERVICESTATETYPE$
#解释
host_perfdata_file_mode=a #解释
service_perfdata_file_mode=a #解释
host_perfdata_file_processing_interval=15 #修改
service_perfdata_file_processing_interval=15 #修改
host_perfdata_file_processing_command=process-host-perfdata-file #解释
service_perfdata_file_processing_command=process-service-perfdata-file #解释
5,检测配置文件是否有误
/nagios/bin/nagios -v /nagios/etc/nagios.cfg
6,由于我是自定义目录安装所以要配置vi /etc/httpd/conf.d/pnp4nagios.conf
指定它的目录Alias /pnp4nagios "/nagios/pnp4nagios/share" 以及 AuthUserFile /nagios/etc/htpasswd.users 密码文件,建议指定到nagios的密码文件不然你每一次都要重新输入pnp4nagios密码
7, 重启 nagios httpd
会有下图 1 图形 点击后是 pnp4nagios 2图 有提示删除install.pnp 删除后就会有下图3 可能会报错 有可能正在生成图片 也有可能是权限问题
1 图形  2图形
2图形 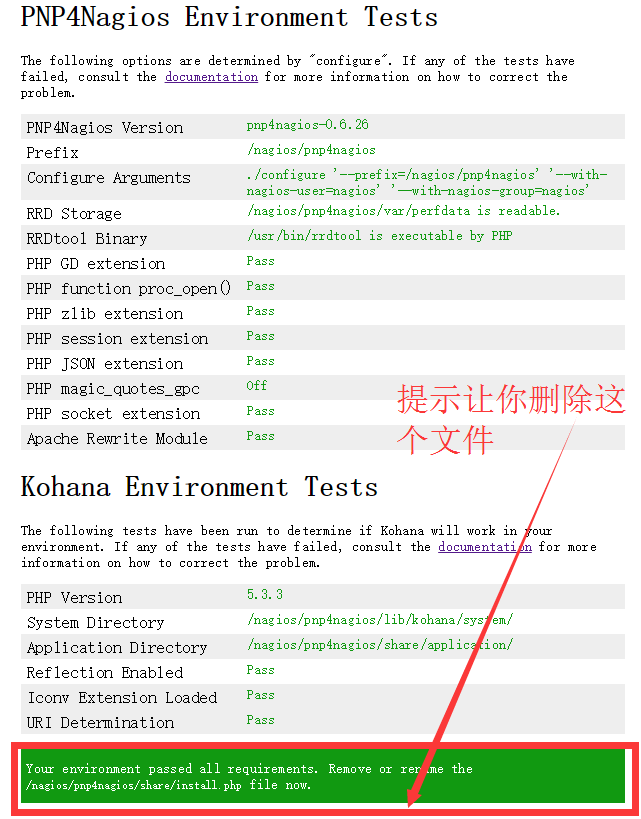
3图形 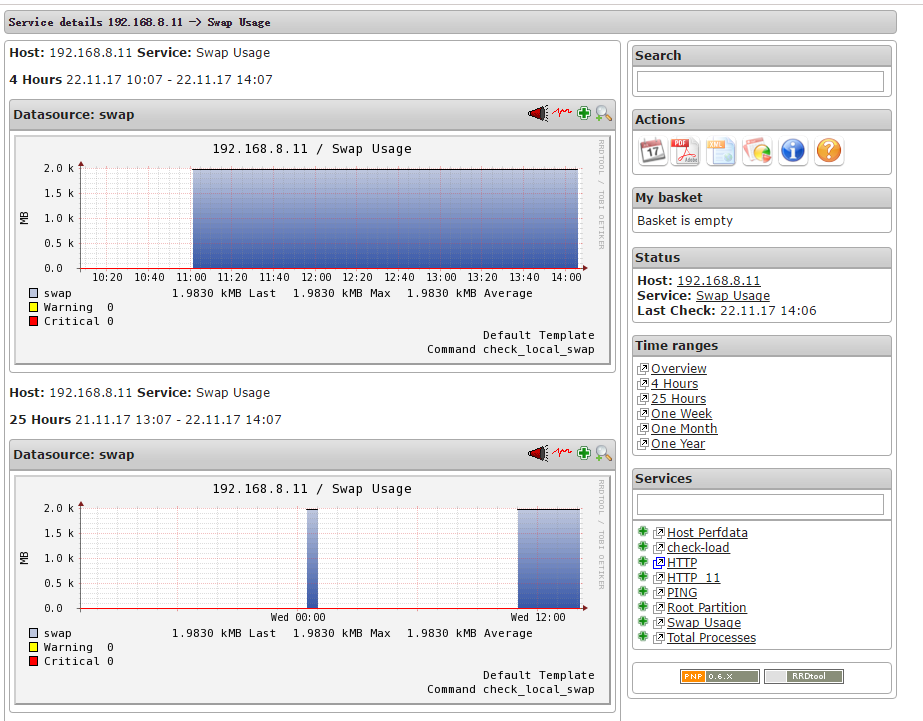
四,客户端插件nrpe 被监控客户机设置
1,安装nrpe依赖包
yum install openssl openssl-devel -y
2,安装nrpe
./configure --prefix=/nagios/nrpe --enable-ssl --with-nagios-user=nagios --with-nagios-group=nagios --with-nrpe-user=nagios --with-nrpe-group=nagios
make all
make install-plugin
make install-daemon
make install-daemon-config
make install-xinetd
3、编辑nrpe配置文件,增加监控机地址Nagios-ip和本机IP:
vi /etc/xinetd.d/nrpe
only_from = 192.168.8.10,127.0.0.1
4、编辑vi /nagios/nrpe/nrpe.cfg
allowed_hosts=192.168.8.10,127.0.0.1
5、修改services文件,增加端口
vi /etc/services
nrpe 5666/tcp #NRPE
6、启动 nrpe
/nagios/bin/nrpe -c /nagios/etc/nrpe.cfg -d
设置开机启动 #如果你发现主机是存活的服务全部不在 那就是服务器重启了
vi /etc/rc.d/rc.local
加入/nagios/bin/nrpe -c /nagios/etc/nrpe.cfg -d
7,nagios主机设置
1、vi /usr/local/nagios/etc/nagios.cfg
加入cfg_file=/usr/local/nagios/etc/objects/192.168.8.11.cfg
2、创建并编辑192.168.8.11.cfg
vi /usr/local/nagios/etc/objects/192.168.8.11.cfg
define host{
use linux-server
host_name 192.168.8.11
alias my
address 192.168.8.11
}
define service{
use generic-service
host_name 192.168.8.11
service_description Swap Usage
check_command check_local_swap!20!10
}
define service{
use generic-service
host_name 192.168.8.11
service_description check-load
check_command check_local_load!5.0,4.0,3.0!10.0,6.0,4.0
}
define service{
use generic-service
host_name 192.168.8.11
service_description Root Partition
check_command check_local_disk!20%!10%!/
}
define service{
use generic-service
host_name 192.168.8.11
service_description Swap Usage
check_command check_local_swap!20!10
}
define service{
use generic-service
host_name 192.168.8.11
service_description Total Processes
check_command check_local_procs!250!400!RSZDT
}
define service{
use generic-service ; Name of service template to use
host_name 192.168.8.11
service_description PING
check_command check_ping!100.0,20%!500.0,60%
}
define service{
use generic-service ; Name of service template to use
host_name 192.168.8.11
service_description HTTP_11
check_command check_http
notifications_enabled 0
}
vi /usr/local/nagios/etc/objects/commands.cfg
在最后面增加如下内容
#############################################
# 'check_nrpe ' command definition
define command{
command_name check_nrpe
command_line $USER1$/check_nrpe -H $HOSTADDRESS$ -c $ARG1$
}
3、service nagios restart
五、邮件报警设置
1,安装邮件组件
yum install mailx senmail* -y
2,编辑邮箱并发送测试
vi /etc/mail.rc
set bsdcompat
set from=jie_linux@163.com
set smtp=smtp.163.com
set smtp-auth-user=jie_linux@163.com
set smtp-auth-password="XXXXXXXXXXX"
set smtp-auth=login
进行测试:
echo "测试邮件"|nail -s "测试" 717122108@qq.com
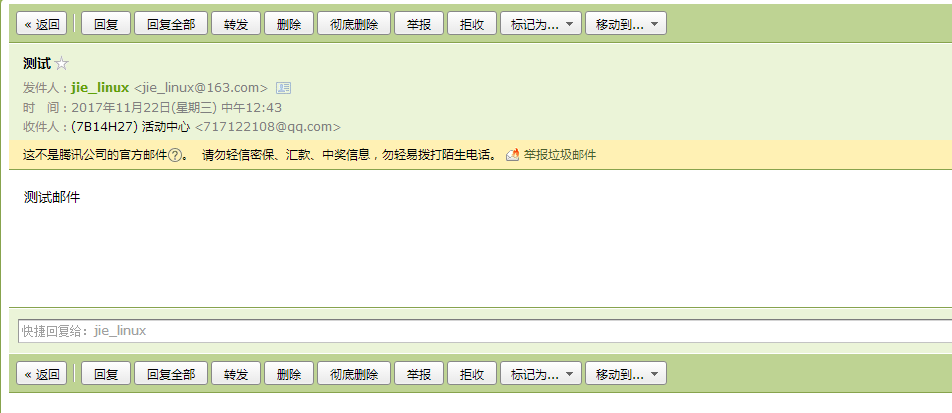
3、编辑contacts.cfg(联系人) command.cfg----下列邮件定义信息无需修改(nagios 4.3.4)
vi contacts.cfg #只需要修改email就行
define contact{
contact_name nagiosadmin ; Short name of user
use generic-contact ; Inherit default values from generic-contact template (defined above)
alias Nagios Admin ; Full name of user
email 717122108@qq.com ; <<***** CHANGE THIS TO YOUR EMAIL ADDRESS ******
}
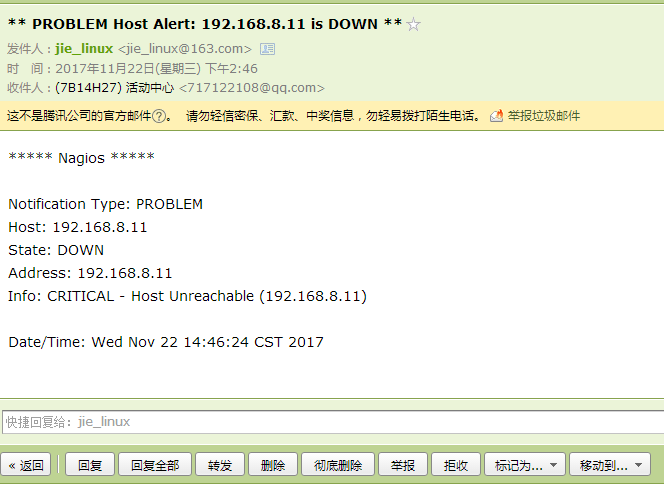
下方是邮件内容 一分钟就刷出服务器DOWN了但邮件好慢 服务器起来时邮件是秒发 还需要调监控频率 和 发送邮件的设置
注:本文参考Jim的ChinaUnix博客 http://blog.chinaunix.net/uid-25896650-id-5069857.html
