vs2019 .net core 3.1 使用GRPC 多个proto文件
服务端:
1.使用vs2019创建GRPC服务端
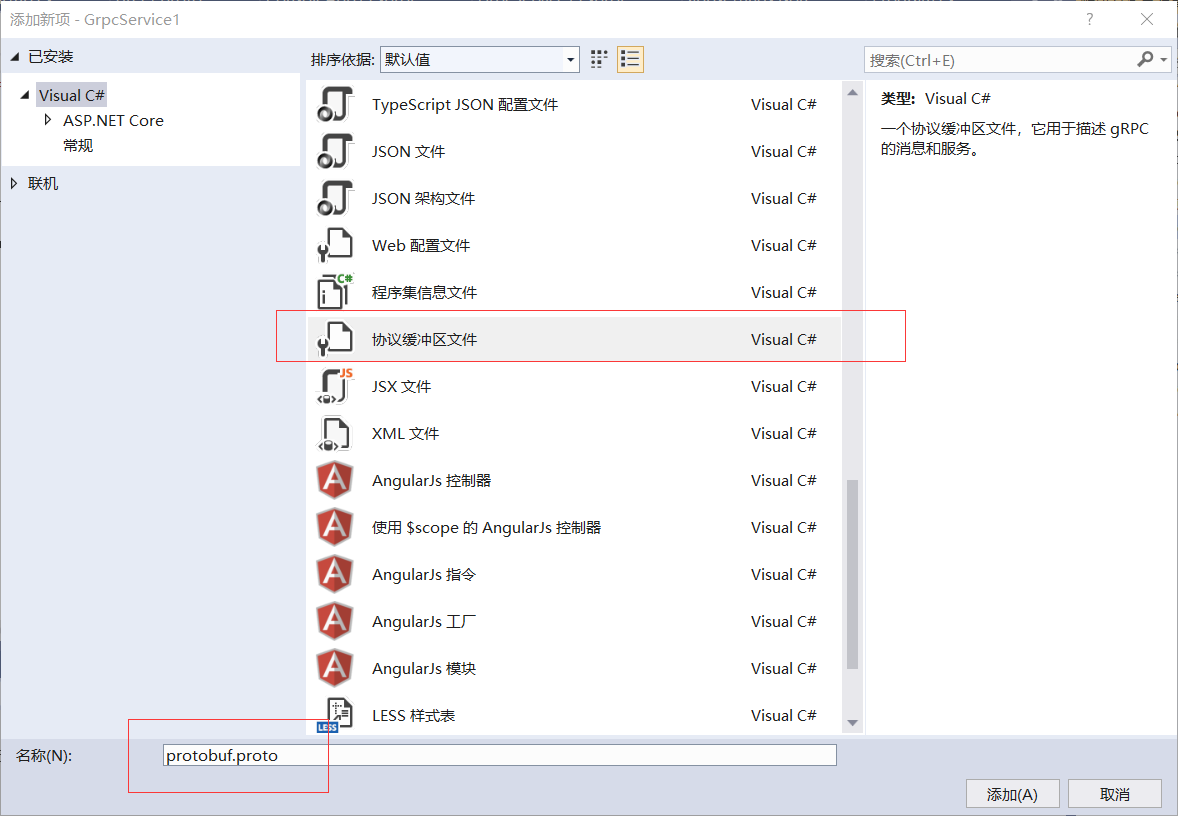
2.在项目下的Protos文件夹创建.proto文件
内容设置如下:
syntax = "proto3";

// 命名空间
option csharp_namespace = "GrpcService1";
package first;

//定义的服务
service ProFirst {
  // 方法
  rpc SayHello (LxpRequest) returns (LxpReply);
  // 方法
  rpc GetUserInfo(LxpRequest) returns(LxpReply);
}
 //请求体
message LxpRequest {
  string name = 1;
  string  age = 4;
}
 //响应体
message LxpReply {
  string message = 1;

}
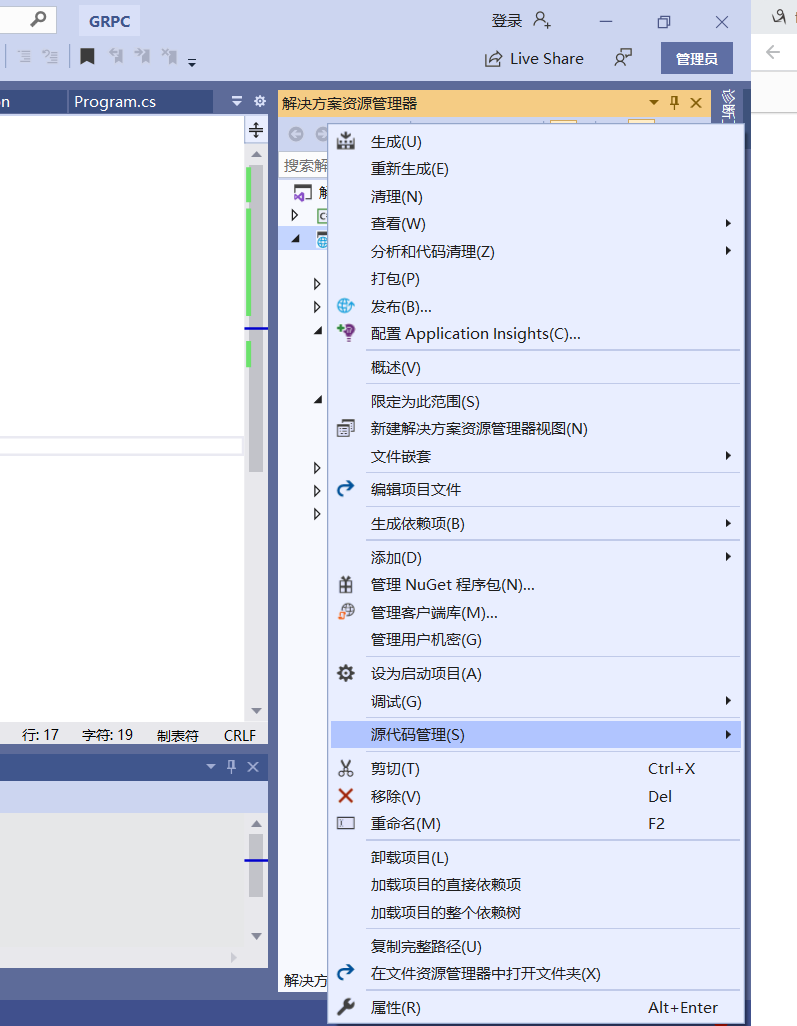
3.右键项目->编辑项目文件->将创建的.proto文件添加进去,vs2019自动生成代码
<Project Sdk="Microsoft.NET.Sdk.Web">
<PropertyGroup>
<TargetFramework>netcoreapp3.1</TargetFramework>
</PropertyGroup>
<ItemGroup>
<!--此处为proto文件的路径,编辑器会去查找对应的proto文件并生成代码-->
<!--注意此处的 GrpcServices 属性需要设置为Server,如果是客户端的话需要设置为Client-->
<Protobuf Include="Protos\greet.proto" GrpcServices="Server" />
<Protobuf Include="Protos\first.proto" GrpcServices="Server" />
</ItemGroup>
<ItemGroup>
<PackageReference Include="Grpc.AspNetCore" Version="2.27.0" />
</ItemGroup>
</Project>
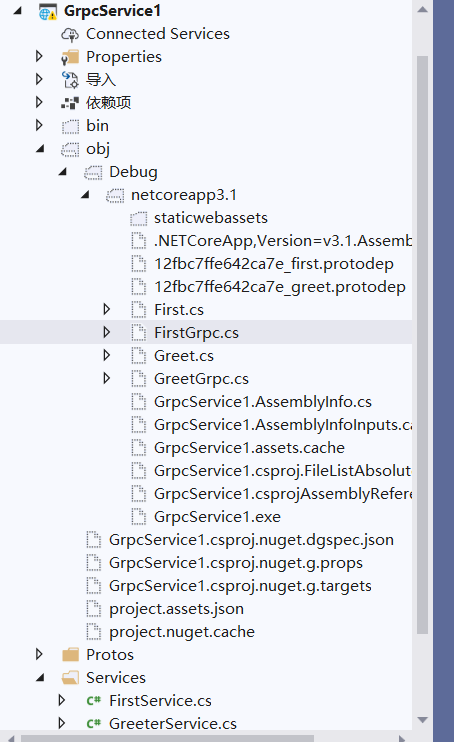
设置完成会在项目的obj>debug>netcoreapp3.1目录下自动生成对应的代码
3.在项目下的Services文件
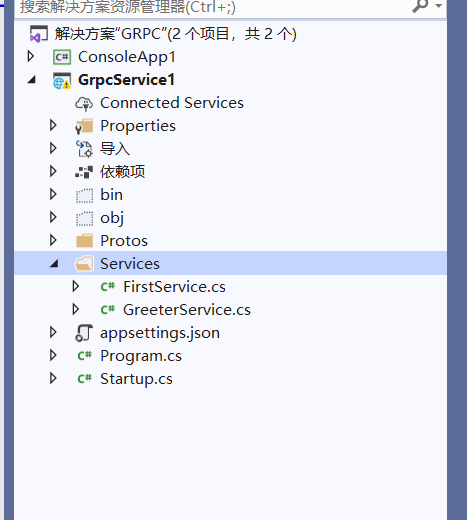
在Service文件夹添加类,让该类继承proto自动生成的代码,并且重写,这里需要注意的是 每次在proto文件新增方法的时候需要在该文件实现,否则会调用错误,报未实现的错误
using Grpc.Core;
using Microsoft.Extensions.Logging;
using System;
using System.Collections.Generic;
using System.Linq;
using System.Reflection.Metadata.Ecma335;
using System.Threading.Tasks;

namespace GrpcService1
{
    // 这里继承proto文件生成的服务抽象类,需要自己实现
    public class FirstService : ProFirst.ProFirstBase
    {
        private readonly ILogger<FirstService> _logger;
        public FirstService(ILogger<FirstService> logger)
        {
            _logger = logger;
        }

        public override bool Equals(object obj)
        {
            return base.Equals(obj);
        }

        public override int GetHashCode()
        {
            return base.GetHashCode();
        }

        public override Task<LxpReply> GetUserInfo(LxpRequest request, ServerCallContext context)
        {
            return Task.FromResult(new LxpReply { Message = "LXP  我爱你" });

        }

        public override Task<LxpReply> SayHello(LxpRequest request, ServerCallContext context)
        {
            return Task.FromResult(new LxpReply { Message = "LXP 你好" });
        }

        public override string ToString()
        {
            return base.ToString();
        }
    }
}
4.在startup类文件配置grpc
startup文件中需要启用,在ConfigureServices注册服务,Configure设置服务的终结点
using System;
using System.Collections.Generic;
using System.Linq;
using System.Threading.Tasks;
using Microsoft.AspNetCore.Builder;
using Microsoft.AspNetCore.Hosting;
using Microsoft.AspNetCore.Http;
using Microsoft.Extensions.DependencyInjection;
using Microsoft.Extensions.Hosting;

namespace GrpcService1
{
    public class Startup
    {
        // This method gets called by the runtime. Use this method to add services to the container.
        // For more information on how to configure your application, visit https://go.microsoft.com/fwlink/?LinkID=398940
        public void ConfigureServices(IServiceCollection services)
        {
            services.AddGrpc();
        }

        // This method gets called by the runtime. Use this method to configure the HTTP request pipeline.
        public void Configure(IApplicationBuilder app, IWebHostEnvironment env)
        {
            if (env.IsDevelopment())
            {
                app.UseDeveloperExceptionPage();
            }

            app.UseRouting();

            app.UseEndpoints(endpoints =>
            {
                endpoints.MapGrpcService<GreeterService>();
                endpoints.MapGrpcService<FirstService>();//自己新加的服务类
                endpoints.MapGet("/", async context =>
                {
                    await context.Response.WriteAsync("Communication with gRPC endpoints must be made through a gRPC client. To learn how to create a client, visit: https://go.microsoft.com/fwlink/?linkid=2086909");
                });
            });
        }
    }
}
5.在appsettings.json文件配置http2
{
  "Logging": {
    "LogLevel": {
      "Default": "Information",
      "Microsoft": "Warning",
      "Microsoft.Hosting.Lifetime": "Information"
    }
  },
  "AllowedHosts": "*",
  "Kestrel": {
    "EndpointDefaults": {
      "Protocols": "Http2"
    }
  }
}
然后在测试的时候需要使用临时的证书,点击确定,如果需要发布到正式环境下需要申请证书
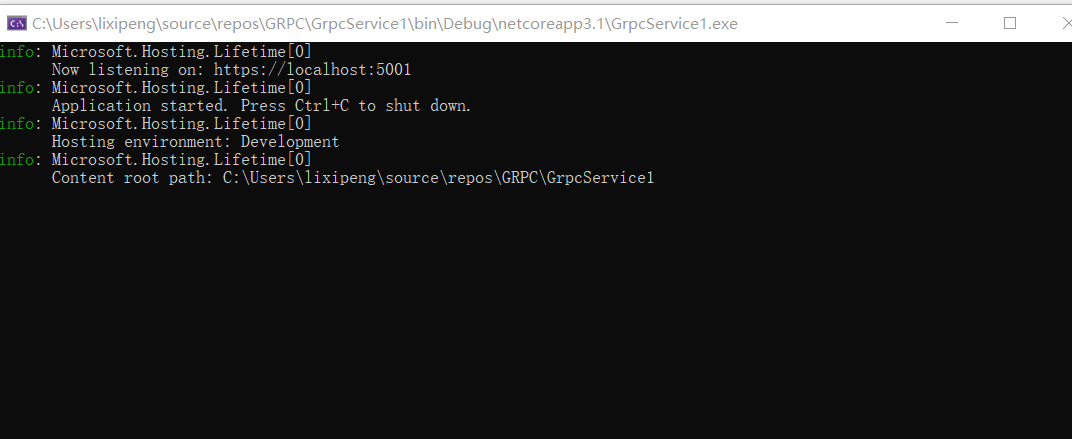
点击运行
客户端(控制台或asp.net mvc等等):
1.安装nuget包 grpc-aspnetcore
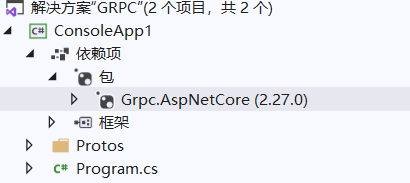
2.将服务端的Protos文件夹整个复制到客户端

3.右键项目->编辑项目文件->将创建的.proto文件添加进去,将Server修改为Client,vs2019自动生成代码
<Project Sdk="Microsoft.NET.Sdk">
    <PropertyGroup>
        <OutputType>Exe</OutputType>
        <TargetFramework>netcoreapp3.1</TargetFramework>
    </PropertyGroup>

    <ItemGroup>
        <None Remove="Protos\first.proto" />
    </ItemGroup>

    <ItemGroup>
        <PackageReference Include="Grpc.AspNetCore" Version="2.27.0" />
    </ItemGroup>
    <ItemGroup>
        <!--这里需要注意GrpcServices修改为Client-->
        <Protobuf Include="Protos\first.proto" GrpcServices="Client" />
        <Protobuf Include="Protos\greet.proto" GrpcServices="Client" />
    </ItemGroup>
</Project>
4.开始愉快的使用,在项目需要的地方调用
using Grpc.Core;
using Grpc.Net.Client;
using GrpcService1;
using System;

namespace ConsoleApp1
{
    class Program
    {
        static async System.Threading.Tasks.Task Main(string[] args)
        {
            var channel = GrpcChannel.ForAddress("https://localhost:5001");

            var client = new Greeter.GreeterClient(channel);

            var sayHello = client.SayHello(new HelloRequest { Name = "123" });
            var sayHelloAsync = await client.SayHelloAsync(new HelloRequest { Name = "123" });

            var client1 = new ProFirst.ProFirstClient(channel);
            var client1SayHello = client1.SayHello(new LxpRequest { Name = "123", Age = "123" });
            var userInfo = client1.GetUserInfo(new LxpRequest { Name = "321", Age = "abc" });
            var userInfoAsync = await client1.GetUserInfoAsync(new LxpRequest { Name = "321", Age = "abc" });
            Console.WriteLine("Hello World!");
        }
    }
}

 浙公网安备 33010602011771号