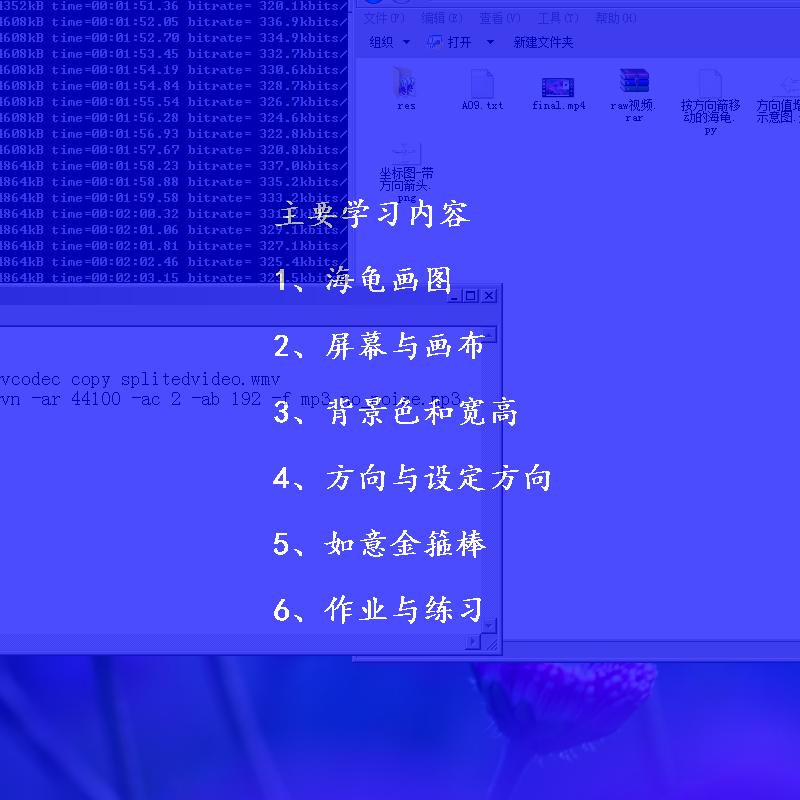
Python如意金箍棒演示幻灯片.pyw

用Python制作的幻灯片类型的作品,主要学习如何用python画孙悟空的如意金箍棒 ,以下是完整源代码。
本程序需要sprites模块支持,安装方法为在命令提示符下输入以下命令安装:
pip install -i https://pypi.tuna.tsinghua.edu.cn/simple sprites --upgrade
  1 """
  2    第九课 如意金箍棒(屏幕与方向)
  3 """
  4 from sprites import *
  5
  6 s = '第九课 如意金箍棒(屏幕与方向)'
  7 screen = Screen()
  8 screen.bgcolor('blue')
  9 screen.titlebar(False)
 10 root = screen._root              # 窗口对象
 11 root.wm_attributes('-alpha',0.7) # 设置窗口为全透明(0到1.0)
 12 screen.setup(800,800)
 13 screen.tracer(0,0)
 14
 15 # 下面的代码让窗口可以拖动.
 16 oldx = 0
 17 oldy = 0
 18 def startmove(event):
 19     global oldx,oldy
 20     oldx = event.x
 21     oldy = event.y
 22 def stopmove(event):
 23     global oldx,oldy
 24     oldx = 0
 25     oldy = 0
 26 def movewindow(event):
 27     global oldx,oldy
 28     dx = event.x - oldx
 29     dy = event.y - oldy
 30     root.move(dx,dy)
 31 screen.cv.bind("<ButtonPress-2>", startmove)
 32 screen.cv.bind("<ButtonRelease-2>", stopmove)
 33 screen.cv.bind("<B2-Motion>",movewindow)
 34
 35 # 下面的代码按方向箭头则窗口能上下左右移动
 36 screen.onkeypress(lambda:root.move(10),'Right')
 37 screen.onkeypress(lambda:root.move(-10),'Left')
 38 screen.onkeypress(lambda:root.move(0,-10),'Up')
 39 screen.onkeypress(lambda:root.move(0,10),'Down')
 40 screen.listen()
 41
 42 ft_title = ('楷体',30,'bold')
 43 ft_context = ('宋体',18,'normal')
 44 t = Sprite(visible=False,pos=(-500,100))
 45 t.color('magenta')
 46 clock = Clock()
 47 for x in range(100):
 48     t.clear()
 49     t.write(s,align='center',font=ft_title)
 50     t.wait()
 51     t.fd(5)
 52     clock.tick(60)
 53
 54 spacekey = Key('space')     # 空格键
 55 m1 = Mouse()                # 鼠标左键
 56 while not m1.down():screen.update()
 57
 58 # 简介
 59 brief ="""
 60 这节课我们要学习如何画一根如意金箍棒。
 61
 62 更重要的是,还要知道海龟画图的起源。
 63
 64 还有屏幕与设置屏幕与方向的相关命令。
 65 """
 66 if brief!='':  # 如果有课程简介,则生成一个角色,
 67     ftx = ('宋体',18,'normal')
 68     简介 = Sprite(visible=False,pos=(0,-100))
 69     简介.color('white')
 70     简介.write(brief,align='center',font=ftx)
 71     while  m1.down():screen.update()
 72     while not m1.down():screen.update()
 73
 74 for x in range(66):              # 标题向右消失
 75     t.clear()
 76     t.write(s,align='center',font=ft_title)
 77     t.fd(10)
 78     if brief!='':
 79         简介.clear()
 80         简介.write(brief,align='center',font=ftx)
 81         简介.bk(10)
 82     clock.tick(60)
 83 简介.clear()
 84
 85 #以下是显示学习的内容段
 86 studycontent = """
 87 主要学习内容
 88
 89 1、海龟画图
 90
 91 2、屏幕与画布
 92
 93 3、背景色和宽高
 94
 95 4、方向与设定方向
 96
 97 5、如意金箍棒
 98
 99 6、作业与练习
100 """
101 t.color('white')
102 t.clear()
103 t.sety(-260)              # 这里修改菜单的显示y坐标
104 ft = ('楷体',24,'bold')
105 s = studycontent
106 while not m1.down():screen.update()
107 #  下面的代码显示主菜单
108 for x in range(130):
109     t.clear()
110     t.write(s,align='center',font=ft)
111     t.bk(5)
112     clock.tick(60)
113
114 def slow_write(t,string):
115     """
116        t:角色,string:要显示的字
117        本函数慢慢的显示字。
118     """
119     string = string.split('\n') # 换成列表
120     oldxy = t.position()   # 记录老的坐标
121     t.goto(-360,330)       # 定位到标题的坐标
122     # 显示标题,注意string[0]是一个空行
123     t.write(string[1],font=ft_title)
124     t.addy(-50)
125     for line in string[2:]:    # 每一行字
126         for char in line:     # 每一个字符
127             t.write(char,align='center',font=ft_context)
128             t.wait(0.1)
129             cd = len(bytes(char,'gb2312'))
130             if cd == 1:
131                 t.addx(16)
132             else:
133                 t.addx(24)
134         t.setx(-360)
135         t.addy(-30)
136     t.goto(oldxy)
137
138 s1 = """
139 1、海龟画图
140
141 海龟画图这个名字源于上个世纪60年代的logo计算
142 机语言。logo计算机语言是至今还在使用的教编程
143 入门的一种计算机语言。它通过输入命令指挥一只
144 小海龟移动,从而能够画出漂亮的图形而得名。如,
145 输入fd 100,就能让小海龟前进100个单位。
146 """
147 def press1():
148     t.clear()
149     slow_write(t,s1)
150     while not spacekey.down():screen.update()
151     t.clear()
152     t.write(s,align='center',font=ft)
153 screen.onkeypress(press1,'1')
154
155
156 s2 = """
157 2、屏幕与画布
158
159 海龟移动所在的地方叫屏幕。在屏幕上有画布,
160 有滚动条,海龟是在画布上进行绘画的。
161 当屏幕变小时,滚动条才会自动出现。
162 获取屏幕可以用getscreen命令。
163 下面的命令就能获取屏幕对象,我们把它取名为sc。
164
165    import turtle
166
167    sc = turtle.getscreen()
168
169 """
170 def press2():
171     t.clear()
172     slow_write(t,s2)
173     while not spacekey.down():screen.update()
174     t.clear()
175     t.write(s,align='center',font=ft)
176 screen.onkeypress(press2,'2')
177
178
179 s3 = """
180 3、背景色和宽高
181
182 我们可以给屏幕设定背景颜色及屏幕的宽度和高度。
183
184 设定背景色的命令为bgcolor,
185 假设屏幕对象的名称为screen,那么
186 screen.bgcolor('green') 就能把背景色设为绿色。
187
188 设定宽高的命令为setup,用法为screen.setup(宽度,高度)。
189 如screen.setup(480,360),会设定屏幕的宽高为480x360。
190 """
191 def press3():
192     t.clear()
193     slow_write(t,s3)
194     while not spacekey.down():screen.update()
195     t.clear()
196     t.write(s,align='center',font=ft)
197 screen.onkeypress(press3,'3')
198
199
200 s4 = """
201 4、方向与设定方向
202
203 在海龟画图中,海龟默认的方向为向右。
204 它的方向值为0度。可以用left命令让它向左旋转90度,
205 这个时候它的方向值为90度。
206
207 如果继续用left命令让它向左旋转90度,
208 它的方向值就变成了180度。
209
210 继续向左旋转90度,则方向值变成了270度。
211
212 再继续向左旋转90度,则方向值为360度。
213
214 这个时候它回到了初始的方向。
215 360度的方向也就是0度的方向。
216
217 我们可以看出当用left旋转海龟的时候,
218 海龟的方向值是增加的。反过来,
219 用right命令旋转海龟的时候,方向值是减小的。
220
221 如果要设定方向,可以用setheading命令,
222 简写形式为seth。用法:
223    海龟.setheading(方向值)
224 """
225 def press4():
226     t.clear()
227     slow_write(t,s4)
228     while not spacekey.down():screen.update()
229     t.clear()
230     t.write(s,align='center',font=ft)
231 screen.onkeypress(press4,'4')
232
233
234 s5 = """
235 5、如意金箍棒
236
237    编制程序,画孙悟空的如意金箍棒。
238    我们将要从下往上画这个图形,以下是主要步骤:
239
240    导入海龟模块
241    获取屏幕对象
242    设定屏幕为黑
243    设定屏幕宽高
244
245    设定画笔粗细
246    设定画笔为向上
247    让海龟退100个单位
248
249    设定画笔颜色为橙色
250    前进50个单位
251    设定画笔颜色为红色
252    前进150个单位
253    设定画笔颜色为橙色
254    前进50个单位
255
256 """
257 def press5():
258     t.clear()
259     slow_write(t,s5)
260     while not spacekey.down():screen.update()
261     t.clear()
262     t.write(s,align='center',font=ft)
263 screen.onkeypress(press5,'5')
264
265 s6 = """
266 6、作业与练习
267
268    ★ 你能说说屏幕和窗口的区别吗?
269    ★ -90度的方向是朝向上、下、左、右中的哪一个方向呢?
270    ★ 修改如意金箍棒程序,让它变成斜的,
271    颜色、长度和背景色都不一样。
272
273 """
274 def press6():
275     t.clear()
276     slow_write(t,s6)
277     while not spacekey.down():screen.update()
278     t.clear()
279     t.write(s,align='center',font=ft)
280 screen.onkeypress(press6,'6')
281
282
283
284 byebye = """
285 下次再见!
286 """
287 def pressq():
288     t.clear()
289     t.color('cyan')
290     t.home()
291     t.write(byebye,align='center',font=('宋体',38,'bold'))
292     while not spacekey.down():screen.update()
293     screen.bye()
294 screen.onkeypress(pressq,'q')
295
296
297 screen.mainloop()


