
Android笔记-跳转到相册选择图片
跳转到相册选择图片
即设置一个点击事件,点击之后即可跳转到相册进行图片的选择
具体的实现步骤:
界面很简单的啦,这里就直接将源代码放出来啦:
<?xml version="1.0" encoding="utf-8"?>
<LinearLayout xmlns:android="http://schemas.android.com/apk/res/android"
    xmlns:app="http://schemas.android.com/apk/res-auto"
    xmlns:tools="http://schemas.android.com/tools"
    android:layout_width="match_parent"
    android:layout_height="match_parent"
    tools:context=".tiaoPhoto"
    android:orientation="vertical">

    <LinearLayout
        android:orientation="horizontal"
        android:layout_width="match_parent"
        android:layout_height="wrap_content">

        <TextView
            android:layout_width="300px"
            android:layout_height="wrap_content"
            android:text="对方号码:">

        </TextView>
        <EditText
            android:id="@+id/et_hao"
            android:layout_width="780px"
            android:layout_height="wrap_content"
            android:text="10086">

        </EditText>
    </LinearLayout>

    <LinearLayout
        android:orientation="horizontal"
        android:layout_width="match_parent"
        android:layout_height="wrap_content">

        <TextView
            android:layout_width="300px"
            android:layout_height="wrap_content"
            android:text="彩信标题:">

        </TextView>
        <EditText
            android:id="@+id/et_top"
            android:layout_width="780px"
            android:layout_height="wrap_content"
            android:text="下面是打招呼内容">

        </EditText>
    </LinearLayout>

    <LinearLayout
        android:orientation="horizontal"
        android:layout_width="match_parent"
        android:layout_height="wrap_content">

        <TextView
            android:layout_width="300px"
            android:layout_height="wrap_content"
            android:text="彩信内容:">

        </TextView>
        <EditText
            android:id="@+id/et_body"
            android:layout_width="780px"
            android:layout_height="wrap_content"
            android:text="hello">

        </EditText>
    </LinearLayout>

    <LinearLayout
        android:orientation="horizontal"
        android:layout_width="match_parent"
        android:layout_height="wrap_content">

        <TextView
            android:layout_width="300px"
            android:layout_height="wrap_content"
            android:text="图片附件:">

        </TextView>

        <ImageView
            android:id="@+id/iv_photo"
            android:layout_width="780px"
            android:layout_height="400px">

        </ImageView>

    </LinearLayout>

    <Button
        android:id="@+id/btn_send"
        android:layout_width="match_parent"
        android:layout_height="wrap_content"
        android:text="发送彩信">

    </Button>

</LinearLayout>
然后就是后台代码了,如下所示:
package com.example.myapplication;

import androidx.activity.result.ActivityResult;
import androidx.activity.result.ActivityResultCallback;
import androidx.activity.result.ActivityResultLauncher;
import androidx.activity.result.contract.ActivityResultContracts;
import androidx.appcompat.app.AppCompatActivity;

import android.content.Intent;
import android.net.Uri;
import android.os.Bundle;
import android.util.Log;
import android.view.View;
import android.widget.ImageView;

public class tiaoPhoto extends AppCompatActivity implements View.OnClickListener {
    private ImageView iv_photo;
    private ActivityResultLauncher<Intent> resultLauncher;

    @Override
    protected void onCreate(Bundle savedInstanceState) {
        super.onCreate(savedInstanceState);
        setContentView(R.layout.activity_tiao_photo);

        iv_photo=findViewById(R.id.iv_photo);

        iv_photo.setOnClickListener(this);//设置点击事件


        //跳转到系统相册,选择图片,并返回
        resultLauncher=registerForActivityResult(new ActivityResultContracts.StartActivityForResult(), new ActivityResultCallback<ActivityResult>() {
            @Override
            public void onActivityResult(ActivityResult result) {
                if(result.getResultCode()==RESULT_OK){
                    Intent intent=result.getData();

                    //获得选中文件的路径对象
                    Uri pUri=intent.getData();
                    if(pUri!=null){
                        iv_photo.setImageURI(pUri);
                        Log.d("ning","pUri"+pUri.toString());
                    }

                }
            }
        });

    }

    @Override
    public void onClick(View view) {
        switch(view.getId()){
            case R.id.iv_photo:
                //跳转到系统相册,选择图片,并返回
                Intent intent=new Intent(Intent.ACTION_GET_CONTENT);

                //确定需要的图片类型
                intent.setType("image/*");

                resultLauncher.launch(intent);//返回之后,跳转到上面的那个方法里面

                break;
        }
    }
}
结果展示
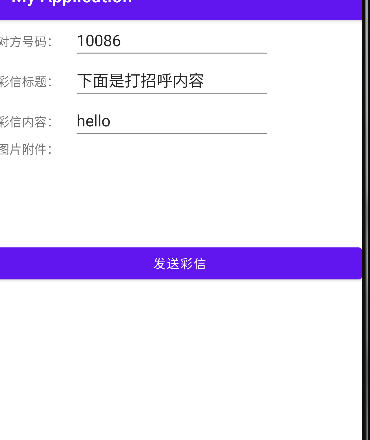
页面呈现:
点击事件的呈现:

