一、SpringMVC简介
1、什么是MVC
MVC是一种软件架构的思想,将软件按照模型、视图、控制器来划分
M:Model,模型层,指工程中的JavaBean,作用是处理数据
JavaBean分为两类:
一类称为实体类Bean:专门存储业务数据的,如 Student、User 等
一类称为业务处理 Bean:指 Service 或 Dao 对象,专门用于处理业务逻辑和数据访问。
V:View,视图层,指工程中的html或jsp等页面,作用是与用户进行交互,展示数据
C:Controller,控制层,指工程中的servlet,作用是接收请求和响应浏览器
MVC的工作流程: 用户通过视图层发送请求到服务器,在服务器中请求被Controller接收,Controller
调用相应的Model层处理请求,处理完毕将结果返回到Controller,Controller再根据请求处理的结果
找到相应的View视图,渲染数据后最终响应给浏览器
maven依赖
<!-- Spring5和Thymeleaf整合包 -->
<dependency>
    <groupId>org.thymeleaf</groupId>
    <artifactId>thymeleaf-spring5</artifactId>
    <version>3.0.12.RELEASE</version>
</dependency>
配置web.xml
注册SpringMVC的前端控制器DispatcherServlet
a>默认配置方式
此配置作用下,SpringMVC的配置文件默认位于WEB-INF下,默认名称为<servlet-name>-
servlet.xml,例如,以下配置所对应SpringMVC的配置文件位于WEB-INF下,文件名为springMVC
servlet.xml
SpringMVC的视图
SpringMVC中的视图是View接口,视图的作用渲染数据,将模型Model中的数据展示给用户
SpringMVC视图的种类很多,默认有转发视图和重定向视图
当工程引入jstl的依赖,转发视图会自动转换为JstlView
若使用的视图技术为Thymeleaf,在SpringMVC的配置文件中配置了Thymeleaf的视图解析器,由此视
图解析器解析之后所得到的是ThymeleafView
1、ThymeleafView
当控制器方法中所设置的视图名称没有任何前缀时,此时的视图名称会被SpringMVC配置文件中所配置
的视图解析器解析,视图名称拼接视图前缀和视图后缀所得到的最终路径,会通过转发的方式实现跳转
    @RequestMapping("/index")
    public String index() {
        return "index";
    }
2、转发视图
SpringMVC中默认的转发视图是InternalResourceView
SpringMVC中创建转发视图的情况:
当控制器方法中所设置的视图名称以"forward:"为前缀时,创建InternalResourceView视图,此时的视
图名称不会被SpringMVC配置文件中所配置的视图解析器解析,而是会将前缀"forward:"去掉,剩余部
分作为最终路径通过转发的方式实现跳转
例如"forward:/","forward:/index"
   @RequestMapping("/testForward")
    public String testForward(){
        return "forward:/index";
    }
3、重定向视图
SpringMVC中默认的重定向视图是RedirectView
当控制器方法中所设置的视图名称以"redirect:"为前缀时,创建RedirectView视图,此时的视图名称不
会被SpringMVC配置文件中所配置的视图解析器解析,而是会将前缀"redirect:"去掉,剩余部分作为最
终路径通过重定向的方式实现跳转
例如"redirect:/","redirect:/index"
 @RequestMapping("/testRedirect")
    public String testRedirect(){
        return "redirect:/index";
    }


HttpMessageConverter
HttpMessageConverter,报文信息转换器,将请求报文转换为Java对象,或将Java对象转换为响应报
文
HttpMessageConverter提供了两个注解和两个类型:@RequestBody,@ResponseBody,RequestEntity,ResponseEntity
 @RequestMapping("/testResponseBody")
    @ResponseBody
    public String testResponseBody(){
        return "success";
    }
    @RequestMapping("/testRequestEntity")
    public String testRequestEntity(RequestEntity<String> requestEntity){
        System.out.println("requestHeader:"+requestEntity.getHeaders());
        System.out.println("requestBody:"+requestEntity.getBody());
        return "success";
    }

 @RequestMapping("/testRequestBody")
    public String testRequestBody(@RequestBody String requestBody){
        System.out.println("requestBody:"+requestBody);
        return "success";
    }
使用ResponseEntity实现下载文件的功能
@RequestMapping("/testDown")
    public ResponseEntity<byte[]> testResponseEntity(HttpSession session) throws IOException {
        //获取ServletContext对象
        ServletContext servletContext = session.getServletContext();
        //获取服务器中文件的真实路径
        String realPath = servletContext.getRealPath("/static/img/1.jpg");
        //创建输入流
        InputStream is = new FileInputStream(realPath);
        //创建字节数组
        byte[] bytes = new byte[is.available()];
        //将流读到字节数组中
        is.read(bytes);
        //创建HttpHeaders对象设置响应头信息
        MultiValueMap<String, String> headers = new HttpHeaders();
        //设置要下载方式以及下载文件的名字
        headers.add("Content-Disposition", "attachment;filename=1.jpg");
        //设置响应状态码
        HttpStatus statusCode = HttpStatus.OK;
        //创建ResponseEntity对象
        ResponseEntity<byte[]> responseEntity = new ResponseEntity<>(bytes, headers, statusCode);
        //关闭输入流
        is.close();
        return responseEntity;
    }
异常处理器
SpringMVC提供了一个处理控制器方法执行过程中所出现的异常的接口:HandlerExceptionResolver
HandlerExceptionResolver接口的实现类有:DefaultHandlerExceptionResolver和
SimpleMappingExceptionResolver
SpringMVC提供了自定义的异常处理器SimpleMappingExceptionResolver,使用方式:
<bean class="org.springframework.web.servlet.handler.SimpleMappingExceptionResolver">
  <property name="exceptionMappings">
    <props>
      <!--
          properties的键表示处理器方法执行过程中出现的异常
          properties的值表示若出现指定异常时,设置一个新的视图名称,跳转到指定页面
      -->
      <prop key="java.lang.ArithmeticException">error</prop>
    </props>
    </property>
      <!--
          exceptionAttribute属性设置一个属性名,将出现的异常信息在请求域中进行共享
      -->
    <property name="exceptionAttribute" value="ex"></property>
</bean>
@ControllerAdvice
public class ExceptionController {

    @ExceptionHandler(ArithmeticException.class)
    public void testException(Exception e) {
        System.out.println("--------exception--------"+e.getMessage());

    }
}
拦截器
1、拦截器的配置
SpringMVC中的拦截器用于拦截控制器方法的执行
SpringMVC中的拦截器需要实现HandlerInterceptor
SpringMVC的拦截器必须在SpringMVC的配置文件中进行配置
<bean class="com.atguigu.interceptor.FirstInterceptor"></bean>
<ref bean="firstInterceptor"></ref>
<!-- 以上两种配置方式都是对DispatcherServlet所处理的所有的请求进行拦截 -->
<mvc:interceptor>
  <mvc:mapping path="/**"/>
  <mvc:exclude-mapping path="/testRequestEntity"/>
  <ref bean="firstInterceptor"></ref>
</mvc:interceptor>
<!--以上配置方式可以通过ref或bean标签设置拦截器,通过mvc:mapping设置需要拦截的请求,通过 mvc:exclude-mapping设置需要排除的请求,即不需要拦截的请求 -->
2、拦截器的三个抽象方法
SpringMVC中的拦截器有三个抽象方法:
1. preHandle:控制器方法执行之前执行preHandle(),其boolean类型的返回值表示是否拦截或放行,返
回true为放行,即调用控制器方法;返回false表示拦截,即不调用控制器方法
2. postHandle:控制器方法执行之后执行postHandle()
3. afterComplation:处理完视图和模型数据,渲染视图完毕之后执行afterComplation()
3、多个拦截器的执行顺序
a>若每个拦截器的preHandle()都返回true
此时多个拦截器的执行顺序和拦截器在SpringMVC的配置文件的配置顺序有关:
preHandle()会按照配置的顺序执行,而postHandle()和afterComplation()会按照配置的反序执行
b>若某个拦截器的preHandle()返回了false
@Configuration
public class WebConfig implements WebMvcConfigurer {
    @Autowired
    private FirstInterceptor firstInterceptor;

    @Autowired
    private SecondInterceptor secondInterceptor;

    @Autowired
    private ThreeInterceptor threeInterceptor;

    //配置拦截器
    @Override
    public void addInterceptors(InterceptorRegistry registry) {
        registry.addInterceptor(firstInterceptor);
        registry.addInterceptor(secondInterceptor);
        registry.addInterceptor(threeInterceptor).addPathPatterns("/**");
  }
}
@Component
public class FirstInterceptor implements HandlerInterceptor {
    @Override
    public boolean preHandle(HttpServletRequest request, HttpServletResponse response, Object handler) throws Exception {
        System.out.println("------firstInterceptor-----preHandle");
        return true;
    }

    @Override
    public void postHandle(HttpServletRequest request, HttpServletResponse response, Object handler, ModelAndView modelAndView) throws Exception {
        System.out.println("------firstInterceptor-----postHandle");
    }

    @Override
    public void afterCompletion(HttpServletRequest request, HttpServletResponse response, Object handler, Exception ex) throws Exception {
        System.out.println("------firstInterceptor-----afterCompletion");
    }
}


@Component
public class SecondInterceptor implements HandlerInterceptor {
    @Override
    public boolean preHandle(HttpServletRequest request, HttpServletResponse response, Object handler) throws Exception {
        System.out.println("------secondInterceptor-----preHandle");
        return true;
    }

    @Override
    public void postHandle(HttpServletRequest request, HttpServletResponse response, Object handler, ModelAndView modelAndView) throws Exception {
        System.out.println("------secondInterceptor-----postHandle");
    }

    @Override
    public void afterCompletion(HttpServletRequest request, HttpServletResponse response, Object handler, Exception ex) throws Exception {
        System.out.println("------secondInterceptor-----afterCompletion");
    }
}


@Component
public class ThreeInterceptor implements HandlerInterceptor {
    @Override
    public boolean preHandle(HttpServletRequest request, HttpServletResponse response, Object handler) throws Exception {
        System.out.println("------threeInterceptor-----preHandle");
        return true;
    }

    @Override
    public void postHandle(HttpServletRequest request, HttpServletResponse response, Object handler, ModelAndView modelAndView) throws Exception {
        System.out.println("------threeInterceptor-----postHandle");
    }

    @Override
    public void afterCompletion(HttpServletRequest request, HttpServletResponse response, Object handler, Exception ex) throws Exception {
        System.out.println("------threeInterceptor-----afterCompletion");
    }
}
执行结果:

注意: /**在拦截器里面表示拦截所有请求,/*在拦截器里面表示拦截上下文后面的一层路径,在过滤器里面拦截所有
SpringMVC的执行流程
1、SpringMVC常用组件
DispatcherServlet:前端控制器,不需要工程师开发,由框架提供
作用:统一处理请求和响应,整个流程控制的中心,由它调用其它组件处理用户的请求
HandlerMapping:处理器映射器,不需要工程师开发,由框架提供
作用:根据请求的url、method等信息查找Handler,即控制器方法
Handler:处理器,需要工程师开发
作用:在DispatcherServlet的控制下Handler对具体的用户请求进行处理
HandlerAdapter:处理器适配器,不需要工程师开发,由框架提供
作用:通过HandlerAdapter对处理器(控制器方法)进行执行
ViewResolver:视图解析器,不需要工程师开发,由框架提供
作用:进行视图解析,得到相应的视图,例如:ThymeleafView、InternalResourceView、
RedirectView
View:视图
作用:将模型数据通过页面展示给用户
2、DispatcherServlet初始化过程
DispatcherServlet 本质上是一个 Servlet,所以天然的遵循 Servlet 的生命周期。所以宏观上是 Servlet
生命周期来进行调度
>DispatcherServlet初始化策略
FrameworkServlet创建WebApplicationContext后,刷新容器,调用onRefresh(wac),此方法在
DispatcherServlet中进行了重写,调用了initStrategies(context)方法,初始化策略,即初始化
DispatcherServlet的各个组件
所在类:org.springframework.web.servlet.DispatcherServlet
    protected void initStrategies(ApplicationContext context) {
        this.initMultipartResolver(context);
        this.initLocaleResolver(context);
        this.initThemeResolver(context);
        this.initHandlerMappings(context);
        this.initHandlerAdapters(context);
        this.initHandlerExceptionResolvers(context);
        this.initRequestToViewNameTranslator(context);
        this.initViewResolvers(context);
        this.initFlashMapManager(context);
    }
3、DispatcherServlet调用组件处理请求
FrameworkServlet重写HttpServlet中的service()和doXxx(),这些方法中调用了
processRequest(request, response)
所在类:org.springframework.web.servlet.FrameworkServlet
    protected void doService(HttpServletRequest request, HttpServletResponse response) throws Exception {
        this.logRequest(request);
        Map<String, Object> attributesSnapshot = null;
        if (WebUtils.isIncludeRequest(request)) {
            attributesSnapshot = new HashMap();
            Enumeration attrNames = request.getAttributeNames();

            label95:
            while(true) {
                String attrName;
                do {
                    if (!attrNames.hasMoreElements()) {
                        break label95;
                    }

                    attrName = (String)attrNames.nextElement();
                } while(!this.cleanupAfterInclude && !attrName.startsWith("org.springframework.web.servlet"));

                attributesSnapshot.put(attrName, request.getAttribute(attrName));
            }
        }

        request.setAttribute(WEB_APPLICATION_CONTEXT_ATTRIBUTE, this.getWebApplicationContext());
        request.setAttribute(LOCALE_RESOLVER_ATTRIBUTE, this.localeResolver);
        request.setAttribute(THEME_RESOLVER_ATTRIBUTE, this.themeResolver);
        request.setAttribute(THEME_SOURCE_ATTRIBUTE, this.getThemeSource());
        if (this.flashMapManager != null) {
            FlashMap inputFlashMap = this.flashMapManager.retrieveAndUpdate(request, response);
            if (inputFlashMap != null) {
                request.setAttribute(INPUT_FLASH_MAP_ATTRIBUTE, Collections.unmodifiableMap(inputFlashMap));
            }

            request.setAttribute(OUTPUT_FLASH_MAP_ATTRIBUTE, new FlashMap());
            request.setAttribute(FLASH_MAP_MANAGER_ATTRIBUTE, this.flashMapManager);
        }

        try {
      // 处理请求和响应
          this.doDispatch(request, response);
        } finally {
            if (!WebAsyncUtils.getAsyncManager(request).isConcurrentHandlingStarted() && attributesSnapshot != null) {
                this.restoreAttributesAfterInclude(request, attributesSnapshot);
            }

        }

    }
protected void doDispatch(HttpServletRequest request, HttpServletResponse response) throws Exception {
        HttpServletRequest processedRequest = request;
        HandlerExecutionChain mappedHandler = null;
        boolean multipartRequestParsed = false;
        WebAsyncManager asyncManager = WebAsyncUtils.getAsyncManager(request);

        try {
            try {
                ModelAndView mv = null;
                Object dispatchException = null;

                try {
                    processedRequest = this.checkMultipart(request);
                    multipartRequestParsed = processedRequest != request;

            /* mappedHandler:调用链 包含handler、interceptorList、interceptorIndex handler:
              浏览器发送的请求所匹配的控制器方法 interceptorList:处理控制器方法的所有拦截器集合
              interceptorIndex:拦截器索引,控制拦截器afterCompletion()的执行
            */
                    mappedHandler = this.getHandler(processedRequest);
                    if (mappedHandler == null) {
                        this.noHandlerFound(processedRequest, response);
                        return;
                    }

              // 通过控制器方法创建相应的处理器适配器,调用所对应的控制器方法
                    HandlerAdapter ha = this.getHandlerAdapter(mappedHandler.getHandler());
                    String method = request.getMethod();
                    boolean isGet = "GET".equals(method);
                    if (isGet || "HEAD".equals(method)) {
                        long lastModified = ha.getLastModified(request, mappedHandler.getHandler());
                        if ((new ServletWebRequest(request, response)).checkNotModified(lastModified) && isGet) {
                            return;
                        }
                    }
            // 调用拦截器的preHandle()
                    if (!mappedHandler.applyPreHandle(processedRequest, response)) {
                        return;
                    }
            // 由处理器适配器调用具体的控制器方法,最终获得ModelAndView对象
                    mv = ha.handle(processedRequest, response, mappedHandler.getHandler());
                    if (asyncManager.isConcurrentHandlingStarted()) {
                        return;
                    }

                    this.applyDefaultViewName(processedRequest, mv);
                  // 调用拦截器的postHandle()
                    mappedHandler.applyPostHandle(processedRequest, response, mv);
                } catch (Exception var20) {
                    dispatchException = var20;
                } catch (Throwable var21) {
                    dispatchException = new NestedServletException("Handler dispatch failed", var21);
                }
           // 后续处理:处理模型数据和渲染视图
                this.processDispatchResult(processedRequest, response, mappedHandler, mv, (Exception)dispatchException);
            } catch (Exception var22) {
                this.triggerAfterCompletion(processedRequest, response, mappedHandler, var22);
            } catch (Throwable var23) {
                this.triggerAfterCompletion(processedRequest, response, mappedHandler, new NestedServletException("Handler processing failed", var23));
            }

        } finally {
            if (asyncManager.isConcurrentHandlingStarted()) {
                if (mappedHandler != null) {
                    mappedHandler.applyAfterConcurrentHandlingStarted(processedRequest, response);
                }
            } else if (multipartRequestParsed) {
                this.cleanupMultipart(processedRequest);
            }

        }
    }
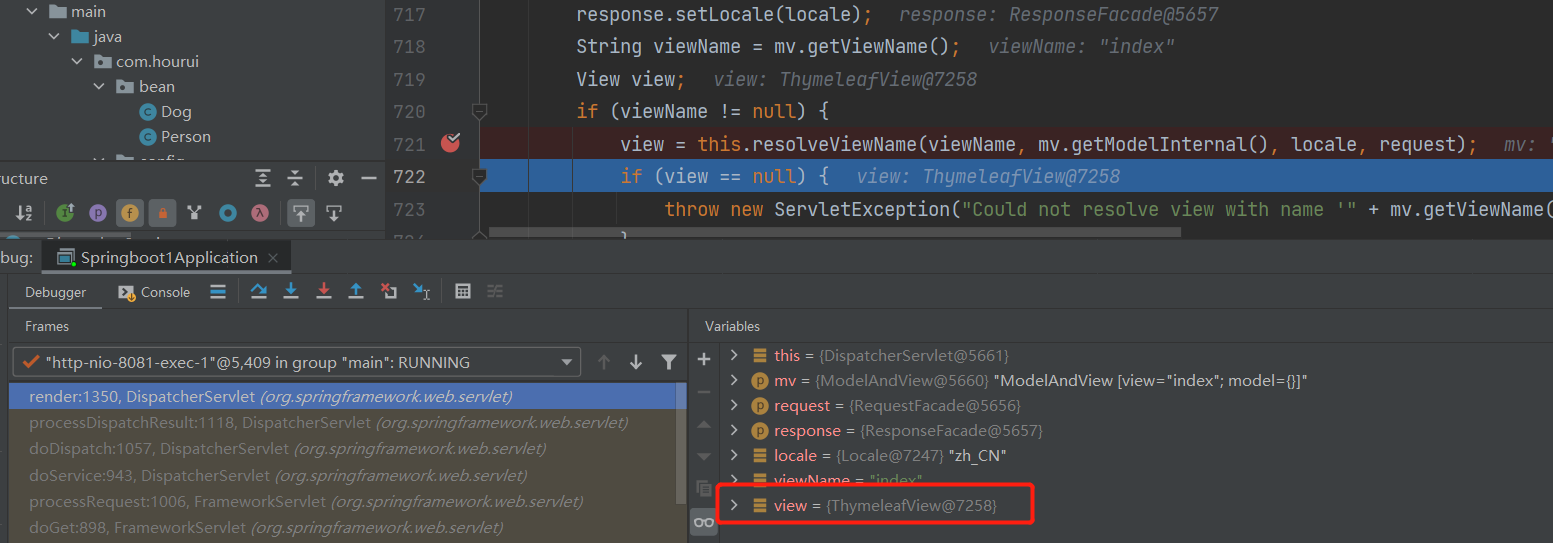
private void processDispatchResult(HttpServletRequest request, HttpServletResponse response, @Nullable HandlerExecutionChain mappedHandler, @Nullable ModelAndView mv, @Nullable Exception exception) throws Exception {
    boolean errorView = false;
    if (exception != null) {
        if (exception instanceof ModelAndViewDefiningException) {
            this.logger.debug("ModelAndViewDefiningException encountered", exception);
            mv = ((ModelAndViewDefiningException)exception).getModelAndView();
        } else {
            Object handler = mappedHandler != null ? mappedHandler.getHandler() : null;
            mv = this.processHandlerException(request, response, handler, exception);
            errorView = mv != null;
        }
    }

    if (mv != null && !mv.wasCleared()) {
     // 处理模型数据和渲染视图
     this.render(mv, request, response);
        if (errorView) {
            WebUtils.clearErrorRequestAttributes(request);
        }
    } else if (this.logger.isTraceEnabled()) {
        this.logger.trace("No view rendering, null ModelAndView returned.");
    }

    if (!WebAsyncUtils.getAsyncManager(request).isConcurrentHandlingStarted()) {
        if (mappedHandler != null) {
      // 调用拦截器的afterCompletion()
            mappedHandler.triggerAfterCompletion(request, response, (Exception)null);
        }

    }
}
4、SpringMVC的执行流程
1) 用户向服务器发送请求,请求被SpringMVC 前端控制器 DispatcherServlet捕获。
2) DispatcherServlet对请求URL进行解析,得到请求资源标识符(URI),判断请求URI对应的映射:
a) 不存在
i. 再判断是否配置了mvc:default-servlet-handler
ii. 如果没配置,则控制台报映射查找不到,客户端展示404错误
b) 存在则执行下面的流程
3) 根据该URI,调用HandlerMapping获得该Handler配置的所有相关的对象(包括Handler对象以及
Handler对象对应的拦截器),最后以HandlerExecutionChain执行链对象的形式返回。
4) DispatcherServlet 根据获得的Handler,选择一个合适的HandlerAdapter。
5) 如果成功获得HandlerAdapter,此时将开始执行拦截器的preHandler(…)方法【正向】
6) 提取Request中的模型数据,填充Handler入参,开始执行Handler(Controller)方法,处理请求。
在填充Handler的入参过程中,根据你的配置,Spring将帮你做一些额外的工作:
a) HttpMessageConveter: 将请求消息(如Json、xml等数据)转换成一个对象,将对象转换为指定
的响应信息
b) 数据转换:对请求消息进行数据转换。如String转换成Integer、Double等
c) 数据格式化:对请求消息进行数据格式化。 如将字符串转换成格式化数字或格式化日期等
d) 数据验证: 验证数据的有效性(长度、格式等),验证结果存储到BindingResult或Error中
7) Handler执行完成后,向DispatcherServlet 返回一个ModelAndView对象。
8) 此时将开始执行拦截器的postHandle(...)方法【逆向】。
9) 根据返回的ModelAndView(此时会判断是否存在异常:如果存在异常,则执行
HandlerExceptionResolver进行异常处理)选择一个适合的ViewResolver进行视图解析,根据Model
和View,来渲染视图。
10) 渲染视图完毕执行拦截器的afterCompletion(…)方法【逆向】。
11) 将渲染结果返回给客户端。
