

Docker Compose
Docker Compose
Compose 简介
Compose 是用于定义和运行多容器 Docker 应用程序的工具。通过 Compose,可以使用 YML 文件来配置应用程序需要的所有服务。然后,使用一个命令,就可以从 YML 文件配置中创建并启动所有服务。
Compose 使用的三个步骤:
- 使用 Dockerfile 定义应用程序的环境。
- 使用 docker-compose.yml 定义构成应用程序的服务,这样它们可以在隔离环境中一起运行。
- 最后,执行 docker-compose up 命令来启动并运行整个应用程序。
YAML 入门教程。
YAML 是 "YAML Ain't a Markup Language"(YAML 不是一种标记语言)的递归缩写。
YAML 的语法和其他高级语言类似,并且可以简单表达清单、散列表,标量等数据形态。它使用空白符号缩进和大量依赖外观的特色,特别适合用来表达或编辑数据结构、各种配置文件、文件大纲(例如:许多电子邮件标题格式和YAML非常接近)。
YAML 的配置文件后缀为 .yml,如:liuyang.yml 。
基本语法
- 大小写敏感
- 使用缩进表示层级关系
- 缩进不允许使用tab,只允许空格
- 缩进的空格数不重要,只要相同层级的元素左对齐即可
- '#'表示注释
数据类型
YAML 支持以下几种数据类型:
- 对象:键值对的集合,又称为映射(mapping)/ 哈希(hashes) / 字典(dictionary)
- 数组:一组按次序排列的值,又称为序列(sequence) / 列表(list)
- 纯量(scalars):单个的、不可再分的值
YAML 对象
对象键值对使用冒号结构表示 key: value,冒号后面要加一个空格。
也可以使用 key:{key1: value1, key2: value2, ...}。
还可以使用缩进表示层级关系;
key:
    child-key: value
    child-key2: value2
较为复杂的对象格式,可以使用问号加一个空格代表一个复杂的 key,配合一个冒号加一个空格代表一个 value:
?
    - complexkey1
    - complexkey2
:
    - complexvalue1
    - complexvalue2
意思即对象的属性是一个数组 [complexkey1,complexkey2],对应的值也是一个数组 [complexvalue1,complexvalue2]
YAML 数组
以 - 开头的行表示构成一个数组:
- A
- B
- C
YAML 支持多维数组,可以使用行内表示:
key: [value1, value2, ...]
数据结构的子成员是一个数组,则可以在该项下面缩进一个空格。
-
 - A
 - B
 - C
一个相对复杂的例子:
companies:
    -
        id: 1
        name: company1
        price: 200W
    -
        id: 2
        name: company2
        price: 500W
意思是 companies 属性是一个数组,每一个数组元素又是由 id、name、price 三个属性构成。
数组也可以使用流式(flow)的方式表示:
companies: [{id: 1,name: company1,price: 200W},{id: 2,name: company2,price: 500W}]
复合结构
数组和对象可以构成复合结构,例:
languages:
  - Ruby
  - Perl
  - Python
websites:
  YAML: yaml.org
  Ruby: ruby-lang.org
  Python: python.org
  Perl: use.perl.org
转换为 json 为:
{
  languages: [ 'Ruby', 'Perl', 'Python'],
  websites: {
    YAML: 'yaml.org',
    Ruby: 'ruby-lang.org',
    Python: 'python.org',
    Perl: 'use.perl.org'
  }
}
纯量
纯量是最基本的,不可再分的值,包括:
- 字符串
- 布尔值
- 整数
- 浮点数
- Null
- 时间
- 日期
使用一个例子来快速了解纯量的基本使用:
boolean:
    - TRUE  #true,True都可以
    - FALSE  #false,False都可以
float:
    - 3.14
    - 6.8523015e+5  #可以使用科学计数法
int:
    - 123
    - 0b1010_0111_0100_1010_1110    #二进制表示
null:
    nodeName: 'node'
    parent: ~  #使用~表示null
string:
    - 哈哈
    - 'Hello world'  #可以使用双引号或者单引号包裹特殊字符
    - newline
    - newline2    #字符串可以拆成多行,每一行会被转化成一个空格
date:
    - 2018-02-17    #日期必须使用ISO 8601格式,即yyyy-MM-dd
datetime:
    -  2018-02-17T15:02:31+08:00    #时间使用ISO 8601格式,时间和日期之间使用T连接,最后使用+代表时区
引用
& 锚点和 * 别名,可以用来引用:
defaults: &defaults
  adapter:  postgres
  host:     localhost

development:
  database: myapp_development
  <<: *defaults

test:
  database: myapp_test
  <<: *defaults
相当于:
defaults:
  adapter:  postgres
  host:     localhost

development:
  database: myapp_development
  adapter:  postgres
  host:     localhost

test:
  database: myapp_test
  adapter:  postgres
  host:     localhost
& 用来建立锚点(defaults),<< 表示合并到当前数据,* 用来引用锚点。
下面是另一个例子:
- &showell Steve
- Clark
- Brian
- Oren
- *showell
转为 JavaScript 代码如下:
[ 'Steve', 'Clark', 'Brian', 'Oren', 'Steve' ]
yaml 配置实例
version: '3'
services:
  web:
    build: .
    ports:
   - "5000:5000"
    volumes:
   - .:/code
    - logvolume01:/var/log
    links:
   - redis
  redis:
    image: redis
volumes:
  logvolume01: {}
Compose 使用
1、准备
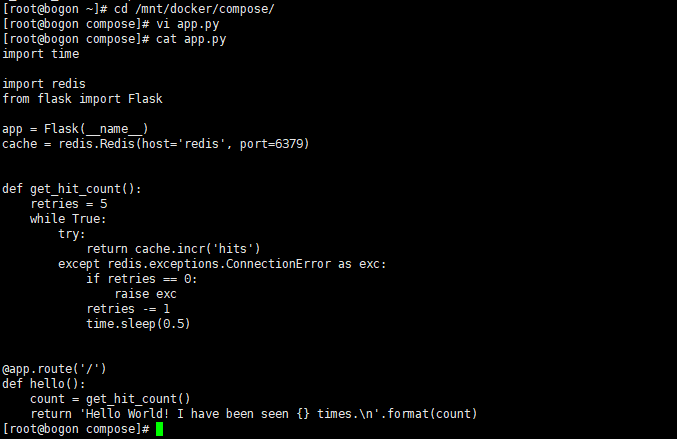
创建一个测试目录 /mnt/docker/compose ,在测试目录中创建一个名为 app.py 的文件,并复制粘贴以下内容:
import time

import redis
from flask import Flask

app = Flask(__name__)
cache = redis.Redis(host='redis', port=6379)


def get_hit_count():
    retries = 5
    while True:
        try:
            return cache.incr('hits')
        except redis.exceptions.ConnectionError as exc:
            if retries == 0:
                raise exc
            retries -= 1
            time.sleep(0.5)


@app.route('/')
def hello():
    count = get_hit_count()
    return 'Hello World! I have been seen {} times.\n'.format(count)
操作流程如下:
[root@bogon ~]# cd /mnt/docker/compose/
[root@bogon compose]# vi app.py
[root@bogon compose]# cat app.py
import time

import redis
from flask import Flask

app = Flask(__name__)
cache = redis.Redis(host='redis', port=6379)


def get_hit_count():
    retries = 5
    while True:
        try:
            return cache.incr('hits')
        except redis.exceptions.ConnectionError as exc:
            if retries == 0:
                raise exc
            retries -= 1
            time.sleep(0.5)


@app.route('/')
def hello():
    count = get_hit_count()
    return 'Hello World! I have been seen {} times.\n'.format(count)
[root@bogon compose]#
在此示例中,redis 是应用程序网络上的 redis 容器的主机名,该主机使用的端口为 6379。
在 compose 目录中创建另一个名为 requirements.txt 的文件,内容如下:
flask
redis
操作流程如下:
[root@bogon compose]# vi requirements.txt
[root@bogon compose]# cat requirements.txt
flask
redis
[root@bogon compose]#

2、创建 Dockerfile 文件
在 compose 目录中,创建一个名为的文件 Dockerfile,内容如下:
FROM python:3.7-alpine
WORKDIR /code
ENV FLASK_APP app.py
ENV FLASK_RUN_HOST 0.0.0.0
RUN apk add --no-cache gcc musl-dev linux-headers
COPY requirements.txt requirements.txt
RUN pip install -r requirements.txt
COPY . .
CMD ["flask", "run"]
操作流程如下:
[root@bogon compose]# vi Dockerfile
[root@bogon compose]# cat Dockerfile
FROM python:3.7-alpine
WORKDIR /code
ENV FLASK_APP app.py
ENV FLASK_RUN_HOST 0.0.0.0
RUN apk add --no-cache gcc musl-dev linux-headers
COPY requirements.txt requirements.txt
RUN pip install -r requirements.txt
COPY . .
CMD ["flask", "run"]
[root@bogon compose]#

Dockerfile 内容解释:
- FROM python:3.7-alpine: 从 Python 3.7 映像开始构建镜像。
- WORKDIR /code: 将工作目录设置为 /code。
- ENV FLASK_APP app.py、ENV FLASK_RUN_HOST 0.0.0.0:设置 flask 命令使用的环境变量。
- RUN apk add --no-cache gcc musl-dev linux-headers: 安装 gcc,以便诸如 MarkupSafe 和 SQLAlchemy 之类的 Python 包可以编译加速。
- COPY requirements.txt requirements.txt、RUN pip install -r requirements.txt:复制 requirements.txt 并安装 Python 依赖项。
- COPY . .: 将 . 项目中的当前目录复制到 . 镜像中的工作目录。
- CMD ["flask", "run"]: 容器提供默认的执行命令为:flask run。
3、创建 docker-compose.yml
在测试目录中创建一个名为 docker-compose.yml 的文件,然后粘贴以下内容:
docker-compose.yml 配置文件
# yaml 配置
version: '2.0'
services:
  web:
    build: .
    ports:
     - "5000:5000"
  redis:
    image: "redis:alpine"
操作流程如下:
[root@bogon compose]# vi docker-compose.yml
[root@bogon compose]# cat docker-compose.yml
# yaml 配置
version: '2.0'
services:
  web:
    build: .
    ports:
     - "5000:5000"
  redis:
    image: "redis:alpine"
[root@bogon compose]#

该 Compose 文件定义了两个服务:web 和 redis。
- web:该 web 服务使用从 Dockerfile 当前目录中构建的镜像。然后,它将容器和主机绑定到暴露的端口 5000。此示例服务使用 Flask Web 服务器的默认端口 5000 。
- redis:该 redis 服务使用 Docker Hub 的公共 Redis 映像。
4、使用 Compose 命令构建和运行您的应用
在此之前需要先安装docker-compose,命令如下:
#安装依赖
yum -y install epel-release
#安装PIP
yum -y install python-pip
#升级PIP
pip install --upgrade pip
#安装docker-compose
pip install -U docker-compose
或
# 下载文件
sudo curl -L https://get.daocloud.io/docker/compose/releases/download/1.25.1/docker-compose-`uname -s`-`uname -m` -o /usr/local/bin/docker-compose
#添加权限
sudo chmod +x /usr/local/bin/docker-compose
在测试目录中,执行以下命令来启动应用程序:
[root@bogon compose]# docker-compose up
Building web
Step 1/9 : FROM python:3.7-alpine
 ---> c46f62f378d7
Step 2/9 : WORKDIR /code
 ---> Running in 13d047a2029c
Removing intermediate container 13d047a2029c
 ---> 7c493a023c56
Step 3/9 : ENV FLASK_APP app.py
 ---> Running in 99ea9dea41df
Removing intermediate container 99ea9dea41df
 ---> df8e1699f6f9
Step 4/9 : ENV FLASK_RUN_HOST 0.0.0.0
 ---> Running in afbc9cc78c48
Removing intermediate container afbc9cc78c48
 ---> 1f22e8ecf2d3
Step 5/9 : RUN apk add --no-cache gcc musl-dev linux-headers
 ---> Running in 15bd6fe9a6af
fetch https://dl-cdn.alpinelinux.org/alpine/v3.13/main/x86_64/APKINDEX.tar.gz
fetch https://dl-cdn.alpinelinux.org/alpine/v3.13/community/x86_64/APKINDEX.tar.gz
(1/13) Installing libgcc (10.2.1_pre1-r3)
(2/13) Installing libstdc++ (10.2.1_pre1-r3)
(3/13) Installing binutils (2.35.2-r0)
(4/13) Installing libgomp (10.2.1_pre1-r3)
(5/13) Installing libatomic (10.2.1_pre1-r3)
(6/13) Installing libgphobos (10.2.1_pre1-r3)
(7/13) Installing gmp (6.2.1-r0)
(8/13) Installing isl22 (0.22-r0)
(9/13) Installing mpfr4 (4.1.0-r0)
(10/13) Installing mpc1 (1.2.0-r0)
(11/13) Installing gcc (10.2.1_pre1-r3)
(12/13) Installing linux-headers (5.7.8-r0)
(13/13) Installing musl-dev (1.2.2-r0)
Executing busybox-1.32.1-r6.trigger
OK: 139 MiB in 48 packages
Removing intermediate container 15bd6fe9a6af
 ---> e0da7fd31435
Step 6/9 : COPY requirements.txt requirements.txt
 ---> 89892ac19868
Step 7/9 : RUN pip install -r requirements.txt
 ---> Running in 8325285b3f59
Collecting flask
  Downloading Flask-1.1.2-py2.py3-none-any.whl (94 kB)
Collecting redis
  Downloading redis-3.5.3-py2.py3-none-any.whl (72 kB)
Collecting Werkzeug>=0.15
  Downloading Werkzeug-1.0.1-py2.py3-none-any.whl (298 kB)
Collecting Jinja2>=2.10.1
  Downloading Jinja2-2.11.3-py2.py3-none-any.whl (125 kB)
Collecting click>=5.1
  Downloading click-7.1.2-py2.py3-none-any.whl (82 kB)
Collecting itsdangerous>=0.24
  Downloading itsdangerous-1.1.0-py2.py3-none-any.whl (16 kB)
Collecting MarkupSafe>=0.23
  Downloading MarkupSafe-1.1.1.tar.gz (19 kB)
Building wheels for collected packages: MarkupSafe
  Building wheel for MarkupSafe (setup.py): started
  Building wheel for MarkupSafe (setup.py): finished with status 'done'
  Created wheel for MarkupSafe: filename=MarkupSafe-1.1.1-cp37-cp37m-linux_x86_64.whl size=17026 sha256=9498873341e543f0d4462633ccc6349ec0fa59ce8562d65e7d54b214924105c2
  Stored in directory: /root/.cache/pip/wheels/b9/d9/ae/63bf9056b0a22b13ade9f6b9e08187c1bb71c47ef21a8c9924
Successfully built MarkupSafe
Installing collected packages: MarkupSafe, Werkzeug, Jinja2, itsdangerous, click, redis, flask
Successfully installed Jinja2-2.11.3 MarkupSafe-1.1.1 Werkzeug-1.0.1 click-7.1.2 flask-1.1.2 itsdangerous-1.1.0 redis-3.5.3
Removing intermediate container 8325285b3f59
 ---> a569a3d38828
Step 8/9 : COPY . .
 ---> 8d20a3a55d38
Step 9/9 : CMD ["flask", "run"]
 ---> Running in 7447e3d44e2a
Removing intermediate container 7447e3d44e2a
 ---> 65af4f3c61e5
Successfully built 65af4f3c61e5
Successfully tagged compose_web:latest
WARNING: Image for service web was built because it did not already exist. To rebuild this image you must use `docker-compose build` or `docker-compose up --build`.
Pulling redis (redis:alpine)...
alpine: Pulling from library/redis
540db60ca938: Already exists
29712d301e8c: Pull complete
8173c12df40f: Pull complete
ce3f2993175f: Pull complete
62cc615d2d57: Pull complete
03f18c6c97e1: Pull complete
Digest: sha256:cd68f7db2caeff01a62bab0cdb5630e86e2a608b0aba3b988b1d13dcf3cfdedb
Status: Downloaded newer image for redis:alpine
Creating compose_web_1   ... done
Creating compose_redis_1 ... done
Attaching to compose_redis_1, compose_web_1
redis_1  | 1:C 17 Apr 2021 07:56:56.446 # oO0OoO0OoO0Oo Redis is starting oO0OoO0OoO0Oo
redis_1  | 1:C 17 Apr 2021 07:56:56.447 # Redis version=6.2.1, bits=64, commit=00000000, modified=0, pid=1, just started
redis_1  | 1:C 17 Apr 2021 07:56:56.447 # Warning: no config file specified, using the default config. In order to specify a config file use redis-server /path/to/redis.conf
redis_1  | 1:M 17 Apr 2021 07:56:56.447 * monotonic clock: POSIX clock_gettime
redis_1  | 1:M 17 Apr 2021 07:56:56.448 * Running mode=standalone, port=6379.
redis_1  | 1:M 17 Apr 2021 07:56:56.448 # WARNING: The TCP backlog setting of 511 cannot be enforced because /proc/sys/net/core/somaxconn is set to the lower value of 128.
redis_1  | 1:M 17 Apr 2021 07:56:56.448 # Server initialized
redis_1  | 1:M 17 Apr 2021 07:56:56.448 # WARNING overcommit_memory is set to 0! Background save may fail under low memory condition. To fix this issue add 'vm.overcommit_memory = 1' to /etc/sysctl.conf and then reboot or run the command 'sysctl vm.overcommit_memory=1' for this to take effect.
redis_1  | 1:M 17 Apr 2021 07:56:56.450 * Ready to accept connections
web_1    |  * Serving Flask app "app.py"
web_1    |  * Environment: production
web_1    |    WARNING: This is a development server. Do not use it in a production deployment.
web_1    |    Use a production WSGI server instead.
web_1    |  * Debug mode: off
web_1    |  * Running on http://0.0.0.0:5000/ (Press CTRL+C to quit)

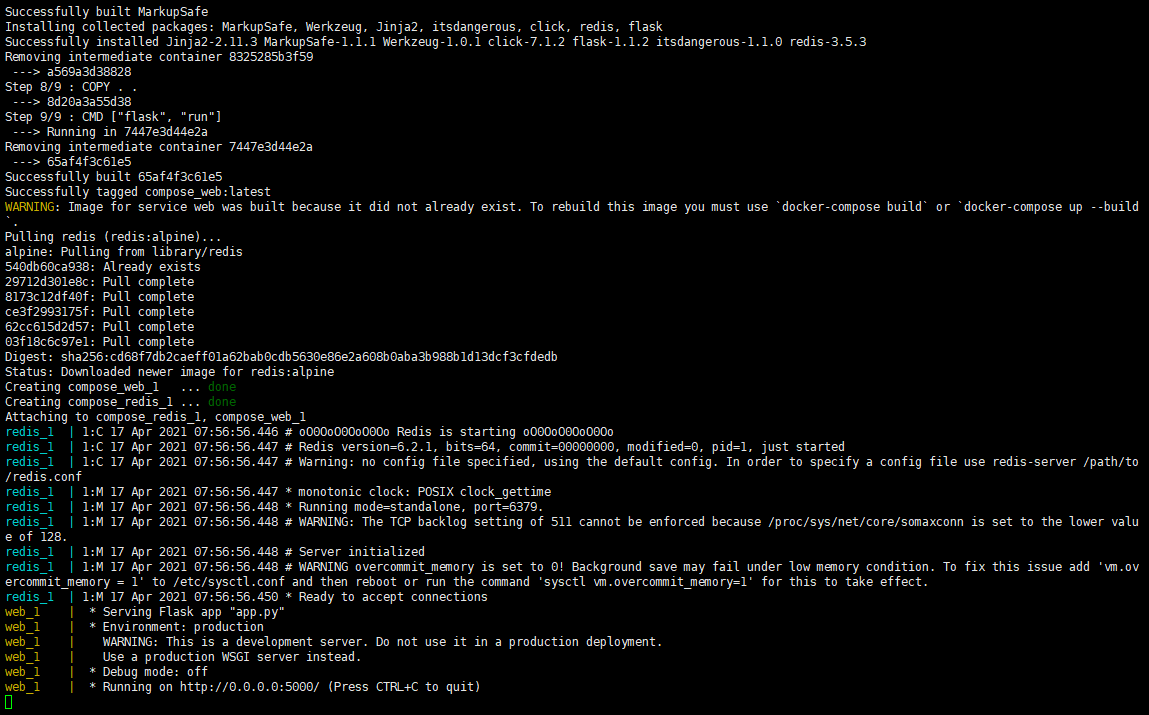
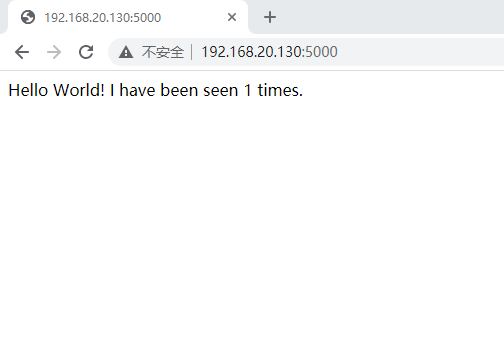
可以看到,该服务器已顺利启动。通过IP:5000可以访问该服务。
打开Chrome浏览器,输入地址:IP:5000,访问 web 服务。

该web服务的功能是输出 Hello World 信息,并统计页面的打开次数。可以看到,当前的次数为 1 。
刷新该页面,

可以看到累计次数变为 2 。
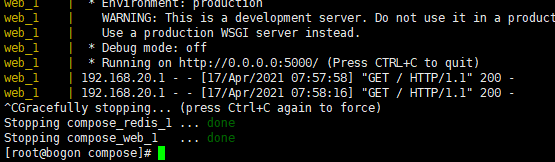
同时,在启动服务的终端里也可以看到 Web 服务输出的相关日志。

使用 docker-compose up 启动的服务为前端服务(当前的终端被挂起,不能再接收其他命令),如果需要在后台运行服务,可以加上 -d 参数。
接下来使用后台方式启动服务,首先停止现有服务,按CTRL+C停止现有服务。
再次使用浏览器查看服务:
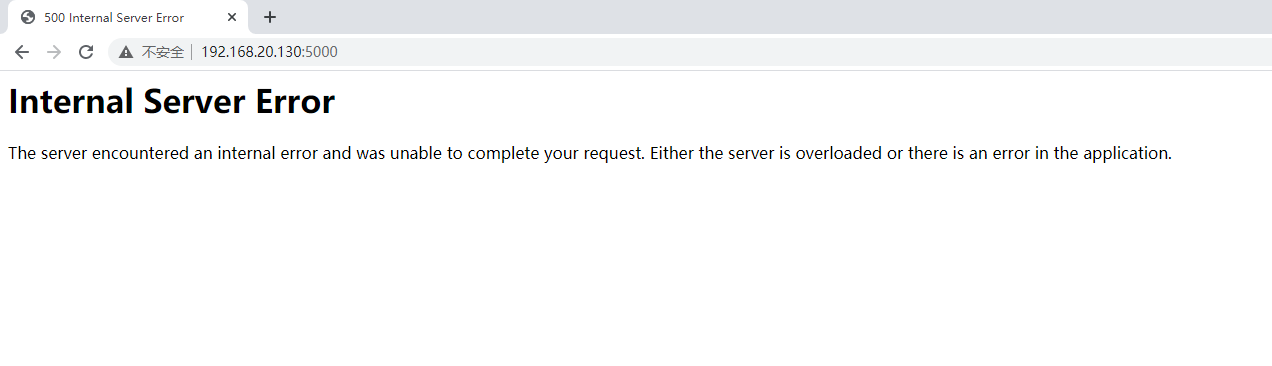
可以看到,服务已停止。
使用 docker ps 查看运行的容器:
如果要删除运行服务的容器,可以使用 docker-compose down 命令,加上 -v 选项表示删除,挂载目录中的内容。
[root@bogon compose]# docker ps -a
CONTAINER ID IMAGE COMMAND CREATED STATUS PORTS NAMES
a91522be8ba1 redis:alpine "docker-entrypoint.s¡" 2 minutes ago Exited (0) About a minute ago compose_redis_1
898b2c87eeea compose_web "flask run" 2 minutes ago Exited (137) 56 seconds ago compose_web_1
ef123b2ba724 mynginx:v1.0 "/docker-entrypoint.¡" 58 minutes ago Up 58 minutes 0.0.0.0:80->80/tcp myserver
3b98b6c6f48d liuyang/ubuntu_net:v1.0 "/bin/bash" 5 hours ago Up 5 hours test2
6434fed6fbdb liuyang/ubuntu_net:v1.0 "/bin/bash" 5 hours ago Up 5 hours test1
[root@bogon compose]# docker-compose down -v
Removing compose_redis_1 ... done
Removing compose_web_1 ... done
Removing network compose_default
[root@bogon compose]# docker ps -a
CONTAINER ID IMAGE COMMAND CREATED STATUS PORTS NAMES
ef123b2ba724 mynginx:v1.0 "/docker-entrypoint.¡" 59 minutes ago Up 59 minutes 0.0.0.0:80->80/tcp myserver
3b98b6c6f48d liuyang/ubuntu_net:v1.0 "/bin/bash" 5 hours ago Up 5 hours test2
6434fed6fbdb liuyang/ubuntu_net:v1.0 "/bin/bash" 5 hours ago Up 5 hours test1
[root@bogon compose]#
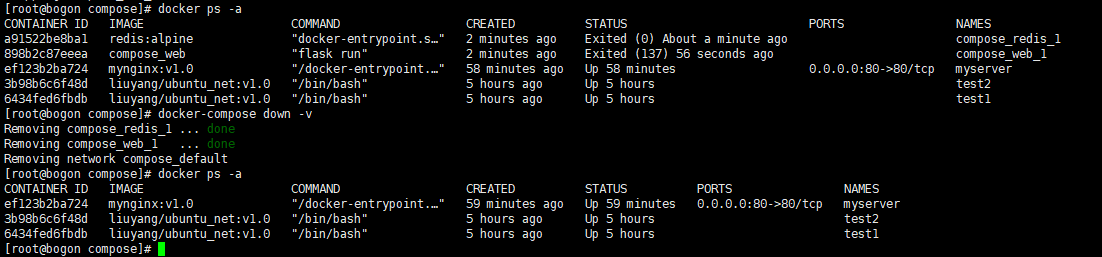
可以看到,容器已被移除。
接下来,使用 -d 选项在后台启动服务。
[root@bogon compose]# docker-compose up -d
Creating network "compose_default" with the default driver
Creating compose_redis_1 ... done
Creating compose_web_1   ... done
[root@bogon compose]#

使用 -d 选项启动后,当前终端并没有被挂起。
再次,通过浏览器访问服务:
可见,服务可正常访问。
yml 配置指令参考
version
指定 yml 的 compose 版本。
build
指定为构建镜像上下文路径:
例如 webapp 服务,指定为从上下文路径 ./dir/Dockerfile 所构建的镜像:
version: "3.7"
services:
  webapp:
    build: ./dir
或者,作为具有在上下文指定的路径的对象,以及可选的 Dockerfile 和 args:
version: "3.7"
services:
  webapp:
    build:
      context: ./dir
      dockerfile: Dockerfile-alternate
      args:
        buildno: 1
      labels:
        - "com.example.description=Accounting webapp"
        - "com.example.department=Finance"
        - "com.example.label-with-empty-value"
      target: prod
- context:上下文路径。
- dockerfile:指定构建镜像的 Dockerfile 文件命。
- args:添加构建参数,这是只能在构建过程中访问的环境变量。
- labels:设置构建镜像的标签。
- target:多层构建,可以指定构建哪一层。
cap_add,cap_drop
添加或删除容器拥有的宿主机的内核功能。
cap_add:
  - ALL # 开启全部权限

cap_drop:
  - SYS_PTRACE # 关闭 ptrace权限
cgroup_parent
为容器指定父 cgroup 组,意味着将继承该组的资源限制。
cgroup_parent: m-executor-abcd
command
覆盖容器启动的默认命令。
command: ["bundle", "exec", "thin", "-p", "3000"]
container_name
指定自定义容器名称,而不是生成的默认名称。
container_name: my-web-container
depends_on
设置依赖关系。
- docker-compose up :以依赖性顺序启动服务。在以下示例中,先启动 db 和 redis ,才会启动 web。
- docker-compose up SERVICE :自动包含 SERVICE 的依赖项。在以下示例中,docker-compose up web 还将创建并启动 db 和 redis。
- docker-compose stop :按依赖关系顺序停止服务。在以下示例中,web 在 db 和 redis 之前停止。
version: "3.7"
services:
  web:
    build: .
    depends_on:
      - db
      - redis
  redis:
    image: redis
  db:
    image: postgres
注意:web 服务不会等待 redis db 完全启动之后才启动。
deploy
指定与服务的部署和运行有关的配置。只在 swarm 模式下才会有用。
version: "3.7"
services:
  redis:
    image: redis:alpine
    deploy:
      mode:replicated
      replicas: 6
      endpoint_mode: dnsrr
      labels:
        description: "This redis service label"
      resources:
        limits:
          cpus: '0.50'
          memory: 50M
        reservations:
          cpus: '0.25'
          memory: 20M
      restart_policy:
        condition: on-failure
        delay: 5s
        max_attempts: 3
        window: 120s
可以选参数:
- endpoint_mode:访问集群服务的方式。
endpoint_mode: vip
# Docker 集群服务一个对外的虚拟 ip。所有的请求都会通过这个虚拟 ip 到达集群服务内部的机器。
endpoint_mode: dnsrr
# DNS 轮询(DNSRR)。所有的请求会自动轮询获取到集群 ip 列表中的一个 ip 地址。
- labels:在服务上设置标签。可以用容器上的 labels(跟 deploy 同级的配置) 覆盖 deploy 下的 labels。
- mode:指定服务提供的模式。
- replicated:复制服务,复制指定服务到集群的机器上。
- global:全局服务,服务将部署至集群的每个节点。
- 图解:下图中黄色的方块是 replicated 模式的运行情况,灰色方块是 global 模式的运行情况。
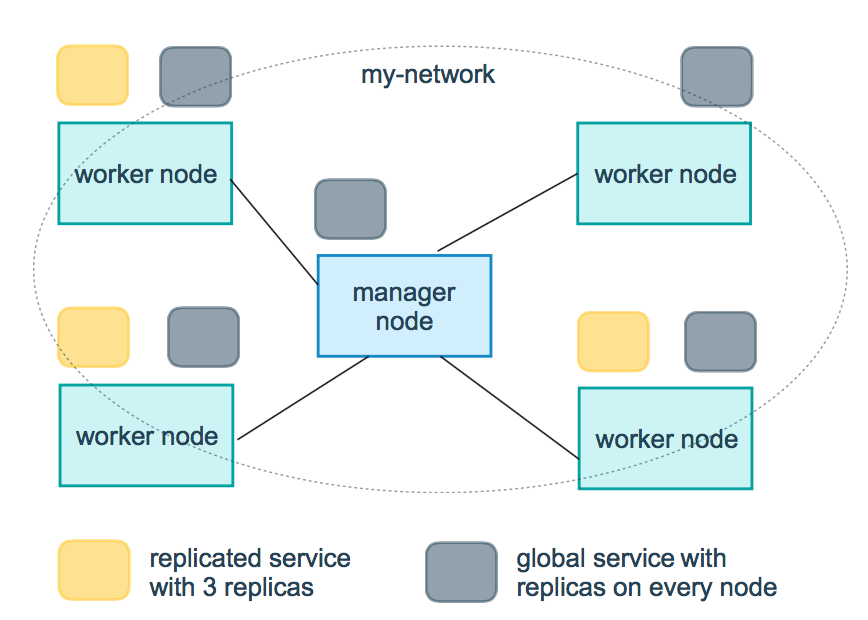
- replicas:mode 为 replicated 时,需要使用此参数配置具体运行的节点数量。
- resources:配置服务器资源使用的限制,例如上例子,配置 redis 集群运行需要的 cpu 的百分比 和 内存的占用。避免占用资源过高出现异常。
- restart_policy:配置如何在退出容器时重新启动容器。
- condition:可选 none,on-failure 或者 any(默认值:any)。
- delay:设置多久之后重启(默认值:0)。
- max_attempts:尝试重新启动容器的次数,超出次数,则不再尝试(默认值:一直重试)。
- window:设置容器重启超时时间(默认值:0)。
- rollback_config:配置在更新失败的情况下应如何回滚服务。
- parallelism:一次要回滚的容器数。如果设置为0,则所有容器将同时回滚。
- delay:每个容器组回滚之间等待的时间(默认为0s)。
- failure_action:如果回滚失败,该怎么办。其中一个 continue 或者 pause(默认pause)。
- monitor:每个容器更新后,持续观察是否失败了的时间 (ns|us|ms|s|m|h)(默认为0s)。
- max_failure_ratio:在回滚期间可以容忍的故障率(默认为0)。
- order:回滚期间的操作顺序。其中一个 stop-first(串行回滚),或者 start-first(并行回滚)(默认 stop-first )。
- update_config:配置应如何更新服务,对于配置滚动更新很有用。
- parallelism:一次更新的容器数。
- delay:在更新一组容器之间等待的时间。
- failure_action:如果更新失败,该怎么办。其中一个 continue,rollback 或者pause (默认:pause)。
- monitor:每个容器更新后,持续观察是否失败了的时间 (ns|us|ms|s|m|h)(默认为0s)。
- max_failure_ratio:在更新过程中可以容忍的故障率。
- order:回滚期间的操作顺序。其中一个 stop-first(串行回滚),或者 start-first(并行回滚)(默认stop-first)。
注:仅支持 V3.4 及更高版本。
devices
指定设备映射列表。
devices:
  - "/dev/ttyUSB0:/dev/ttyUSB0"
dns
自定义 DNS 服务器,可以是单个值或列表的多个值。
dns: 8.8.8.8

dns:
  - 8.8.8.8
  - 9.9.9.9
dns_search
自定义 DNS 搜索域。可以是单个值或列表。
dns_search: example.com

dns_search:
  - dc1.example.com
  - dc2.example.com
entrypoint
覆盖容器默认的 entrypoint。
entrypoint: /code/entrypoint.sh
也可以是以下格式:
entrypoint:
    - php
    - -d
    - zend_extension=/usr/local/lib/php/extensions/no-debug-non-zts-20100525/xdebug.so
    - -d
    - memory_limit=-1
    - vendor/bin/phpunit
env_file
从文件添加环境变量。可以是单个值或列表的多个值。
env_file: .env
也可以是列表格式:
env_file:
  - ./common.env
  - ./apps/web.env
  - /opt/secrets.env
environment
添加环境变量。您可以使用数组或字典、任何布尔值,布尔值需要用引号引起来,以确保 YML 解析器不会将其转换为 True 或 False。
environment:
  RACK_ENV: development
  SHOW: 'true'
expose
暴露端口,但不映射到宿主机,只被连接的服务访问。
仅可以指定内部端口为参数:
expose:
 - "3000"
 - "8000"
extra_hosts
添加主机名映射。类似 docker client --add-host。
extra_hosts:
 - "somehost:162.242.195.82"
 - "otherhost:50.31.209.229"
以上会在此服务的内部容器中 /etc/hosts 创建一个具有 ip 地址和主机名的映射关系:
162.242.195.82  somehost
50.31.209.229   otherhost
healthcheck
用于检测 docker 服务是否健康运行。
healthcheck:
  test: ["CMD", "curl", "-f", "http://localhost"] # 设置检测程序
  interval: 1m30s # 设置检测间隔
  timeout: 10s # 设置检测超时时间
  retries: 3 # 设置重试次数
  start_period: 40s # 启动后,多少秒开始启动检测程序
image
指定容器运行的镜像。以下格式都可以:
image: redis
image: ubuntu:14.04
image: tutum/influxdb
image: example-registry.com:4000/postgresql
image: a4bc65fd # 镜像id
logging
服务的日志记录配置。
driver:指定服务容器的日志记录驱动程序,默认值为json-file。有以下三个选项
driver: "json-file"
driver: "syslog"
driver: "none"
仅在 json-file 驱动程序下,可以使用以下参数,限制日志得数量和大小。
logging:
  driver: json-file
  options:
    max-size: "200k" # 单个文件大小为200k
    max-file: "10" # 最多10个文件
当达到文件限制上限,会自动删除旧文件。
syslog 驱动程序下,可以使用 syslog-address 指定日志接收地址。
logging:
  driver: syslog
  options:
    syslog-address: "tcp://192.168.0.42:123"
network_mode
设置网络模式。
network_mode: "bridge"
network_mode: "host"
network_mode: "none"
network_mode: "service:[service name]"
network_mode: "container:[container name/id]"
networks
配置容器连接的网络,引用顶级 networks 下的条目 。
services:
  some-service:
    networks:
      some-network:
        aliases:
         - alias1
      other-network:
        aliases:
         - alias2
networks:
  some-network:
    # Use a custom driver
    driver: custom-driver-1
  other-network:
    # Use a custom driver which takes special options
    driver: custom-driver-2
aliases :同一网络上的其他容器可以使用服务名称或此别名来连接到对应容器的服务。
restart
- no:是默认的重启策略,在任何情况下都不会重启容器。
- always:容器总是重新启动。
- on-failure:在容器非正常退出时(退出状态非0),才会重启容器。
- unless-stopped:在容器退出时总是重启容器,但是不考虑在Docker守护进程启动时就已经停止了的容器
restart: "no"
restart: always
restart: on-failure
restart: unless-stopped
注:swarm 集群模式,请改用 restart_policy。
secrets
存储敏感数据,例如密码:
version: "3.1"
services:

mysql:
  image: mysql
  environment:
    MYSQL_ROOT_PASSWORD_FILE: /run/secrets/my_secret
  secrets:
    - my_secret

secrets:
  my_secret:
    file: ./my_secret.txt
security_opt
修改容器默认的 schema 标签。
security-opt:
  - label:user:USER   # 设置容器的用户标签
  - label:role:ROLE   # 设置容器的角色标签
  - label:type:TYPE   # 设置容器的安全策略标签
  - label:level:LEVEL  # 设置容器的安全等级标签
stop_grace_period
指定在容器无法处理 SIGTERM (或者任何 stop_signal 的信号),等待多久后发送 SIGKILL 信号关闭容器。
stop_grace_period: 1s # 等待 1 秒
stop_grace_period: 1m30s # 等待 1 分 30 秒
默认的等待时间是 10 秒。
stop_signal
设置停止容器的替代信号。默认情况下使用 SIGTERM 。
以下示例,使用 SIGUSR1 替代信号 SIGTERM 来停止容器。
stop_signal: SIGUSR1
sysctls
设置容器中的内核参数,可以使用数组或字典格式。
sysctls:
  net.core.somaxconn: 1024
  net.ipv4.tcp_syncookies: 0

sysctls:
  - net.core.somaxconn=1024
  - net.ipv4.tcp_syncookies=0
tmpfs
在容器内安装一个临时文件系统。可以是单个值或列表的多个值。
tmpfs: /run

tmpfs:
  - /run
  - /tmp
ulimits
覆盖容器默认的 ulimit。
ulimits:
  nproc: 65535
  nofile:
    soft: 20000
    hard: 40000
volumes
将主机的数据卷或着文件挂载到容器里。
version: "3.7"
services:
  db:
    image: postgres:latest
    volumes:
      - "/localhost/postgres.sock:/var/run/postgres/postgres.sock"
      - "/localhost/data:/var/lib/postgresql/data"
使用 Compose 搭建 redis 集群
Redis 集群是一个提供在多个 Redis 节点间共享数据的程序集。
Redis 集群通过分区来提供一定程度的可用性,在实际环境中当某个节点宕机或者不可达的情况下继续处理命令。
Redis 集群的优势:
- 自动分割数据到不同的节点上。
- 整个集群的部分节点失败或者不可达的情况下能够继续处理命令。
Redis 集群没有使用一致性 hash, 而是引入了哈希槽的概念。
Redis 集群有 16384 个哈希槽,每个 key 通过 CRC16 校验后对 16384 取模来决定放置哪个槽,集群的每个节点负责一部分 hash 槽。
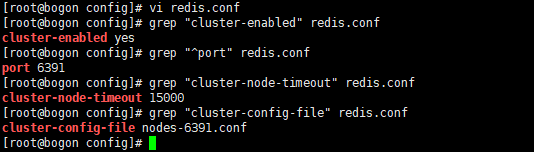
1、修改 redis.conf
进入 /mnt/docker/redis-cluster/config 目录,按如下方式修改redis.conf文件
开启集群功能:
cluster-enabled yes
设置节点端口:
port 6391
节点超时时间,单位毫秒:
cluster-node-timeout 15000
集群内部配置文件:
cluster-config-file "nodes-6391.conf"
2、编写 docker-compose.yml
节点规划图如下:
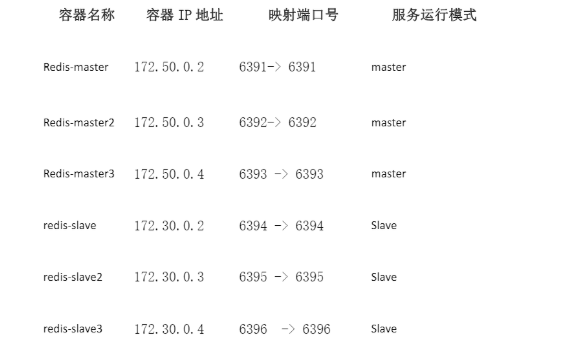
按照上述节点规划图在当前目录下编写 docker-compose.yml 文件, 文件内容如下:
注意:修改合适的挂载卷目录
version: "2.0"
services:
  redis-master1:
     image: redis:5.0
     container_name: redis-master1
     working_dir: /config
     environment:
       - PORT=6391
     ports:
       - "6391:6391"
       - "16391:16391"
     stdin_open: true
     networks:
        redis-master:
            ipv4_address: 172.50.0.2
     tty: true
     privileged: true
     volumes: ["/mnt/docker/redis-cluster/config:/config"]
     entrypoint:
       - /bin/bash
       - redis.sh
  redis-master2:
       image: redis:5.0
       working_dir: /config
       container_name: redis-master2
       environment:
              - PORT=6392
       networks:
          redis-master:
             ipv4_address: 172.50.0.3
       ports:
         - "6392:6392"
         - "16392:16392"
       stdin_open: true
       tty: true
       privileged: true
       volumes: ["/mnt/docker/redis-cluster/config:/config"]
       entrypoint:
         - /bin/bash
         - redis.sh
  redis-master3:
       image: redis:5.0
       container_name: redis-master3
       working_dir: /config
       environment:
              - PORT=6393
       networks:
          redis-master:
            ipv4_address: 172.50.0.4
       ports:
         - "6393:6393"
         - "16393:16393"
       stdin_open: true
       tty: true
       privileged: true
       volumes: ["/mnt/docker/redis-cluster/config:/config"]
       entrypoint:
         - /bin/bash
         - redis.sh
  redis-slave1:
       image: redis:5.0
       container_name: redis-slave1
       working_dir: /config
       environment:
            - PORT=6394
       networks:
          redis-slave:
             ipv4_address: 172.30.0.2
       ports:
         - "6394:6394"
         - "16394:16394"
       stdin_open: true
       tty: true
       privileged: true
       volumes: ["/mnt/docker/redis-cluster/config:/config"]
       entrypoint:
         - /bin/bash
         - redis.sh
  redis-salve2:
       image: redis:5.0
       working_dir: /config
       container_name: redis-salve2
       environment:
             - PORT=6395
       ports:
         - "6395:6395"
         - "16395:16395"
       stdin_open: true
       networks:
          redis-slave:
              ipv4_address: 172.30.0.3
       tty: true
       privileged: true
       volumes: ["/mnt/docker/redis-cluster/config:/config"]
       entrypoint:
         - /bin/bash
         - redis.sh
  redis-salve3:
       image: redis:5.0
       container_name: redis-slave3
       working_dir: /config
       environment:
          - PORT=6396
       ports:
         - "6396:6396"
         - "16396:16396"
       stdin_open: true
       networks:
          redis-slave:
            ipv4_address: 172.30.0.4
       tty: true
       privileged: true
       volumes: ["/mnt/docker/redis-cluster/config:/config"]
       entrypoint:
         - /bin/bash
         - redis.sh
networks:
  redis-master:
     driver: bridge
     ipam:
       driver: default
       config:
          -
           subnet: 172.50.0.0/16
  redis-slave:
       driver: bridge
       ipam:
         driver: default
         config:
            -
             subnet: 172.30.0.0/16
3、编写 redis 默认的启动脚本
创建文件 redis.sh,内容如下:
redis-server /config/nodes-${PORT}.conf
操作过程如下:
[root@bogon config]# vim redis.sh
[root@bogon config]# cat redis.sh
redis-server  /config/nodes-${PORT}.conf
[root@bogon config]#

完成上述步骤后,/mnt/docker/redis-cluster/config 下的目录内容如下所示:

4、启动集群
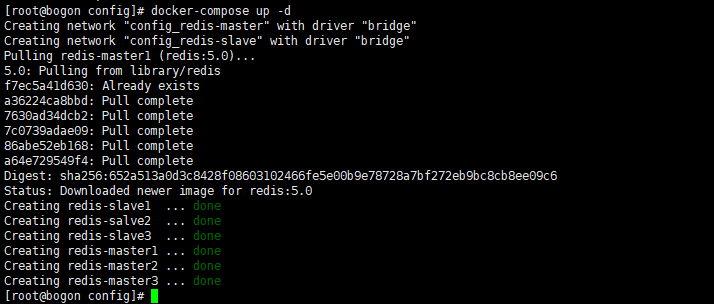
启动服务命令如下:
[root@bogon config]# docker-compose up -d
Creating network "config_redis-master" with driver "bridge"
Creating network "config_redis-slave" with driver "bridge"
Pulling redis-master1 (redis:5.0)...
5.0: Pulling from library/redis
f7ec5a41d630: Already exists
a36224ca8bbd: Pull complete
7630ad34dcb2: Pull complete
7c0739adae09: Pull complete
86abe52eb168: Pull complete
a64e729549f4: Pull complete
Digest: sha256:652a513a0d3c8428f08603102466fe5e00b9e78728a7bf272eb9bc8cb8ee09c6
Status: Downloaded newer image for redis:5.0
Creating redis-slave1  ... done
Creating redis-salve2  ... done
Creating redis-slave3  ... done
Creating redis-master1 ... done
Creating redis-master2 ... done
Creating redis-master3 ... done
[root@bogon config]#
查看服务运行:
[root@bogon config]# docker ps
CONTAINER ID   IMAGE       COMMAND                CREATED         STATUS         PORTS                                                        NAMES
068a52f13c29   redis:5.0   "/bin/bash redis.sh"   5 seconds ago   Up 3 seconds   0.0.0.0:6395->6395/tcp, 6379/tcp, 0.0.0.0:16395->16395/tcp   redis-salve2
cc9f97cef76b   redis:5.0   "/bin/bash redis.sh"   5 seconds ago   Up 3 seconds   0.0.0.0:6396->6396/tcp, 6379/tcp, 0.0.0.0:16396->16396/tcp   redis-slave3
b4bed5f8ae91   redis:5.0   "/bin/bash redis.sh"   5 seconds ago   Up 3 seconds   0.0.0.0:6394->6394/tcp, 6379/tcp, 0.0.0.0:16394->16394/tcp   redis-slave1
a730cd590f55   redis:5.0   "/bin/bash redis.sh"   5 seconds ago   Up 3 seconds   0.0.0.0:6393->6393/tcp, 6379/tcp, 0.0.0.0:16393->16393/tcp   redis-master3
ded8e255da87   redis:5.0   "/bin/bash redis.sh"   5 seconds ago   Up 3 seconds   0.0.0.0:6391->6391/tcp, 6379/tcp, 0.0.0.0:16391->16391/tcp   redis-master1
beecd70435de   redis:5.0   "/bin/bash redis.sh"   5 seconds ago   Up 3 seconds   0.0.0.0:6392->6392/tcp, 6379/tcp, 0.0.0.0:16392->16392/tcp   redis-master2
[root@bogon config]#

初始化集群(这一步开始命令须在 redis5.0 及以上版本运行)。
创建 3 主 3 从的 redis 集群:
首先使用 ip addr 查看当前实验环境的 ip 地址:
[root@bogon config]# ip addr | grep ens33
2: ens33: <BROADCAST,MULTICAST,UP,LOWER_UP> mtu 1500 qdisc pfifo_fast state UP group default qlen 1000
    inet 192.168.20.130/24 brd 192.168.20.255 scope global noprefixroute dynamic ens33
[root@bogon config]#

可以看到当前实验环境的ip地址为 192.168.20.130, 使用 redis-cli --cluster create 启动 redis 集群,命令如下:
注意:如果没有安装redis5,可以参照这个链接 CentOS 7 安装redis 5
[root@bogon ~]# redis-cli --cluster create 192.168.20.130:6391 192.168.20.130:6392 192.168.20.130:6393 192.168.20.130:6394 192.168.20.130:6395 192.168.20.130:6396 --cluster-replicas 1
>>> Performing hash slots allocation on 6 nodes...
Master[0] -> Slots 0 - 5460
Master[1] -> Slots 5461 - 10922
Master[2] -> Slots 10923 - 16383
Adding replica 192.168.20.130:6395 to 192.168.20.130:6391
Adding replica 192.168.20.130:6396 to 192.168.20.130:6392
Adding replica 192.168.20.130:6394 to 192.168.20.130:6393
>>> Trying to optimize slaves allocation for anti-affinity
[WARNING] Some slaves are in the same host as their master
M: c8b51a96f6b9dec610427d006fd323c2348685f0 192.168.20.130:6391
slots:[0-5460] (5461 slots) master
M: 03b13b2c7fdb3d039e0d98296c2a7fa4c42b68f9 192.168.20.130:6392
slots:[5461-10922] (5462 slots) master
M: 13a7098cf80d285f59f818e78a47ef38a3c61079 192.168.20.130:6393
slots:[10923-16383] (5461 slots) master
S: 6c2759f9ddff4fe709f7a5efffcc47b1a3145681 192.168.20.130:6394
replicates c8b51a96f6b9dec610427d006fd323c2348685f0
S: 9d691525ba0605ae15f6820c357effa59caec688 192.168.20.130:6395
replicates 03b13b2c7fdb3d039e0d98296c2a7fa4c42b68f9
S: adc607e40624f637589d9cc7be202c64e5f8eb60 192.168.20.130:6396
replicates 13a7098cf80d285f59f818e78a47ef38a3c61079
Can I set the above configuration? (type 'yes' to accept): yes
>>> Nodes configuration updated
>>> Assign a different config epoch to each node
>>> Sending CLUSTER MEET messages to join the cluster
Waiting for the cluster to join
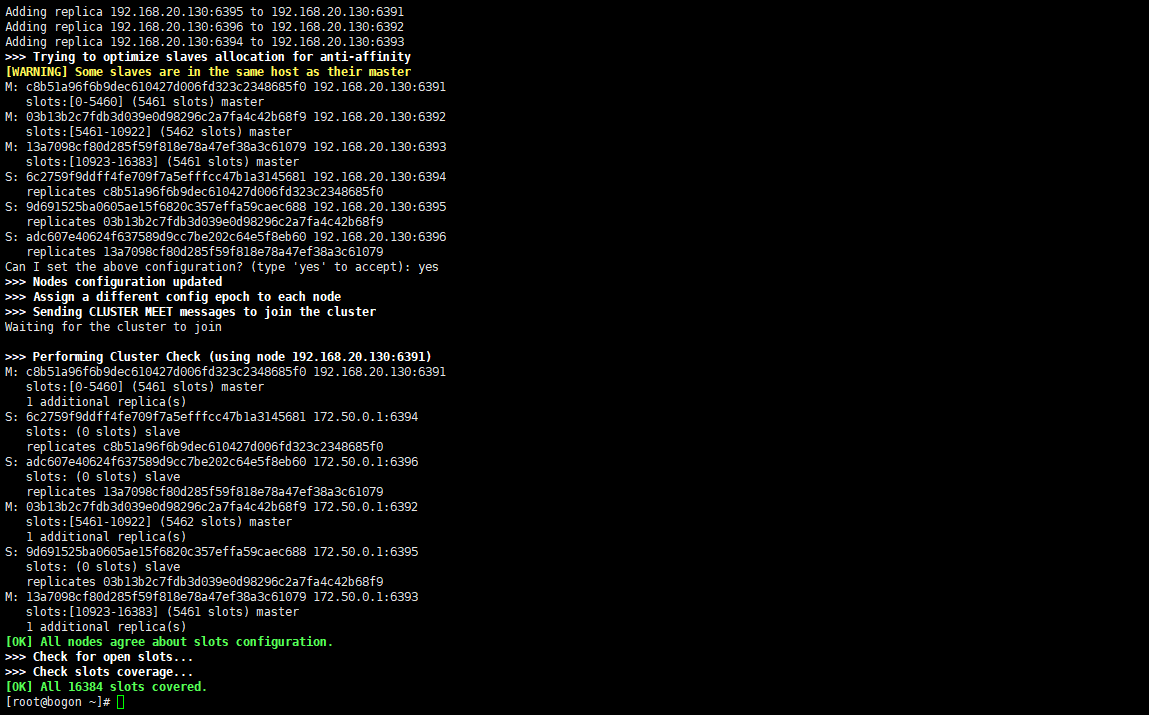
>>> Performing Cluster Check (using node 192.168.20.130:6391)
M: c8b51a96f6b9dec610427d006fd323c2348685f0 192.168.20.130:6391
slots:[0-5460] (5461 slots) master
1 additional replica(s)
S: 6c2759f9ddff4fe709f7a5efffcc47b1a3145681 172.50.0.1:6394
slots: (0 slots) slave
replicates c8b51a96f6b9dec610427d006fd323c2348685f0
S: adc607e40624f637589d9cc7be202c64e5f8eb60 172.50.0.1:6396
slots: (0 slots) slave
replicates 13a7098cf80d285f59f818e78a47ef38a3c61079
M: 03b13b2c7fdb3d039e0d98296c2a7fa4c42b68f9 172.50.0.1:6392
slots:[5461-10922] (5462 slots) master
1 additional replica(s)
S: 9d691525ba0605ae15f6820c357effa59caec688 172.50.0.1:6395
slots: (0 slots) slave
replicates 03b13b2c7fdb3d039e0d98296c2a7fa4c42b68f9
M: 13a7098cf80d285f59f818e78a47ef38a3c61079 172.50.0.1:6393
slots:[10923-16383] (5461 slots) master
1 additional replica(s)
[OK] All nodes agree about slots configuration.
>>> Check for open slots...
>>> Check slots coverage...
[OK] All 16384 slots covered.
[root@bogon ~]#
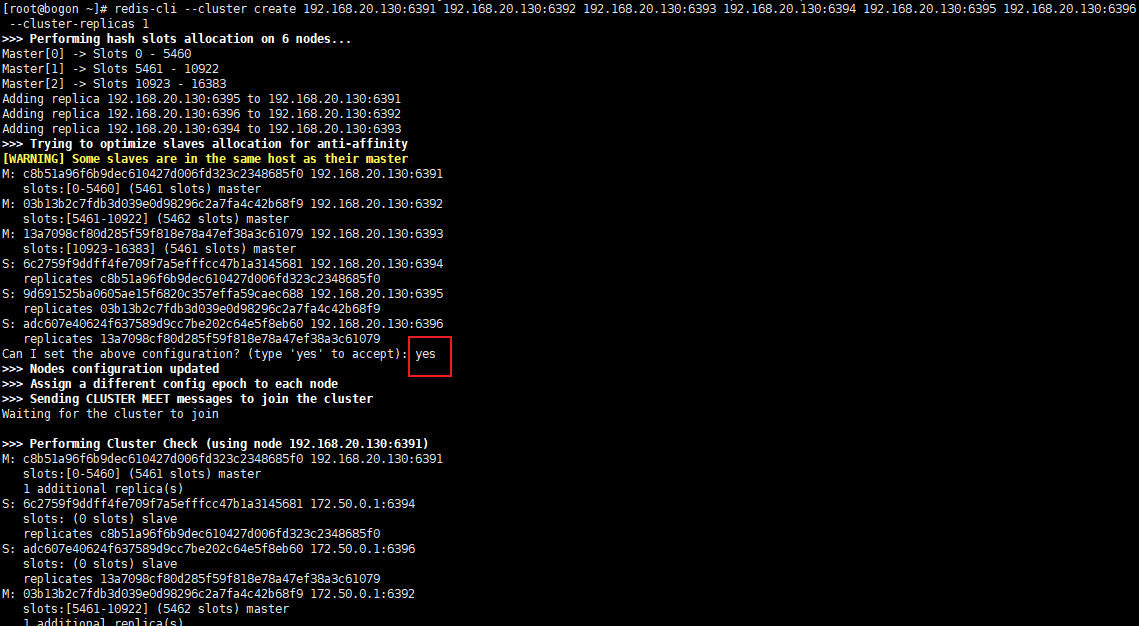
输入 yes,确认要初始化。
查看初始化结果。
进入 redis-cli, 查看节点信息:
[root@bogon ~]# redis-cli -h 192.168.20.130 -p 6391
192.168.20.130:6391> cluster nodes
6c2759f9ddff4fe709f7a5efffcc47b1a3145681 172.50.0.1:6394@16394 slave c8b51a96f6b9dec610427d006fd323c2348685f0 0 1618649323000 4 connected
adc607e40624f637589d9cc7be202c64e5f8eb60 172.50.0.1:6396@16396 slave 13a7098cf80d285f59f818e78a47ef38a3c61079 0 1618649325064 6 connected
c8b51a96f6b9dec610427d006fd323c2348685f0 172.50.0.2:6391@16391 myself,master - 0 1618649322000 1 connected 0-5460
03b13b2c7fdb3d039e0d98296c2a7fa4c42b68f9 172.50.0.1:6392@16392 master - 0 1618649324000 2 connected 5461-10922
9d691525ba0605ae15f6820c357effa59caec688 172.50.0.1:6395@16395 slave 03b13b2c7fdb3d039e0d98296c2a7fa4c42b68f9 0 1618649324043 5 connected
13a7098cf80d285f59f818e78a47ef38a3c61079 172.50.0.1:6393@16393 master - 0 1618649324000 3 connected 10923-16383
192.168.20.130:6391>

上图显示,redis 集群符合预期。
5、测试集群
使用 set 创建集合 test。
[root@bogon ~]# redis-cli -c -h 192.168.20.130 -p 6391 set test 1
OK
[root@bogon ~]# redis-cli -c -h 192.168.20.130 -p 6391 get test
"1"
[root@bogon ~]#

可以看到, redis 的集群模式连接读写正常,集群搭建成功。


【推荐】国内首个AI IDE,深度理解中文开发场景,立即下载体验Trae
【推荐】编程新体验,更懂你的AI,立即体验豆包MarsCode编程助手
【推荐】抖音旗下AI助手豆包,你的智能百科全书,全免费不限次数
【推荐】轻量又高性能的 SSH 工具 IShell:AI 加持,快人一步
· 基于Microsoft.Extensions.AI核心库实现RAG应用
· Linux系列:如何用heaptrack跟踪.NET程序的非托管内存泄露
· 开发者必知的日志记录最佳实践
· SQL Server 2025 AI相关能力初探
· Linux系列:如何用 C#调用 C方法造成内存泄露
· Manus爆火,是硬核还是营销?
· 终于写完轮子一部分:tcp代理 了,记录一下
· 别再用vector<bool>了!Google高级工程师:这可能是STL最大的设计失误
· 单元测试从入门到精通
· 震惊!C++程序真的从main开始吗?99%的程序员都答错了