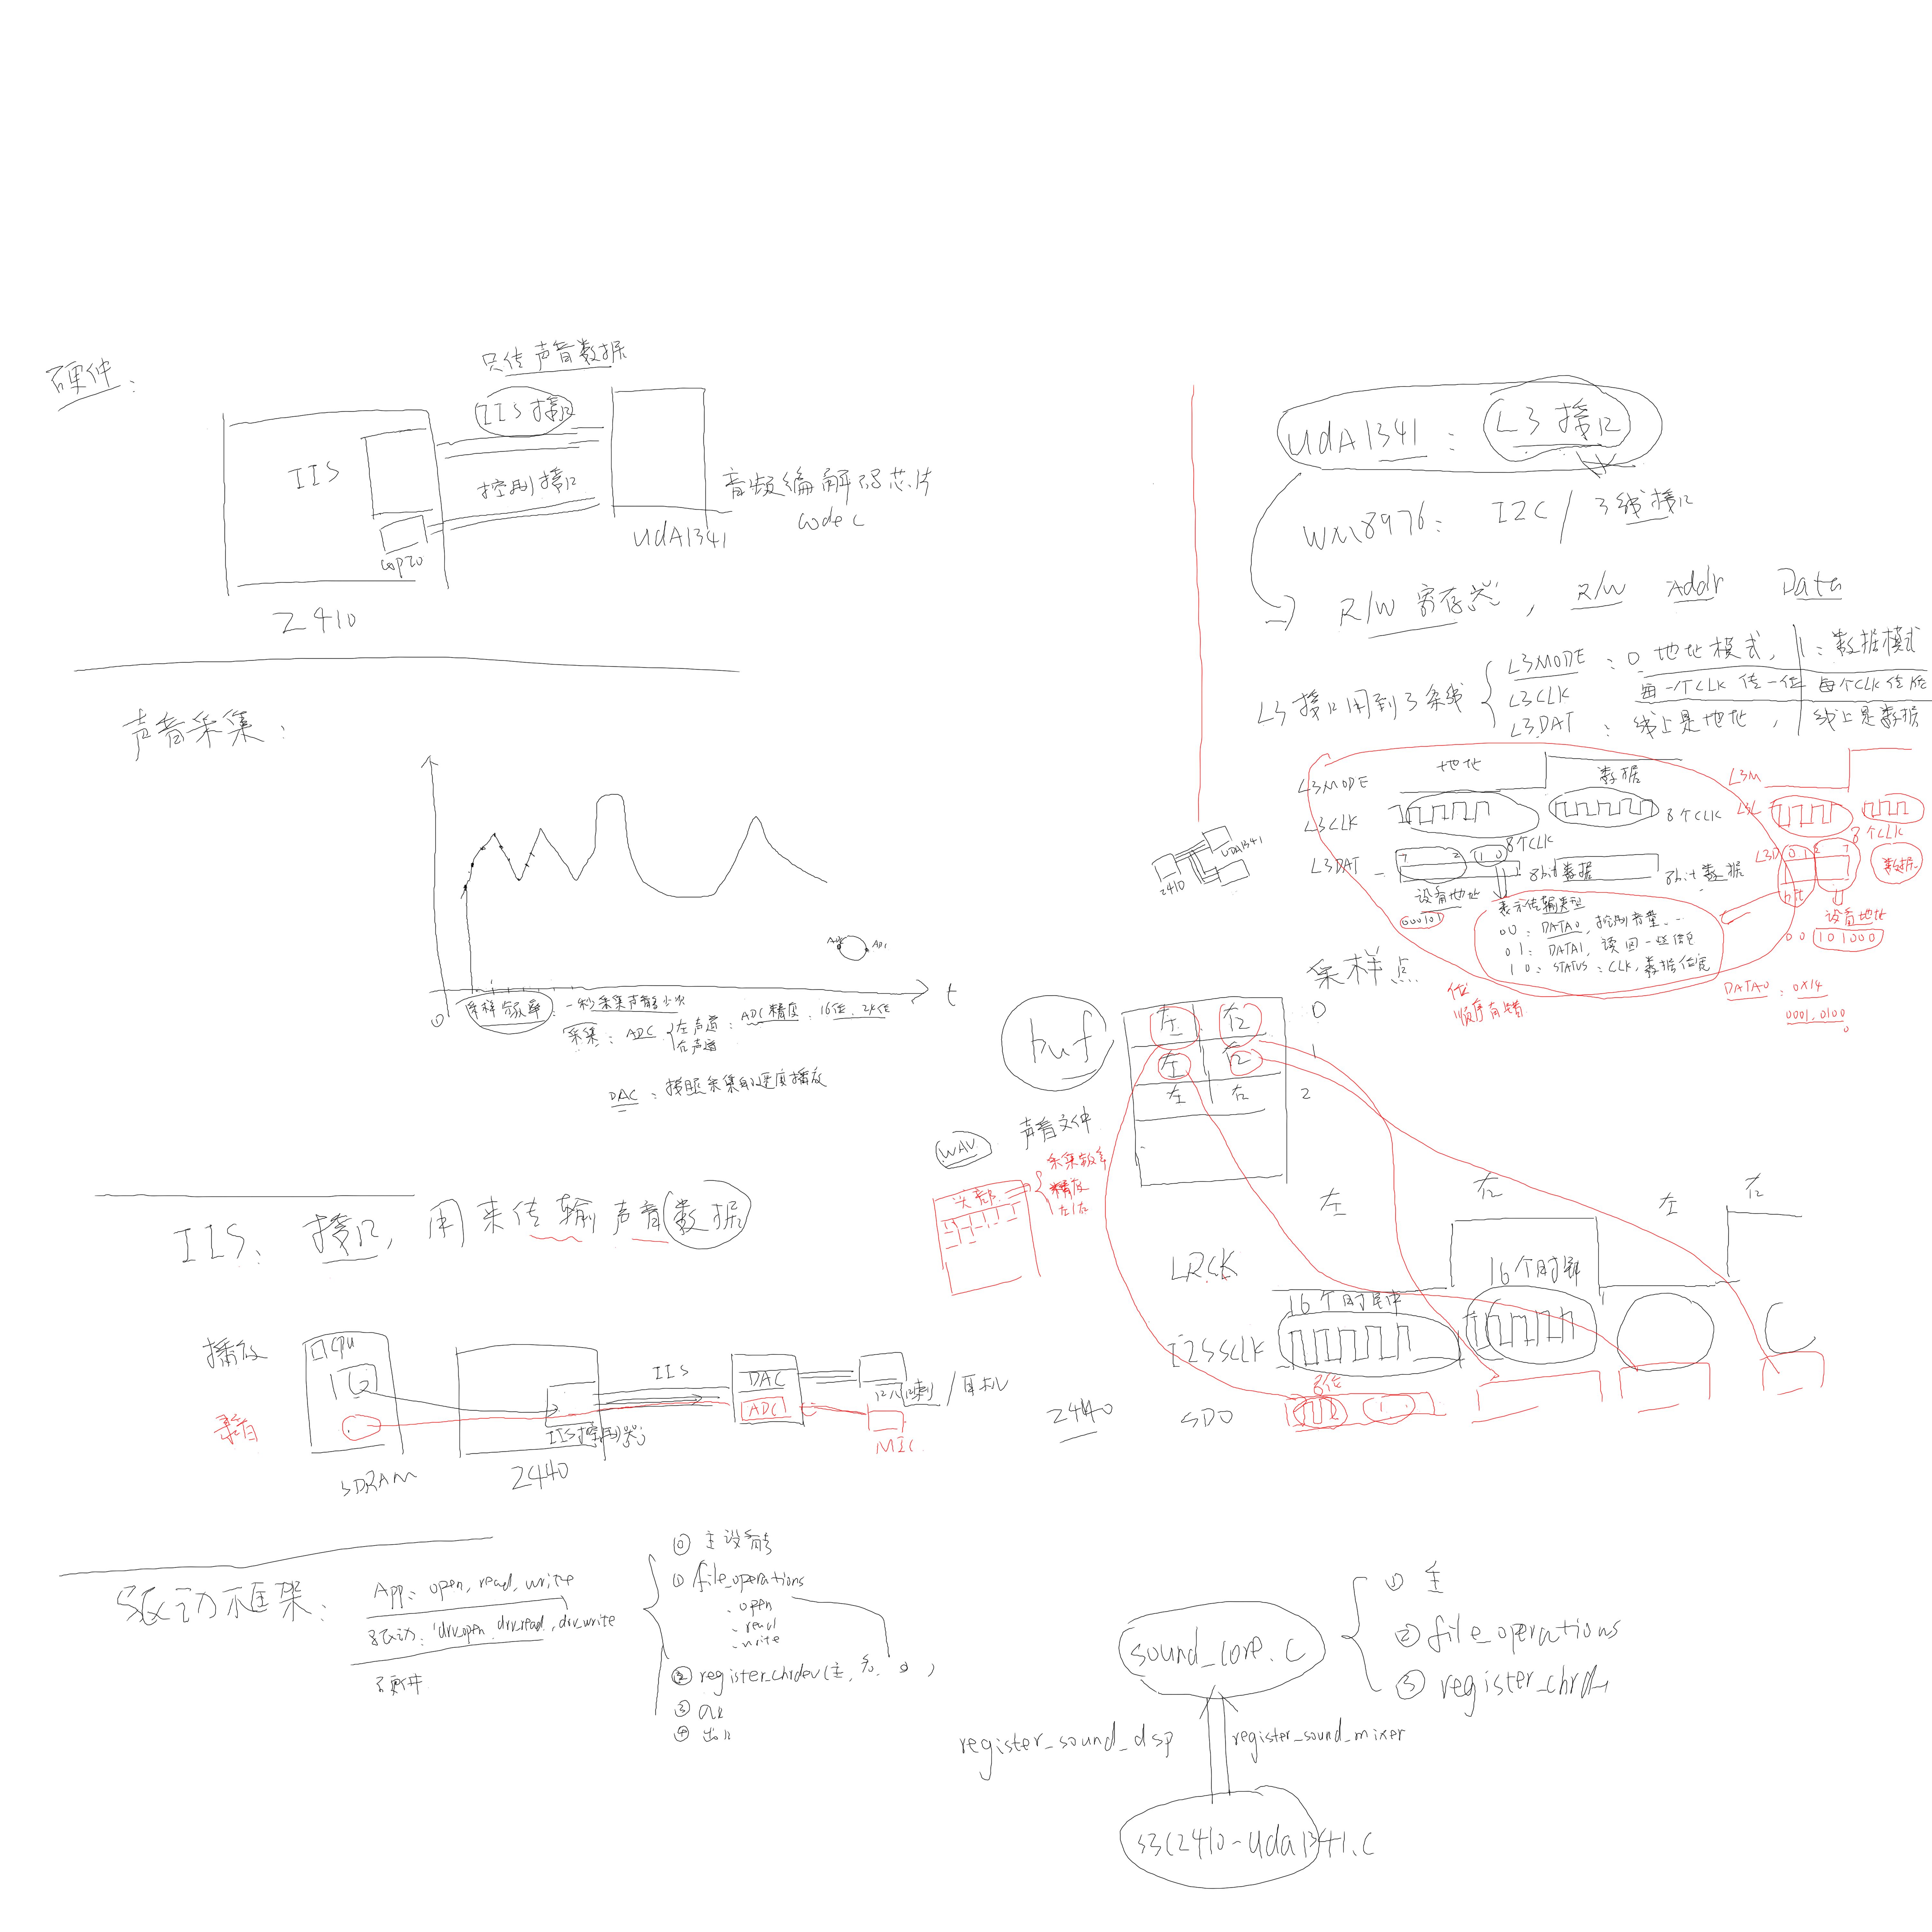
21、IIS声卡驱动程序
声卡芯片的数据通道一般都是IIS接口,但是控制音量等控制信息的接口都不相同
(新内核在linux-3.4.2\sound\soc\codecs\uda134x.c)
uda134x_codec_probe
snd_soc_register_codec
snd_soc_register_dais
snd_soc_instantiate_cards
snd_soc_instantiate_card
snd_card_register
sound\soc\s3c24xx\s3c2410-uda1341.c(新内核在linux-3.4.2\sound\soc\codecs\uda134x.c)
s3c2410_uda1341_init
driver_register(&s3c2410iis_driver);
.....
s3c2410iis_probe
/* 使能时钟 */
/* 配置GPIO */
/* 设置S3C2440的IIS控制器 */
init_s3c2410_iis_bus
/* 使用L3接口初始化uda1341芯片 */
init_uda1341();
/* 设置两个DMA通道:一个用于播放,另一个用于录音 */
.....
register_sound_dsp(&smdk2410_audio_fops, -1);
sound_insert_unit(&chains[3], fops, dev, 3, 131, "dsp", S_IWUSR | S_IRUSR, NULL); // /dev/dsp
register_sound_mixer(&smdk2410_mixer_fops, -1);
sound_insert_unit(&chains[0], fops, dev, 0, 128, "mixer", S_IRUSR | S_IWUSR, NULL); // /dev/mixer
/dev/dsp: 用于播放/录音
/dev/mixer: 调整音量
register_sound_mixer和register_sound_dsp所在的文件A,其会做下面工作,在register的时候会把新的file_operation告诉A这一层,在A中注册的时候其file_operation只有一个open函数,在open的时候,会找到register的时候关联的新的file_operation
2. 提供file_operations
3. 注册register_chrdev
app: open () // 假设主设备号为14
-------------------------------------------
soundcore_open
int unit = iminor(inode);
s = __look_for_unit(chain, unit);
// 从chains数组里得到, 谁来设置这个数组?
new_fops = fops_get(s->unit_fops);
file->f_op = new_fops;
err = file->f_op->open(inode,file);
录音:
app: read
----------------------
file->f_op->read
播放:
app: write
-------------------------
file->f_op->write
测试:
1. 确定内核里已经配置了sound\soc\s3c24xx\s3c2410-uda1341.c
-> Device Drivers
-> Sound
-> Advanced Linux Sound Architecture
-> Advanced Linux Sound Architecture
-> System on Chip audio support
<*> I2S of the Samsung S3C24XX chips
2. make uImage
使用新内核启动
3. ls -l /dev/dsp /dev/mixer
4. 播放:
在WINDOWS PC里找一个wav文件,放到开发板根文件系统里
cat Windows.wav > /dev/dsp
5. 录音:
cat /dev/dsp > sound.bin
然后对着麦克风说话
ctrl+c退出
cat sound.bin > /dev/dsp // 就可以听到录下的声音
怎么写WM8976驱动程序?
1. IIS部分一样,保持不变
2. 控制部分不同,重写
(WM8976当控制接口设置成两线模式的时候就是IIC接口,三线模式的时候则是特殊的接口模式)
测试WM8976:
1. 确定内核里已经配置了sound\soc\s3c24xx\s3c2410-uda1341.c
-> Device Drivers
-> Sound
-> Advanced Linux Sound Architecture // 兼容OSS
-> Advanced Linux Sound Architecture
-> System on Chip audio support
<*> I2S of the Samsung S3C24XX chips
2. 修改sound/soc/s3c24xx/Makefile
obj-y += s3c2410-uda1341.o
改为:
obj-y += s3c-wm8976.o
3. make uImage
使用新内核启动
4. ls -l /dev/dsp /dev/mixer
5. 播放:
在WINDOWS PC里找一个wav文件,放到开发板根文件系统里
cat Windows.wav > /dev/dsp
6. 录音:
cat /dev/dsp > sound.bin
然后对着麦克风说话
ctrl+c退出
cat sound.bin > /dev/dsp // 就可以听到录下的声音
(mp3是压缩的声音文件,wav是原始的声音文件,用声卡播放的时候需要解压缩mp3声音文件)
使用madplay测试声卡:
1. 解压:
tar xzf libid3tag-0.15.1b.tar.gz // 库
tar xzf libmad-0.15.1b.tar.gz // 库
tar xzf madplay-0.15.2b.tar.gz // APP
2. 编译 libid3tag-0.15.1b
mkdir tmp
cd libid3tag-0.15.1b
./configure --host=arm-linux --prefix=/work/drivers_and_test/21th_sound/app/tmp
make
make install
3. 编译 libmad-0.15.1b
cd libmad-0.15.1b
./configure --host=arm-linux --prefix=/work/drivers_and_test/21th_sound/app/tmp
make
make install
4. 编译madplay(./configure --help可以查看编译帮助)
cd madplay-0.15.2b/
./configure --host=arm-linux --prefix=/work/drivers_and_test/21th_sound/app/tmp LDFLAGS="-L/work/drivers_and_test/21th_sound/app/tmp/lib" CFLAGS="-I /work/drivers_and_test/21th_sound/app/tmp/include"
make
make install
5. 把tmp/bin/* tmp/lib/*so* 复制到根文件系统:
cp ./bin/* /work/nfs_root/first_fs/bin
cp ./lib/*so* /work/nfs_root/first_fs/lib -d(保持连接属性)
6. 把一个mp3文件复制到根文件系统
7. madplay --tty-control /1.mp3
播放过程中不断按小键盘的减号("-")会降低音量
不断按小键盘的加号("+")会降低音量


