Python 读取配置文件常用几种方式
引言
我们在设计自动化测试框架的时候,经常使用到配置文件,而配置文件种类有很多,常见的配置文件格式有很多中:ini、yaml、xml、properties、txt、py等。
配置文件ini
虽然配置文件放置一些公共的内容,比如说环境、路径、参数等。但也可以放测试数据,比如说接口一些信息,但不建议这样做。
下面看python读取配置文件ini的实例:
1、新建配置文件ini,符号:;是注释。
1 2 3 4 5 6 7 8 | ;测试配置文件[api]url = "www."method = getheader =data =resp_code = 200resp_json = {} |
2、创建读取ini的py文件,最好与ini配置文件同一层级目录:
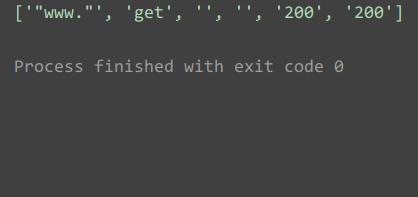
1 2 3 4 5 6 7 8 9 10 11 12 13 14 15 16 17 18 19 20 21 22 | from configparser import ConfigParserimport osclass ReadConfigFile(object): def read_config(self): conn = ConfigParser() file_path = os.path.join(os.path.abspath('.'),'config_test.ini') if not os.path.exists(file_path): raise FileNotFoundError("文件不存在") conn.read(file_path) url = conn.get('api','url') method = conn.get('api','method') header = conn.get('api','header') data = conn.get('api','data') resp_code = conn.get('api','resp_code') resp_json = conn.get('api','resp_code') return [url,method,header,data,resp_code,resp_json]rc = ReadConfigFile()print(rc.read_config()) |
运行结果:
配置文件yaml
上面已经介绍配置文件ini读取方法,现在讲yaml文件读取。
yaml [ˈjæməl]: Yet Another Markup Language :另一种标记语言。yaml 是专门用来写配置文件的语言。
1、yaml文件规则
1.区分大小写;
2.使用缩进表示层级关系;
3.使用空格键缩进,而非Tab键缩进
4.缩进的空格数目不固定,只需要相同层级的元素左侧对齐;
5.文件中的字符串不需要使用引号标注,但若字符串包含有特殊字符则需用引号标注;
6.注释标识为#
2、yaml文件数据结构
1.对象:键值对的集合(简称 "映射或字典")
键值对用冒号 “:” 结构表示,冒号与值之间需用空格分隔
2.数组:一组按序排列的值(简称 "序列或列表")
数组前加有 “-” 符号,符号与值之间需用空格分隔
3.纯量(scalars):单个的、不可再分的值(如:字符串、bool值、整数、浮点数、时间、日期、null等)
None值可用null可 ~ 表示
yaml文件基本数据类型
1 2 3 4 5 6 7 8 9 | # 纯量s_val: name # 字符串:{'s_val': 'name'}spec_s_val: "name\n" # 特殊字符串:{'spec_s_val': 'name\n'num_val: 31.14 # 数字:{'num_val': 31.14}bol_val: true # 布尔值:{'bol_val': True}nul_val: null # null值:{'nul_val': None}nul_val1: ~ # null值:{'nul_val1': None}time_val: 2018-03-01t11:33:22.55-06:00 # 时间值:{'time_val': datetime.datetime(2018, 3, 1, 17, 33, 22, 550000)}date_val: 2019-01-10 # 日期值:{'date_val': datetime.date(2019, 1, 10)} |
简单读取:
前提条件:python中读取yaml文件前需要安装pyyaml和导入yaml模块。
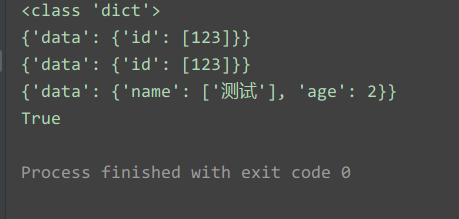
1 2 3 4 5 6 7 8 9 10 11 12 13 14 15 16 17 18 19 20 21 22 23 24 25 26 27 28 29 30 31 32 33 34 35 36 37 38 | import yamldoc = """---"data": "id": - 123---"data": "name": - "测试" "age": 2 """doc2 = """---"data": "id": - 123"""# 方法1data = yaml.load(doc2,Loader=yaml.FullLoader)print(type(data))print(data)get_dict = []# 迭代器data2 = yaml.load_all(doc,Loader=yaml.FullLoader)for i in data2: print(i) get_dict.append(i)print(get_dict[1]['data']['age'] == 2) |
运行结果:
这里有个问题点:Loader=yaml.FullLoader,解释如下:
1 2 3 4 5 6 7 8 9 10 11 12 13 14 15 16 17 18 19 | """1.yaml.load(f, Loader=yaml.FullLoader)2.yaml.warnings({'YAMLLoadWarning': False}) # 全局设置警告,不推荐Loader的几种加载方式BaseLoader - -仅加载最基本的YAMLSafeLoader - -安全地加载YAML语言的子集。建议用于加载不受信任的输入。FullLoader - -加载完整的YAML语言。避免任意代码执行。这是当前(PyYAML5.1)默认加载器调用yaml.load(input)(发出警告后)。UnsafeLoader - -(也称为Loader向后兼容性)原始的Loader代码,可以通过不受信任的数据输入轻松利用。""" |
读取单个yaml文档
这里使用python的open方法打开文件,使用yaml的load方法可以将单个yaml文档中数据转化成字典或列表。
新建配置文件test_config02:
1 2 3 4 5 6 7 8 | ---data: id: 1 name: { age: 2} other: - height: 3 |
新建读取配置文件py:
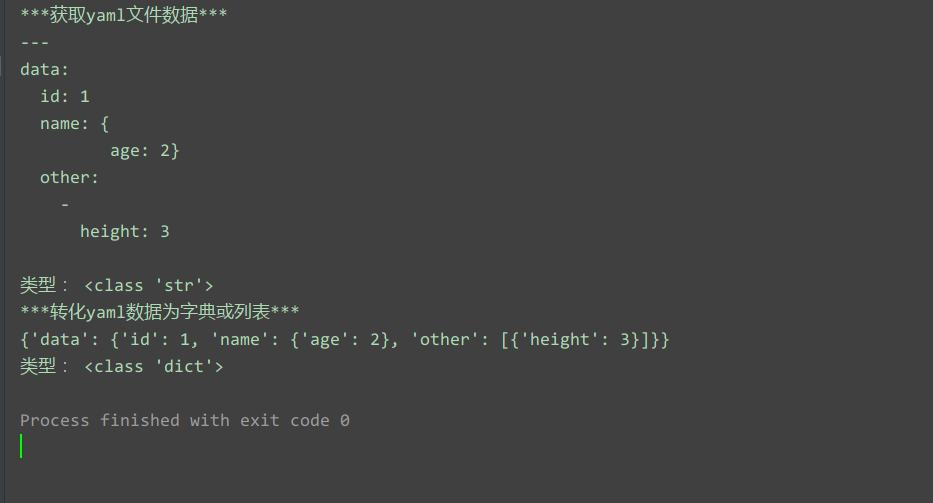
1 2 3 4 5 6 7 8 9 10 11 12 13 14 15 16 17 18 19 20 21 22 23 24 25 26 | # 单个文档import yamlimport osdef get_yaml_data(yaml_file): # 打开yaml文件 print("***获取yaml文件数据***") file = open(yaml_file, 'r', encoding="utf-8") file_data = file.read() file.close() print(file_data) print("类型:", type(file_data)) # 将字符串转化为字典或列表 print("***转化yaml数据为字典或列表***") data = yaml.load(file_data,Loader=yaml.FullLoader) print(data) print("类型:", type(data)) return datacurrent_path = os.path.abspath(".")yaml_path = os.path.join(current_path, "test_config02")get_yaml_data(yaml_path) |
运行结果:
读取多个yaml文档
多个文档在一个yaml文件,使用 --- 分隔方式来分段
新建一个yaml配置文件test_config:
1 2 3 4 5 6 7 8 9 10 11 12 | ---data: id: 1 name: { age: 2} other: - height: 3---id: 2name: "测试用例2" |
编写读写yaml函数:
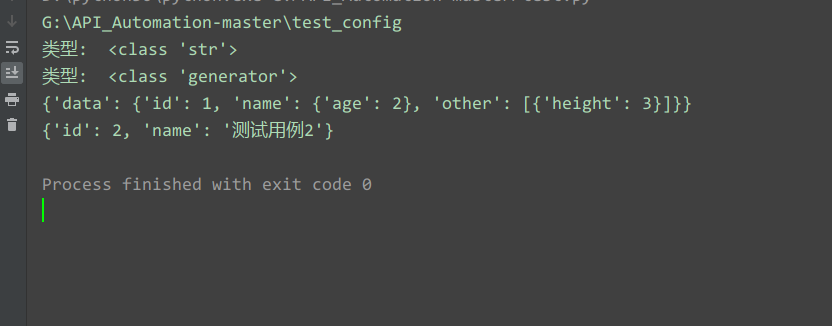
1 2 3 4 5 6 7 8 9 10 11 12 13 14 15 16 17 | import yamlimport osdef get_yaml_load_all(filename): with open(filename,'r') as fp: file_data = fp.read() fp.close() print("类型: ",type(file_data)) all_data = yaml.load_all(file_data,Loader=yaml.FullLoader) print("类型: ",type(all_data)) for data in all_data: print(data)current_path = os.path.abspath('.')file_path = os.path.join(current_path,'test_config')print(file_path)get_yaml_load_all(file_path) |
运行结果:
配置文件xml
python读取xml文件可能自动化测试平时用的少,这里介绍一下:
这个xml文件内容如下:
1 2 3 4 5 6 7 8 9 10 11 12 13 14 15 16 17 18 19 20 21 22 23 24 25 26 27 28 29 30 31 32 33 | <collection shelf="New Arrivals"><movie title="Enemy Behind"> <type>War, Thriller</type> <format>DVD</format> <year>2003</year> <rating>PG</rating> <stars>10</stars> <description>Talk about a US-Japan war</description></movie><movie title="Transformers"> <type>Anime, Science Fiction</type> <format>DVD</format> <year>1989</year> <rating>R</rating> <stars>8</stars> <description>A schientific fiction</description></movie> <movie title="Trigun"> <type>Anime, Action</type> <format>DVD</format> <episodes>4</episodes> <rating>PG</rating> <stars>10</stars> <description>Vash the Stampede!</description></movie><movie title="Ishtar"> <type>Comedy</type> <format>VHS</format> <rating>PG</rating> <stars>2</stars> <description>Viewable boredom</description></movie></collection> |
读取代码:
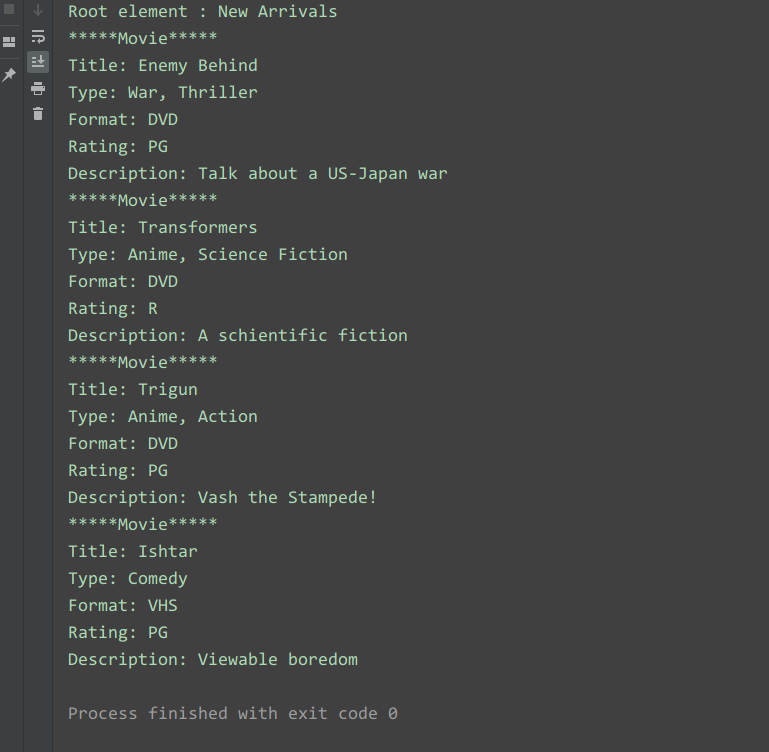
1 2 3 4 5 6 7 8 9 10 11 12 13 14 15 16 17 18 19 20 21 22 23 24 25 26 | # coding=utf-8import xml.dom.minidomfrom xml.dom.minidom import parseDOMTree = parse('config')collection = DOMTree.documentElementif collection.hasAttribute("shelf"): print("Root element : %s" % collection.getAttribute("shelf"))# 在集合中获取所有电影movies = collection.getElementsByTagName("movie")# 打印每部电影的详细信息for movie in movies: print("*****Movie*****") if movie.hasAttribute("title"): print("Title: %s" % movie.getAttribute("title")) type = movie.getElementsByTagName('type')[0] print("Type: %s" % type.childNodes[0].data) format = movie.getElementsByTagName('format')[0] print("Format: %s" % format.childNodes[0].data) rating = movie.getElementsByTagName('rating')[0] print("Rating: %s" % rating.childNodes[0].data) description = movie.getElementsByTagName('description')[0] print("Description: %s" % description.childNodes[0].data) |
运行结果:
作者:全栈测试开发日记
出处:https://www.cnblogs.com/liudinglong/
csdn:https://blog.csdn.net/liudinglong1989/
微信公众号:全栈测试开发日记
本文版权归作者和博客园共有,欢迎转载,但未经作者同意必须保留此段声明,且在文章页面明显位置给出原文连接,否则保留追究法律责任的权利。


【推荐】国内首个AI IDE,深度理解中文开发场景,立即下载体验Trae
【推荐】编程新体验,更懂你的AI,立即体验豆包MarsCode编程助手
【推荐】抖音旗下AI助手豆包,你的智能百科全书,全免费不限次数
【推荐】轻量又高性能的 SSH 工具 IShell:AI 加持,快人一步
· 10年+ .NET Coder 心语,封装的思维:从隐藏、稳定开始理解其本质意义
· .NET Core 中如何实现缓存的预热?
· 从 HTTP 原因短语缺失研究 HTTP/2 和 HTTP/3 的设计差异
· AI与.NET技术实操系列:向量存储与相似性搜索在 .NET 中的实现
· 基于Microsoft.Extensions.AI核心库实现RAG应用
· 10年+ .NET Coder 心语 ── 封装的思维:从隐藏、稳定开始理解其本质意义
· 地球OL攻略 —— 某应届生求职总结
· 提示词工程——AI应用必不可少的技术
· Open-Sora 2.0 重磅开源!
· 周边上新:园子的第一款马克杯温暖上架