Android支持包22.1引进了AppCompatDelegate
最新22.1版本的支持包引入了大量酷炫的新特性,这些特性将允许我们轻易地将材料设计/API 21+的特性应用到之前的那些老的,不兼容的Activity上面。
我们知道,继承AppCompatActivity是最容易实现的方式,但是有时候我们还是需要使用老办法,对吗?
你可以使用支持包提供了新的AppCompatDelegate构件,很容易地将Toolbar添加到Activity上。
1,将Toolbar控件添加到布局文件上面
ActionBar现在已经被不再被告维护了,它应该被Toolbar取代,因为后者允许了更多的UI灵活性,并且允许Activity更容易地兼容于材料设计的UI模式。
因为我们要在这使用支持包,那么我们将使用Toolbar的支持版本,不然的话,将只能在API 21+上可用。
在xml中添加如下内容:

1 <android.support.v7.widget.Toolbar
2     android:id="@+id/my_awesome_toolbar"
3     android:layout_height="@dimen/abc_action_bar_
4 default_height_material"
5     android:layout_width="match_parent"
6     android:minHeight="@dimen/abc_action_bar_
7 default_height_material"
8     android:background="?attr/colorPrimary"
9     />
2,修改主题:
因为我们要将Toolbar嵌入到布局文件中,所以我们需要不支持ActionBar的主题。
所以,在确定在styles.xml文件中使用主题Theme.AppCompat.NoActionBar。
特别推荐,要在你的主题上添加如下所示的材料设计色彩项,这将很容易地实现对Toolbar和状态栏的着色(只有API 21+的设备上才会对状态栏进行着色):

 1 <!-- Base application theme. -->
 2 <style name="AppTheme" parent="Theme.AppCompat.NoActionBar">
 3     <!-- colorPrimary is used for coloring the Toolbar -->
 4     <item name="colorPrimary">#3F51B5</item>
 5     <!-- colorPrimaryDark is used for coloring the status bar -->
 6     <item name="colorPrimaryDark">#303F9F</item>
 7     <!-- colorAccent is used as the default value for colorControlActivated
 8          which is used to tint widgets -->
 9     <item name="colorAccent">#FFAB40</item>
10 </style>
3,将AppCompatDelegate添加到Activity里面
AppCompatDelegate是一个委托代表,它将AppCompatActivity的特性提供给Activity,而且只能通过create()方法创建,此时它需要两个参数,Activity和AppCompatCallback。
所以,首先,我们将Activity实现AppCompatCallback接口,在本例中,可以不必具体实现要覆盖的方法。

 1 public class MainActivity extends Activity implements AppCompatCallback {
 2     @Override
 3     public void onSupportActionModeStarted(ActionMode mode) {
 4       //let's leave this empty, for now
 5     }
 6     @Override
 7     public void onSupportActionModeFinished(ActionMode mode) {
 8       // let's leave this empty, for now
 9     }
10 }
然后,在Activity的onCreate()方法中,
- 通过AppCompatDelegate.create()方法创建AppCompatDelegate;
- 调用AppCompatDelegate.create();(有些Activity的生命周期方法应用由该AppCompatDelegate代理)
- 通过AppCompatDelegate.setContentView()方法填充布局文件;
- 通过AppCompatDelegate.setSupportActionbar()将Toolbar添加给AppCompatDelegate。

 1 private AppCompatDelegate delegate;
 2 @Override
 3 protected void onCreate(Bundle savedInstanceState) {
 4     super.onCreate(savedInstanceState);
 5     //let's create the delegate, passing the activity at both arguments (Activity, AppCompatCallback)
 6     delegate = AppCompatDelegate.create(this, this);
 7     //we need to call the onCreate() of the AppCompatDelegate
 8     delegate.onCreate(savedInstanceState);
 9     //we use the delegate to inflate the layout
10     delegate.setContentView(R.layout.activity_main);
11     //Finally, let's add the Toolbar
12     Toolbar toolbar= (Toolbar) findViewById(R.id.my_awesome_toolbar);
13     delegate.setSupportActionBar(toolbar);
14 }
特别推荐,一个Activity只能链接到一个AppCompatDelegate实例,因此通过create()方法返回的实例应该保存在Activity里面直到该Activity被销毁。
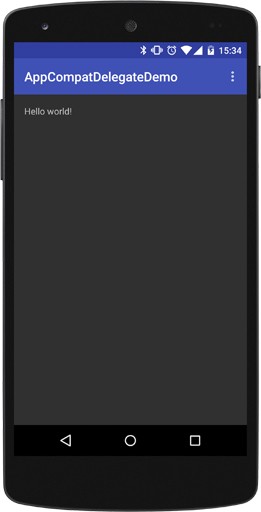
现在,你已经完成了,运行你的应用,然后你的Activity将会魔法一般拥有一个Toolbar,而且看起来完全你是材料设计的AppCompatActivity!

非常简单?
再次声明,这只是边缘事例,在使用AppCompatDelegate之前,问题要考虑使用AppCompatActivity。
同时,一定要检出AppCompatDelegate的完全引用。如果你想要AppCompatDelegate活动地完全像一个AppCompatActivity,那么在你包裹AppCompatDelegate到Activity时将有大量的方法需要考虑写。
谢谢打赏!
您的支持就是我的最大动力!
支付宝

微信

Just remember: Half is worse than none at all.
本文是由SilentKnight诚意发布, 欢迎转载! 但转载请注明出处: 【SilentKnight】
如果觉得还有帮助的话,可以点一下右下角的【推荐】,希望能够持续的为大家带来更好的技术文章!
想跟我一起进步么?那就【关注】我吧


