vue路由
1. 安装vue-router
npm i vue-router -s
2.设置vue-router
首先在vue中src文件夹下的sec下创建一个router文件夹下创建一个index.js文件


// src/router/index.js就是当前项目的路由模块
// 1 导入Vue 和VueRouter的包
import Vue from 'vue'
import VueRouter from 'vue-router'
// 2 调用vue.use()函数,把VueRouter安装为vue插件
Vue.use(VueRouter)
// 3 创建路由的实例对象
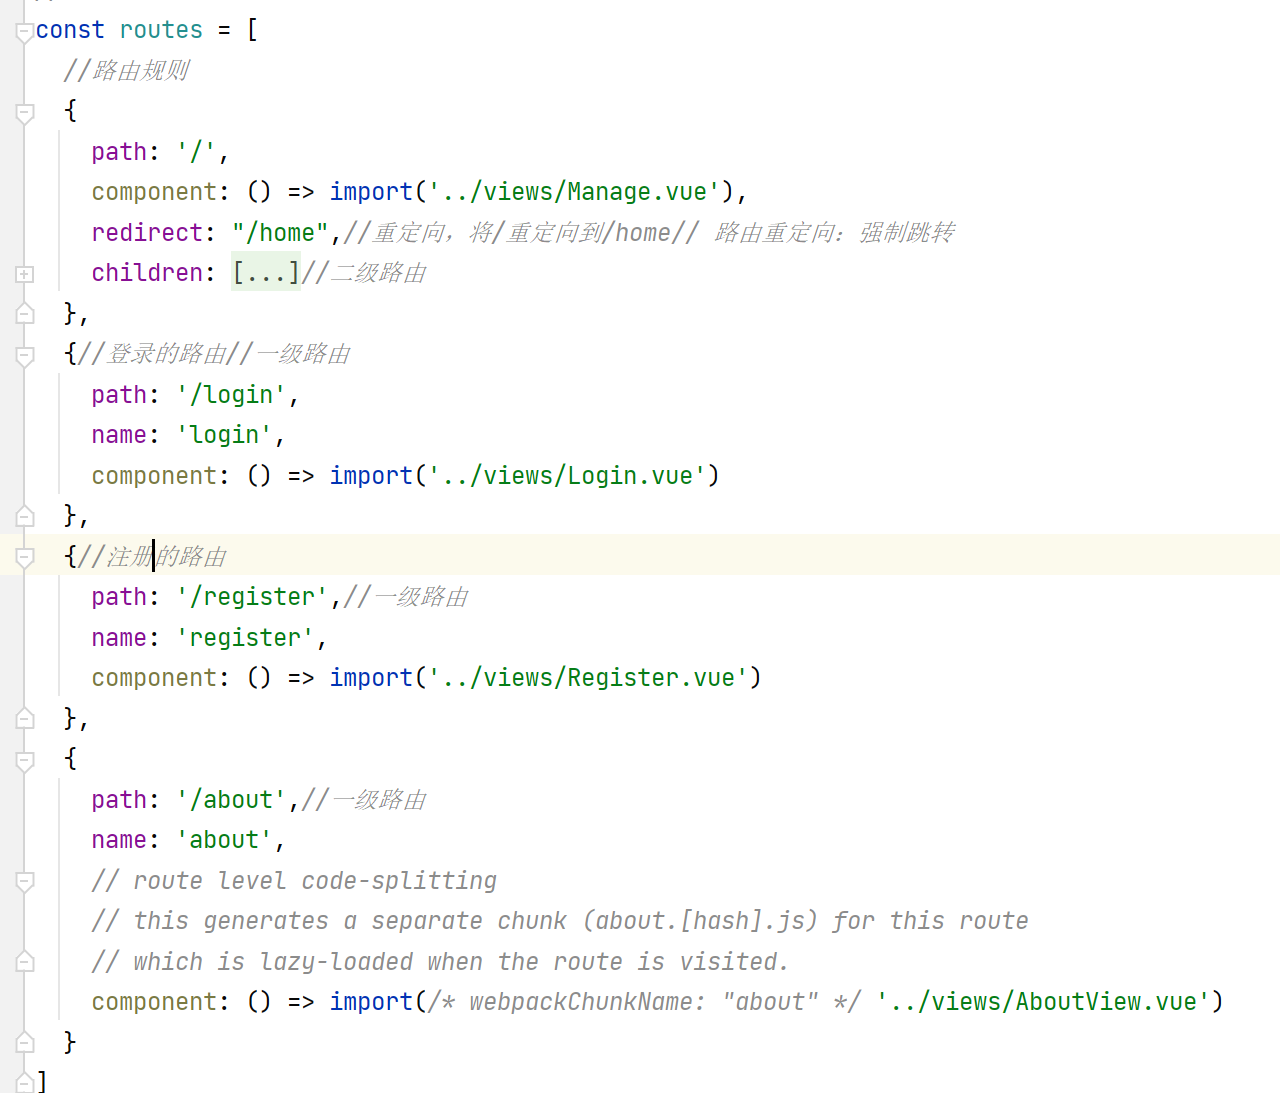
const routes = [
  //路由规则
  {
    path: '/',
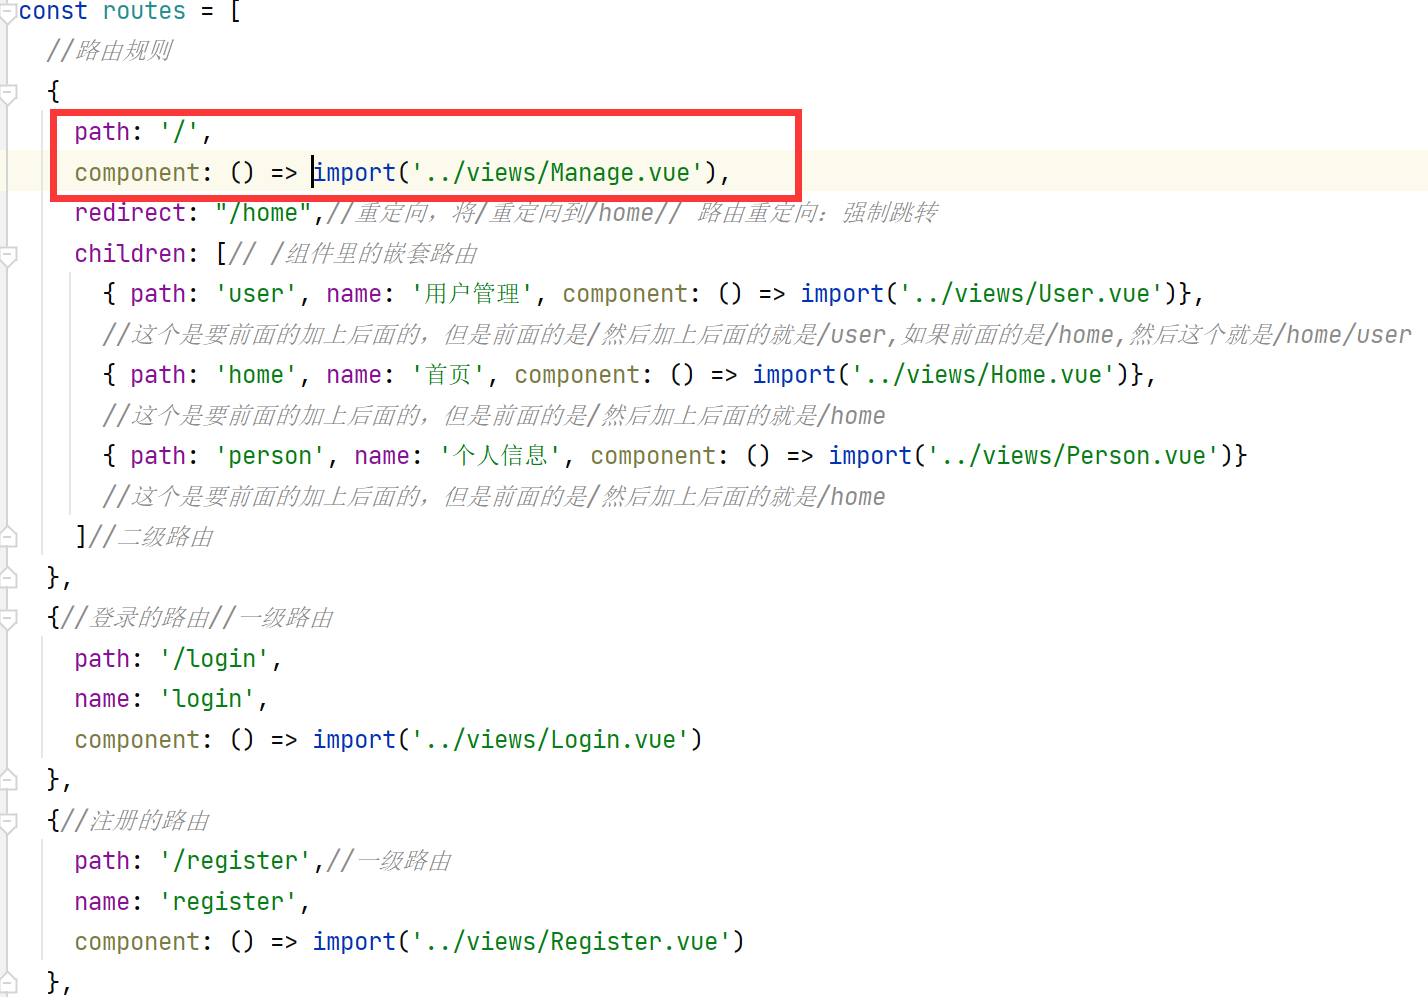
    component: () => import('../views/Manage.vue'),
    redirect: "/home",//重定向,将/重定向到/home// 路由重定向:强制跳转
    children: [// /组件里的嵌套路由
      { path: 'user', name: '用户管理', component: () => import('../views/User.vue')},
      { path: 'home', name: '首页', component: () => import('../views/Home.vue')},
      { path: 'person', name: '个人信息', component: () => import('../views/Person.vue')}
    ]
  },
  {//登录的路由
    path: '/login',
    name: 'login',
    component: () => import('../views/Login.vue')
  },
  {//登录的路由
    path: '/register',
    name: 'register',
    component: () => import('../views/Register.vue')
  },
  {
    path: '/about',
    name: 'about',
    // route level code-splitting
    // this generates a separate chunk (about.[hash].js) for this route
    // which is lazy-loaded when the route is visited.
    component: () => import(/* webpackChunkName: "about" */ '../views/AboutView.vue')
  }
]
// 定义数组routes[],对应哈希地址与组件之间的关系
const router = new VueRouter({
  mode: 'history',
  base: process.env.BASE_URL,
  routes
})
// 4 向外共享路由的实例对象
export default router
或者:

// src/router/index.js就是当前项目的路由模块
// 1 导入Vue 和VueRouter的包
import Vue from 'vue'
import VueRouter from 'vue-router'
// 导入路由要用到的组件
import Home from '../components/Home.vue'
import Movie from '../components/Movie.vue'
import About from '../components/About.vue'

// 2 调用vue.use()函数,把VueRouter安装为vue插件
Vue.use(VueRouter)

// 3 创建路由的实例对象
const router = new VueRouter({
  // 定义数组routes[],对应哈希地址与组件之间的关系
  routes: [
  //路由规则
    { path: '/home', component: Home },
    { path: '/movie', component: Movie },
   {
      path: '/about',
      component: About,
      // about组件里的嵌套路由
      children: [
        { path: 'tab1', component: Tab1 },
        { path: 'tab2', component: Tab2 }
      ]
    },
    // 路由重定向:强制跳转
    { path: '/', redirect: '/home' }
  ]
})

// 4 向外共享路由的实例对象
export default router
然后在main.js中加入
// 1 导入路由模块,拿到路由实例
import router from '../src/router/index.js'
和
new Vue({
  render: h => h(App),

  //  2 挂载路由
  router: router
}).$mount('#app')
3.应用
首先知道<router-view/>或者是<router-view></router-view>,这个是一个路由容器,vue项目最核心的App.vue文件中即是通过router-view进行路由管理。
然后这个是一级路由
<template>
  <div id="app">
    <router-view/>
  </div>
</template>
比如说这个项目中的/login和/register,/about都是一级路由
这个一级路由的跳转是:
this.$router.push("要跳转的路径")
比如说这个@click="$router.push('/register')是要跳转到注册中去
然后上面的http://localhost:8080/默认加载的是Manage.vue中的东西
4.子路由
咱们看卡Manage.vue中的东西
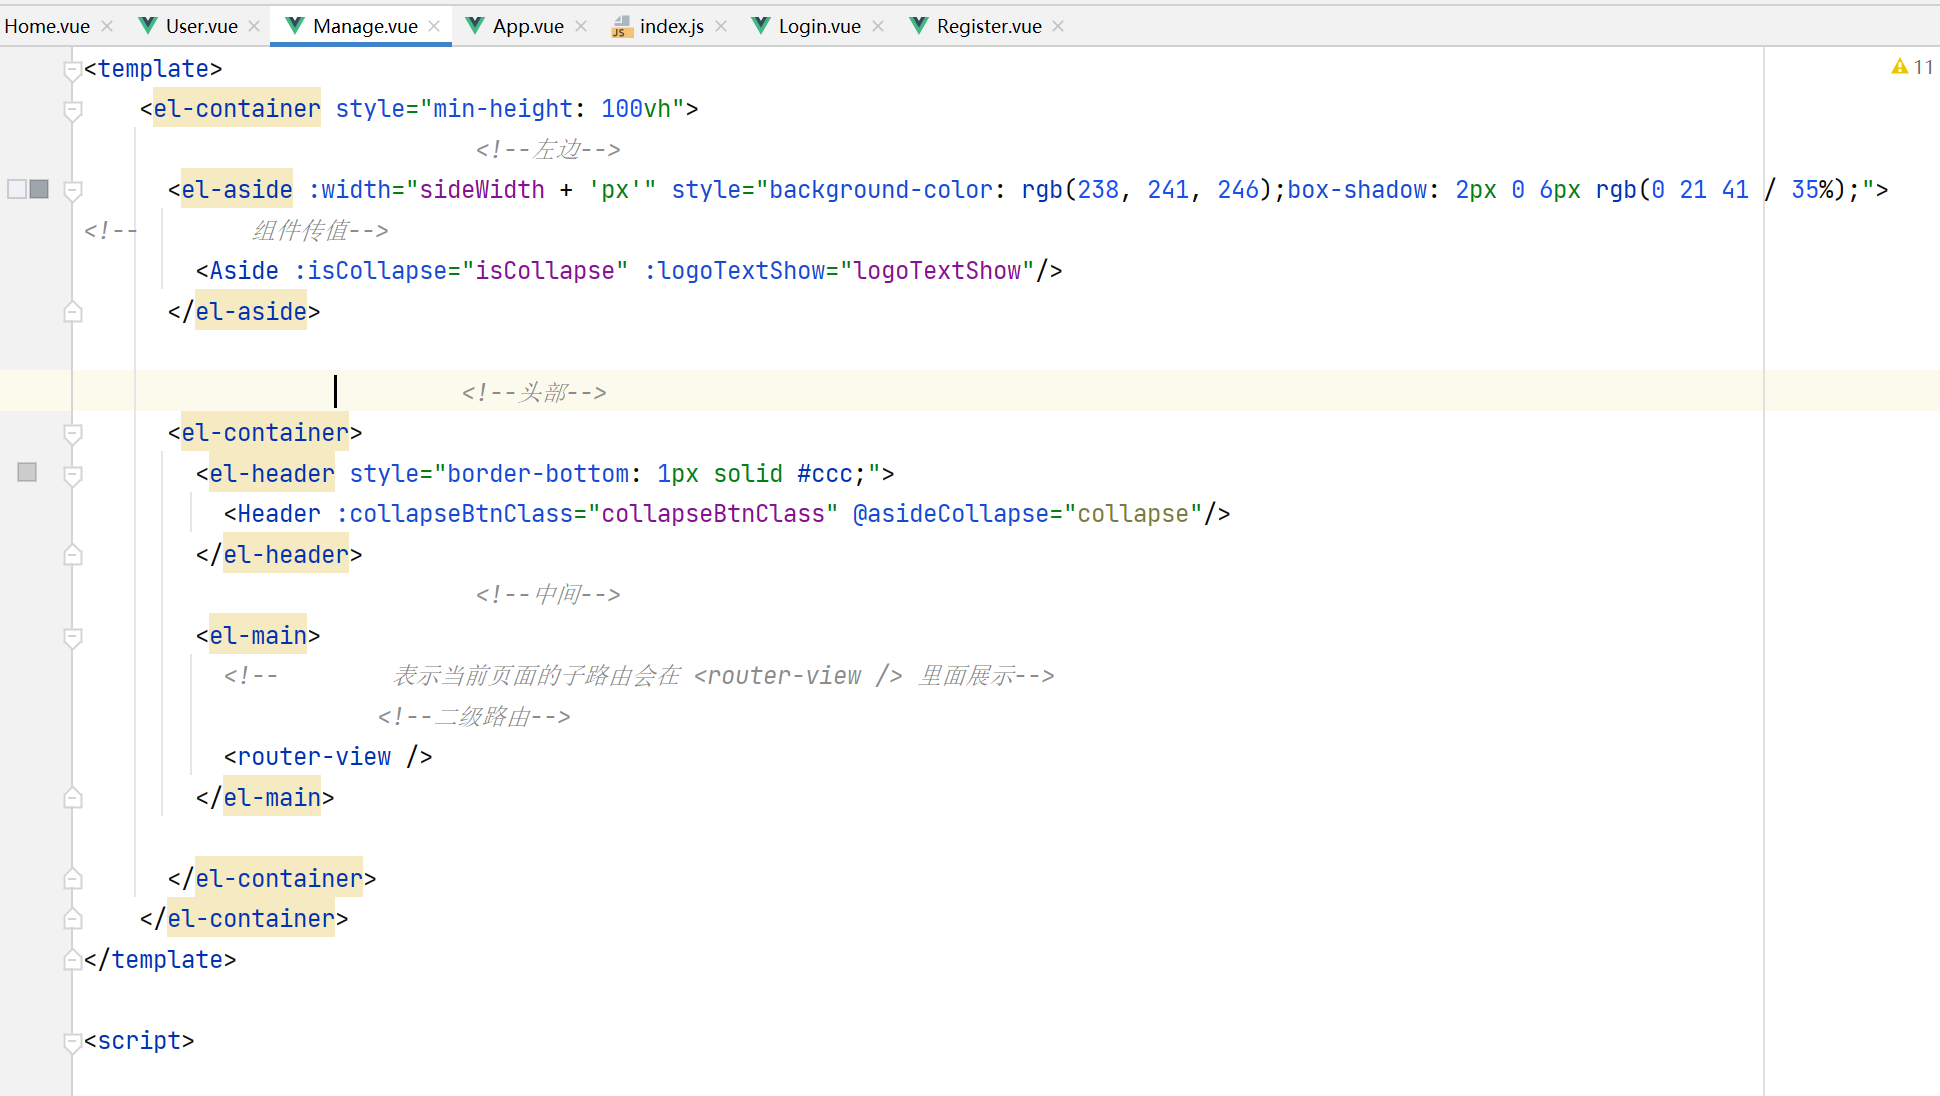
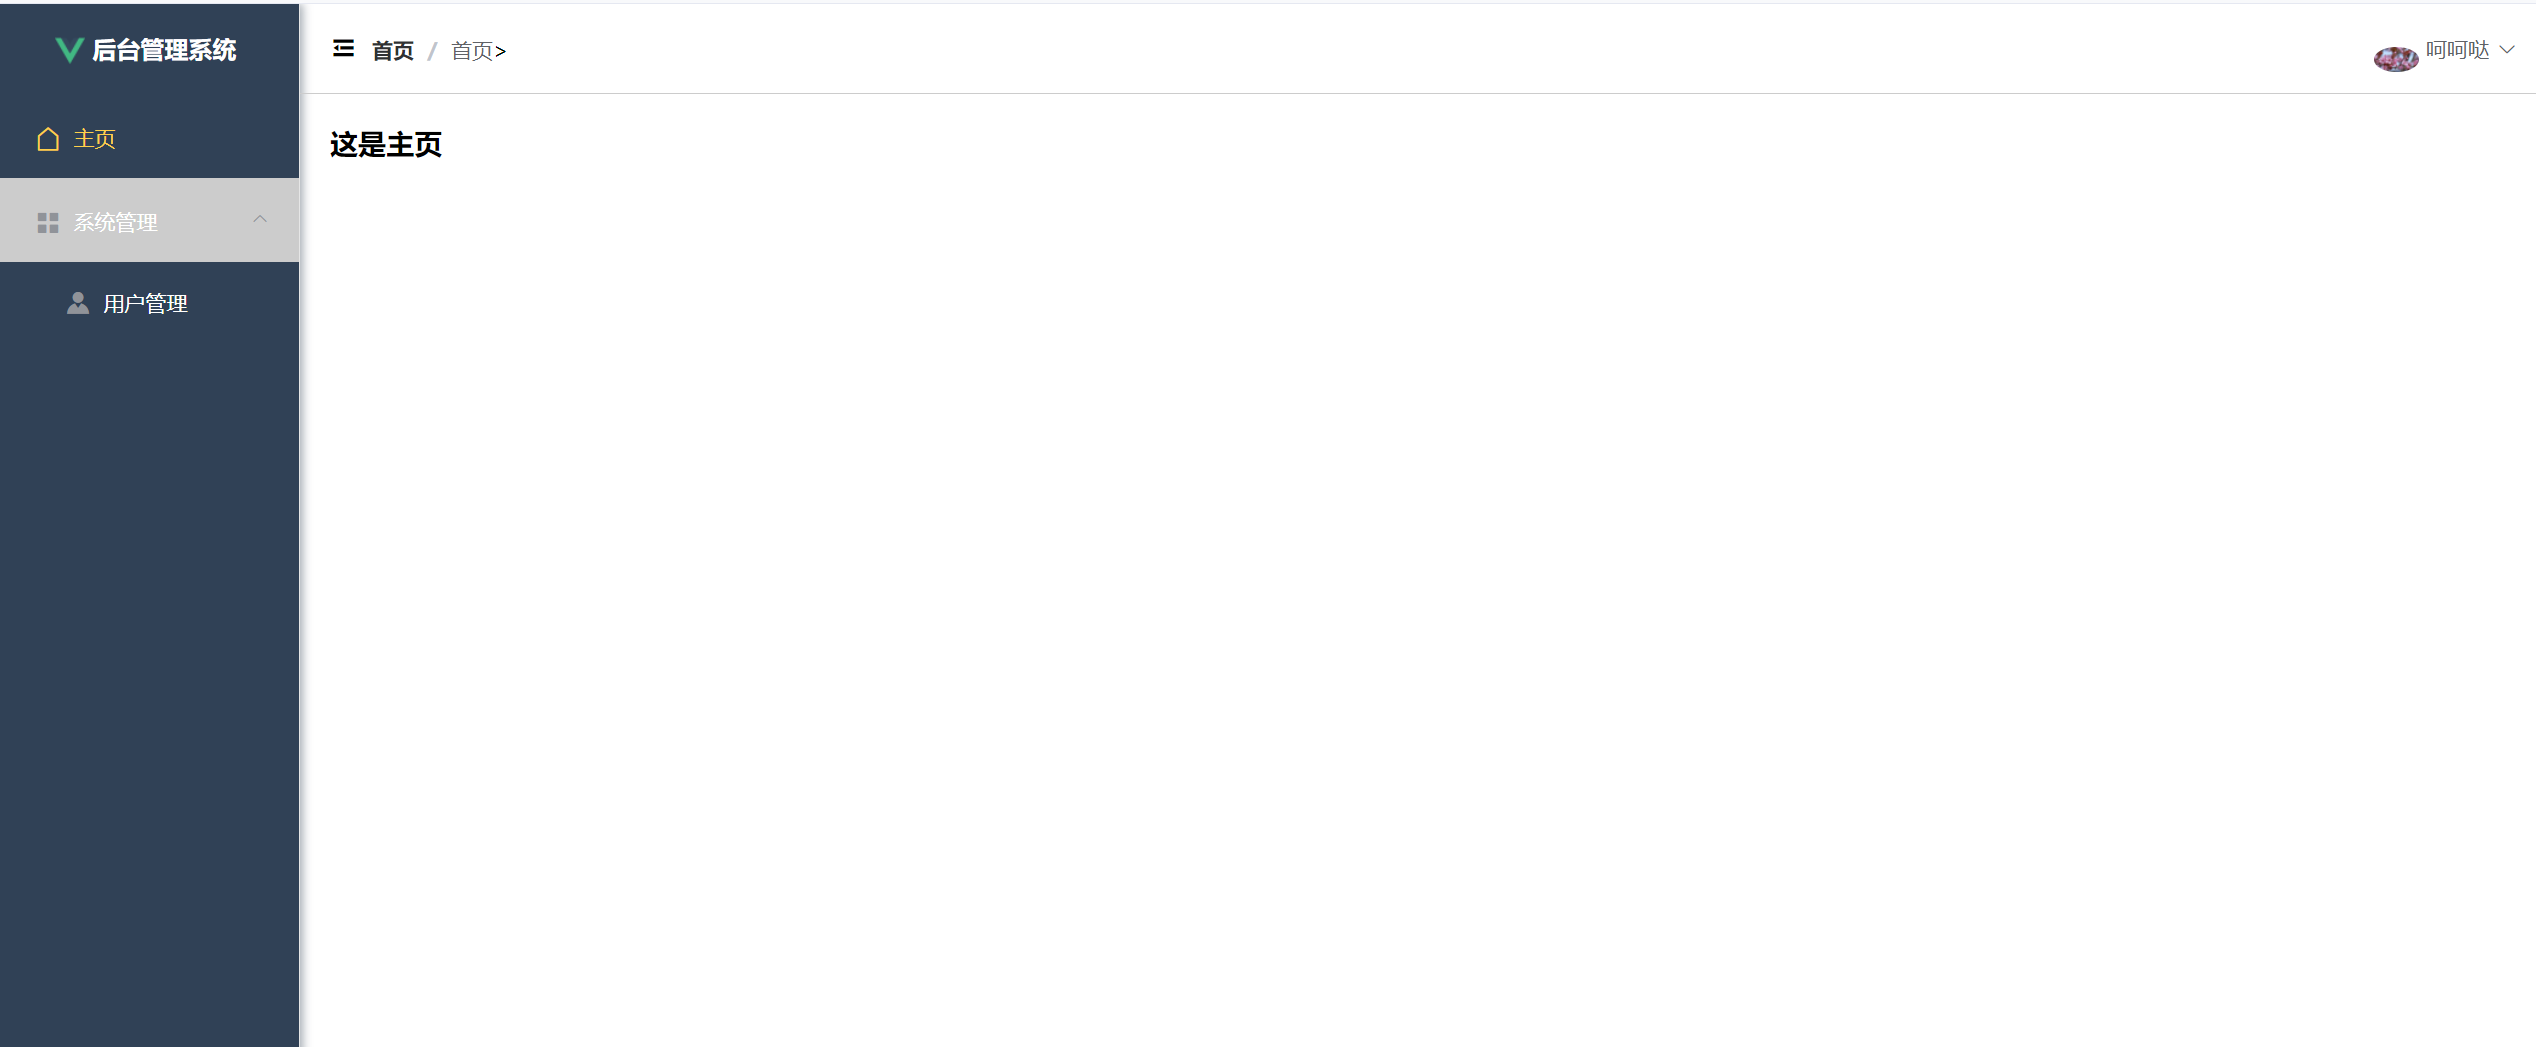
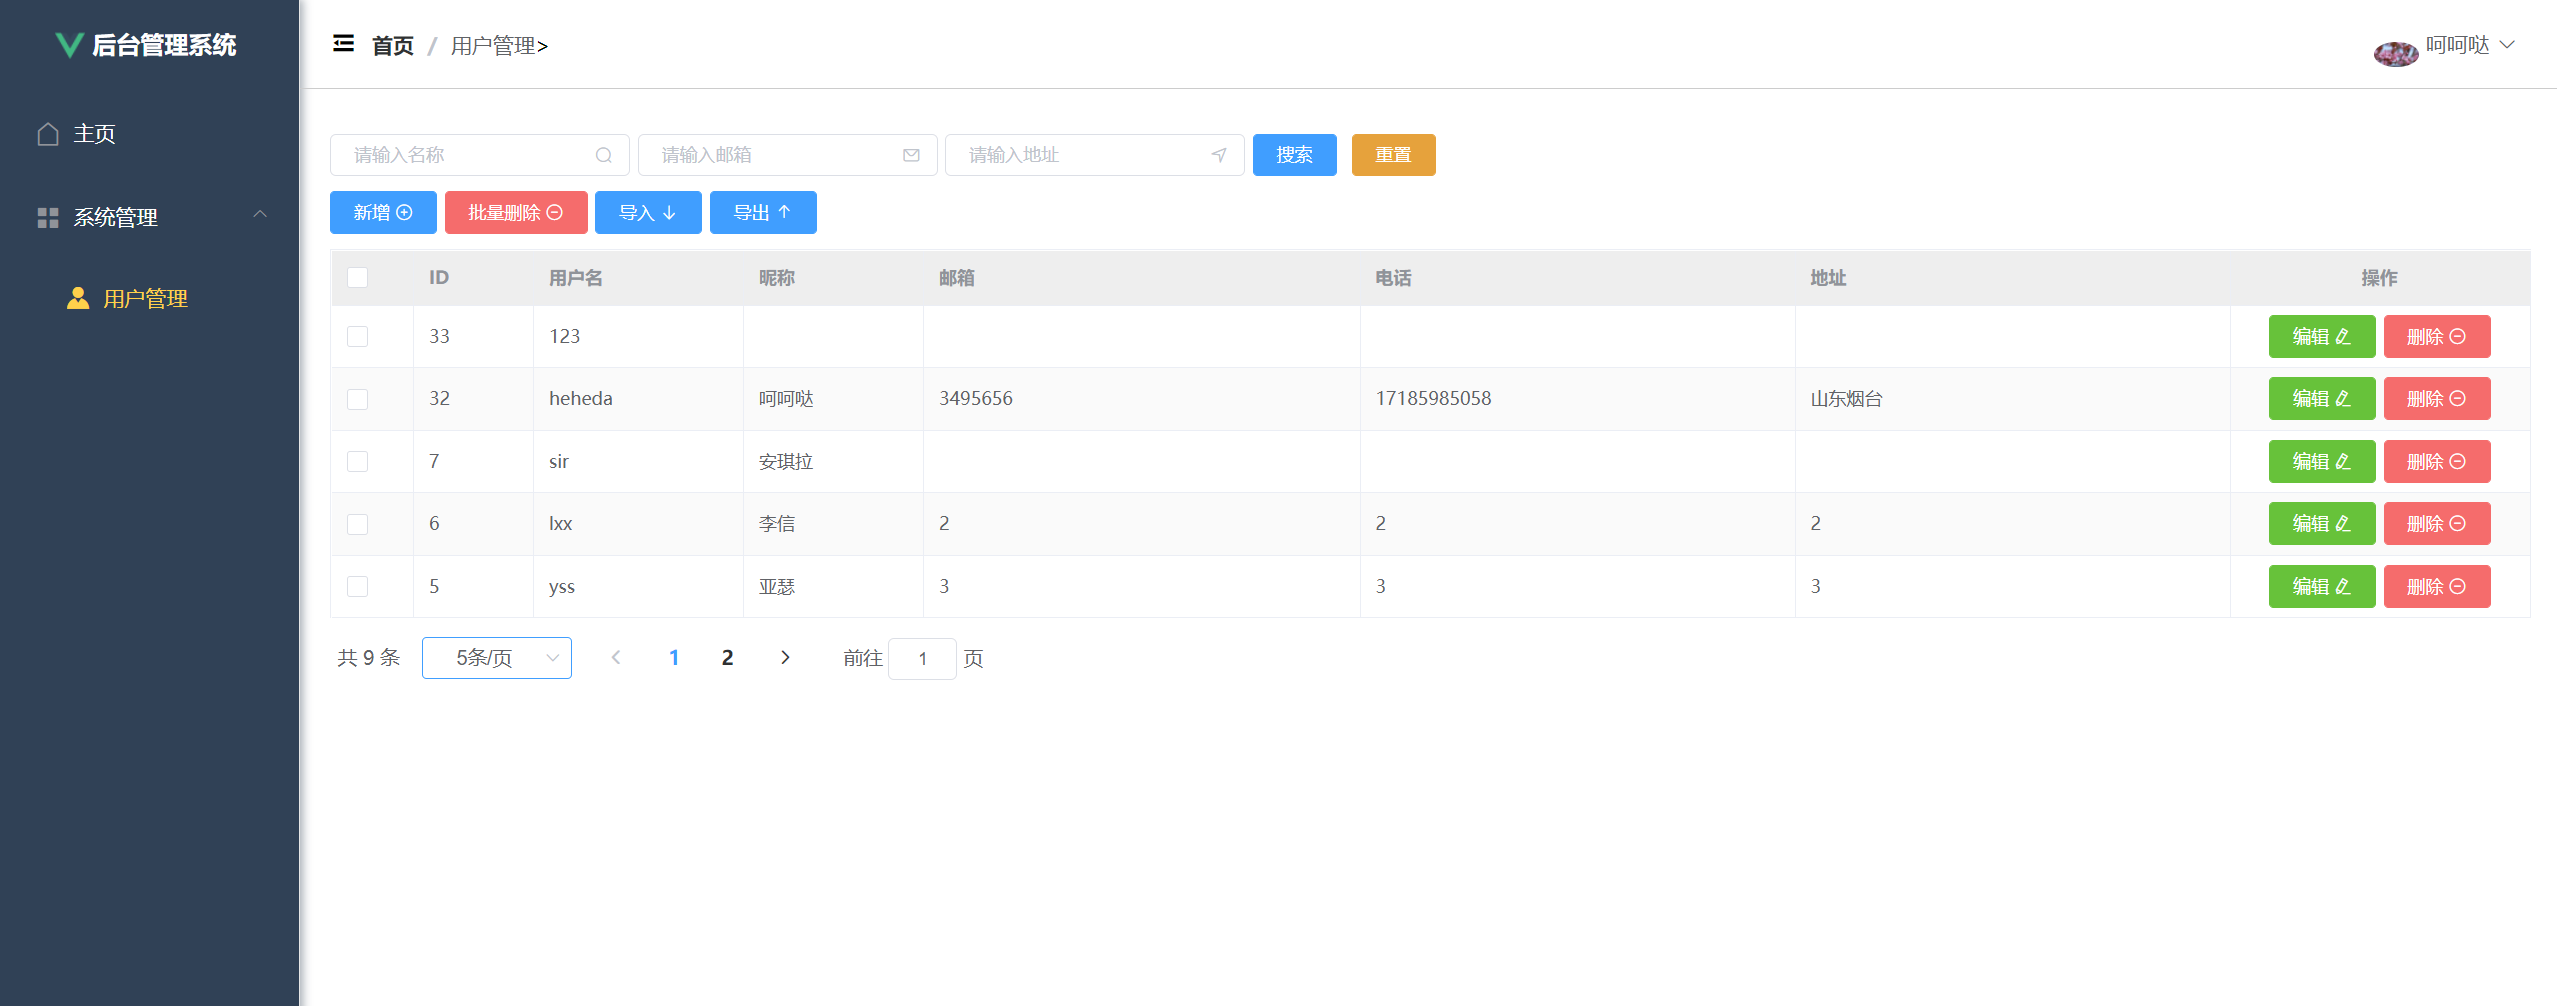
这个中间这部分就是二级路由,就是类似这个样子
又或者说类似与微信上的这个样子

这个的代码是这样的:
{
    path: "/routerViewPractice",
    name: "routerViewPractice",
    component: () => import("@/views/routerView/index.vue"),
    redirect: '/messagePage',//页面默认加载的路由
    children: [
      {
        path: "/messagePage",
        name: "messagePage",
        component: () => import("@/views/routerView/childPages/messagePage.vue")
      },
      {
        path: "/contactPage",
        name: "contactPage",
        component: () => import("@/views/routerView/childPages/contactPage.vue")
      },
      {
        path: "/dynamicPage",
        name: "dynamicPage",
        component: () => import("@/views/routerView/childPages/dynamicPage.vue")
      }
    ]
  }
<template>
  <div>
    <title-bar :title="title" @goBack="goback"></title-bar>
    <router-view></router-view>
    <BottomBar
     @handleMsg='handleMsg'
     @lookContact='lookContact'
     @readDynamic='readDynamic'
    ></BottomBar>
  </div>
</template>
<script>
import TitleBar from "@/components/TitleBar";
import BottomBar from "@/components/BottomBar";
export default {
  name: "",
  components: {
    TitleBar,
    BottomBar
  },
  data() {
    return {
      title: "路由视图",
    };
  },
  methods: {
    // 返回方法
    goback() {
      // this.$emit("GoBack");
    },
    handleMsg() {
      this.$router.push({path: '/messagePage'})
    },
    lookContact() {
      this.$router.push({path: '/contactPage'})
    },
    readDynamic() {
      this.$router.push({path: '/dynamicPage'})
    }
  }
};
</script>
<style scoped>
#page-title {
  width: 100%;
  background-color: #fff;
  display: flex;
  justify-content: center;
}
.backImg {
  width: 20px;
}
</style>
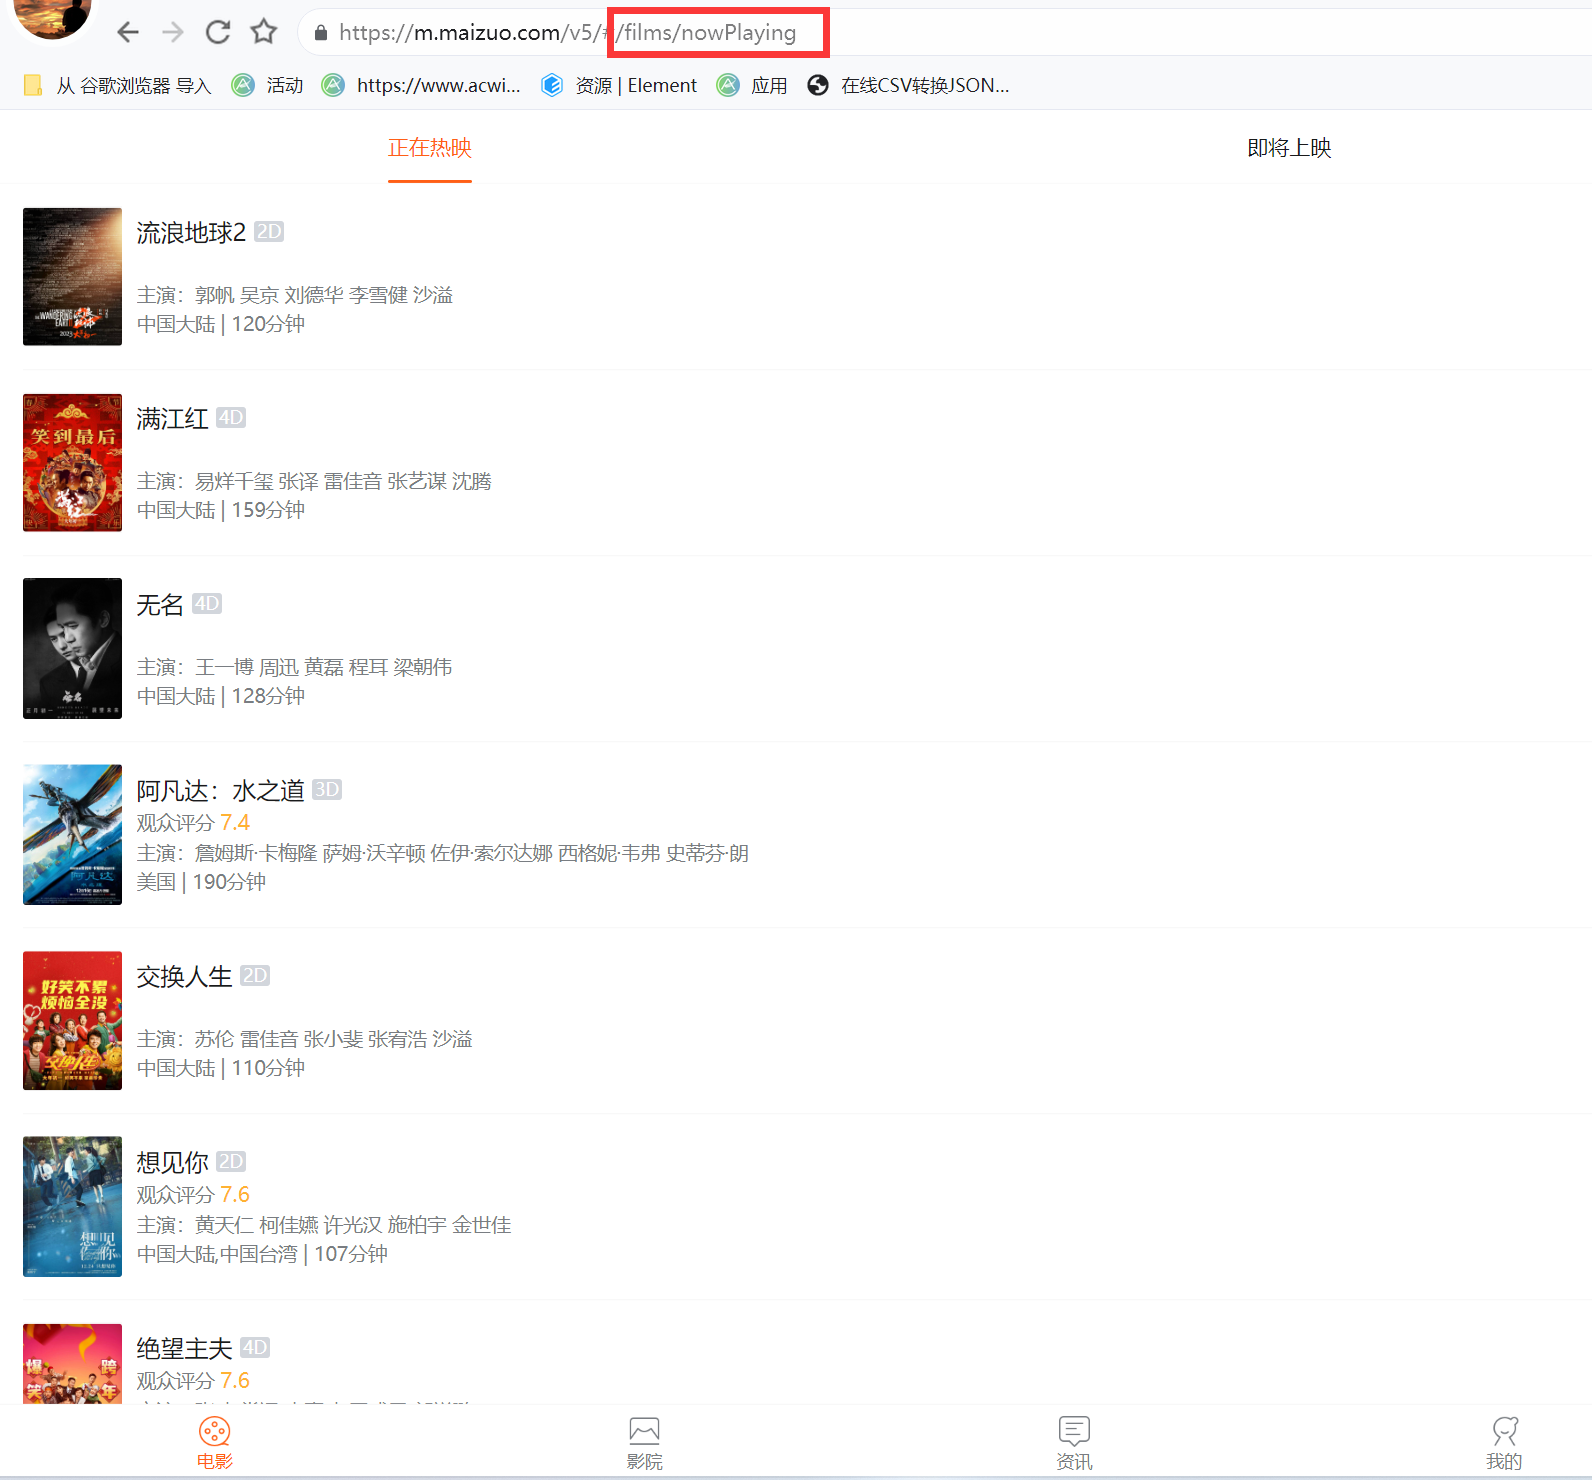
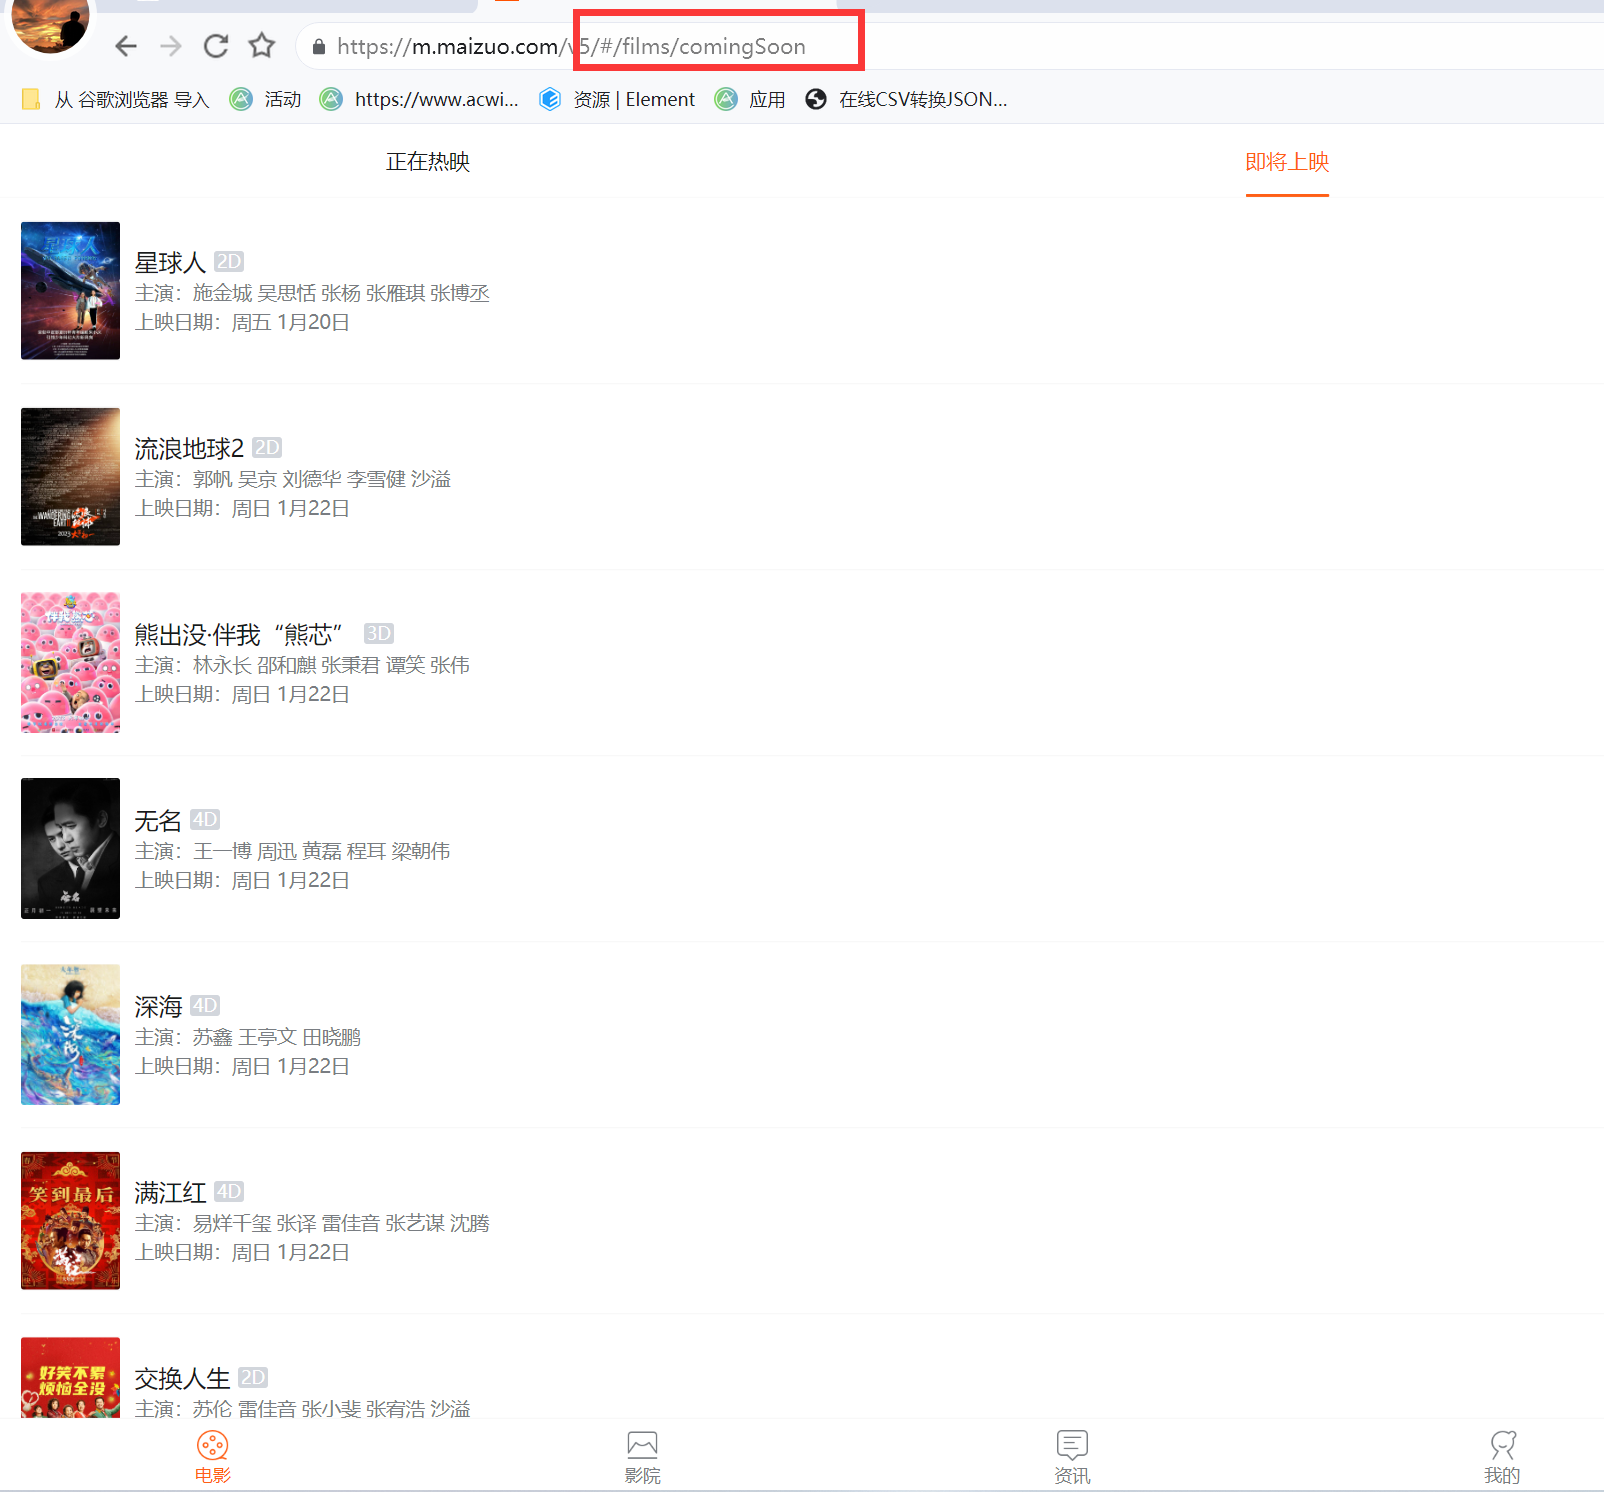
又或者说是这个:这个nowPlaying和comingSoon都是films下的子路由
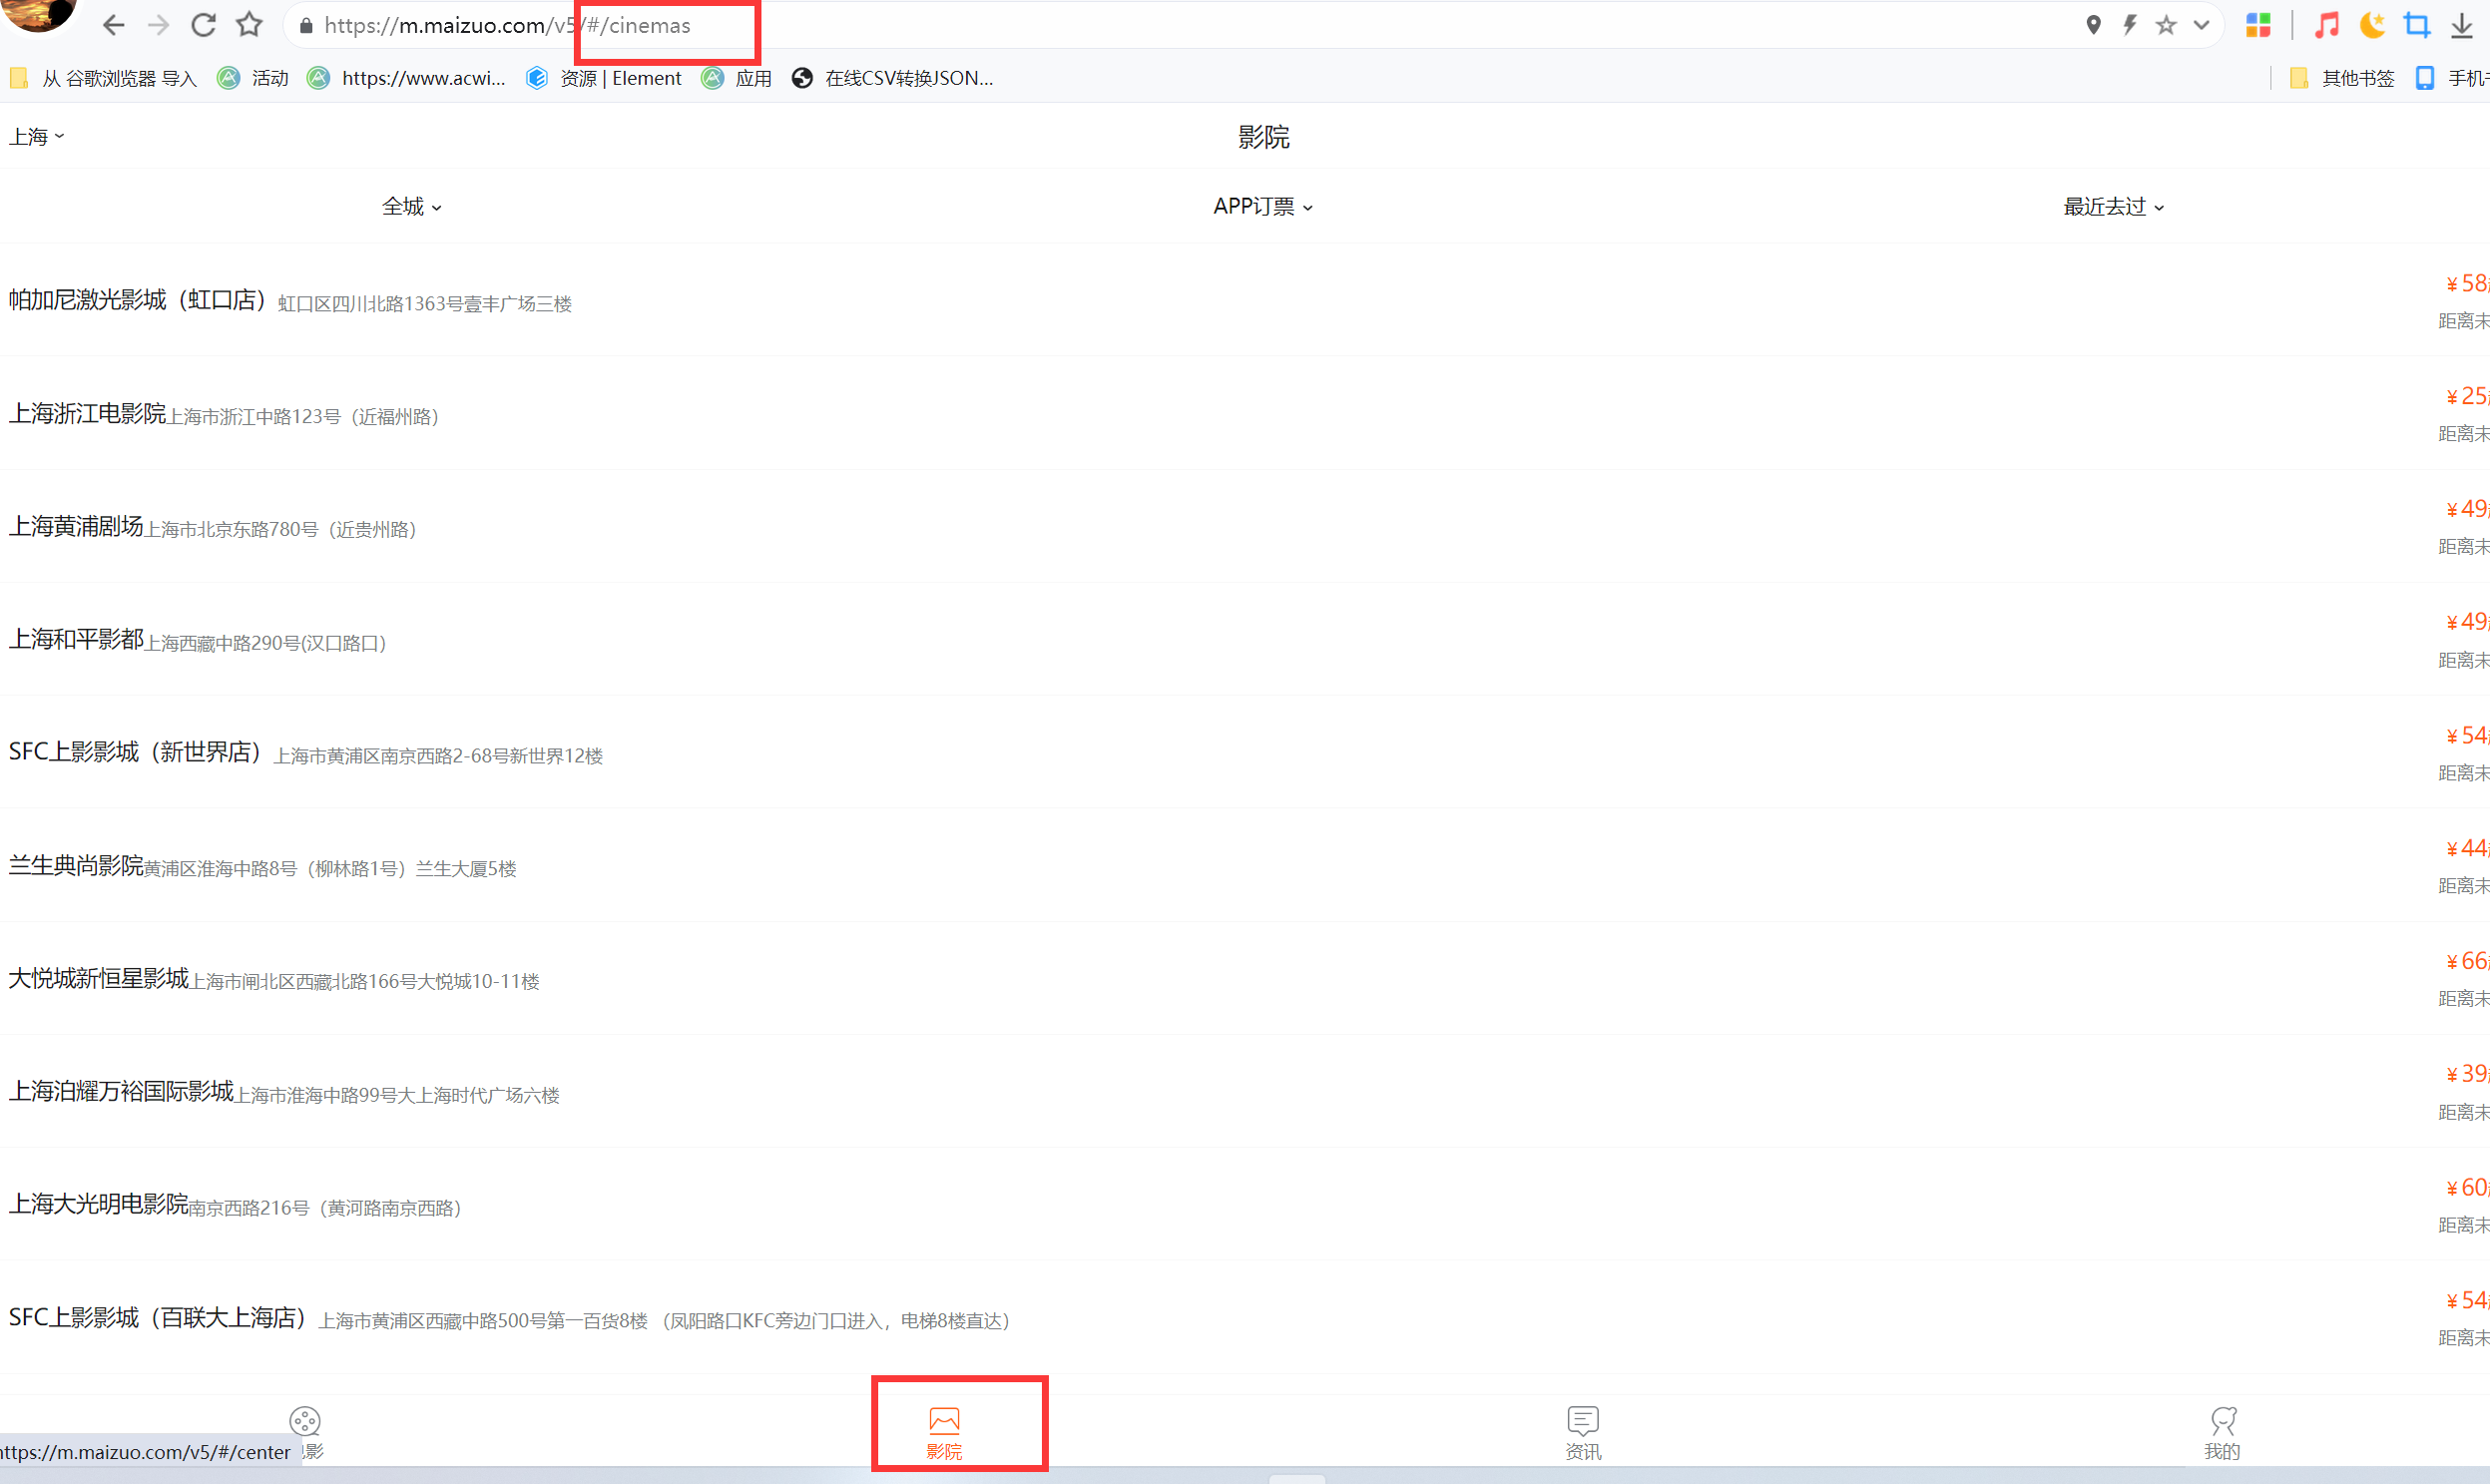
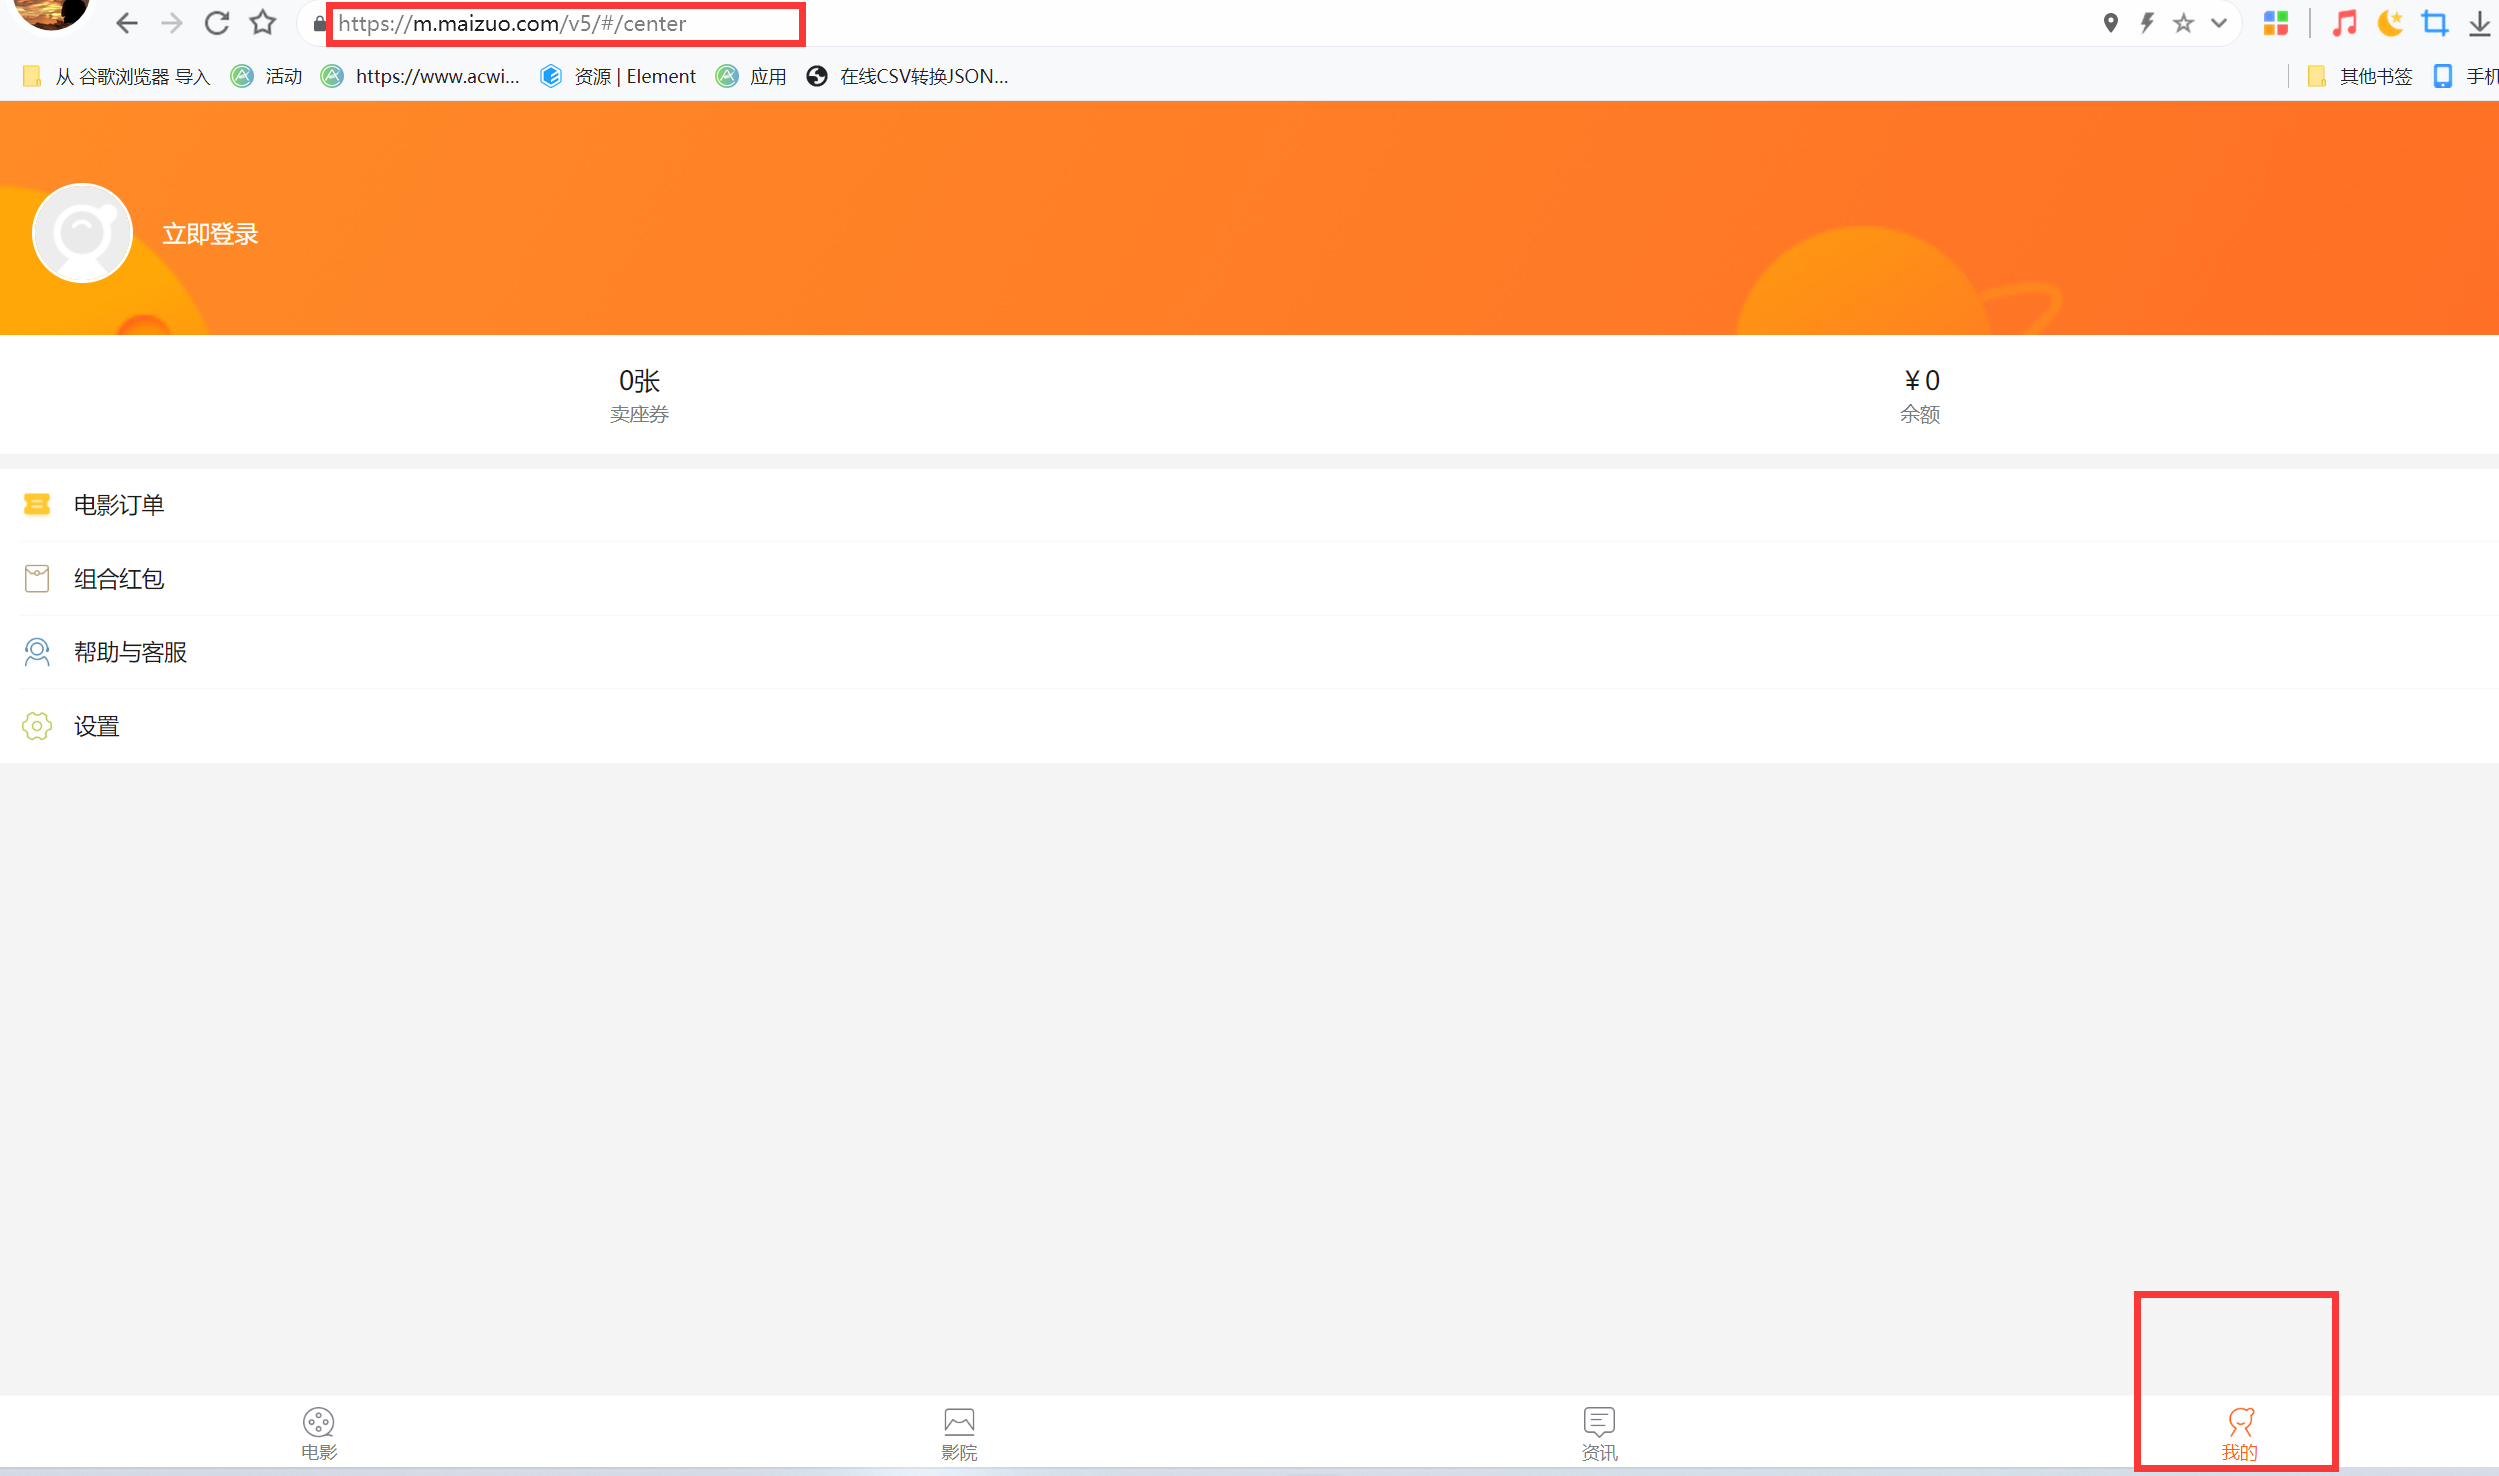
在看一下这个:这个/center和/cinemas但是一级的路由
然后看看这个后台管理系统的结构,大体是这样的:

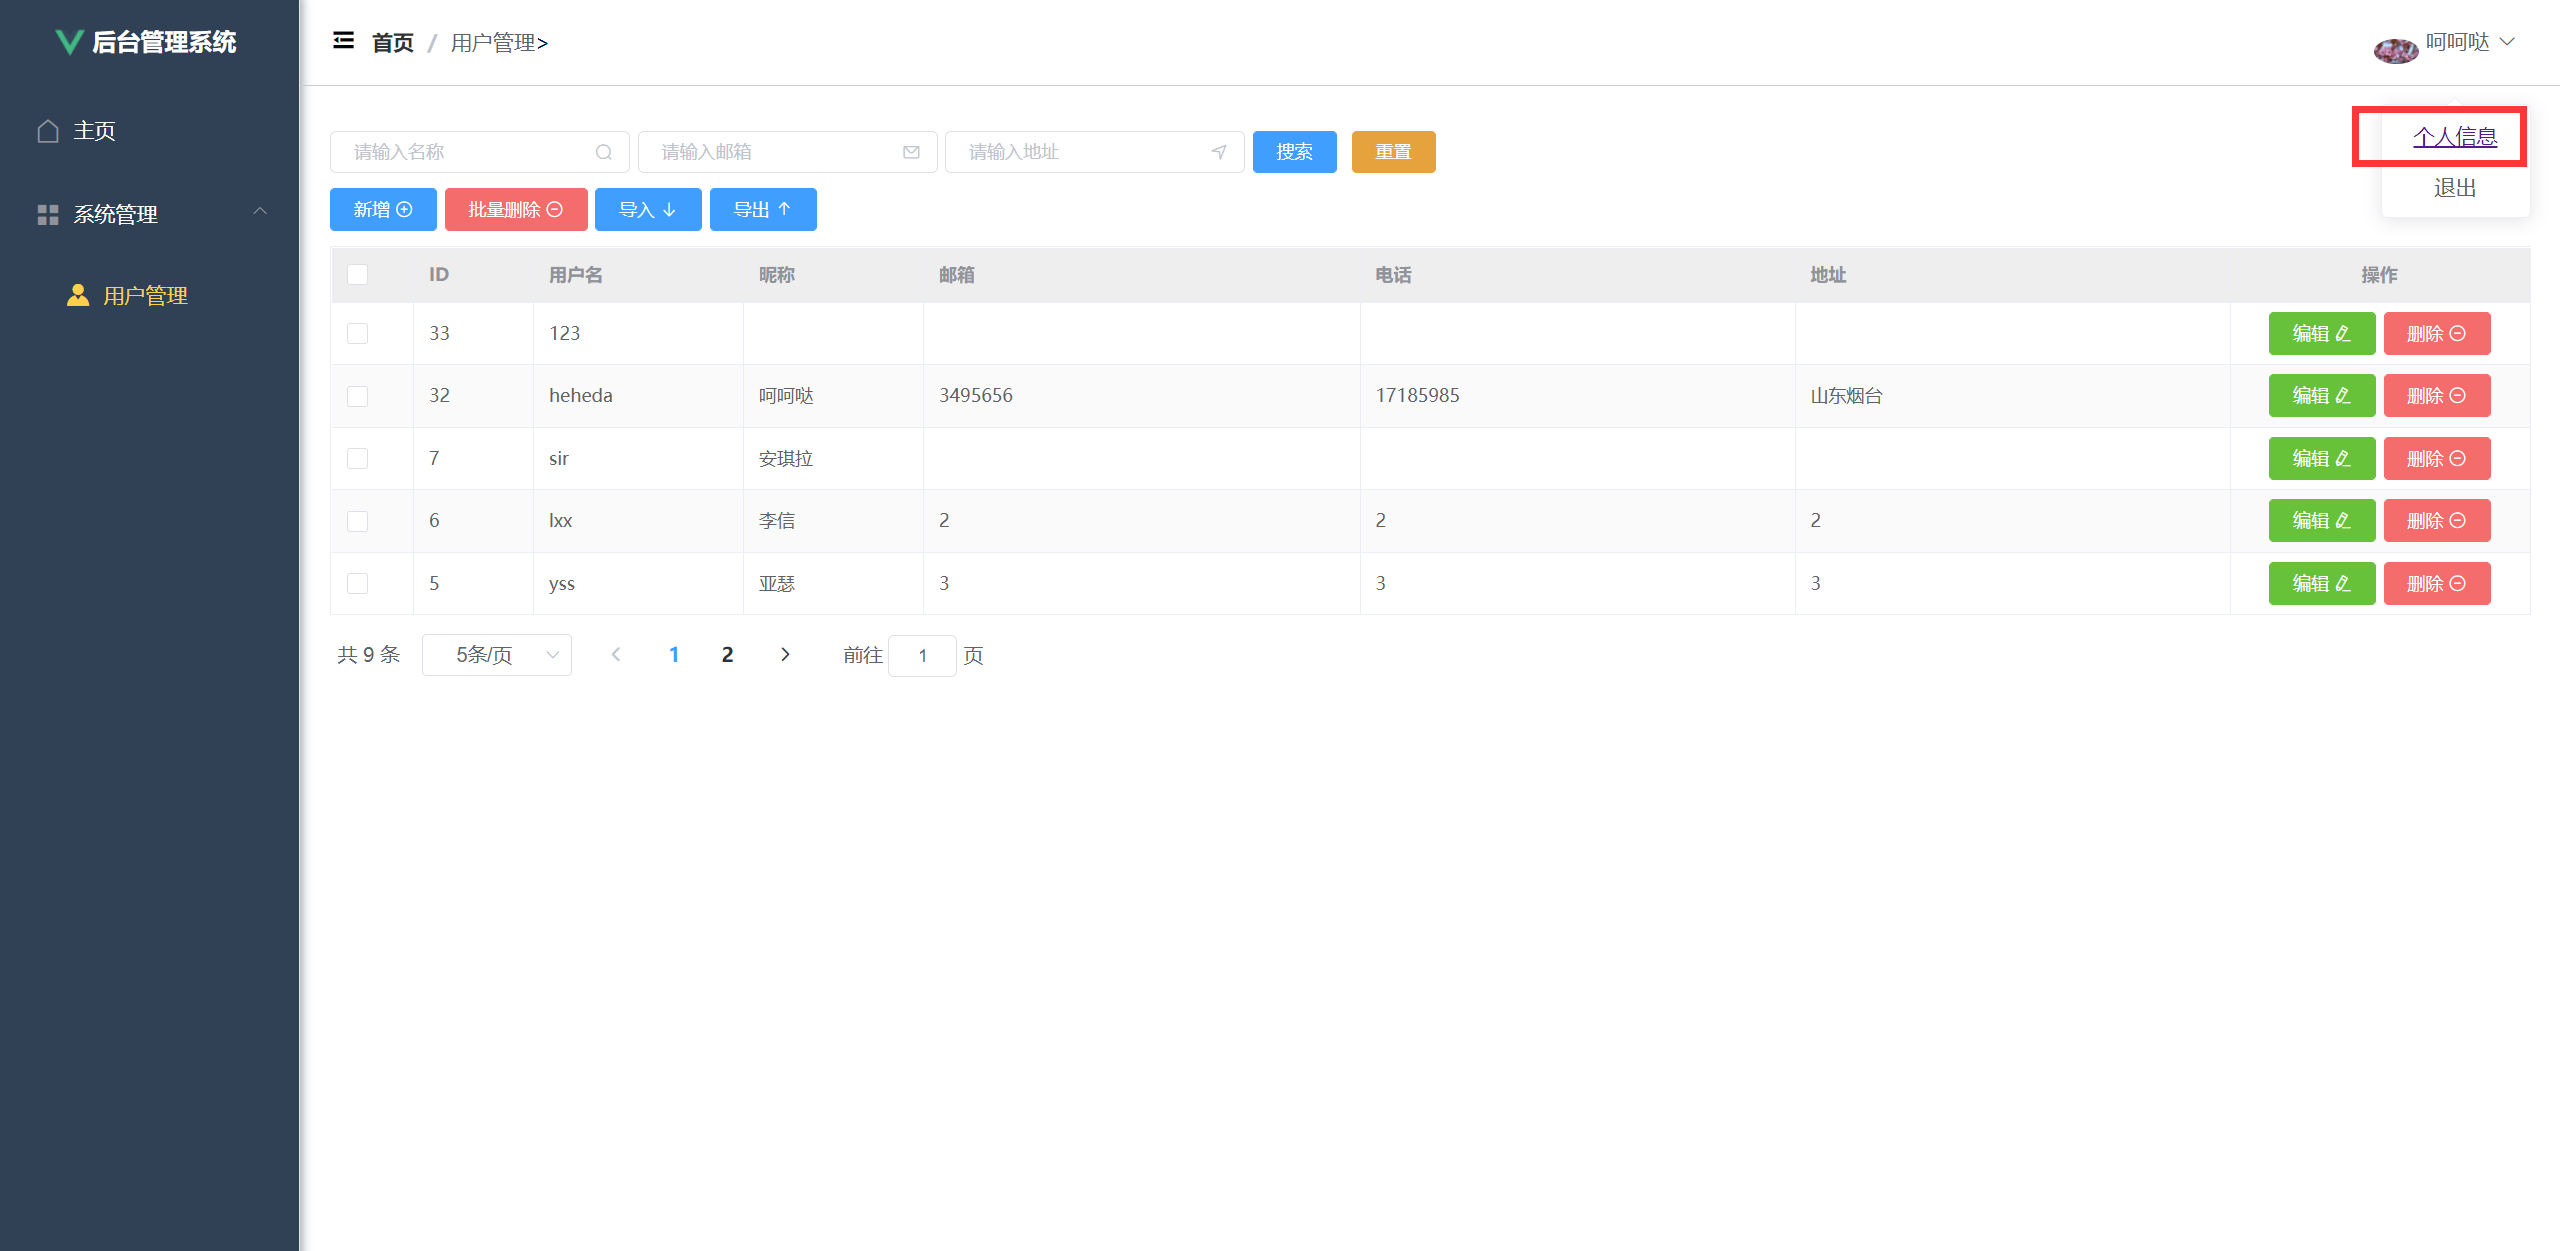
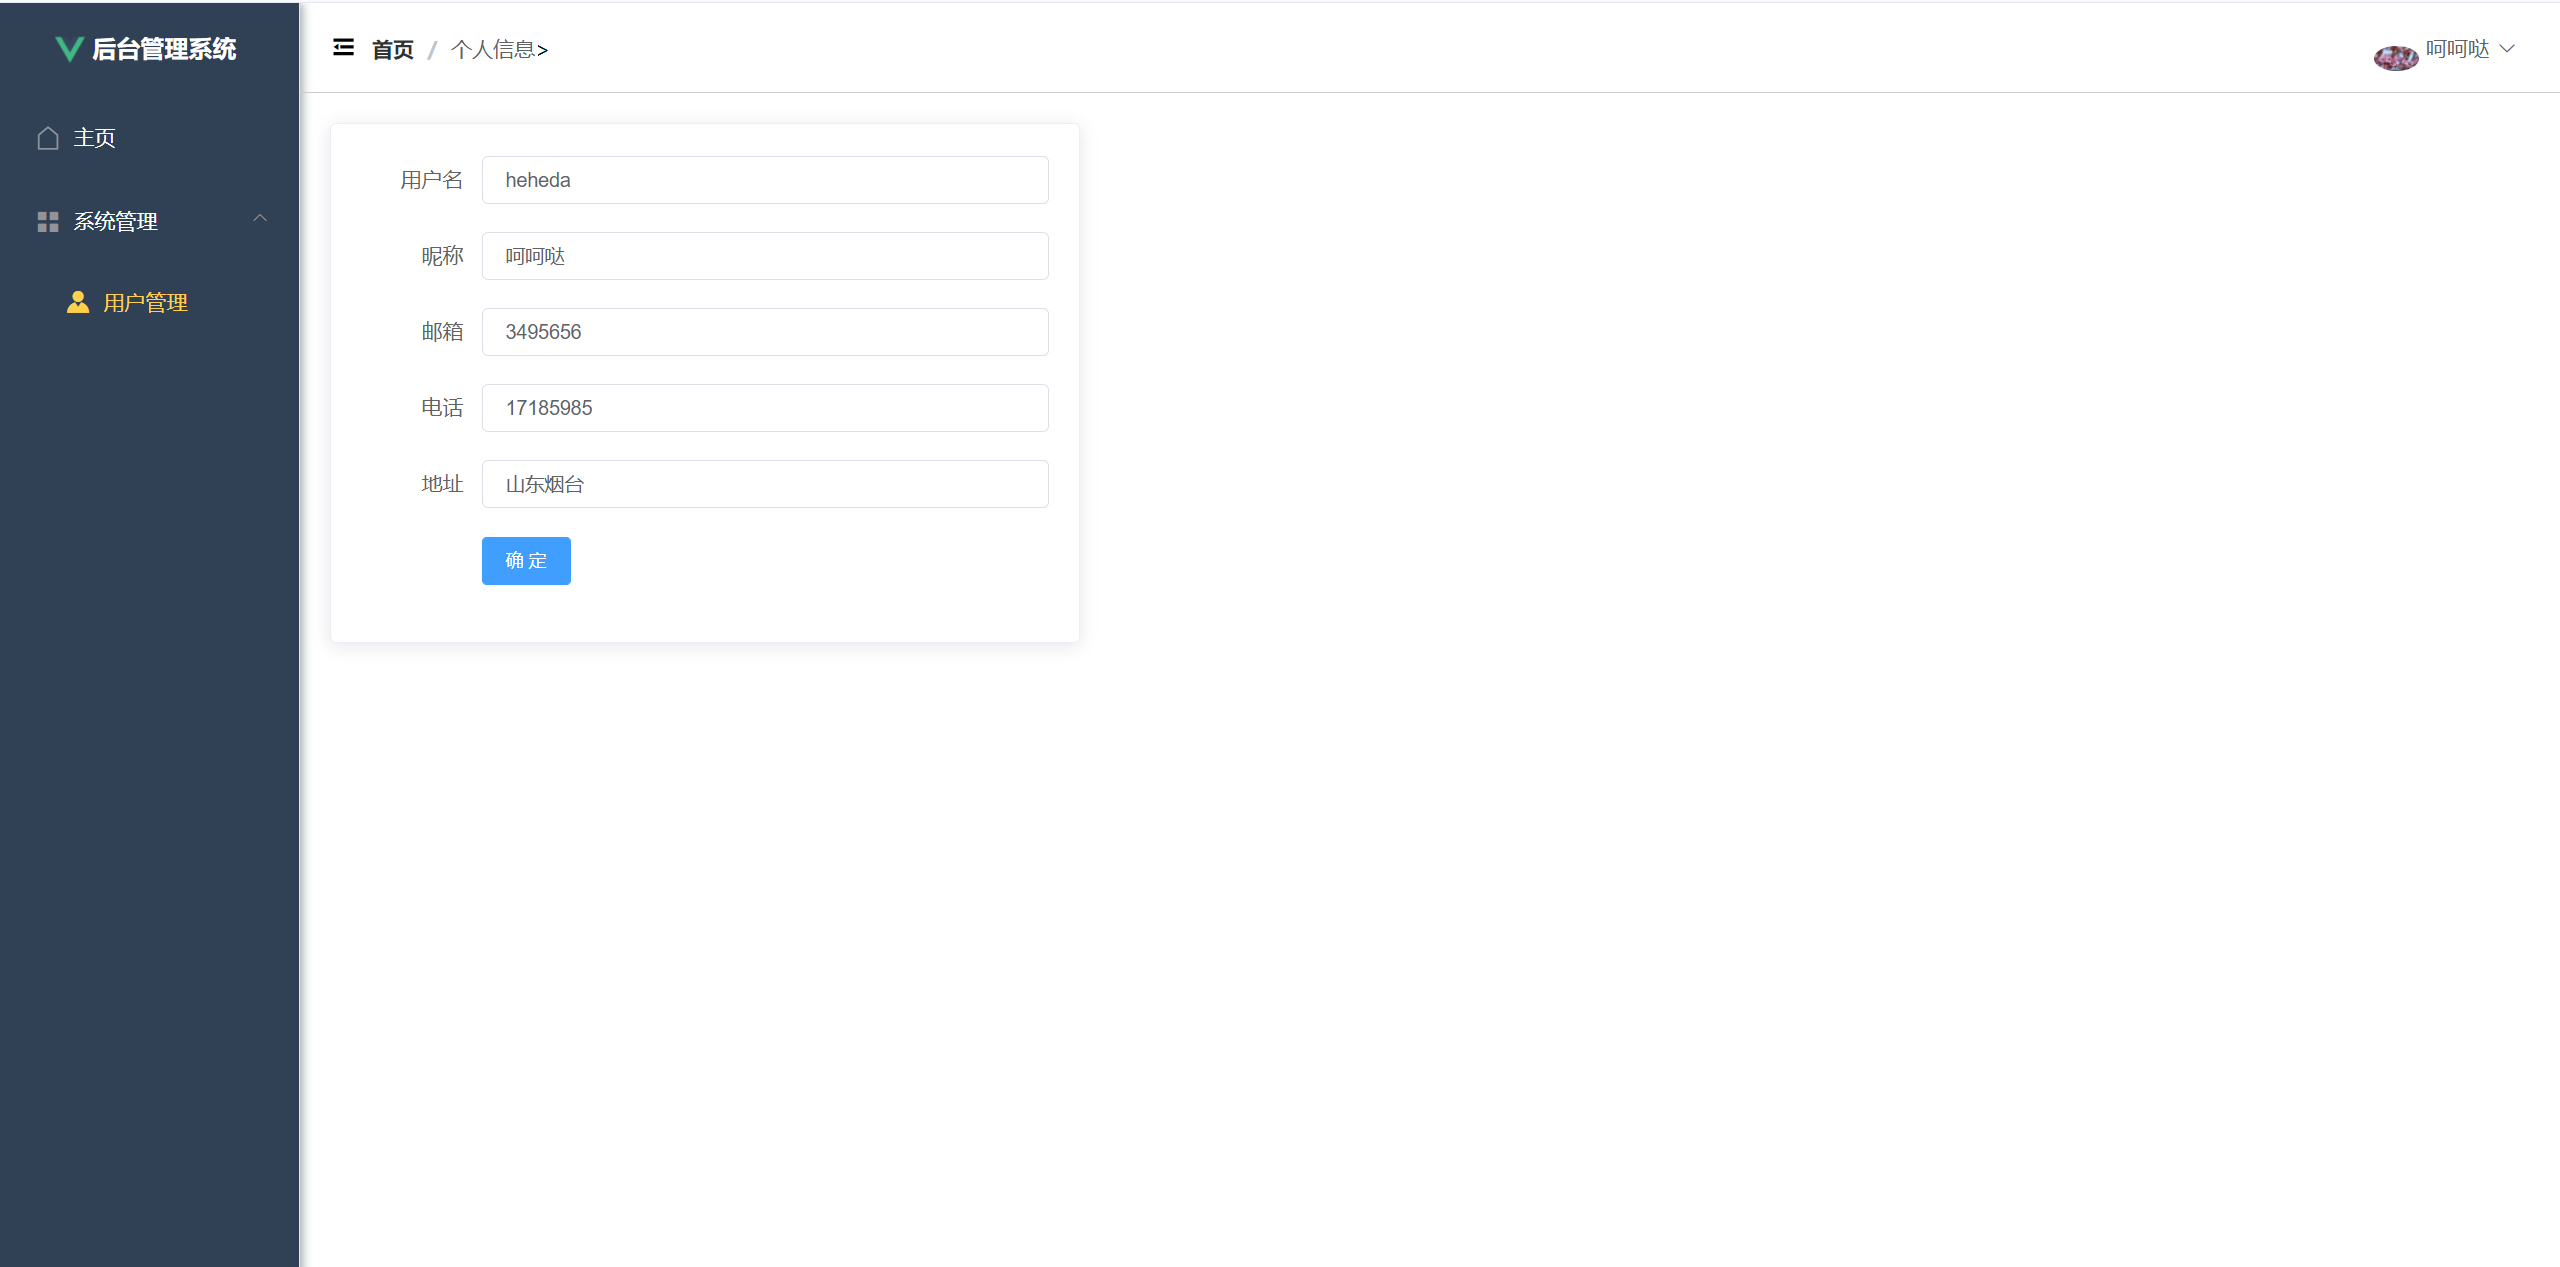
这个结构是这样的:然后这左边和头部都用的是组件,还用到了组件传值和调用组件中的方法,不会的可以看这个传送门
看这个中间部分用了一个<router-view/>这里面是二级路由要显示的东西
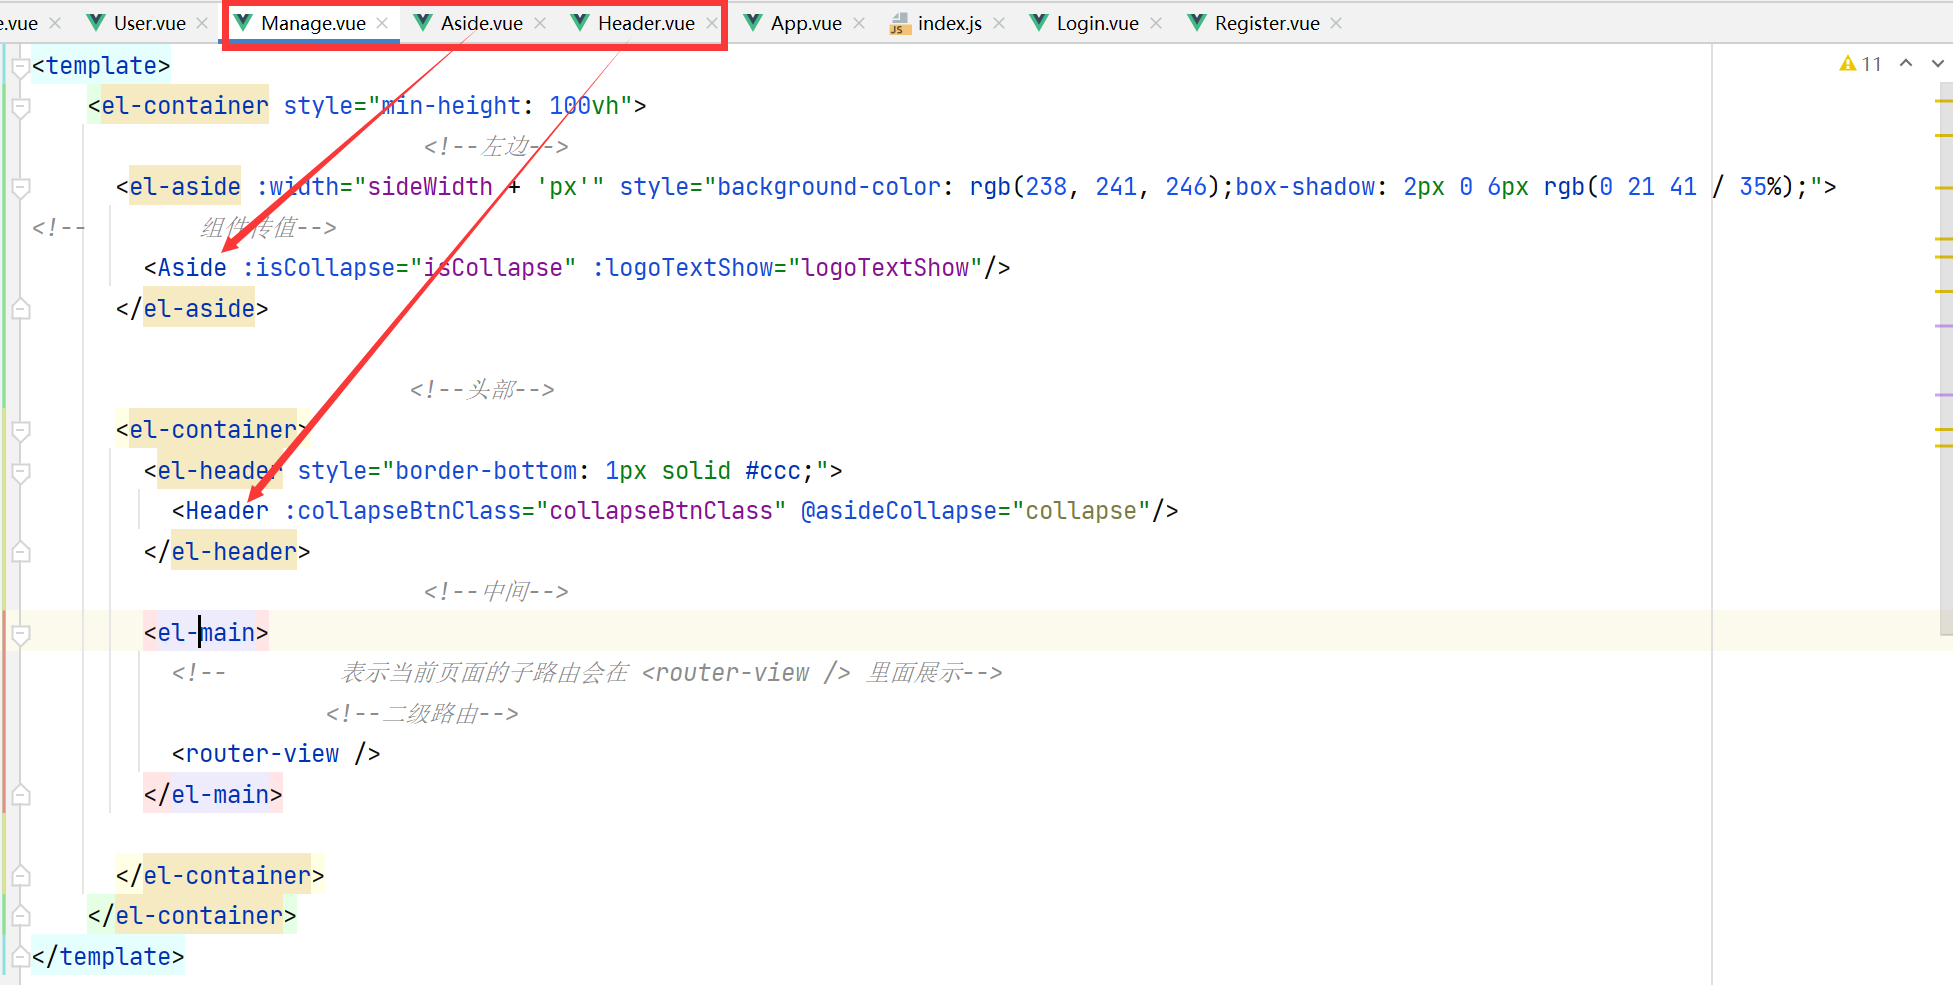
这个是Aside:
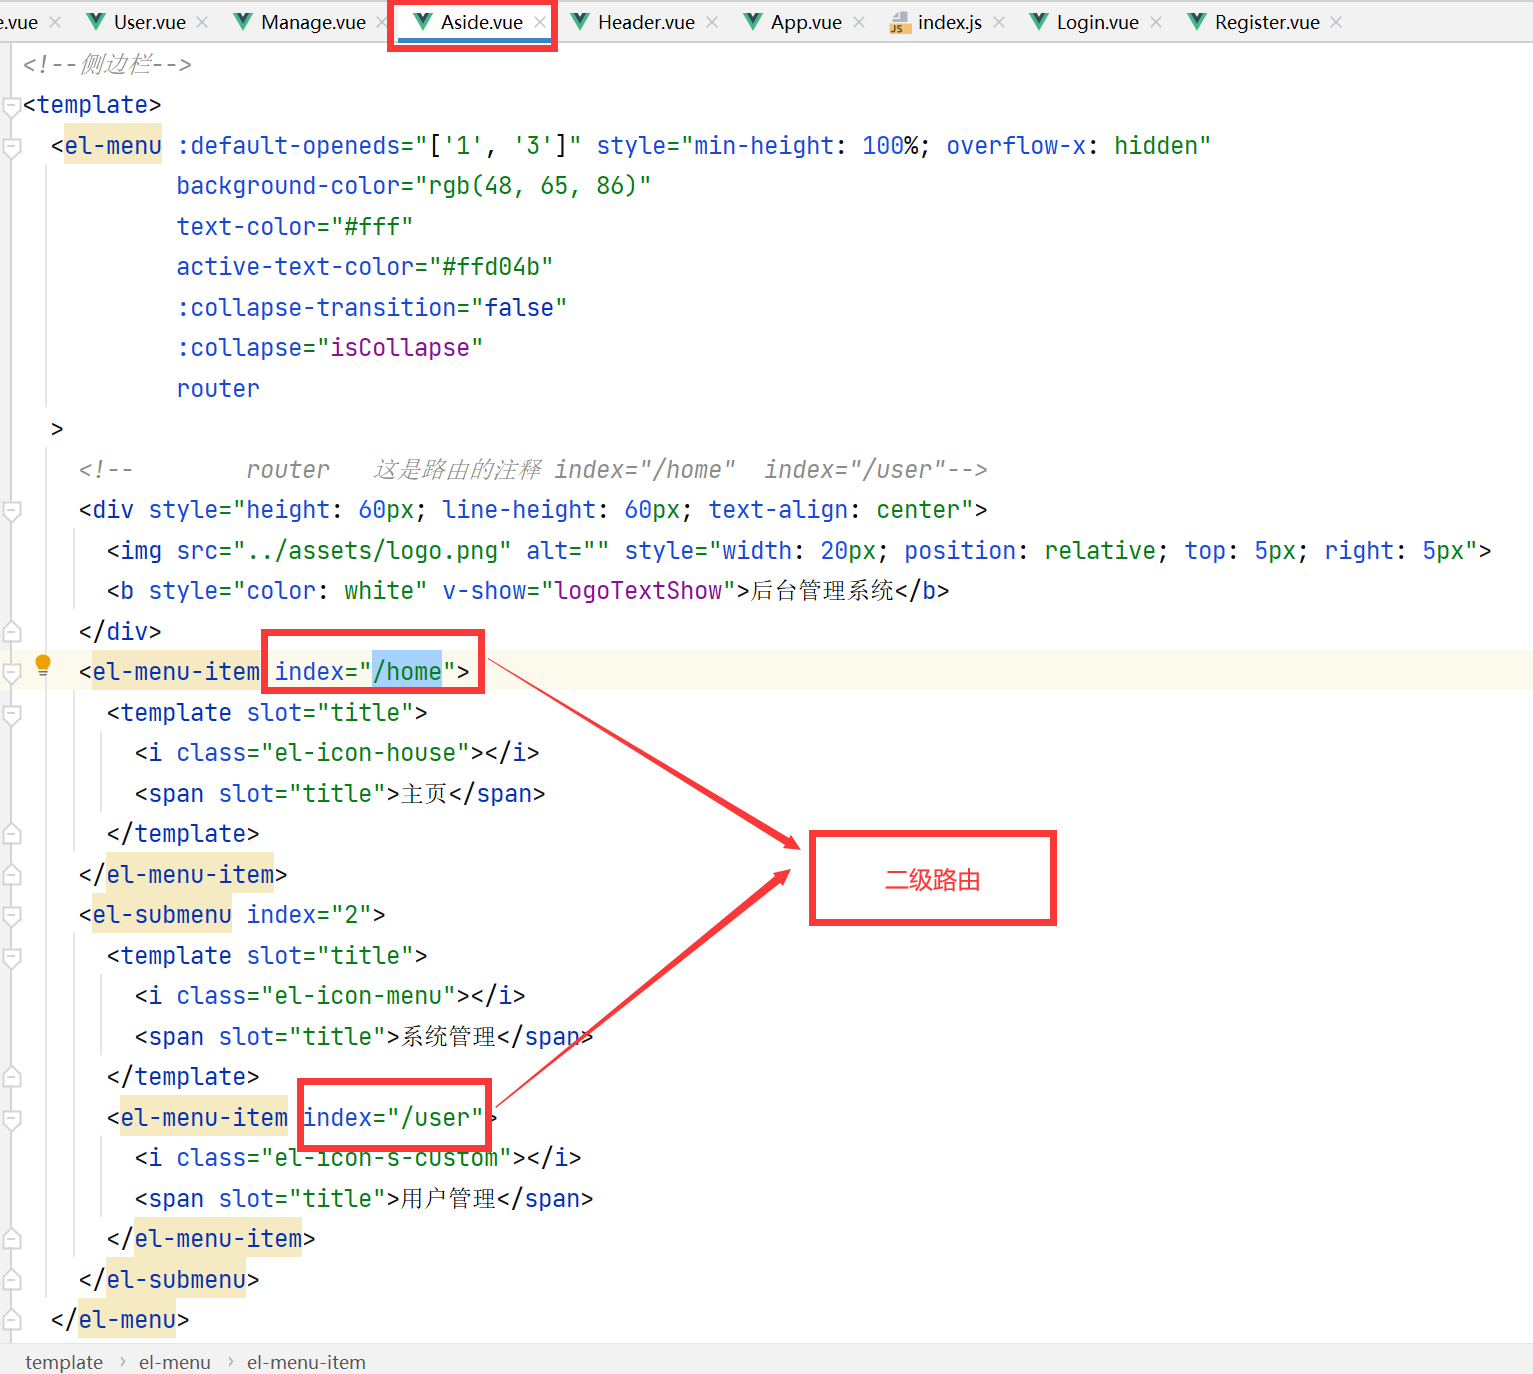
然后看看这个Heard
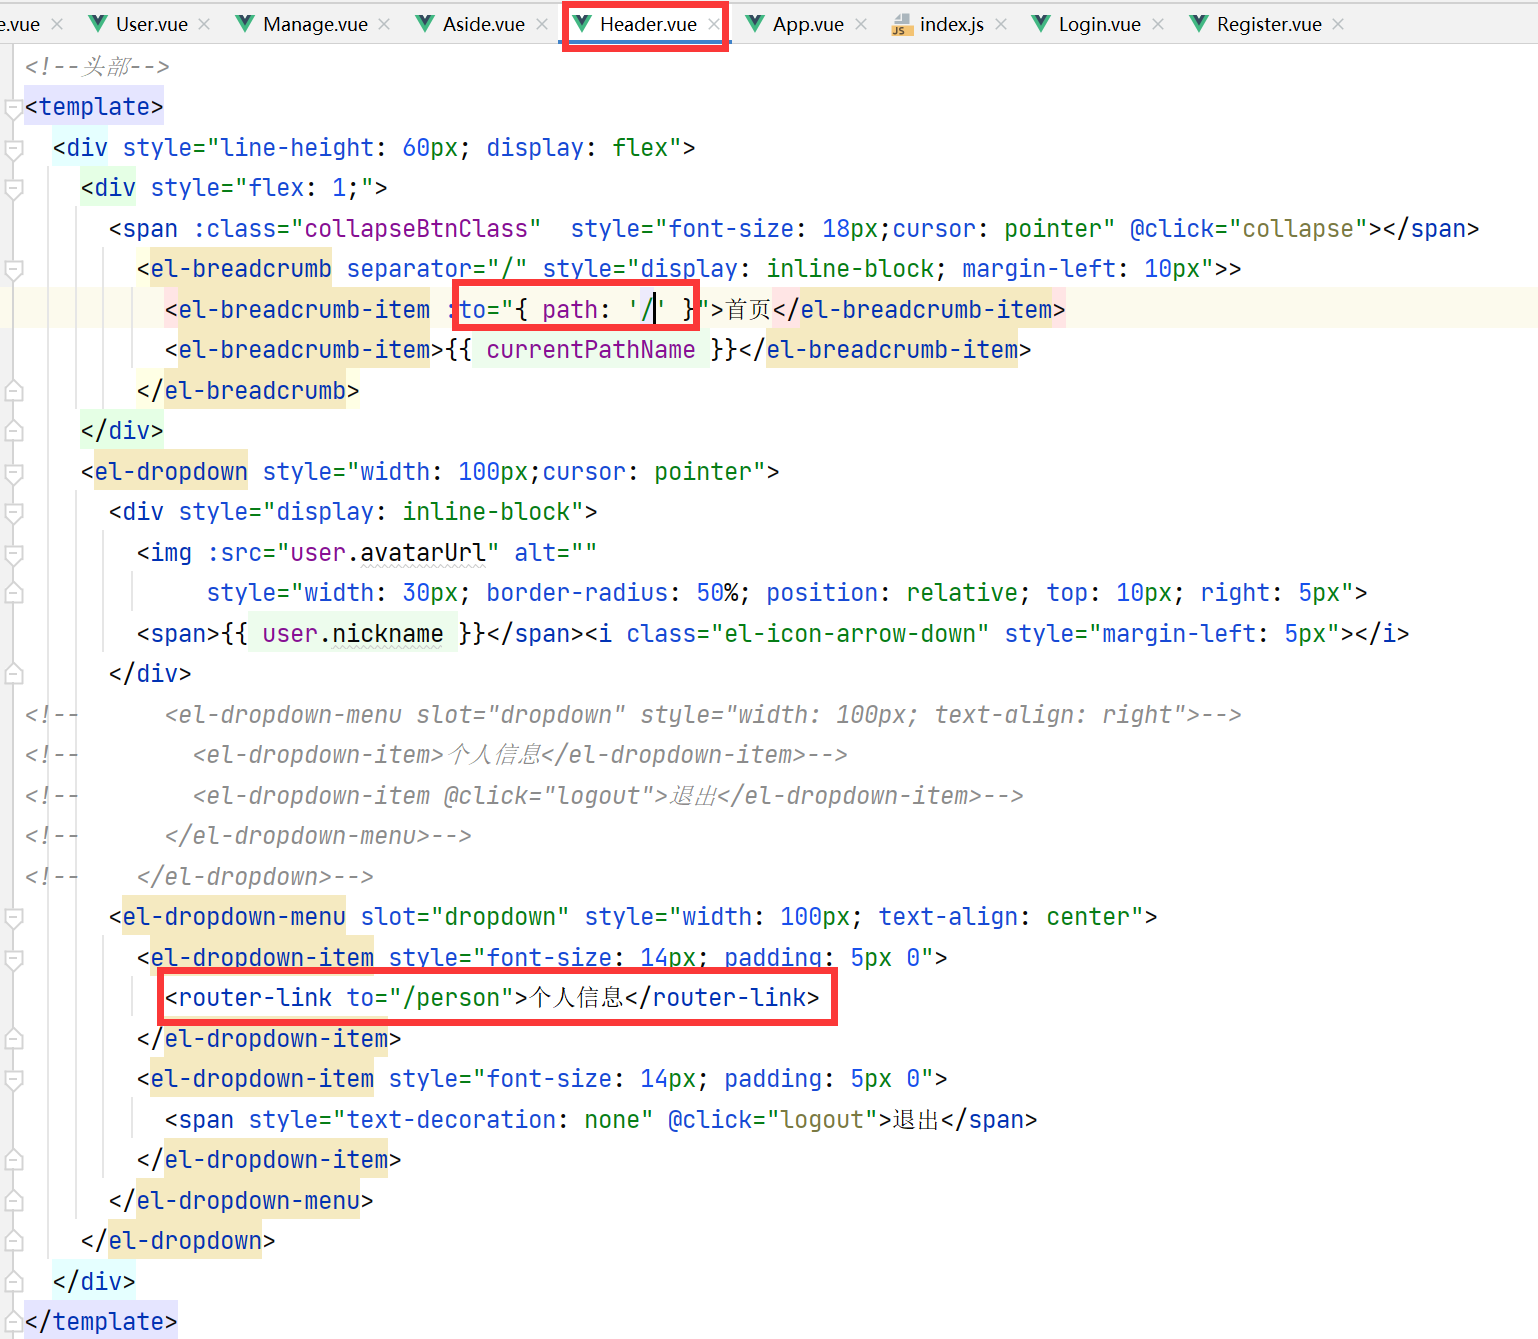
这个个人信息用的是el-card
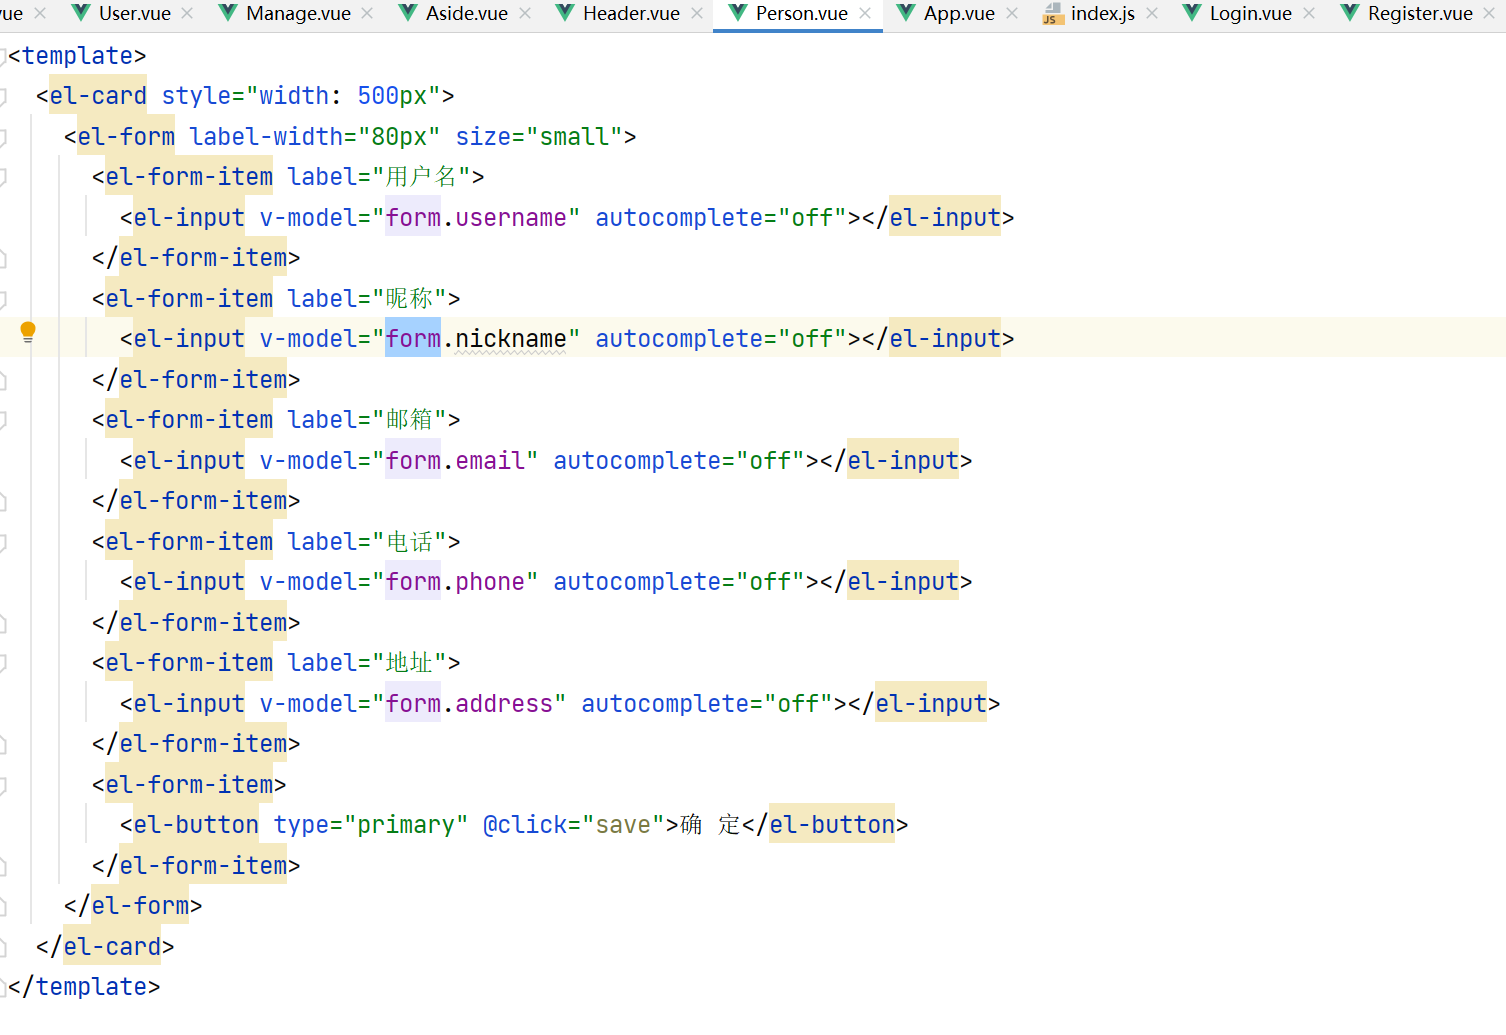
这个用的是element组件


【推荐】国内首个AI IDE,深度理解中文开发场景,立即下载体验Trae
【推荐】编程新体验,更懂你的AI,立即体验豆包MarsCode编程助手
【推荐】抖音旗下AI助手豆包,你的智能百科全书,全免费不限次数
【推荐】轻量又高性能的 SSH 工具 IShell:AI 加持,快人一步
· 震惊!C++程序真的从main开始吗?99%的程序员都答错了
· 【硬核科普】Trae如何「偷看」你的代码?零基础破解AI编程运行原理
· 单元测试从入门到精通
· 上周热点回顾(3.3-3.9)
· winform 绘制太阳,地球,月球 运作规律
2021-01-16 dp迷宫方案数
2021-01-16 输出最长上升子序列的方案
2021-01-16 最大化k*g