yum安装zabbix5.0并配置监控告警
1.搭建基础环境lamp
关闭防火墙与selinux
systemctl stop firewalld
setenforce 0
安装apache并启动
yum install httpd -y
systemctl enable --now httpd
安装数据库并启动
yum install mariadb-server mariadb -y
systemctl enable --now mariadb
安装php
yum install php php-mysql php-gd php-pear -y
测试php
vim/var/www/html/testphp.php
编辑内容如下
<?php
phpinfo();
?>
重启apache
systemctl restart httpd
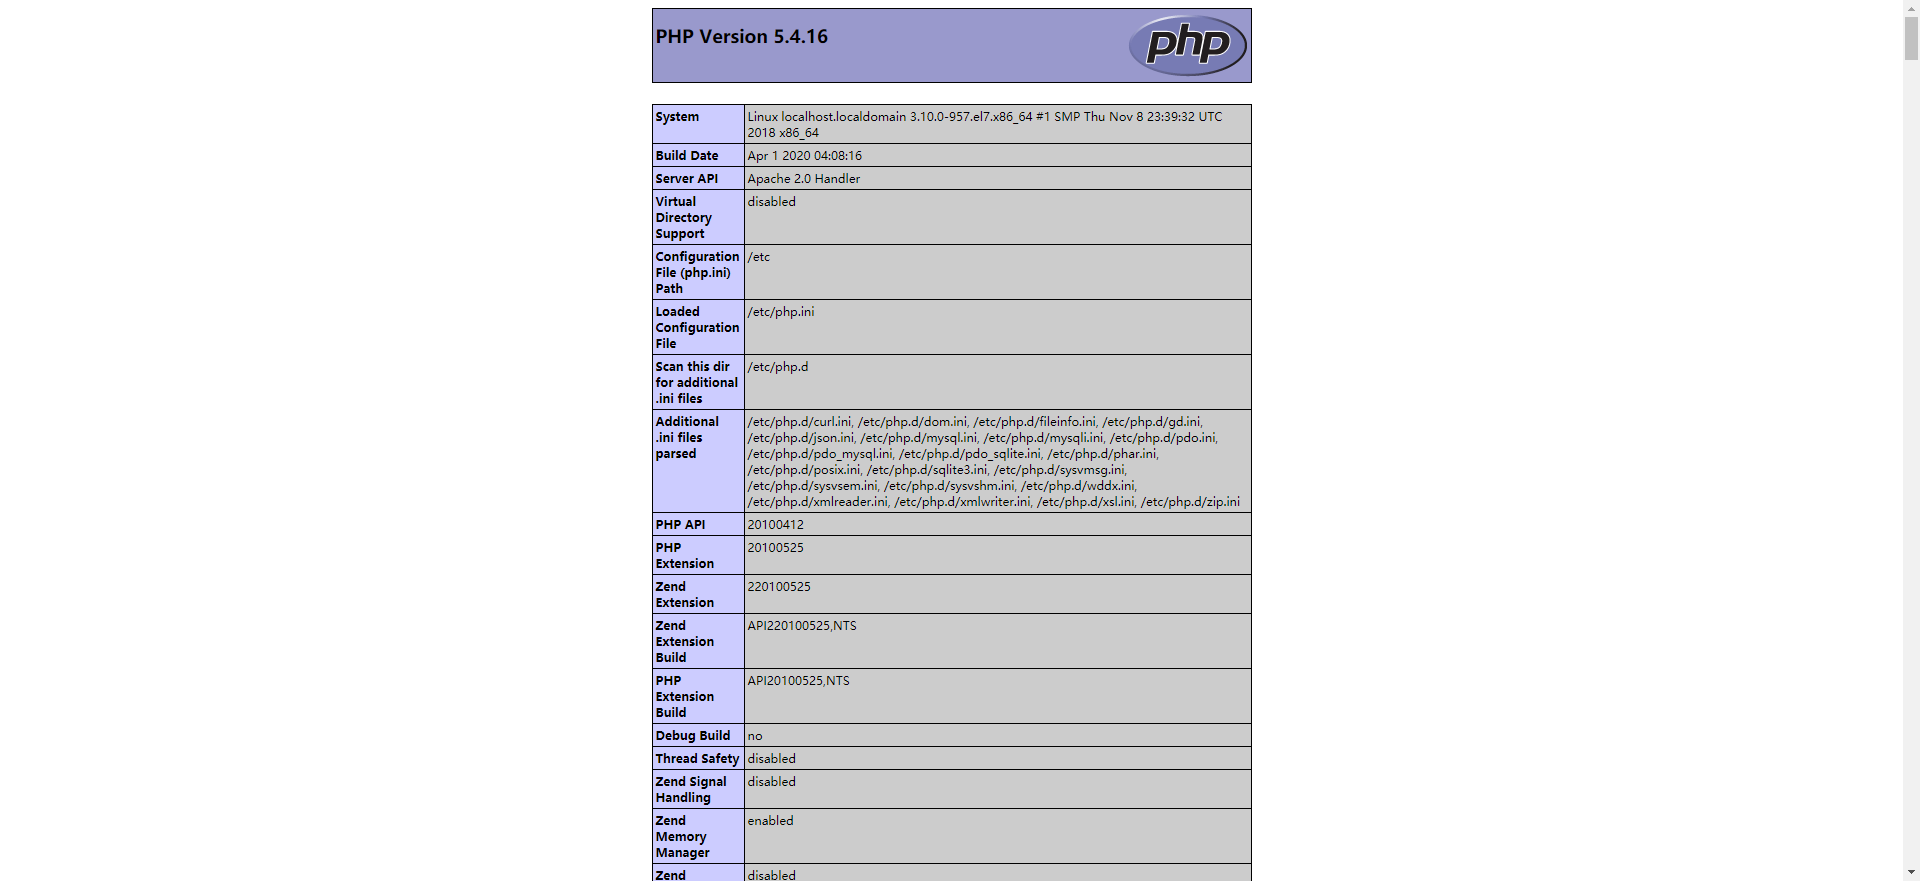
浏览器访问 http://server-ip-address/testphp.php. 将会显示php的版本信息.
2.安装zabbix
2.1下载zabbix官方源
rpm -Uvh https://repo.zabbix.com/zabbix/5.0/rhel/7/x86_64/zabbix-release-5.0-1.el7.noarch.rpm
yum clean all
yum makecache
2.2安装Zabbix服务器和代理
yum -y install zabbix-server-mysql zabbix-agent
2.3安装启用红帽软件插件
yum -y install centos-release-sc
2.4编辑文件/etc/yum.repos.d/zabbix.repo并启用zabbix-frontend存储库
[zabbix-frontend]
...
enabled=1
...
2.5安装Zabbix前端软件包
yum -y install zabbix-web-mysql-scl zabbix-apache-conf-scl
2.6创建初始数据库
mysql -uroot
MariaDB [(none)]> create database zabbix character set utf8 collate utf8_bin;
Query OK, 1 row affected (0.00 sec)

MariaDB [(none)]> create user zabbix@localhost identified by '123456';         //密码自定义
Query OK, 0 rows affected (0.00 sec)

MariaDB [(none)]> grant all privileges on zabbix.* to zabbix@localhost;
Query OK, 0 rows affected (0.00 sec)

MariaDB [(none)]> flush privileges;
Query OK, 0 rows affected (0.00 sec)

MariaDB [(none)]> quit
Bye
2.7在Zabbix服务器主机上,导入初始架构和数据
zcat /usr/share/doc/zabbix-server-mysql-5.0.12/create.sql.gz |mysql -uzabbix -p'123456' zabbix
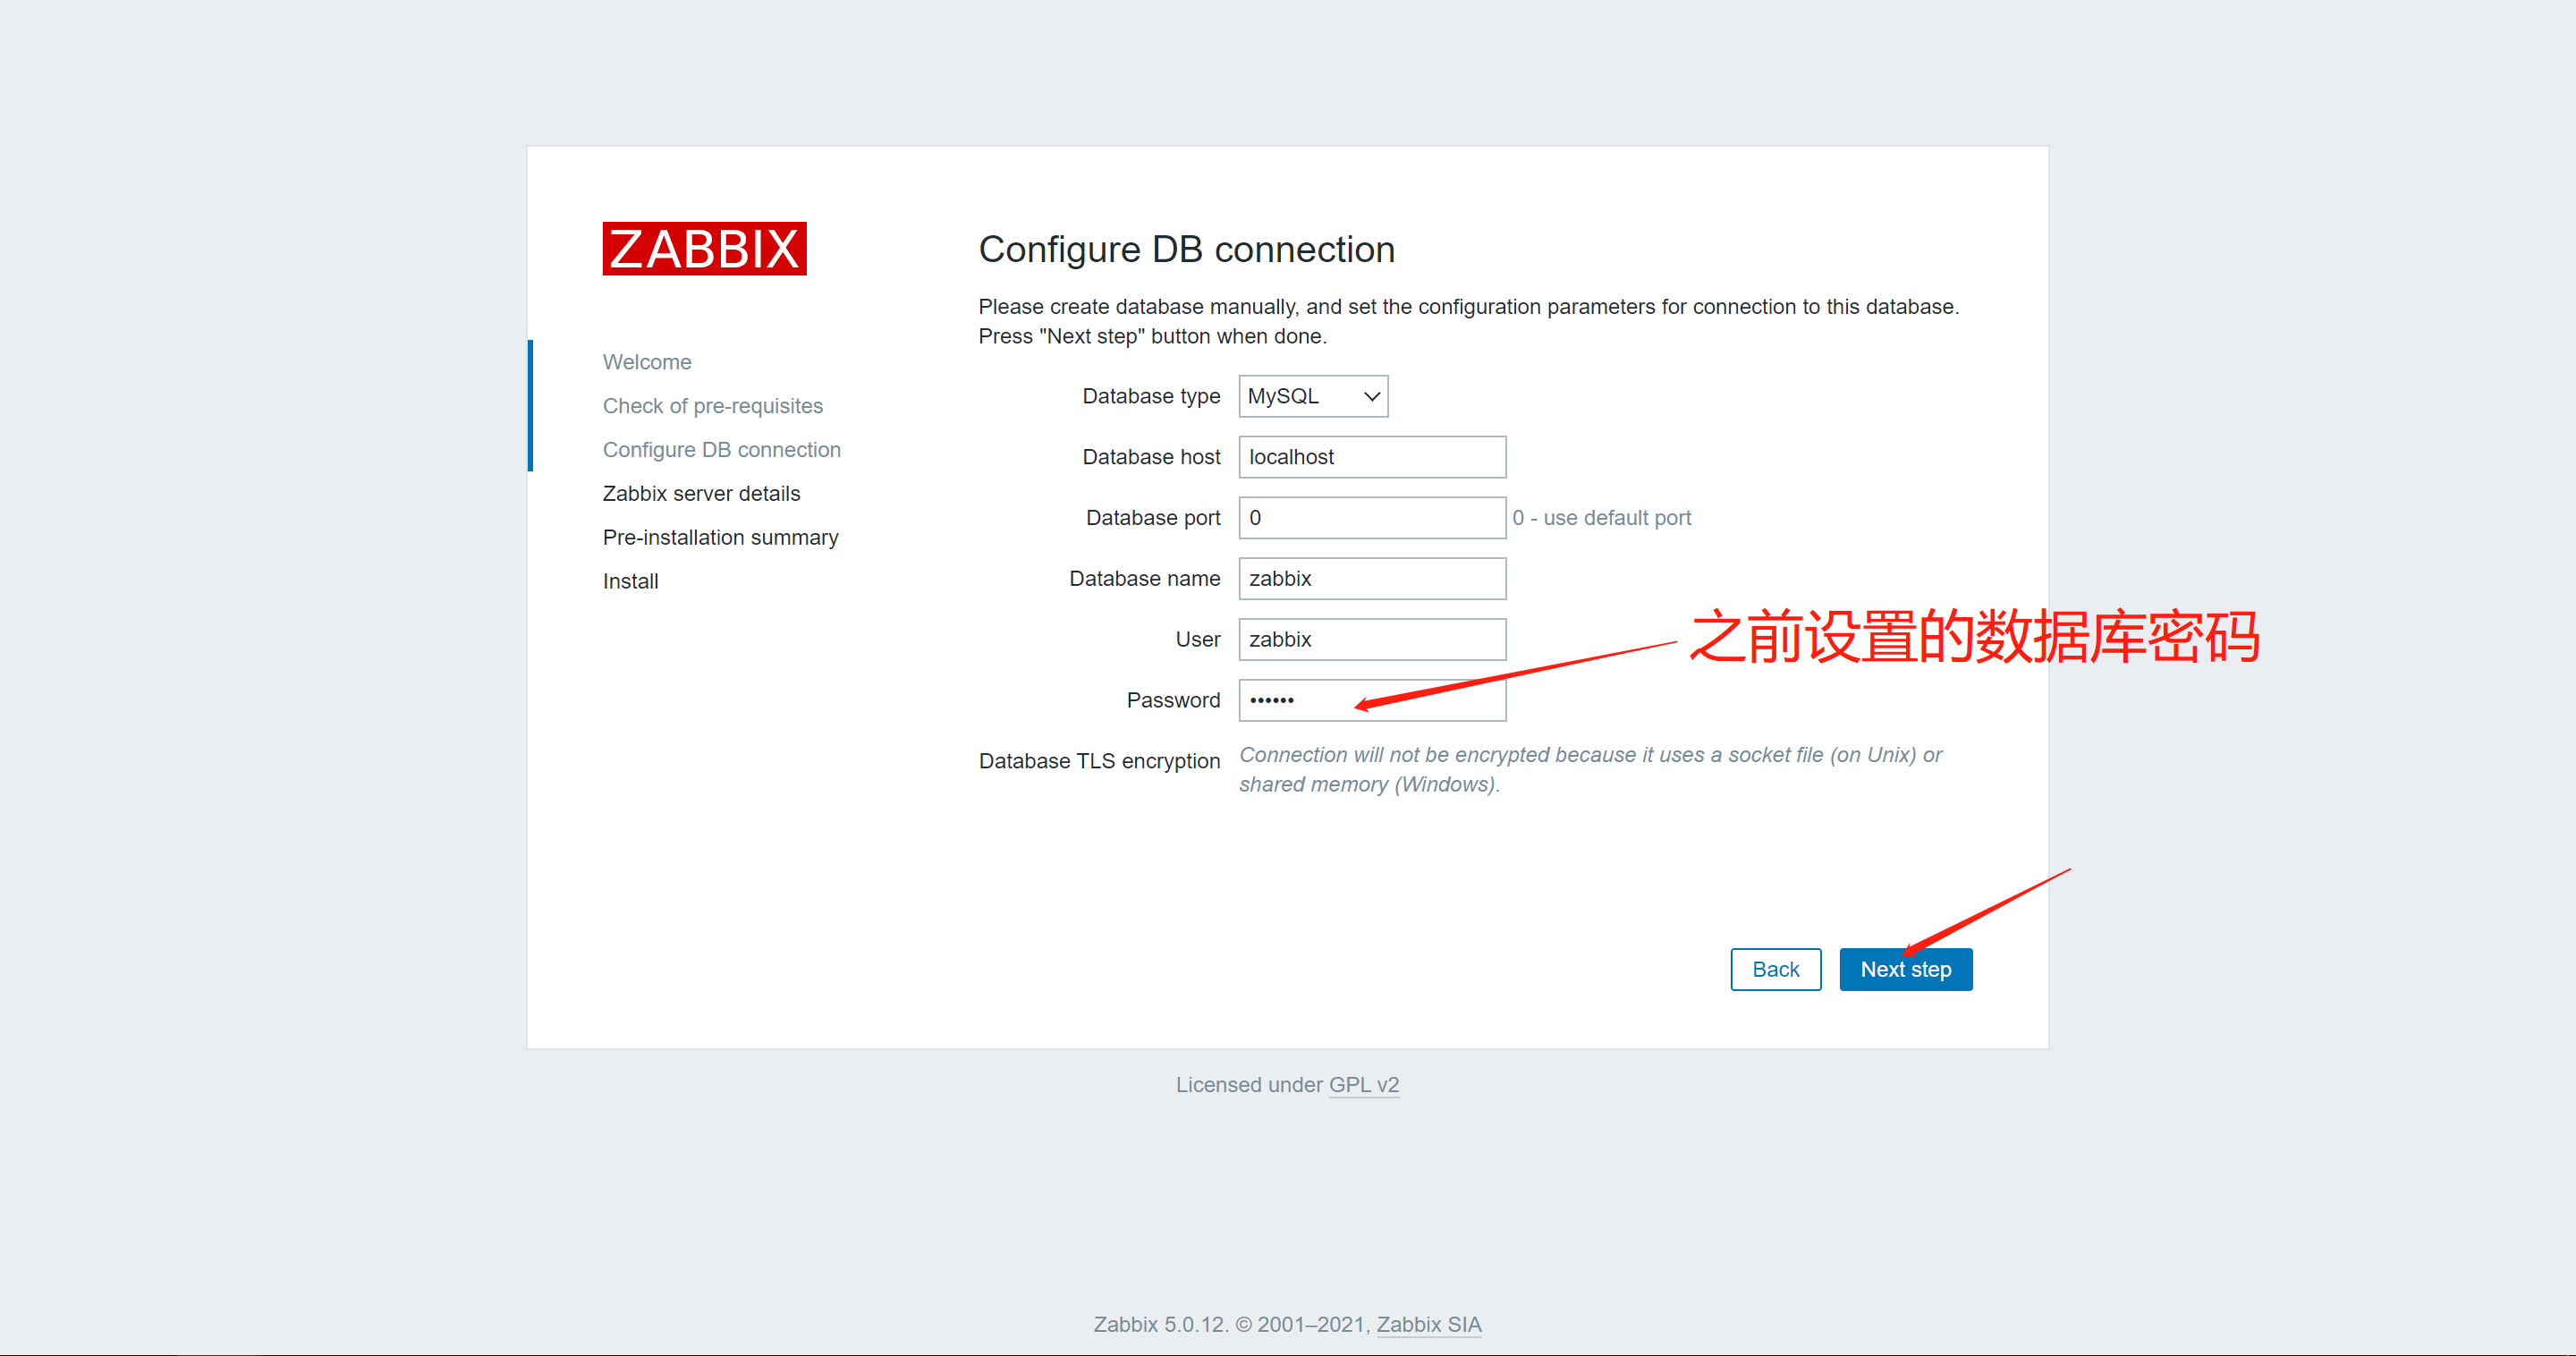
2.8编辑文件/etc/zabbix/zabbix_server.conf
DBHost=localhost    //取消这行注释
DBName=zabbix
DBUser=zabbix
DBPassword=123456   //取消注释并把密码改为之前设置的密码
2.9编辑文件/etc/opt/rh/rh-php72/php-fpm.d/zabbix.conf,取消注释并为您设置正确的时区
php_value[date.timezone] = Asia/Shanghai
2.10启动Zabbix服务器和代理进程
systemctl restart zabbix-server zabbix-agent httpd rh-php72-php-fpm
systemctl enable zabbix-server zabbix-agent httpd rh-php72-php-fpm
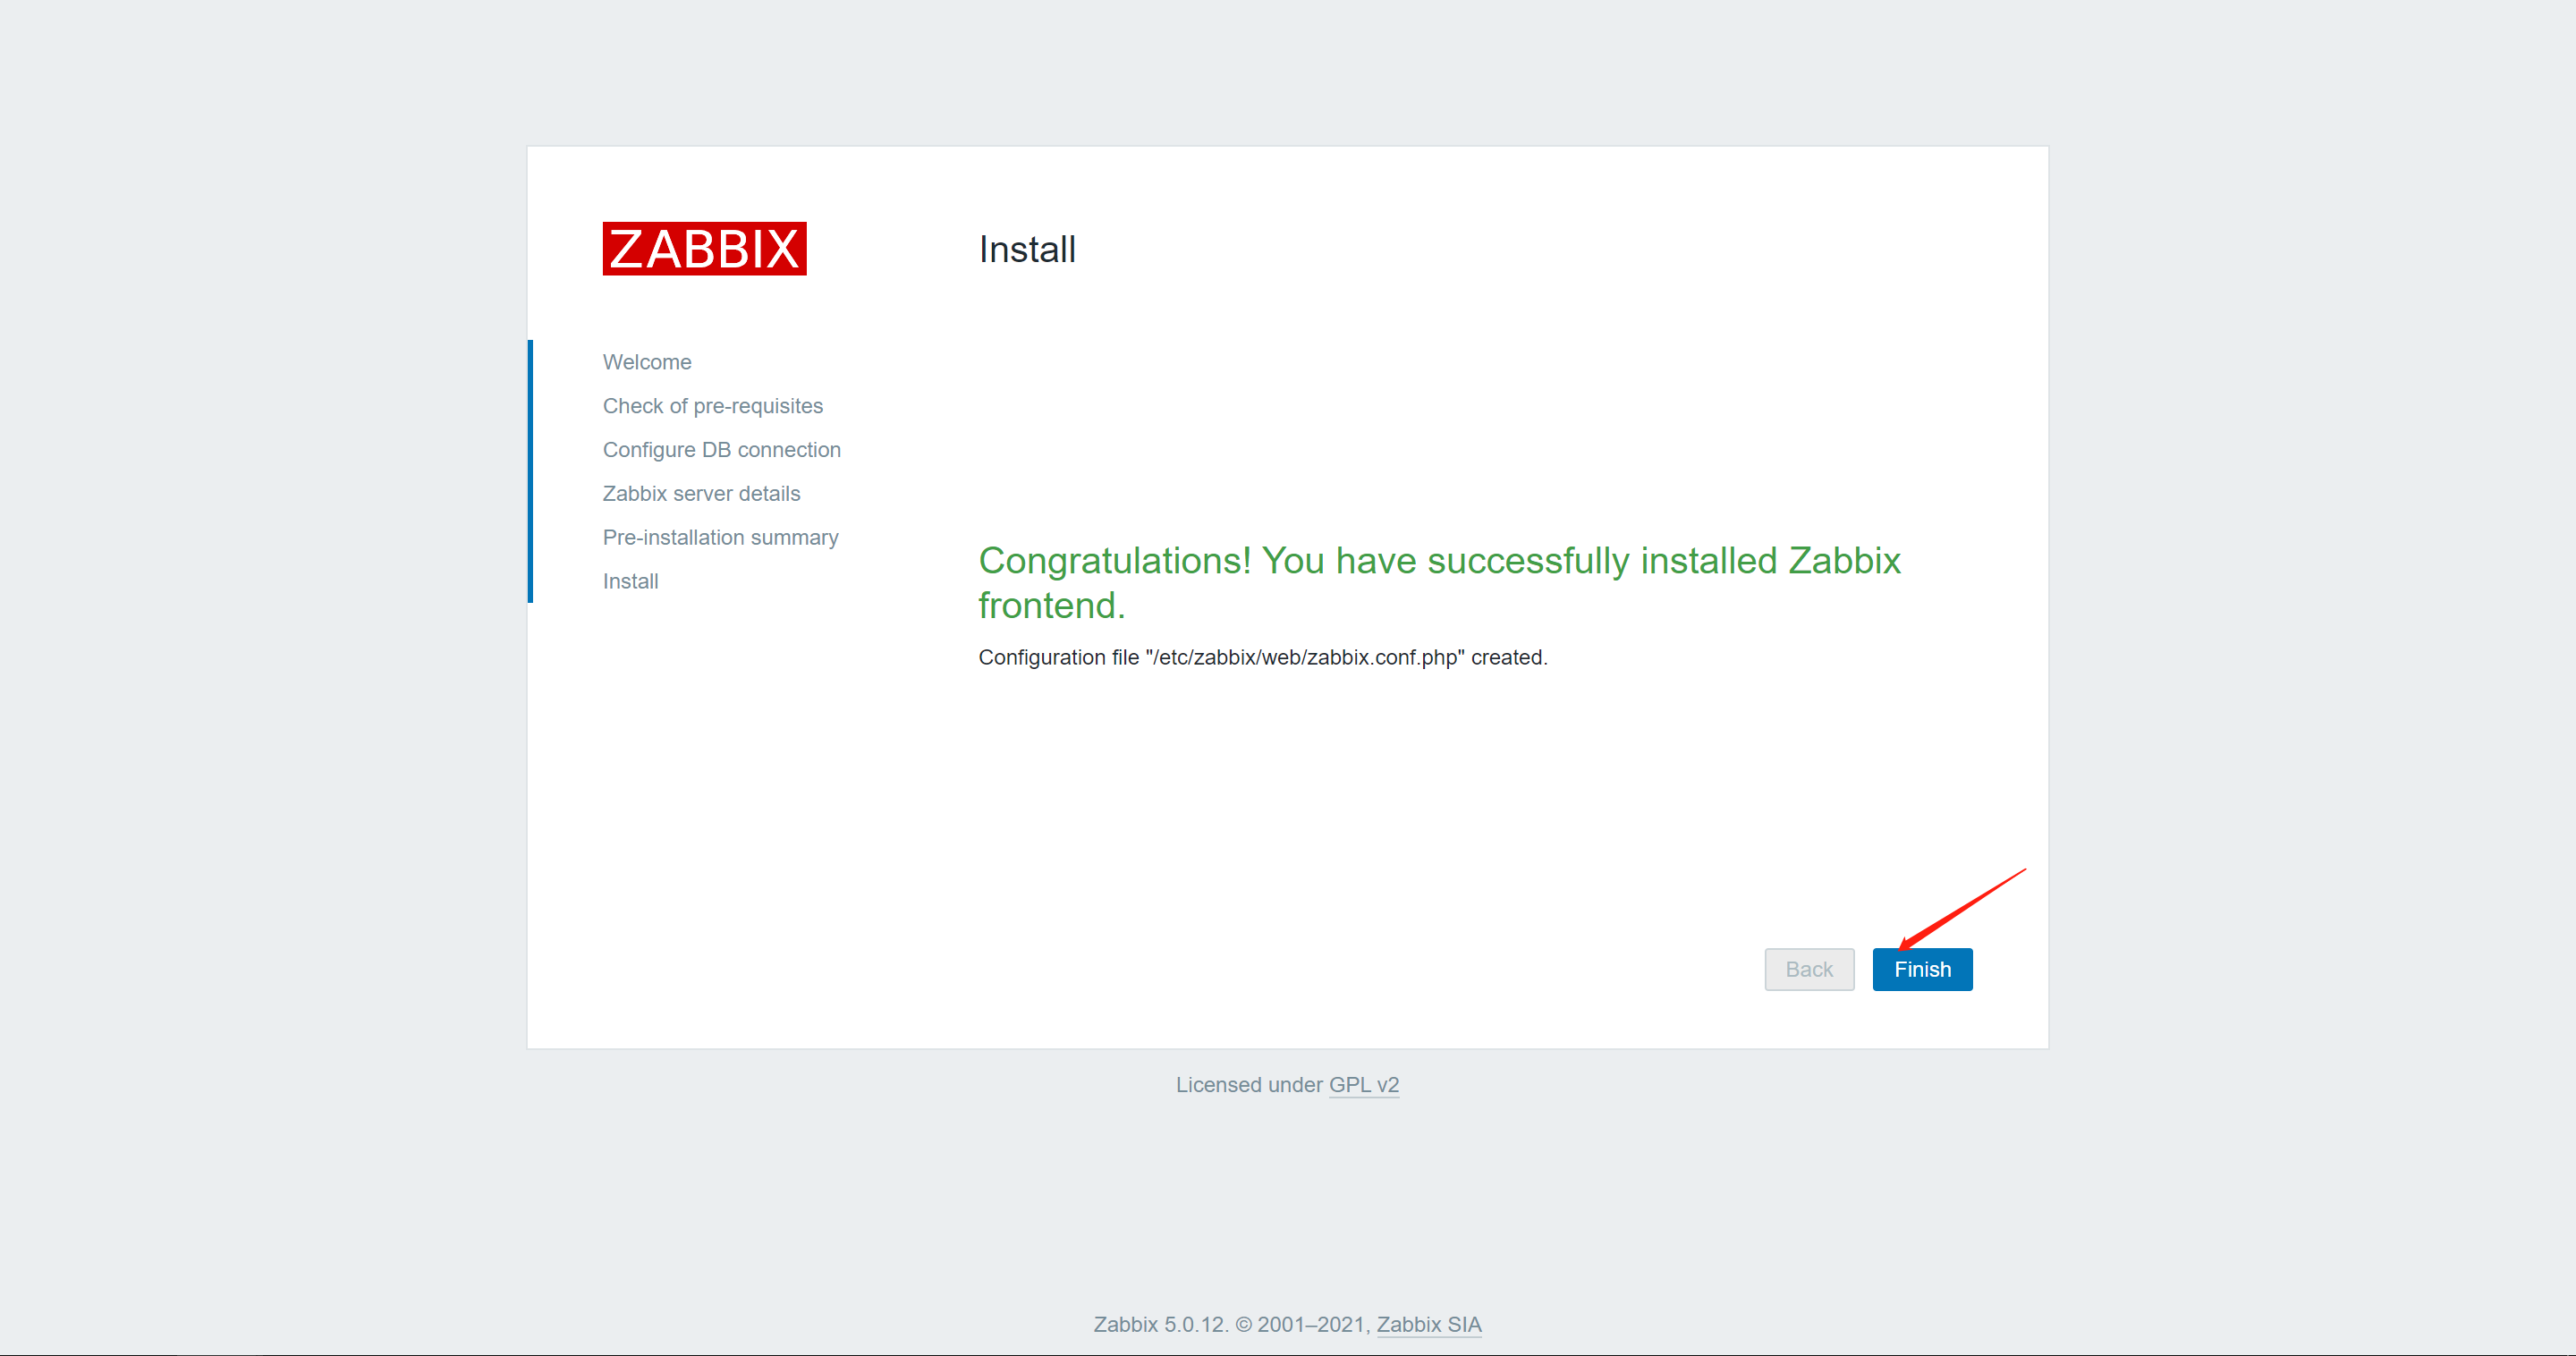
3.配置Zabbix前端
连接到新安装的Zabbix前端:http:// server_ip_or_name /zabbix


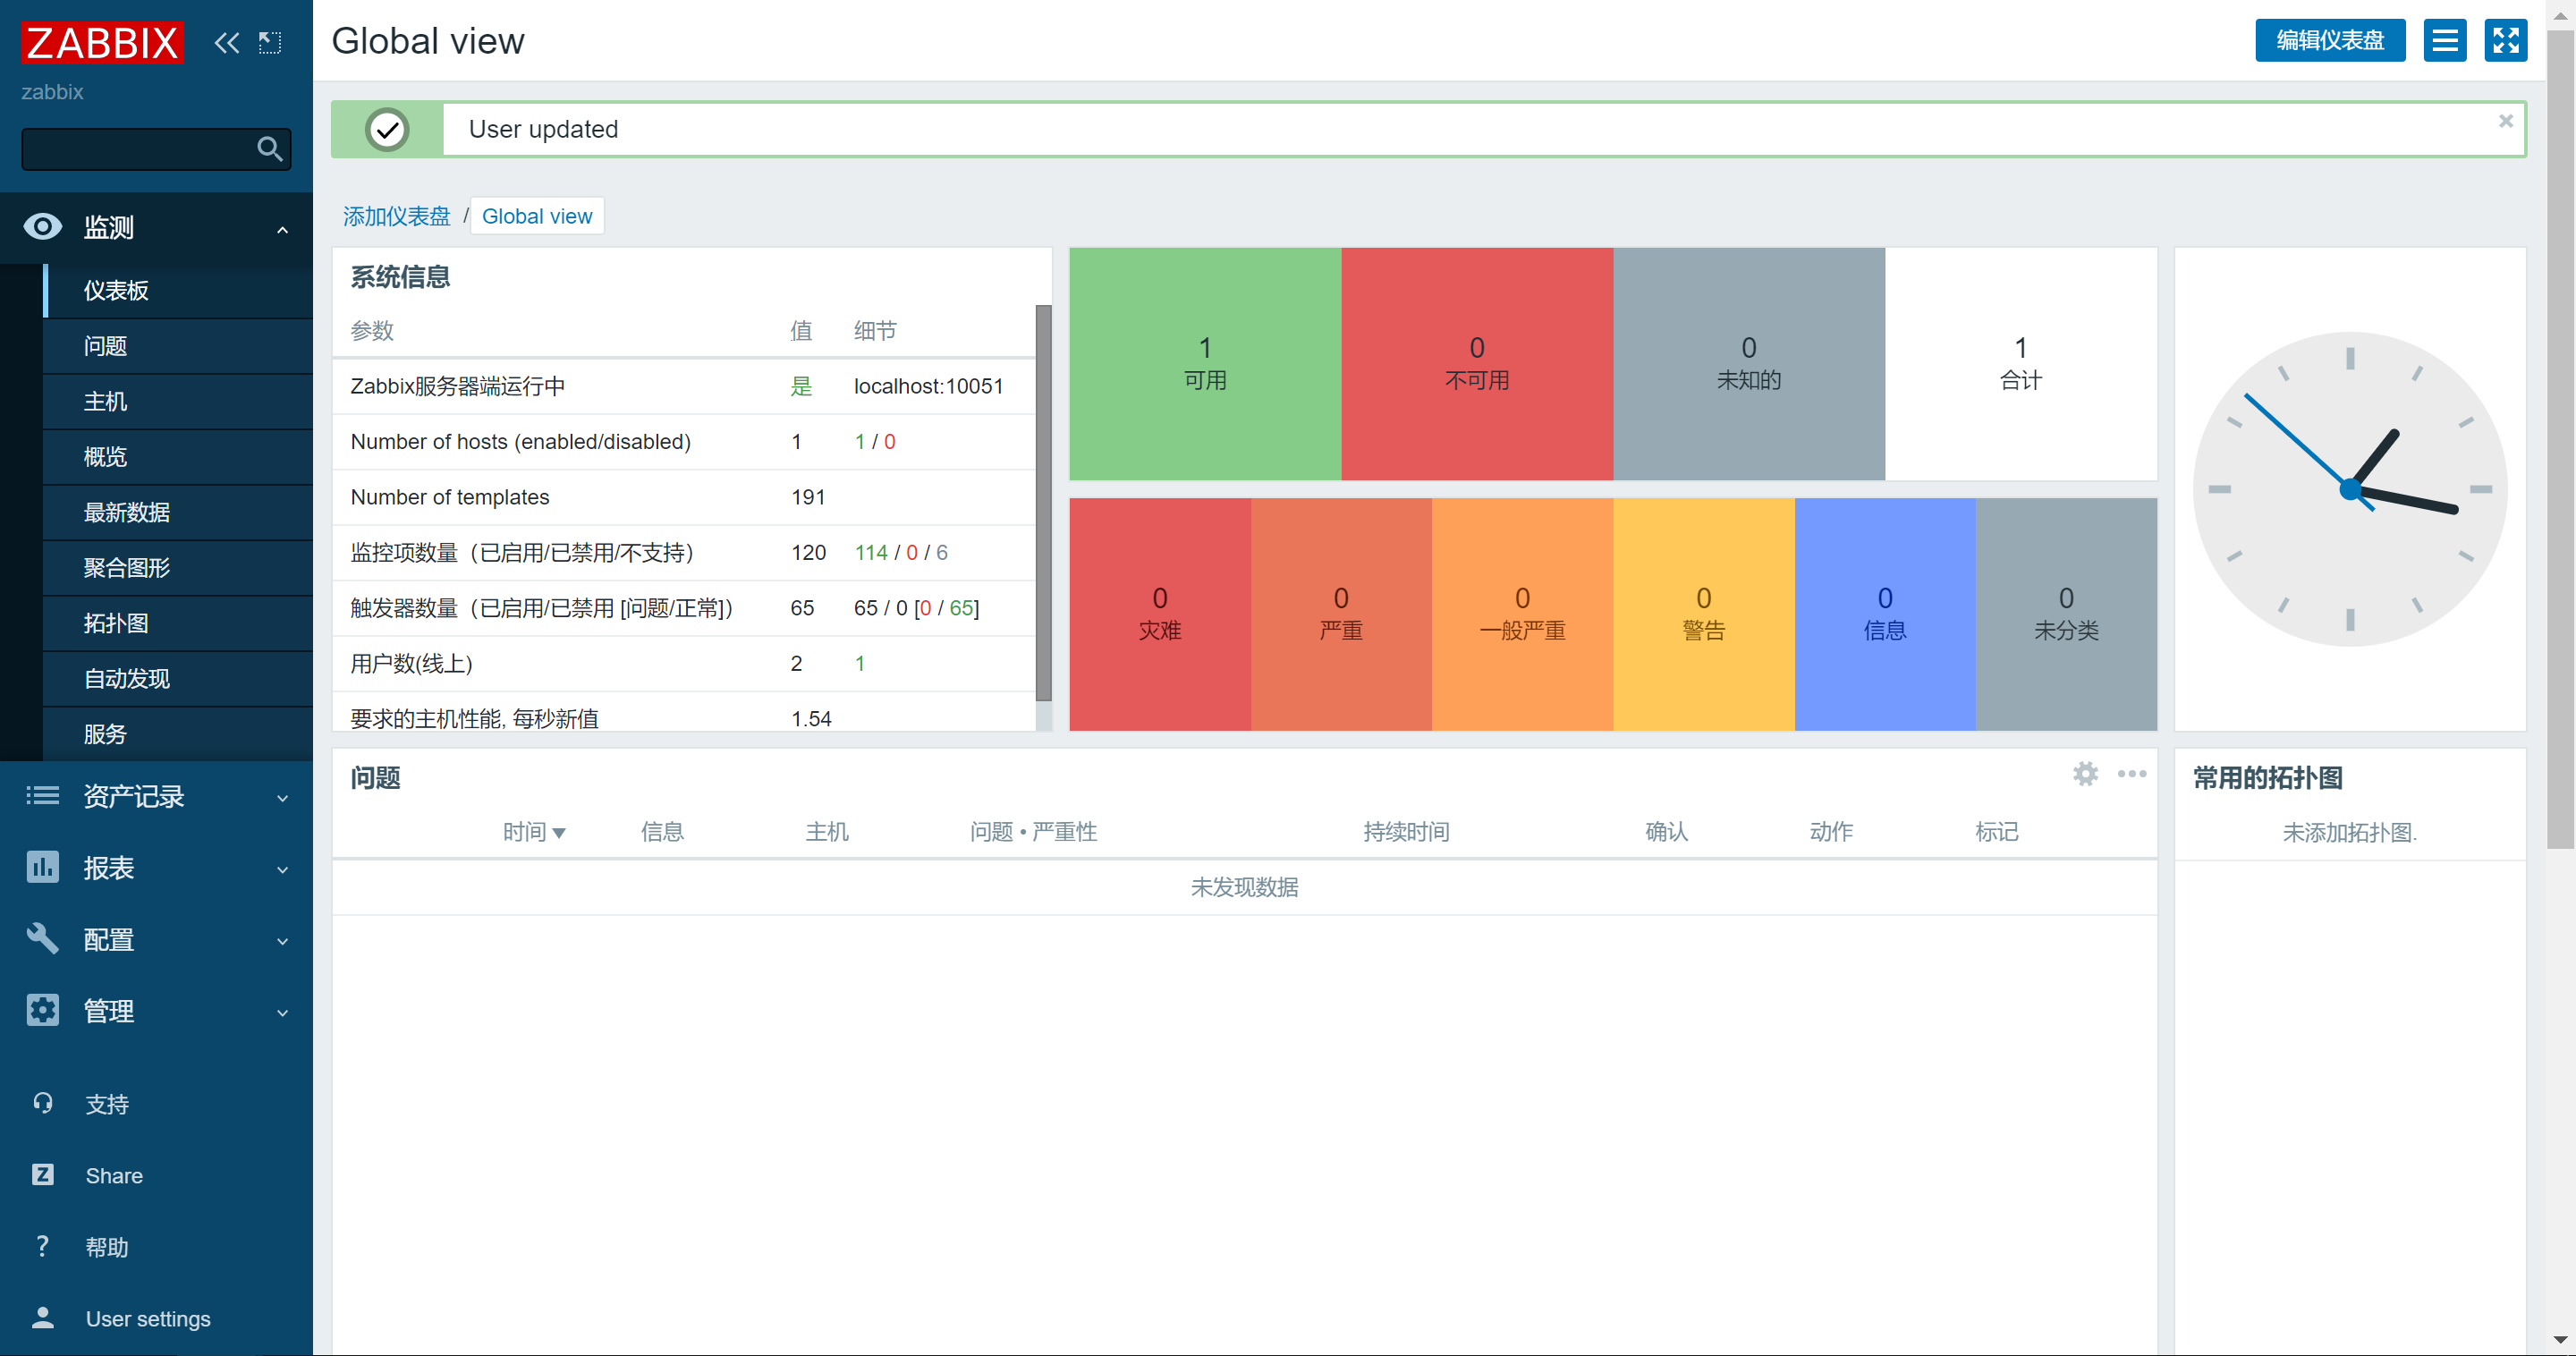
设置中文界面


4.配置Zabbix_agent端
4.1下载zabbix官方源
rpm -Uvh https://repo.zabbix.com/zabbix/5.0/rhel/7/x86_64/zabbix-release-5.0-1.el7.noarch.rpm
yum clean all
yum makecache
4.2安装zabbix_agent
yum -y install zabbix-agent
4.3编辑zabbix_agent配置文件
vim /etc/zabbix/zabbix_agentd.conf
...
Server=192.168.134.128     被动模式
ServerActive=192.168.134.128  主动模式
Hostname=web1
····
4.3启动zabbix_agent
systemctl enable --now zabbix-agent
4.5命令行测试
在zabbix_server端安装zabbix-get
yum -y install zabbix-get
执行命令
[root@centos1 yum.repos.d]# zabbix_get -s 192.168.134.130 -k system.uname
Linux centos2 3.10.0-957.el7.x86_64 #1 SMP Thu Nov 8 23:39:32 UTC 2018 x86_64
[root@centos1 yum.repos.d]# zabbix_get -s 192.168.134.130 -k system.cpu.load[all,avg15]
0.050000
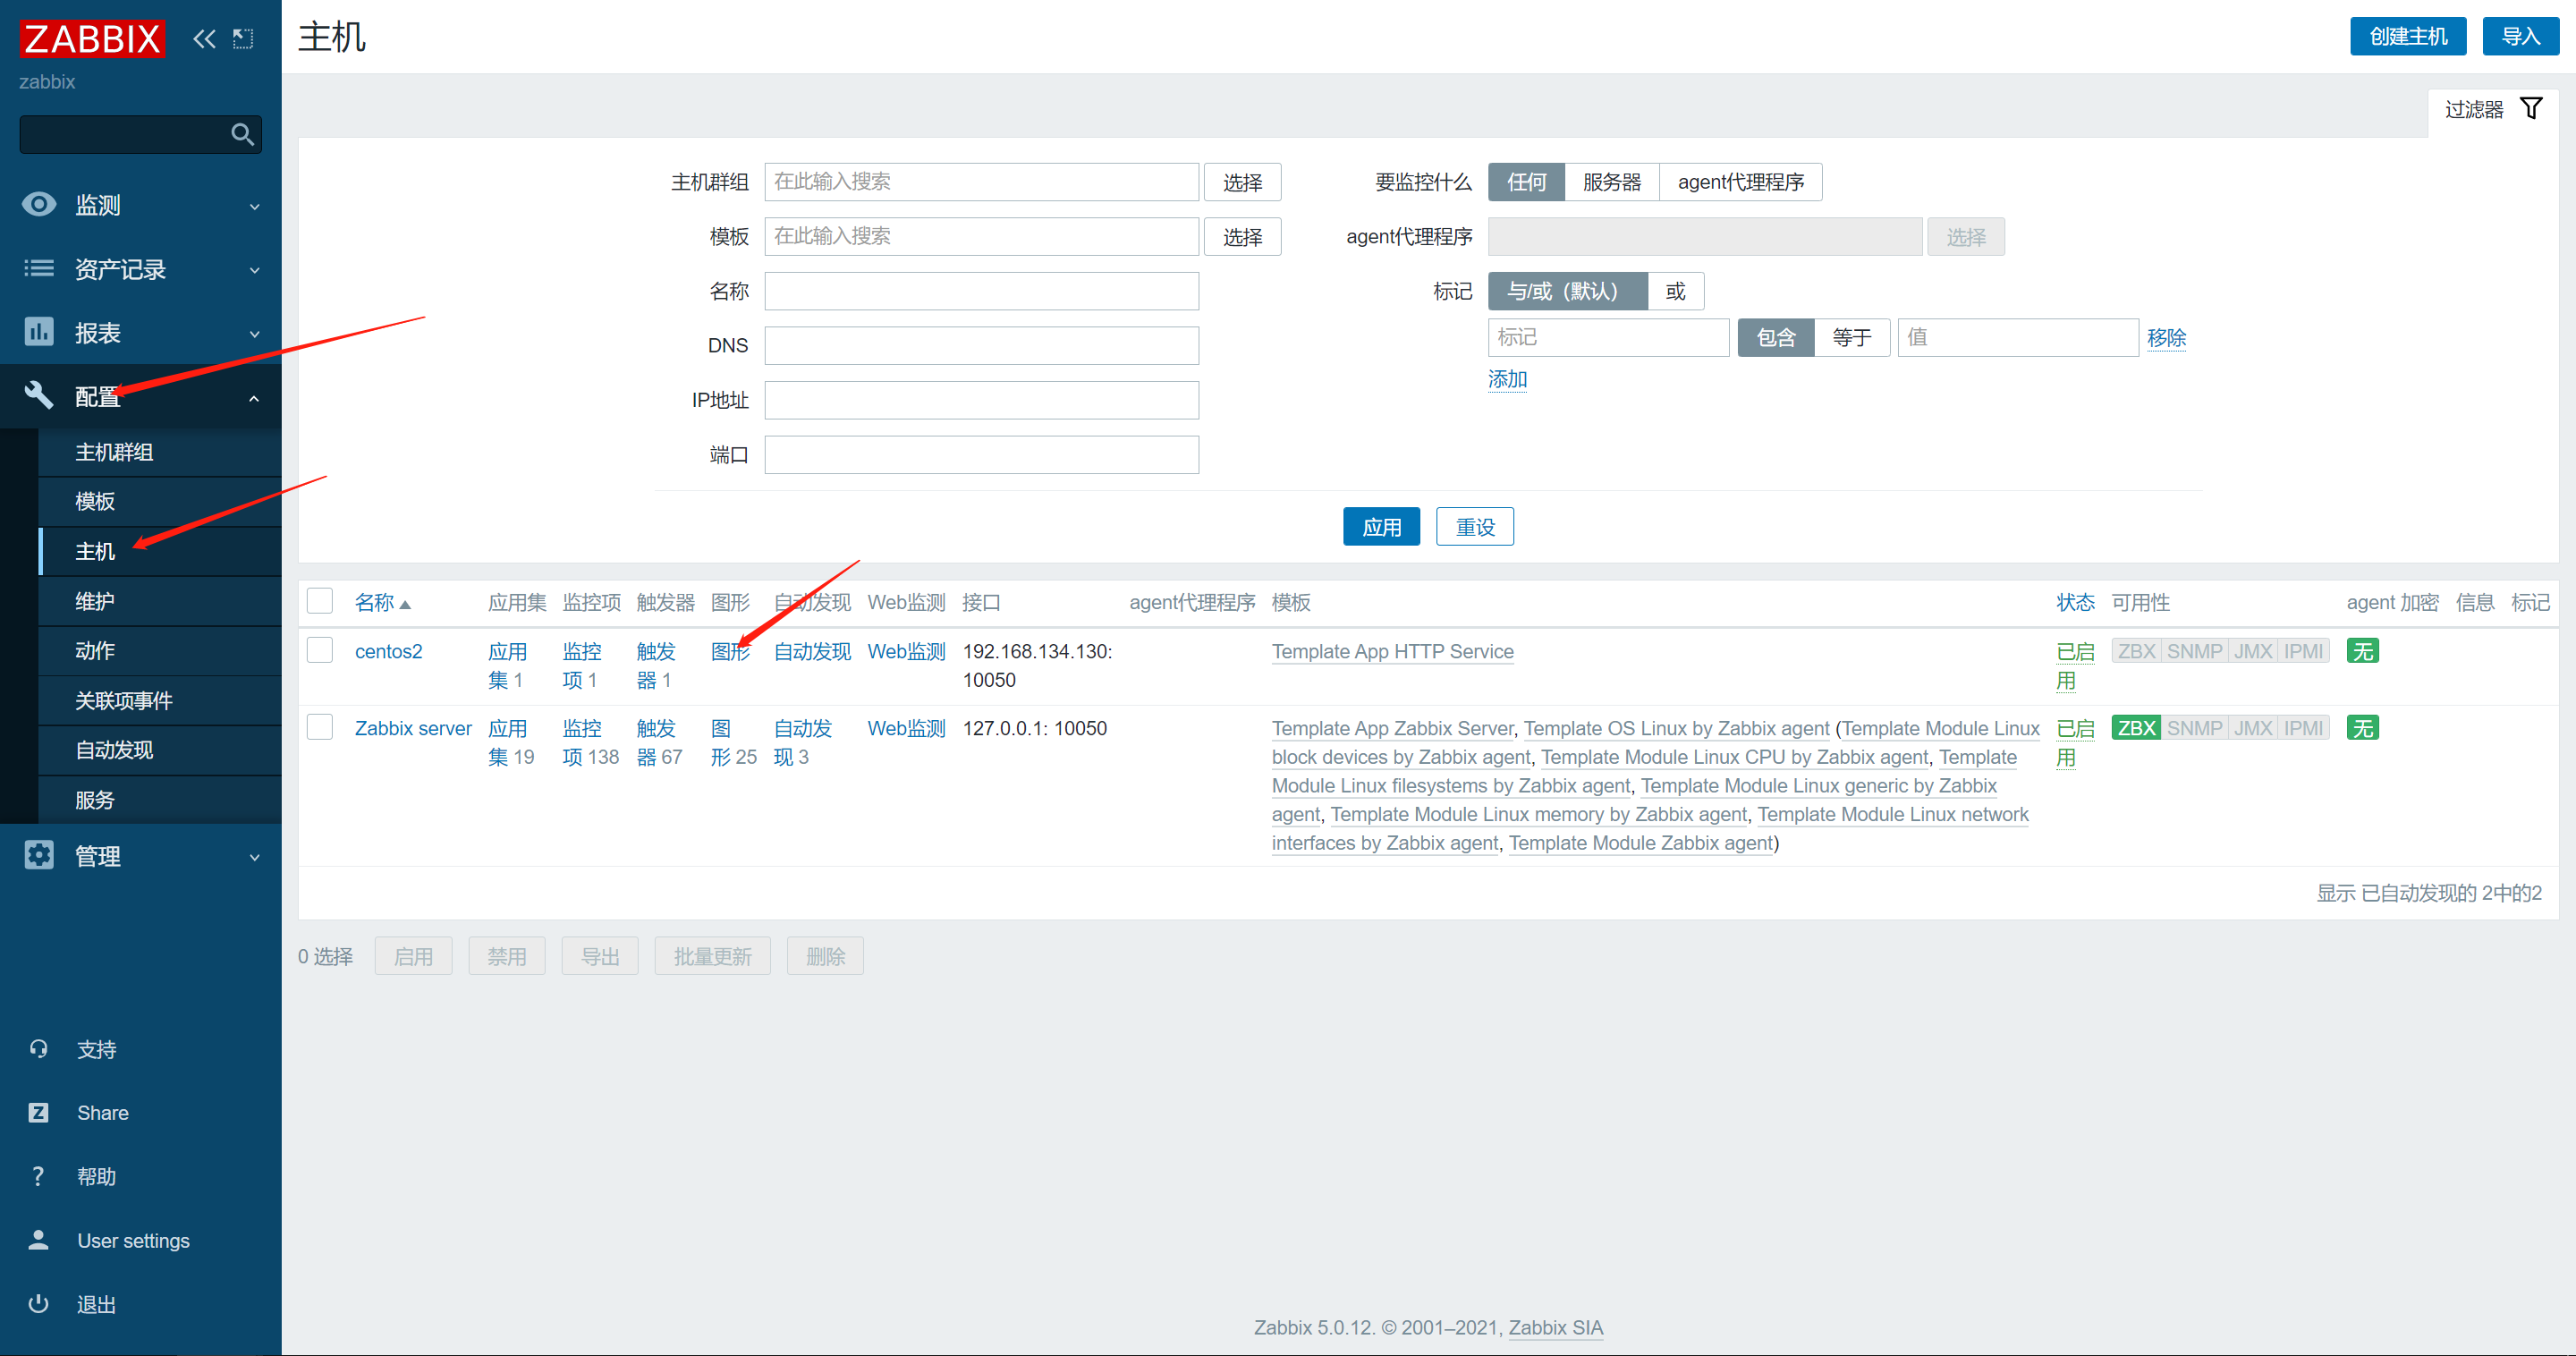
5.web界面配置监控
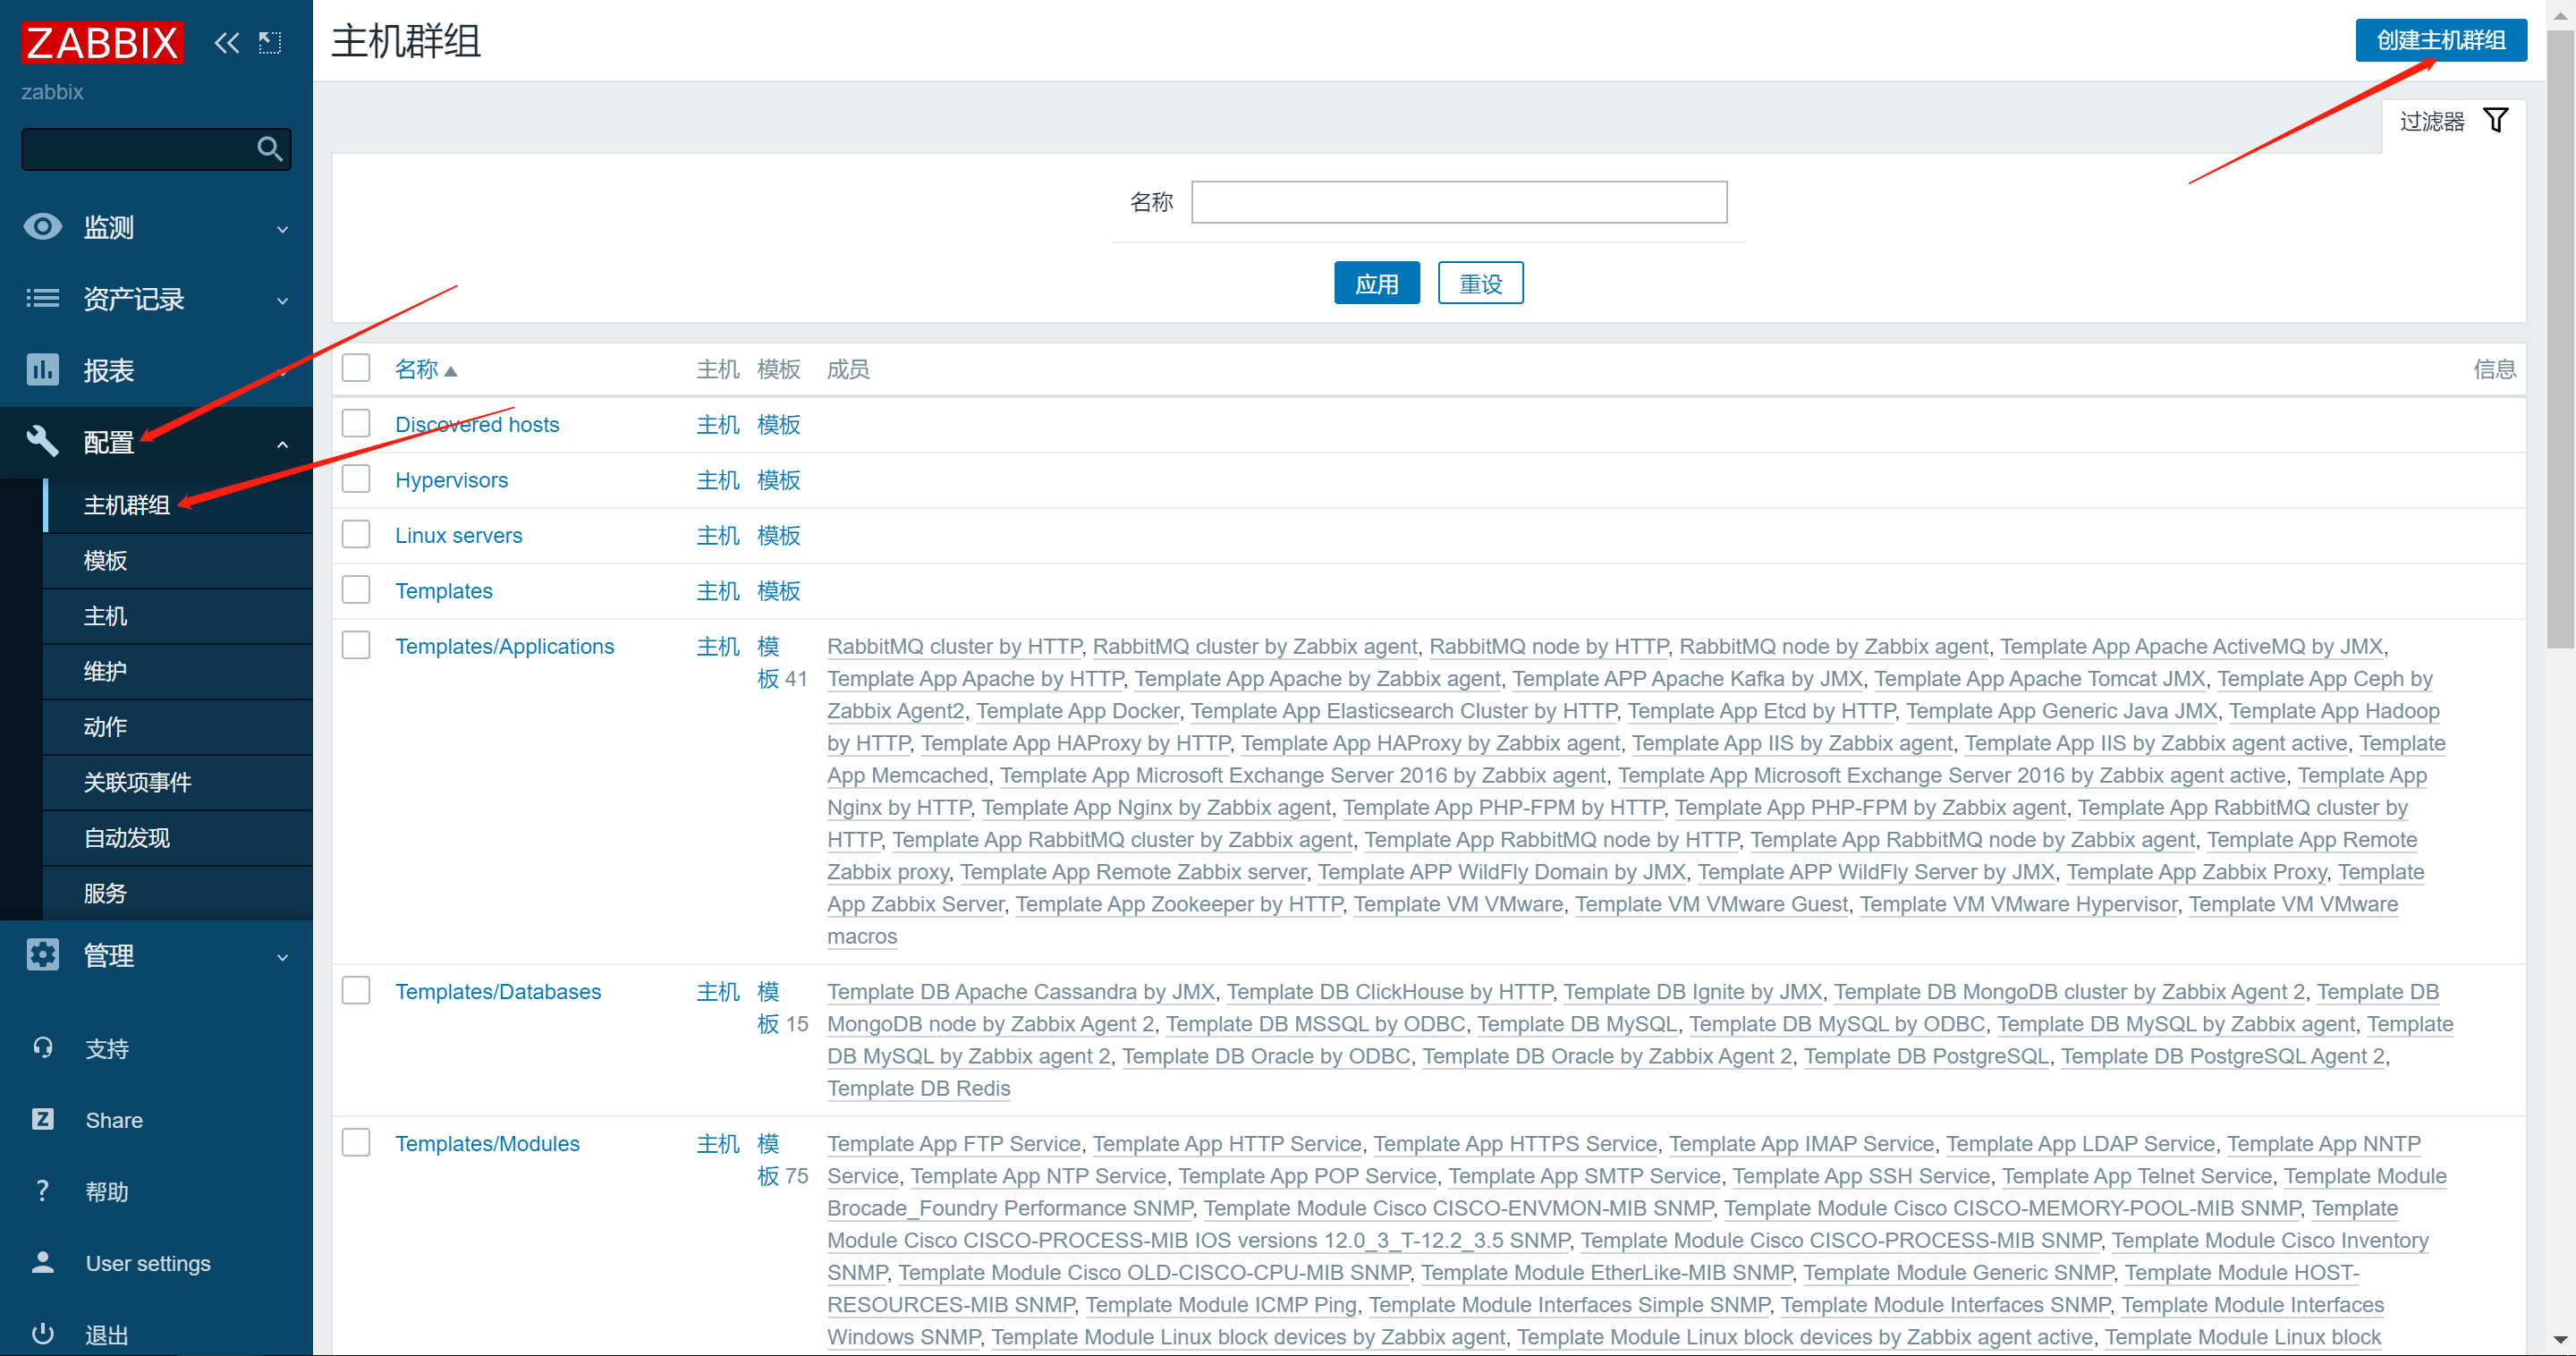
5.1创建主机群组

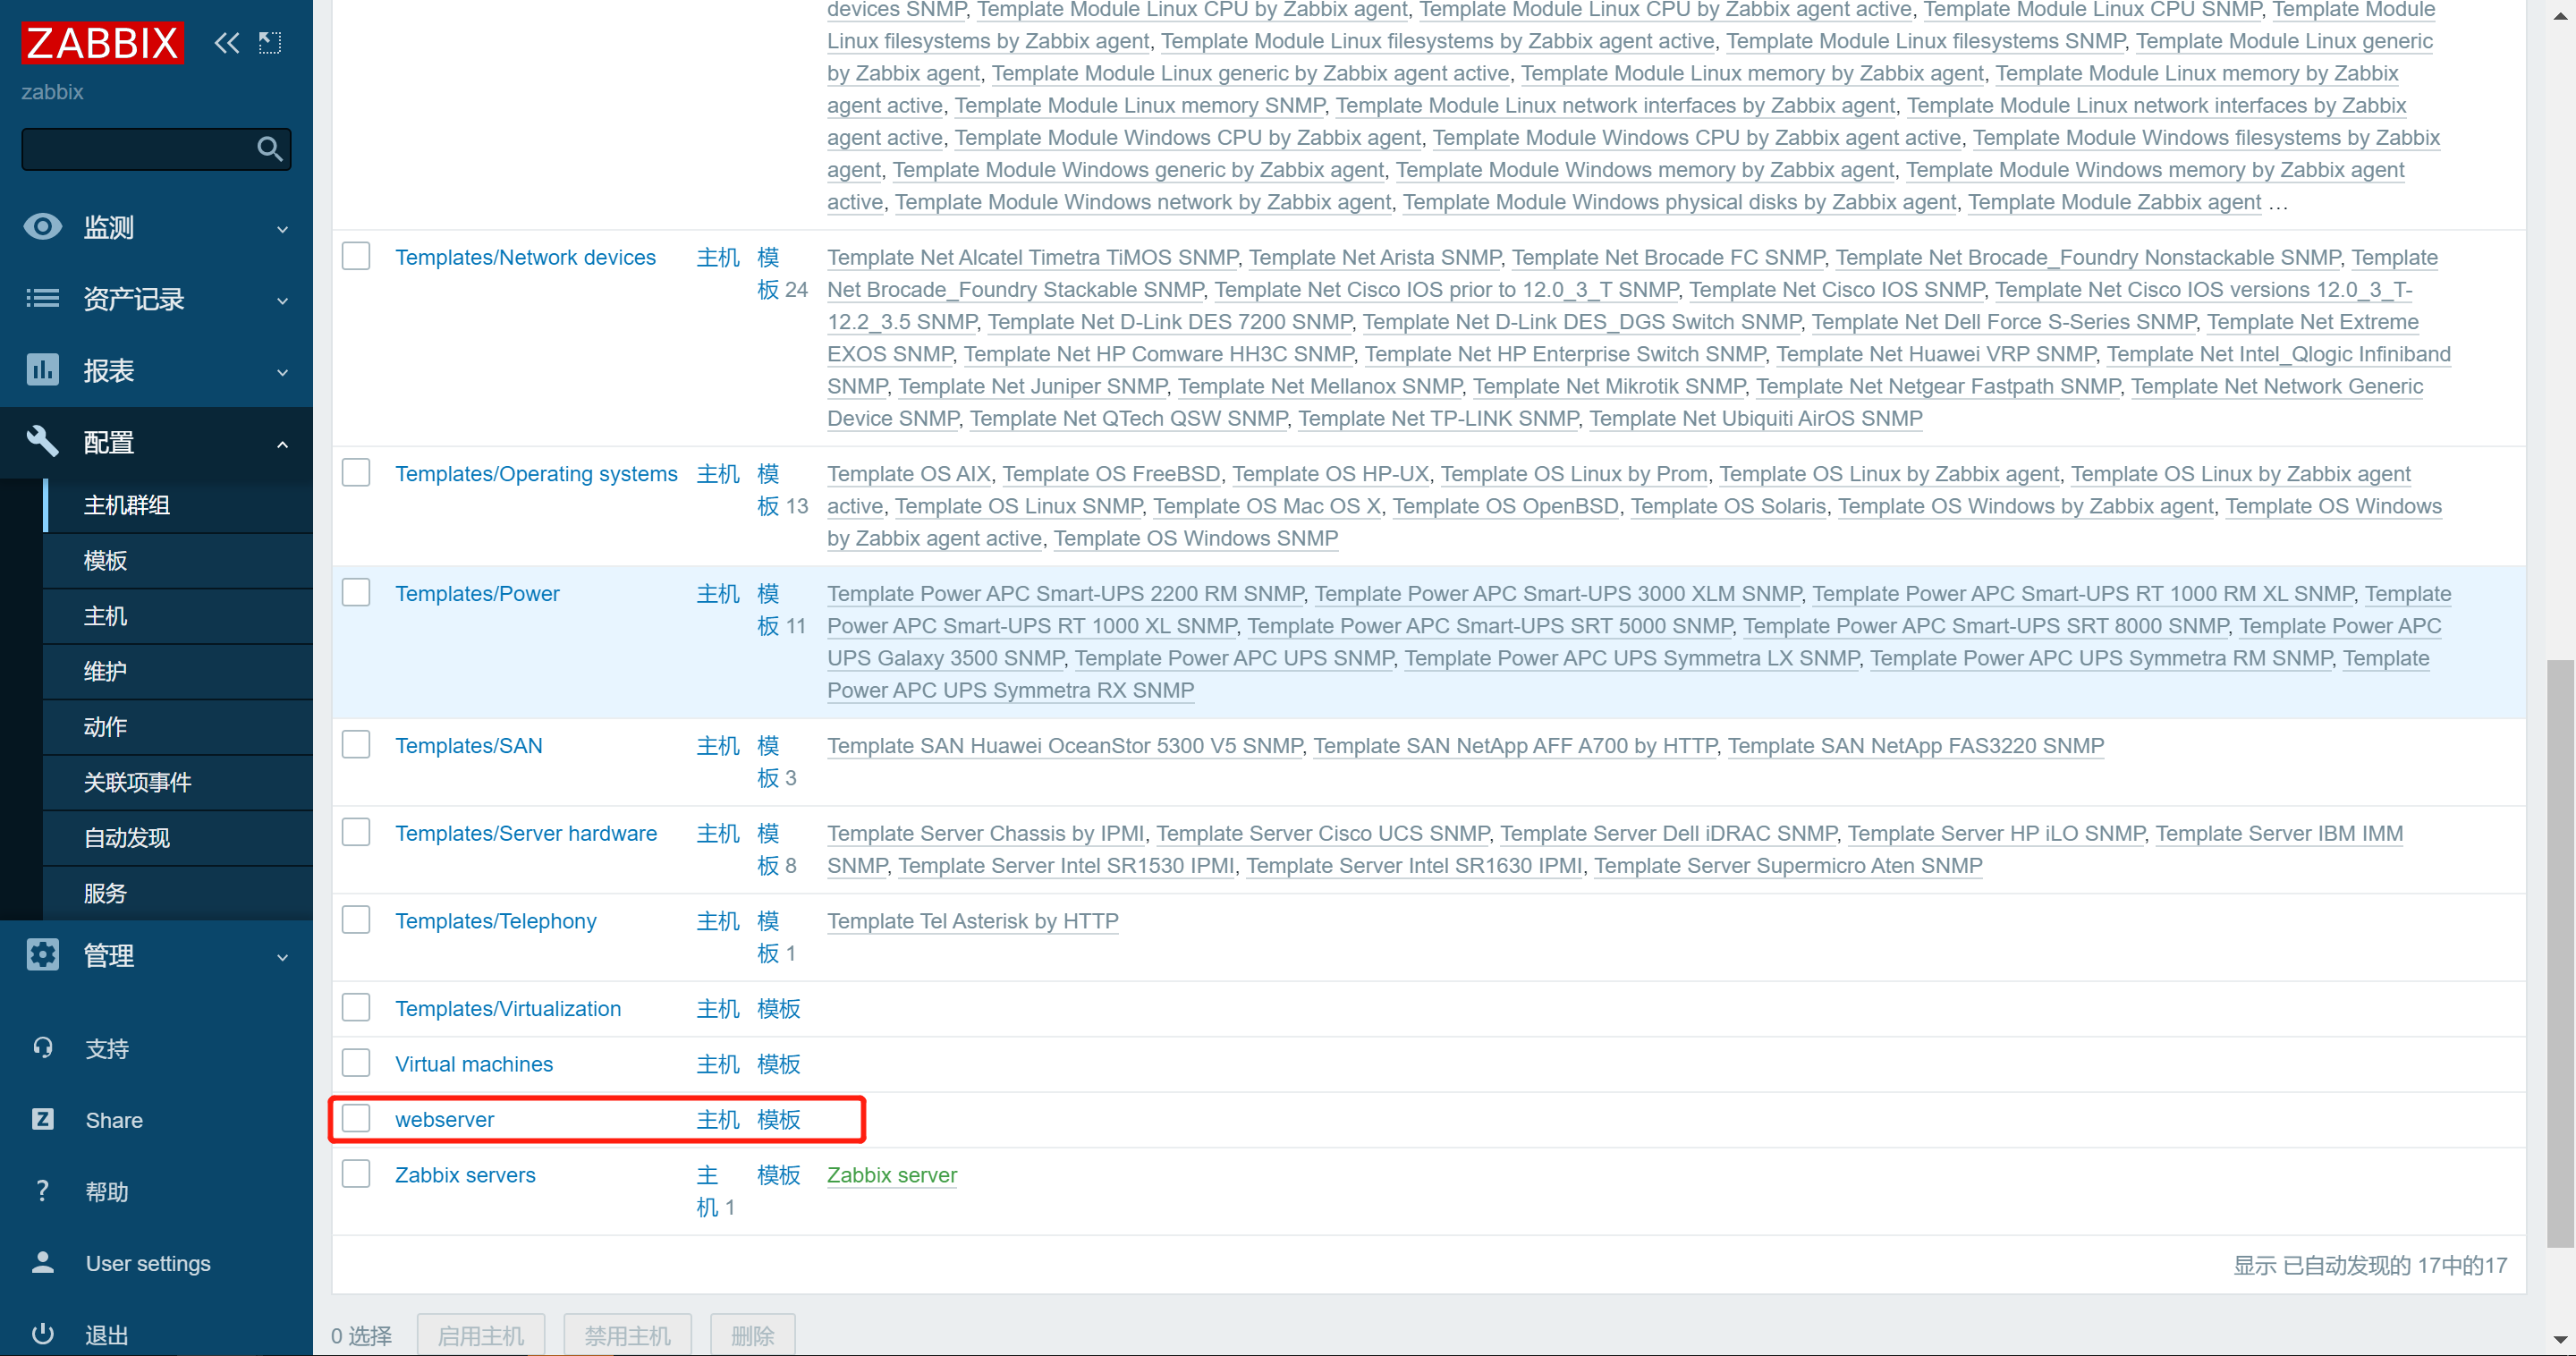
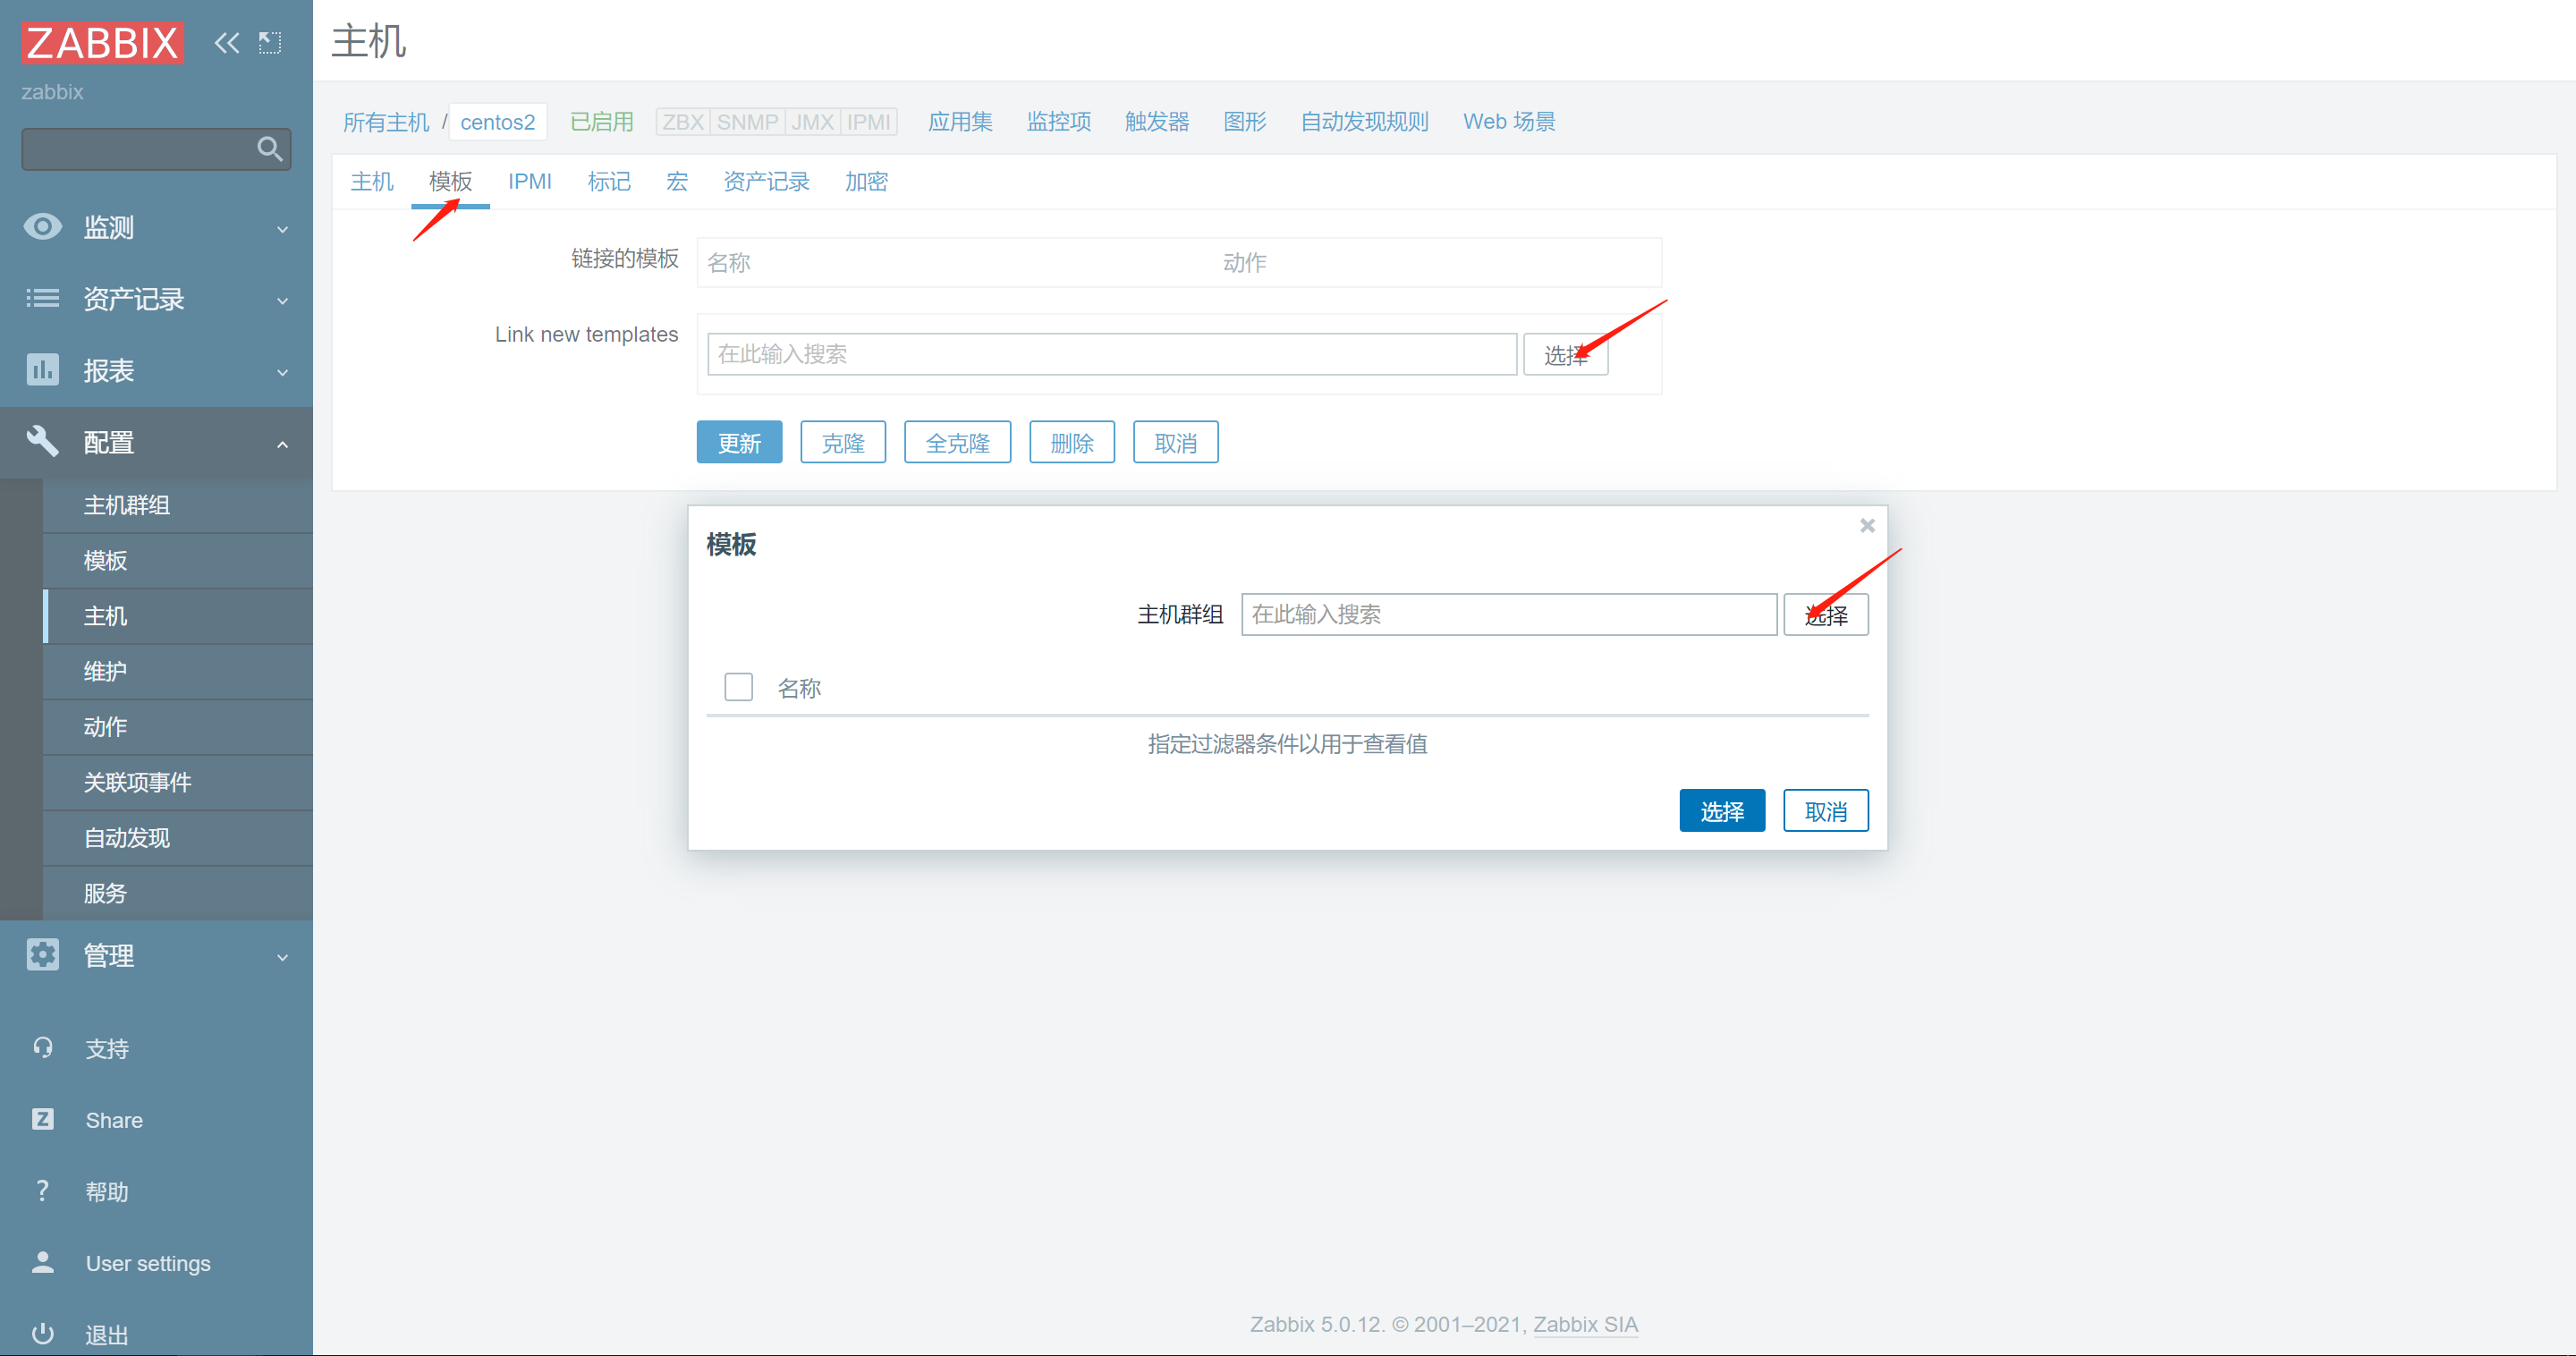
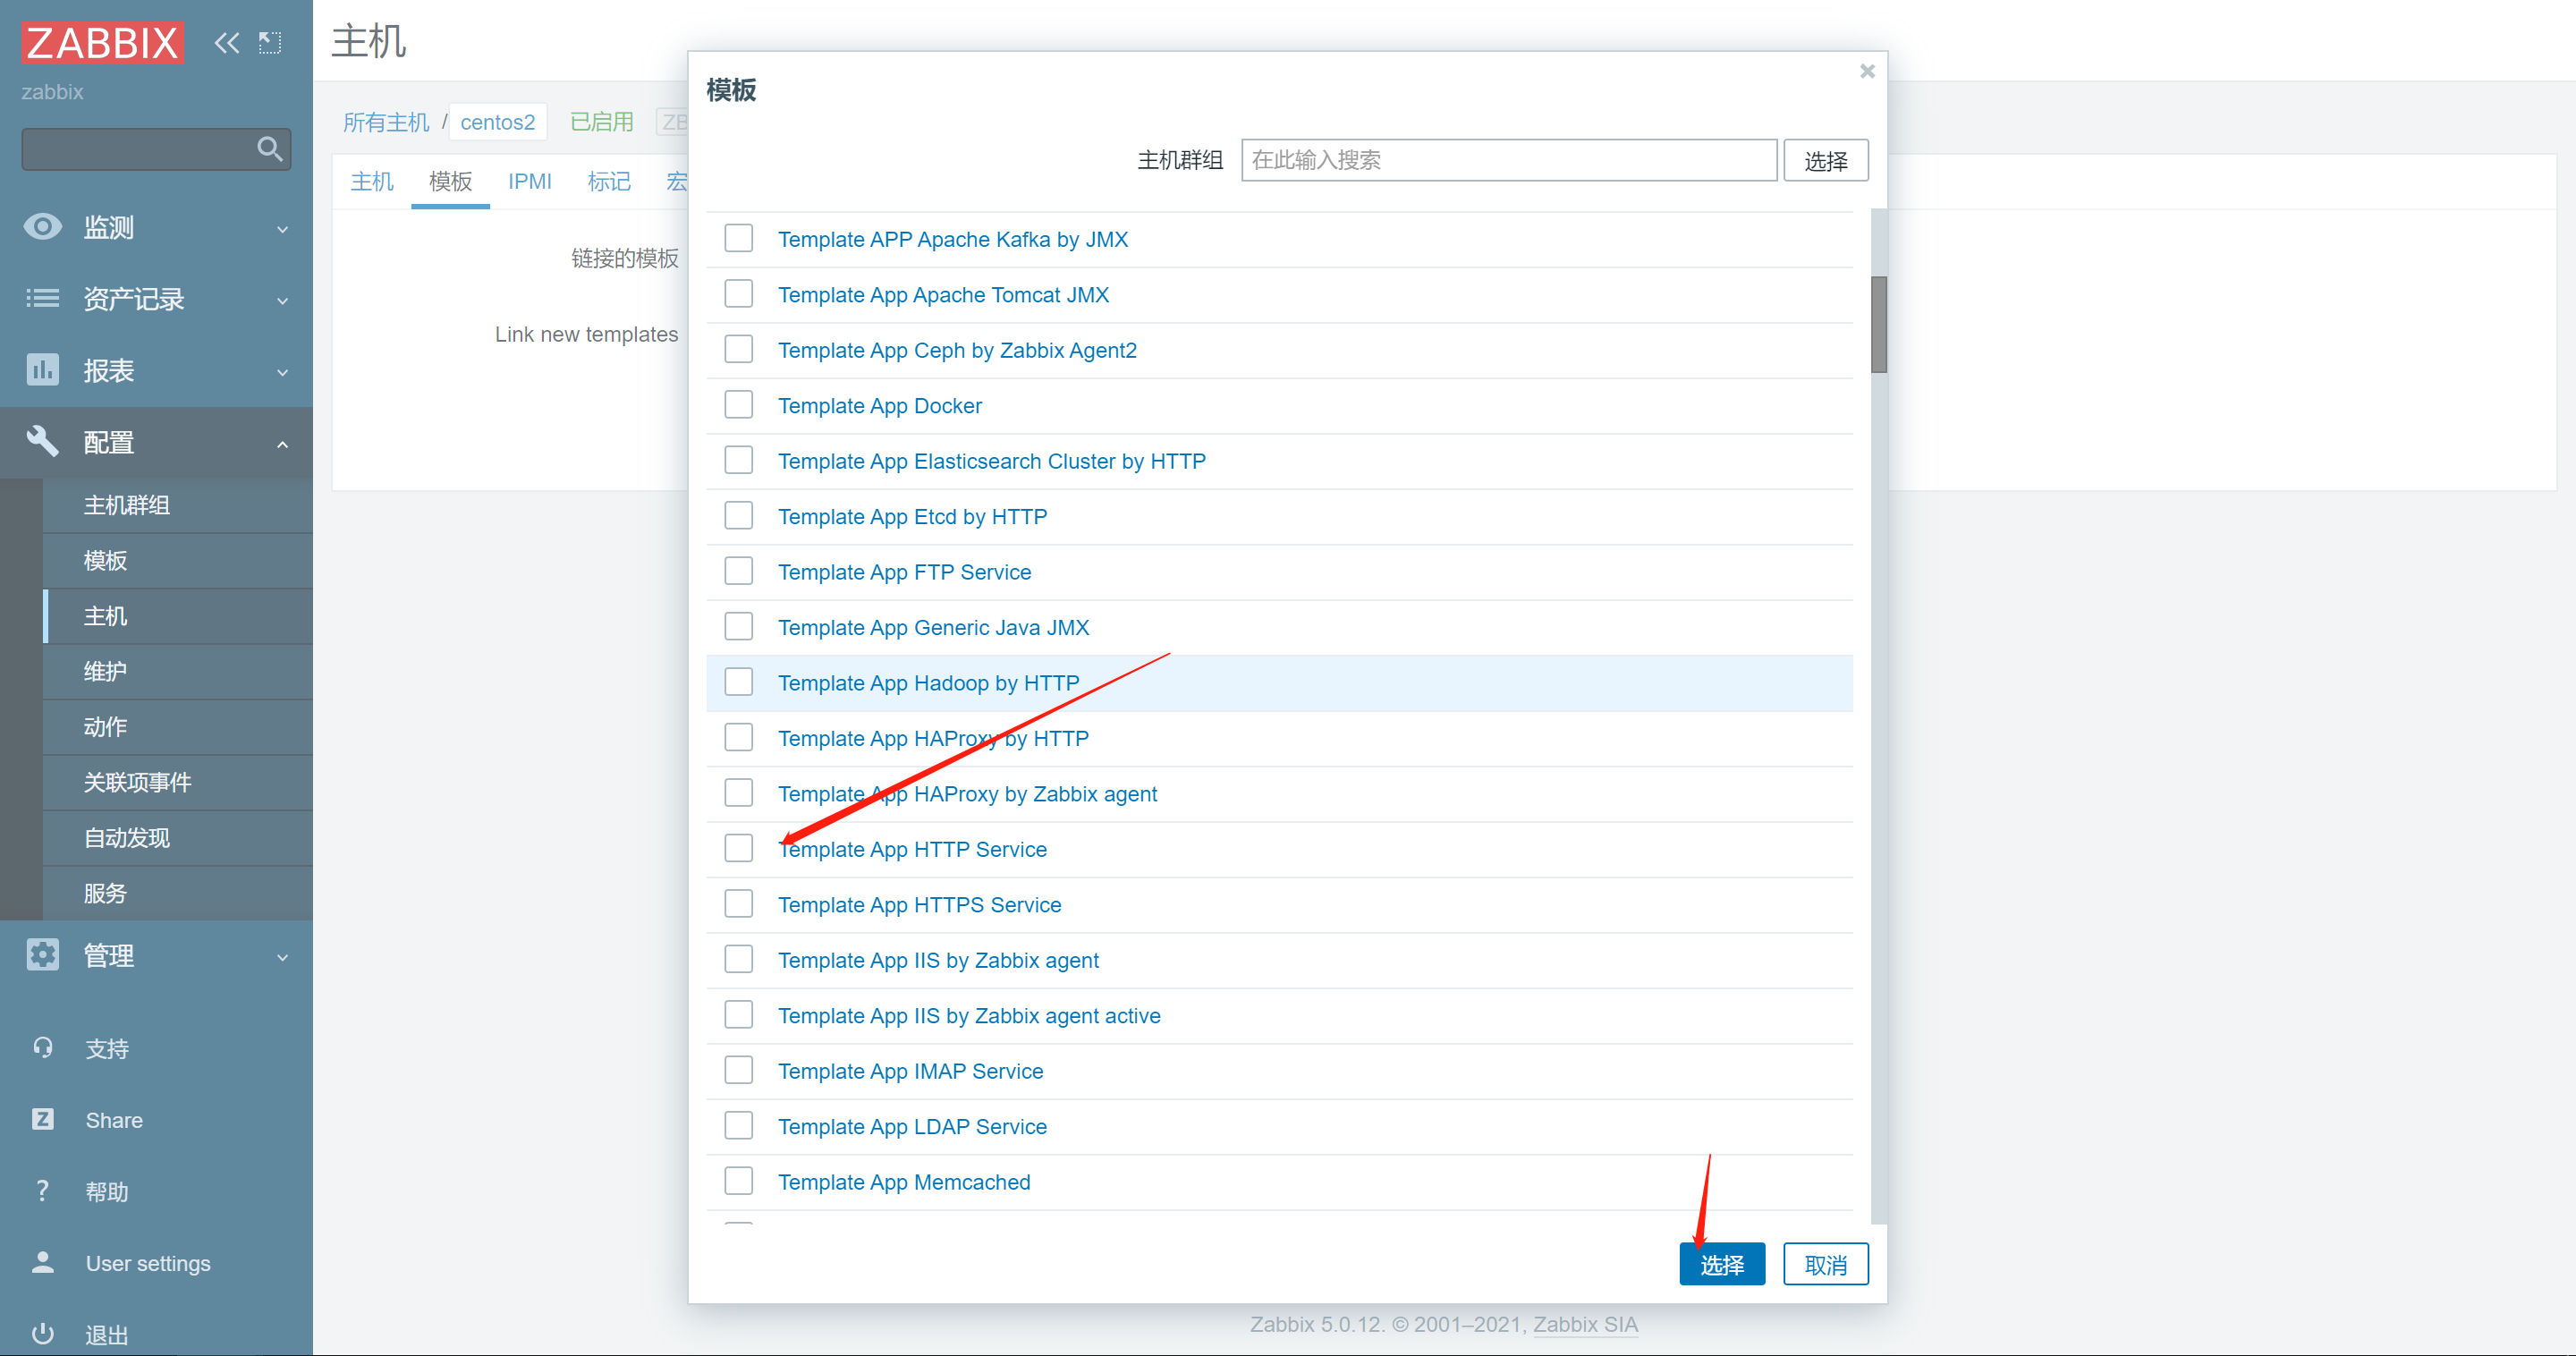
5.2创建主机和模板


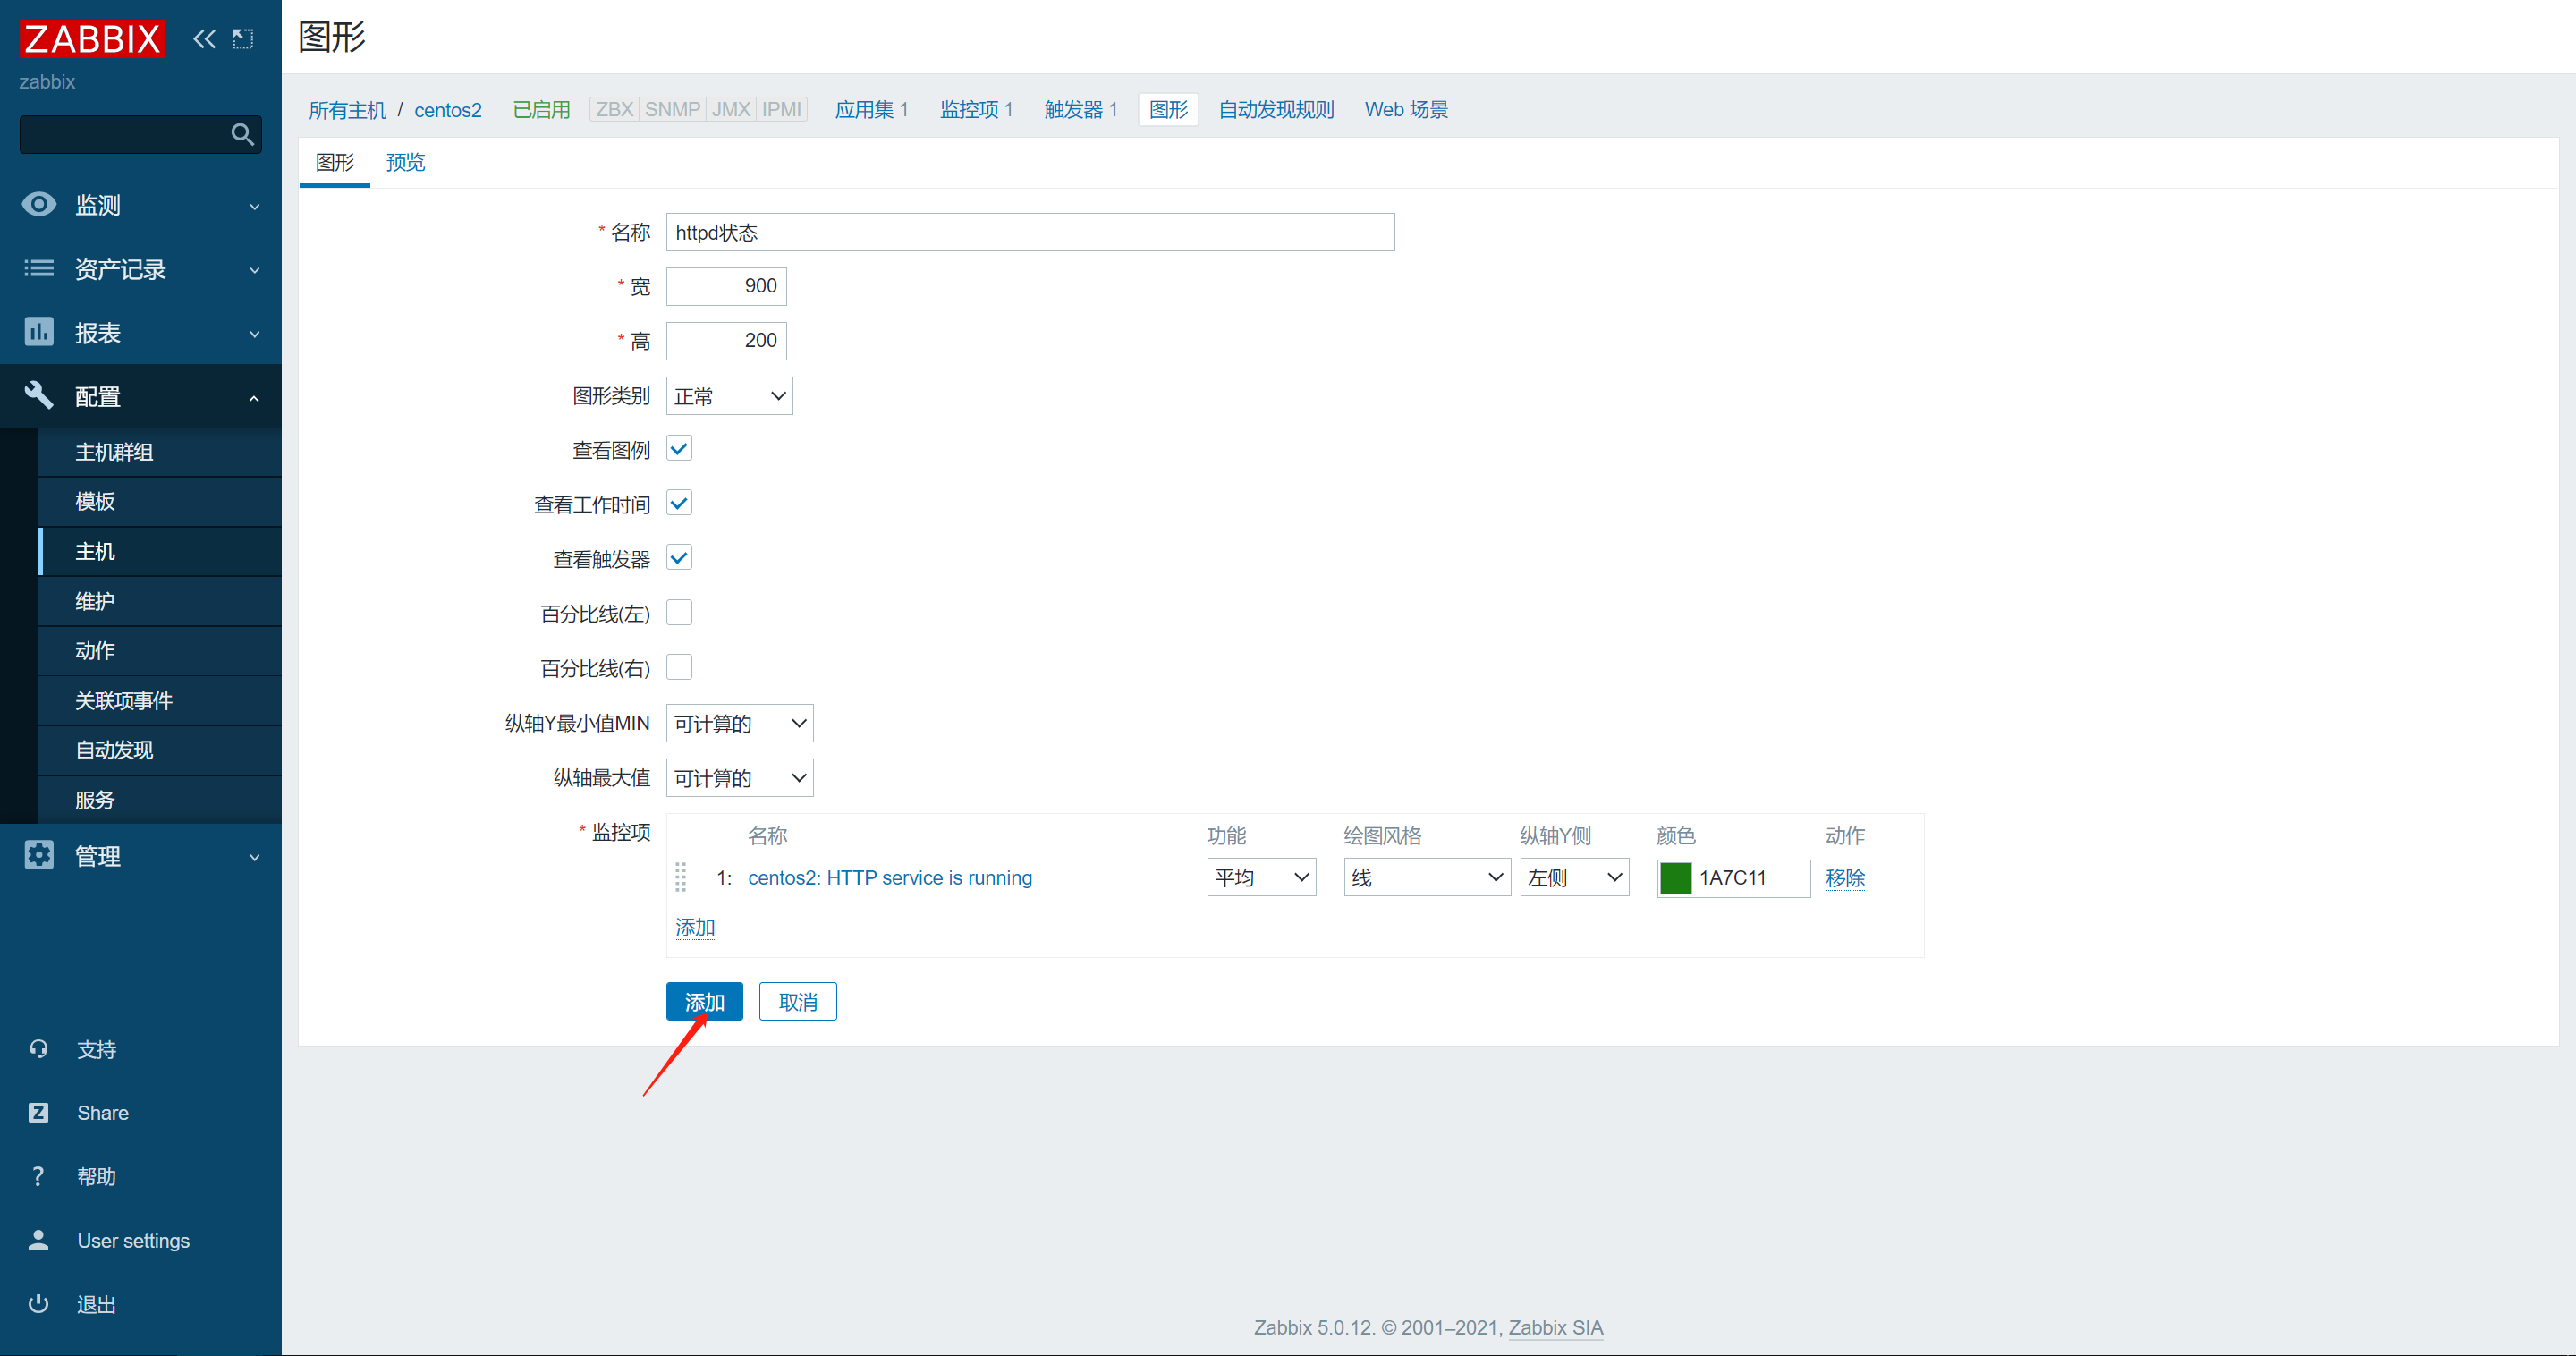
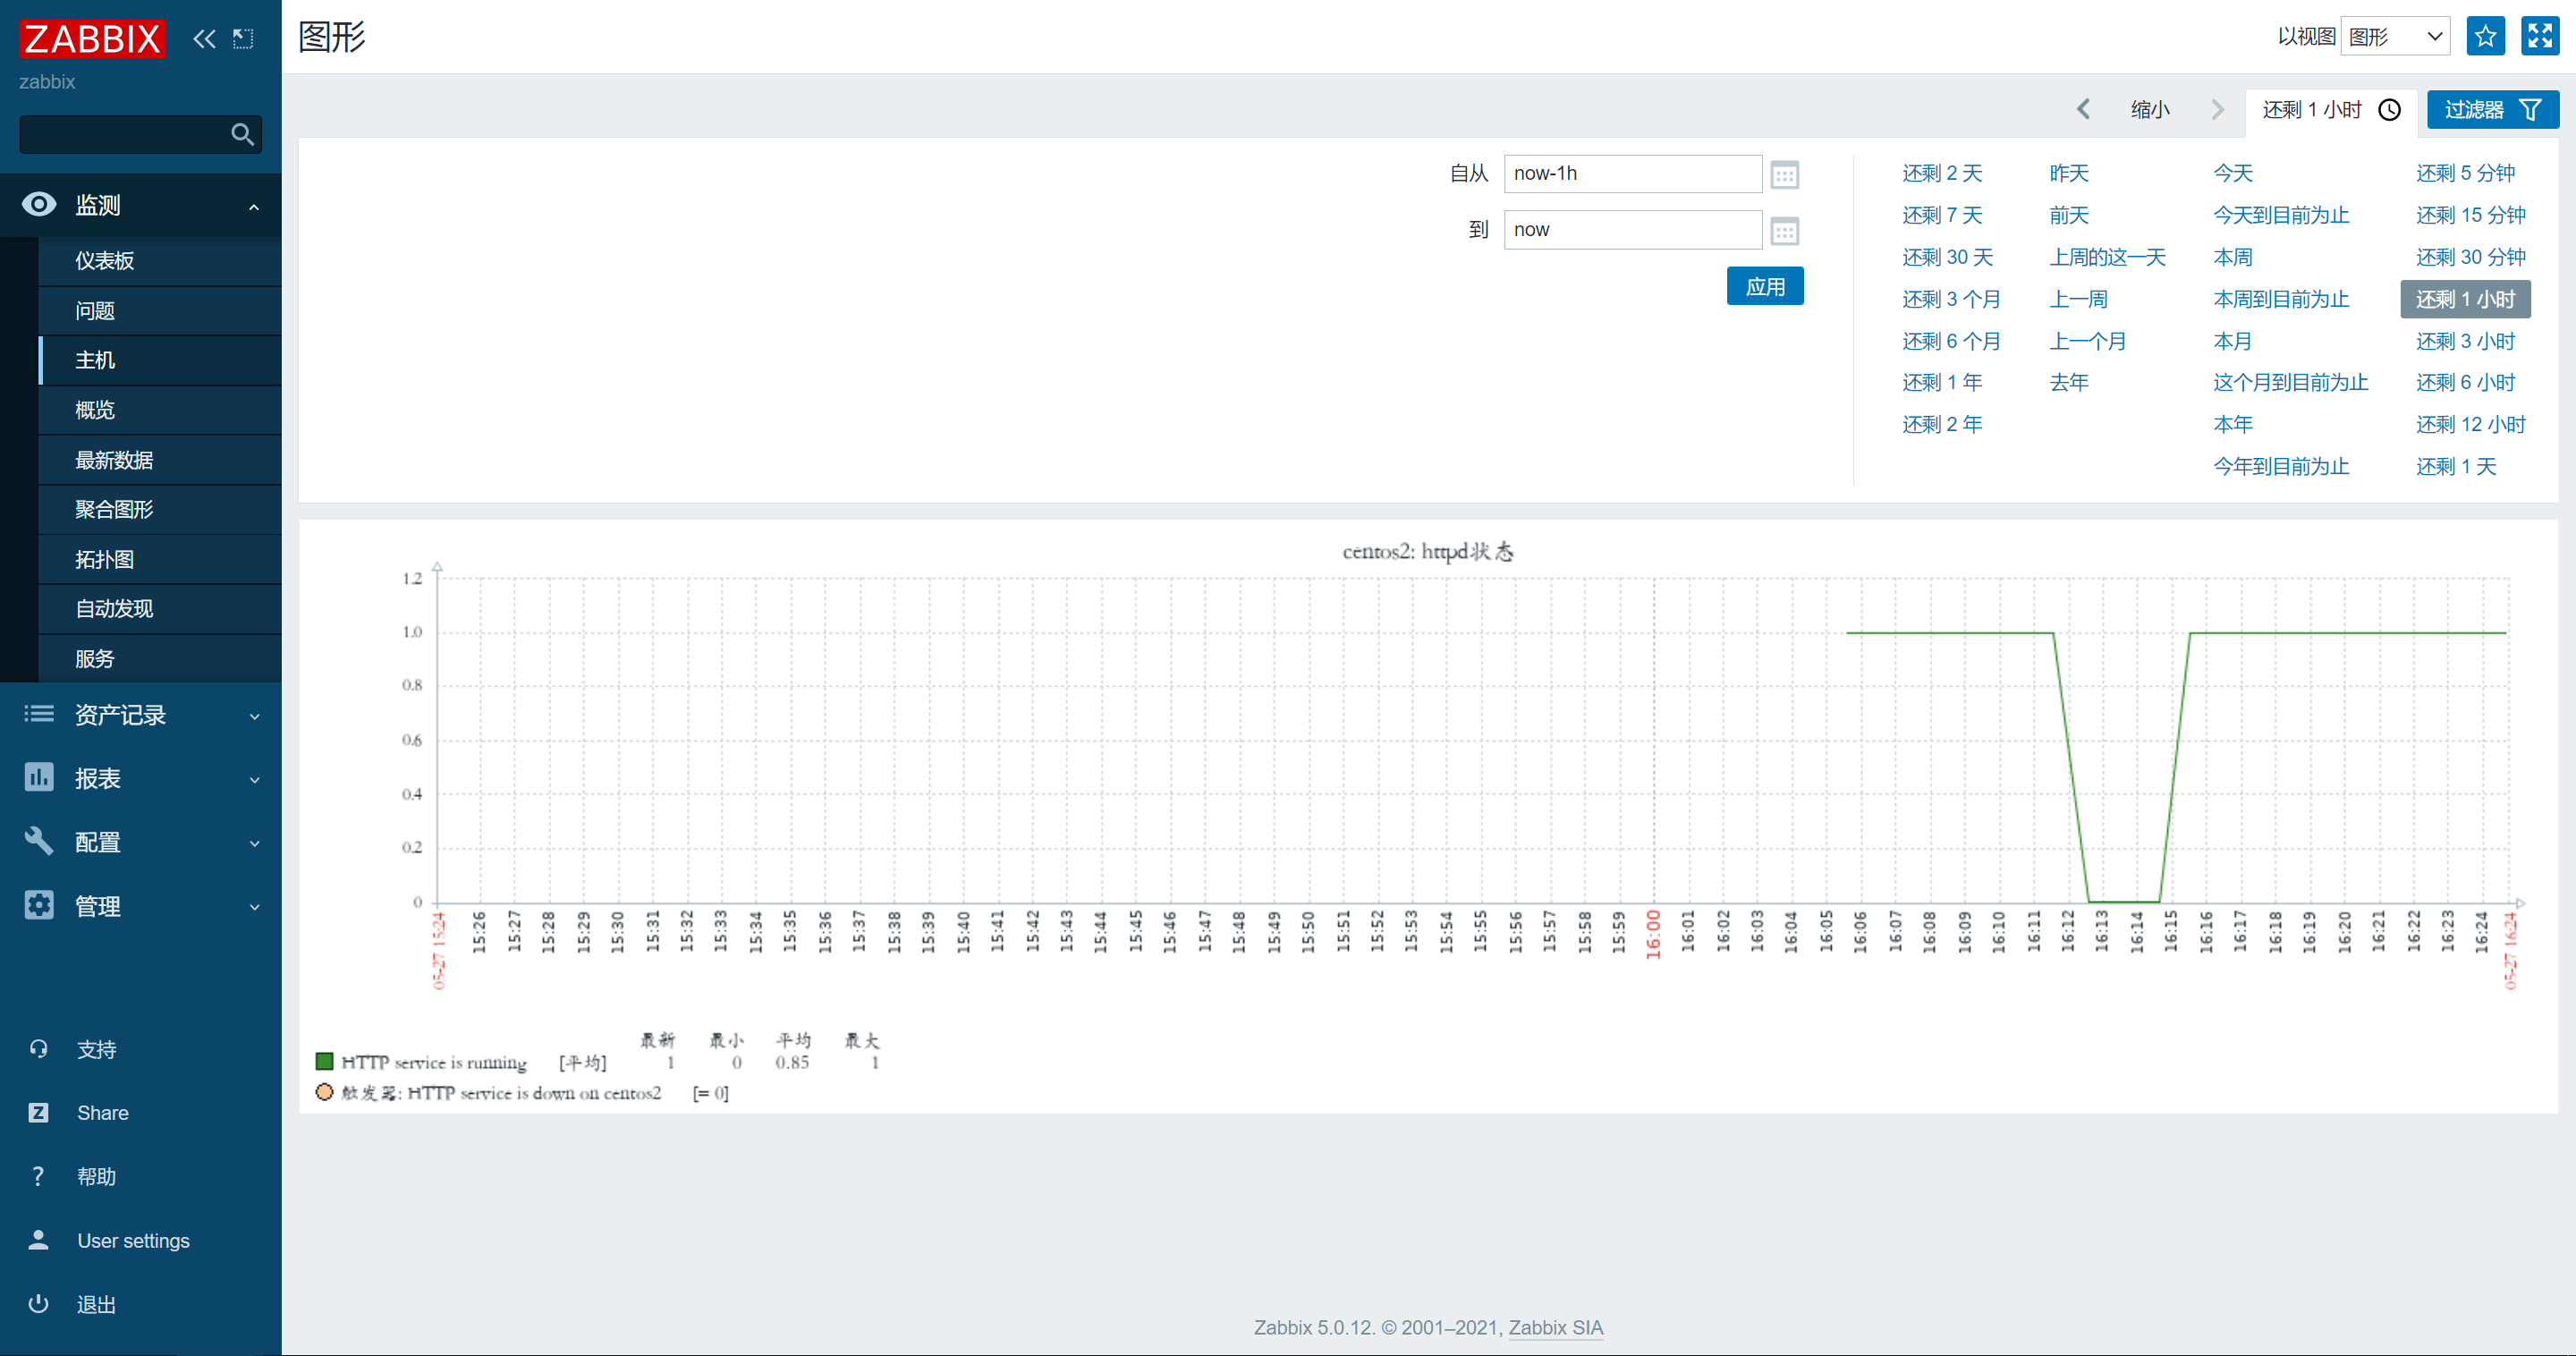
5.3创建图形


6.zabbix解决中文乱码
进入window目录C:\Windows\Fonts 选择你想要的字体符

查看zabbix字体存放目录
[root@centos1 fonts]# rpm -ql zabbix-web |grep fonts
/usr/share/zabbix/assets/fonts
使用工具上传到zabbix-server服务端
重命名为后缀为ttf文件名
mv STKAITI.TTF simkat.ttf
更改zabbix-web界面使用的字体名字;获取文件
[root@centos1 fonts]# rpm -ql zabbix-web |grep  defines.inc.php
/usr/share/zabbix/include/defines.inc.php
修改文件
[root@centos1 fonts]# vim /usr/share/zabbix/include/defines.inc.php
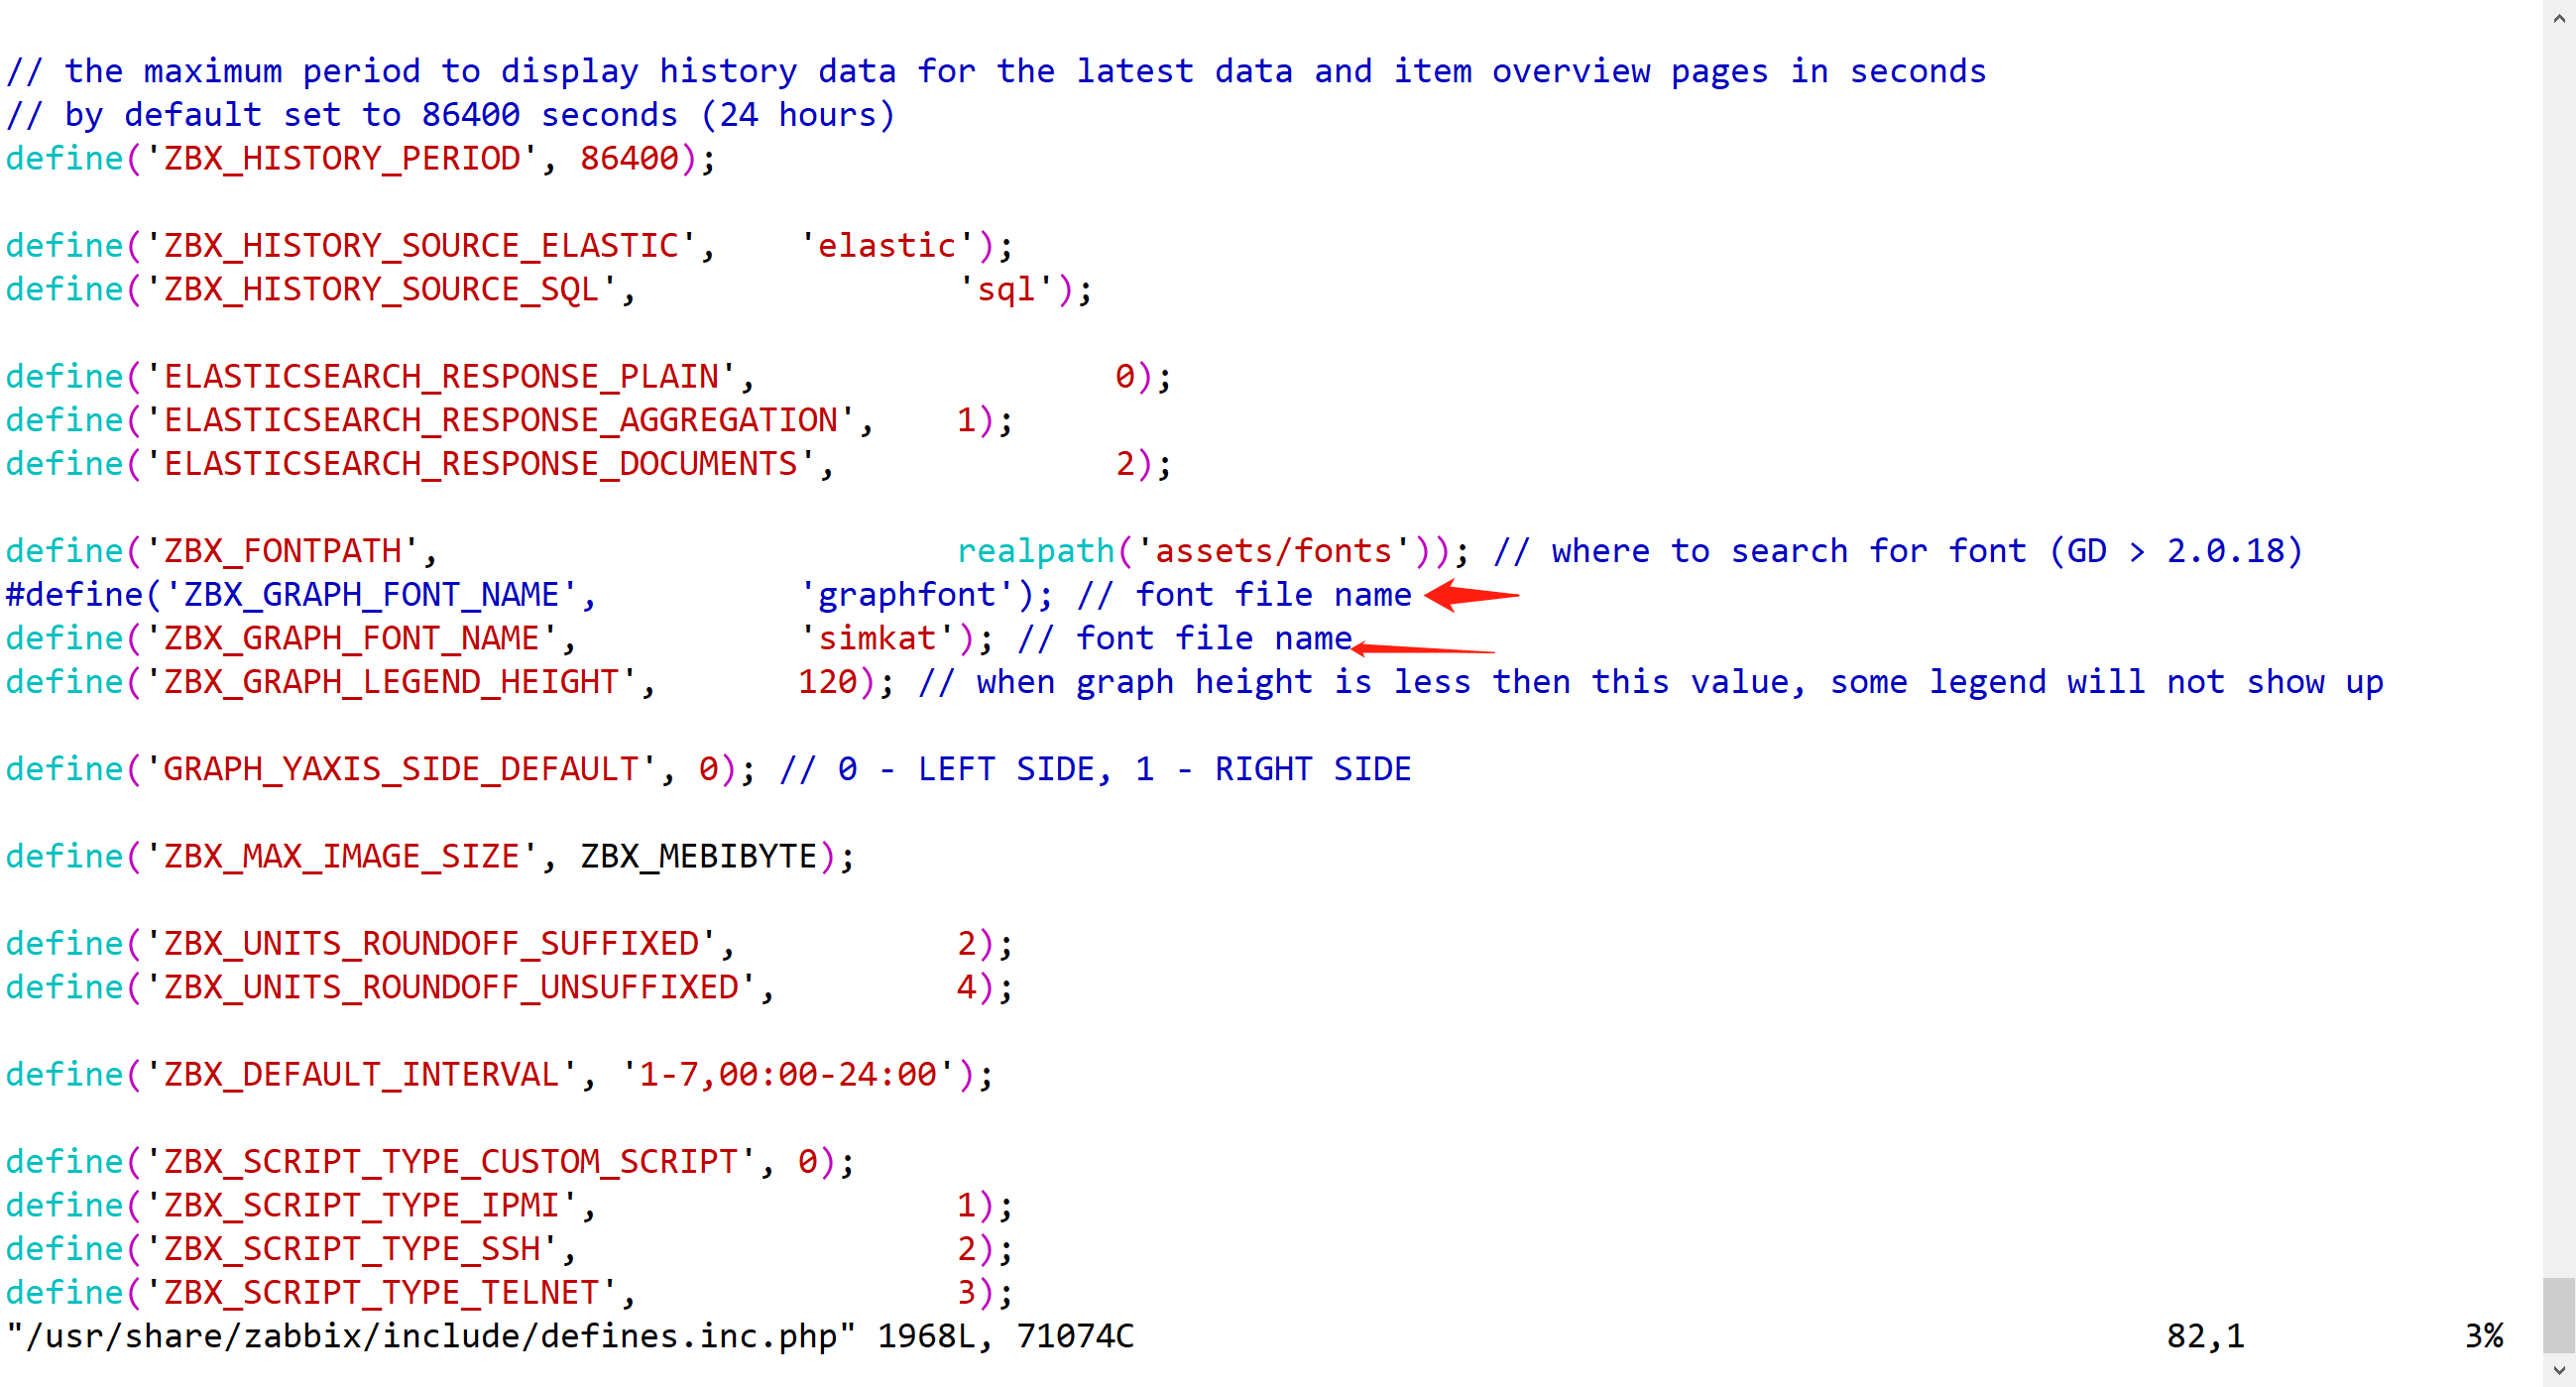
重启服务
systemctl restart zabbix-server

 浙公网安备 33010602011771号