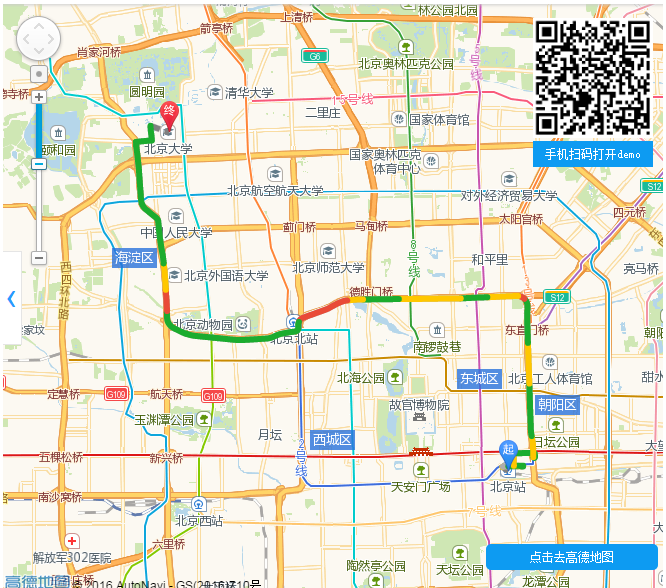
如何实现在H5里调起高德地图APP
这一篇文章将告诉您,如果直接打开高德地图APP,并展示路线规划。适合有定位的移动设备,可以查询到从“我的位置”到目的地的路径规划,并直接导航。
场景二、调起高德地图的路线规划功能
导航是目前JSAPI无法覆盖到的高德地图客户端的重要功能,目前高德地图提供了驾车、公交、步行三种方式的导航服务,JSAPI在Driving、Transfer、Walking三个路线规划插件类中提供了相关功能调起接口,使用这些接口开发者可以在Web页面中直接打开客户端的路线规划结果界面,也可以看到客户端提供的策略更丰富的路线规划结果,只需要点击一下便可以开始导航。想要实现这个功能只需要两步:
加载路线规划插件并创建对象
这里我们以驾车路线规划为例,加载Driving插件,创建Driving对象,同时设置驾车策略为最短时间:
AMap.plugin(["AMap.Driving"], function() {
            var drivingOption = {
                policy:AMap.DrivingPolicy.LEAST_TIME,
                map:map
            };
            var driving = new AMap.Driving(drivingOption); //构造驾车导航类
        });
调用searchOnAMAP方法
Driving对象创建完毕之后,只需要在需要的地方调用searchOnAMAP方法就可以了,下面代码中是在button的点击事件中调用的。searchOnAMAP方法接收一个JSON对象参数,对象中需要指定路线规划的起终点坐标,同时也可以设定起终点名称,示例代码中我们利用了JSAPI路线规划的结果数据中的起终点坐标。调起高德地图客户端之后,只要点击‘开始导航’就可以使用导航功能了:
//根据起终点坐标规划驾车路线
        driving.search(
            [{keyword:'北京站'},{keyword:'北京大学'}],
            function(status,result){
                button.onclick = function(){
                    driving.searchOnAMAP({
                        origin:result.origin,
                        destination:result.destination
                    });
                }
            });

查看全部源代码
<!DOCTYPE html>
<html>
<head lang="en">
    <meta charset="utf-8">
    <meta http-equiv="X-UA-Compatible" content="IE=edge">
    <meta name="viewport" content="initial-scale=1.0, user-scalable=no, width=device-width">
    <title></title>
    <style>
        body,#mapContainer{
            margin:0;
            height:100%;
            width:100%;
            text-align: center;
            font-size:12px;
        }
        .panel{
            position: absolute;
            top:15px;
            right: 15px;
        }
        .qrcodetxt{
            background-color: #0D9BF2;
            padding: 6px;
            color: white;
        }
        .center{
            position: absolute;
            width: 100%;
            bottom: 24px;
        }
        .btmtip {
            cursor: pointer;
            border-radius: 5px;
            background-color: #0D9BF2;
            padding: 6px;
            width: 160px;
            color: white;
            margin: 0 auto;
        }
    </style>
    <link rel="stylesheet" href="http://cache.amap.com/lbs/static/main.css?v=1.0?v=1.0" />
    <script type="text/javascript" src="http://webapi.amap.com/maps?v=1.3&key=您申请的key值&plugin=AMap.ToolBar"></script>
    <script>
        function init() {
            var button = document.getElementById('bt');
            map = new AMap.Map("mapContainer");
            AMap.plugin(["AMap.Driving"], function() {
                var drivingOption = {
                    policy:AMap.DrivingPolicy.LEAST_TIME,
                    map:map
                };
                var driving = new AMap.Driving(drivingOption); //构造驾车导航类
                //根据起终点坐标规划驾车路线
                driving.search([{keyword:'北京站'},{keyword:'北京大学'}],function(status,result){
                    button.onclick = function(){
                        driving.searchOnAMAP({
                            origin:result.origin,
                            destination:result.destination
                        });
                    }
                });

            });
            map.addControl(new AMap.ToolBar());
            if(AMap.UA.mobile){
                document.getElementById('bitmap').style.display='none';
                bt.style.fontSize = '16px';
            }else{
                bt.style.marginRight = '10px';
            }
        }
    </script>
</head>
<body onload="init()">
    <div id="mapContainer" ></div>
    <div class='center'>
        <div id='bt' class="btmtip">点击去高德地图</div>
    </div>
    <div class="panel" id='bitmap' style='top:15px'>
        <img src="http://a.amap.com/lbs/static/img/drivingonapp.png" style='width:120px;height:120px'>
        <div class='qrcodetxt' style='text-align: center'>手机扫码打开demo</div>
    </div>
</body>
</html>
如果真的不知道将来要做什么,索性就先做好眼前的事情。只要今天比昨天过得好,就是进步。长此以往,时间自然会还你一个意想不到的未来。
生活像一个杯子。一开始,里面是空的,之后,要看你怎么对待它。如果你只往不如意的方面想,那么你最终辉得到一杯苦水。如果你往好的方面想,那么你最终会得到一杯清泉。
版权声明:本文为博主原创文章,遵循 CC 4.0 BY-SA 版权协议,转载请附上原文出处链接和本声明。
生活像一个杯子。一开始,里面是空的,之后,要看你怎么对待它。如果你只往不如意的方面想,那么你最终辉得到一杯苦水。如果你往好的方面想,那么你最终会得到一杯清泉。
版权声明:本文为博主原创文章,遵循 CC 4.0 BY-SA 版权协议,转载请附上原文出处链接和本声明。


