添加Usb3.0驱动到win7/8/10的usb安装光盘
文章中所有需要使用到的软件和资源在文章末尾的网盘连接中有下载
Run the DISM GUI Tool
Right-click on DISM GUI.exe and select Run as Administrator. Follow these steps:
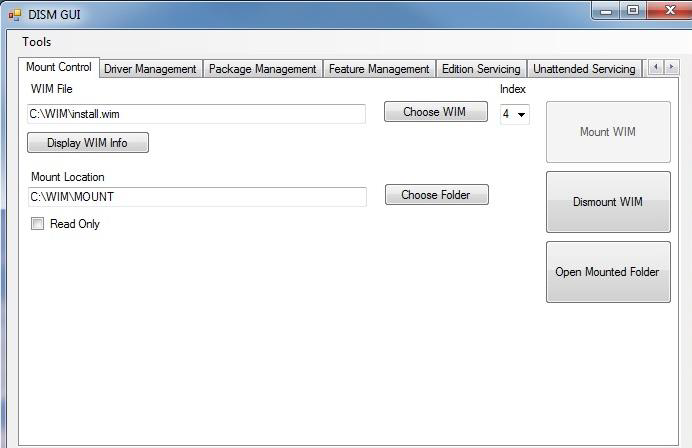
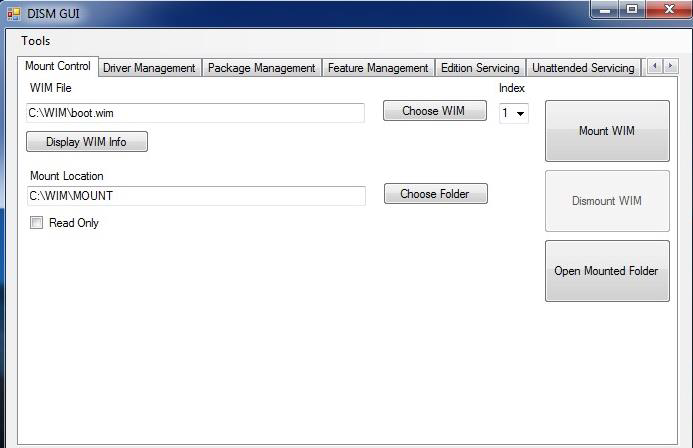
1. Mount install.wim Image
a) On the Mount Control tab, click the Choose WIM button.
b) Navigate to where you copied install.wim (C:\WIM, for example) and click Open.
c) Choose the index number for the version of Windows 7 you have from the drop-down list under Index.
1 = Home Basic
2 = Home Premium
3 = Professional
4 = Ultimate
(ps:windows这部分的索引可以无视)
d) Click the Choose Folder button for the Mount Location. Browse to the proper folder (C:\WIM\MOUNT, for example) and click OK.
e) Verify the Read Only checkbox is clear and click the Mount WIM button.(ps:注意Read Only按钮需要取消勾选)
The mounting process may take a few minutes, depending upon the speed of the Admin system and the size of the install.wim file.
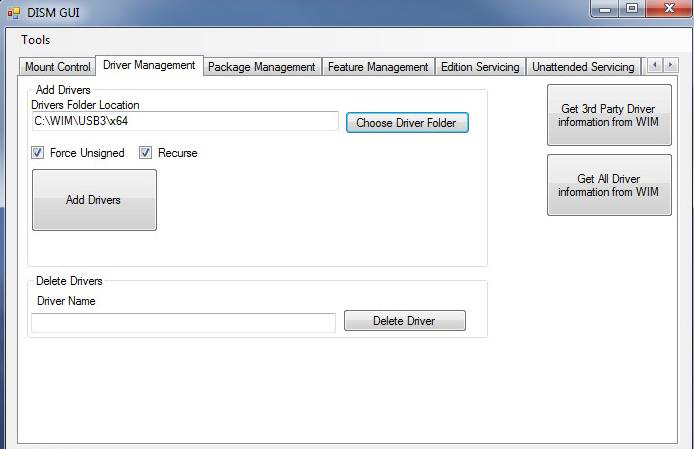
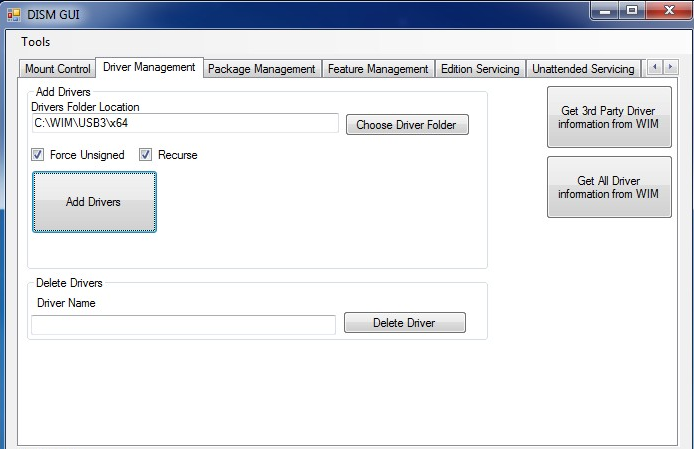
2. Add USB 3.0 Drivers to install.wim Image
a) On the Driver Management tab, click the Choose Driver Folder button.
b) Select the location of your USB 3.0 drivers and click OK.
c) Verify the Recurse checkbox is selected.
d) If your drivers are unsigned or reported to be unsigned, select the Force Unsigned checkbox.(如果不是第三方未签名的驱动Force Unsigned按钮不需要勾选)
e) Click the Add Drivers button.
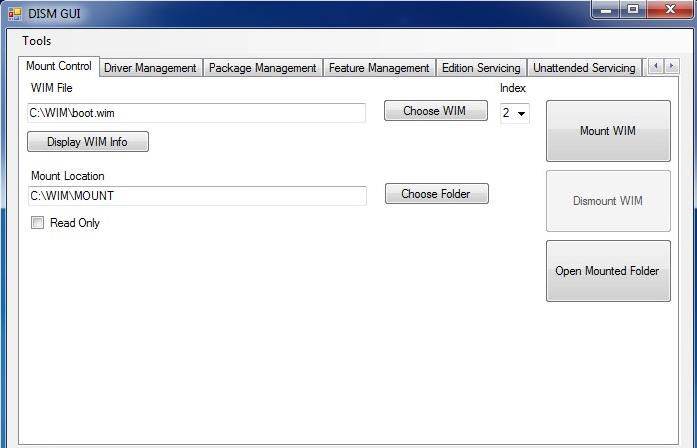
3. Commit Changes to install.wim Image and Unmount
a) On the Mount Control tab, click the Dismount WIM button.
b) Select Yes to commit the changes. This may take a few minutes.

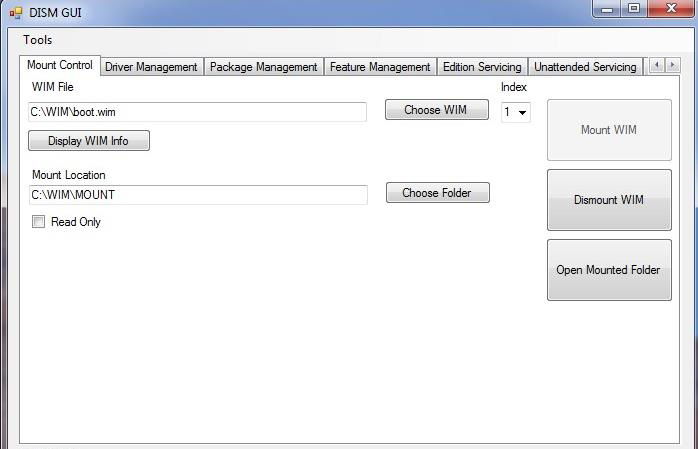
4. Mount boot.wim Image Index 1 (Windows PE)
a) On the Mount Control tab, click the Choose WIM button.
b) Navigate to where you copied boot.wim (C:\WIM in the example) and click Open.
c) Choose index number 1 (for Windows PE) from the drop-down list under Index.
d) The Mount Location should still contain the appropriate folder. If not, click the Choose Folder button for the Mount Location. Browse to the proper folder (C:\WIM\MOUNT, for example) and click OK.
e) Verify the Read Only checkbox is clear and click the Mount WIM button.
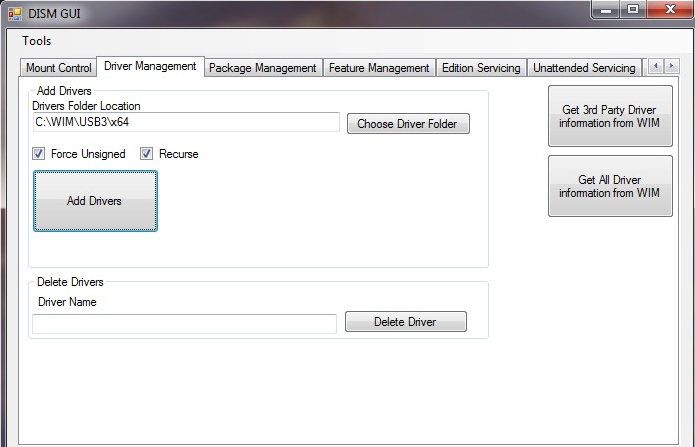
5. Add USB 3.0 Drivers to boot.wim Image
a) On the Driver Management tab, all options should still be set up from adding them to the previous image. If not, click the Choose Driver Folder button. Select the location of your USB 3.0 drivers and click OK.
b) Verify the Recurse checkbox is selected.
c) If your drivers are unsigned or reported to be unsigned, select the Force Unsigned checkbox.
d) Click the Add Drivers button.
6. Commit Changes to boot.wim Image and Unmount
a) On the Mount Control tab, click the Dismount WIM button.
b) Select Yes to commit the changes. This will take about 30 seconds to finish.
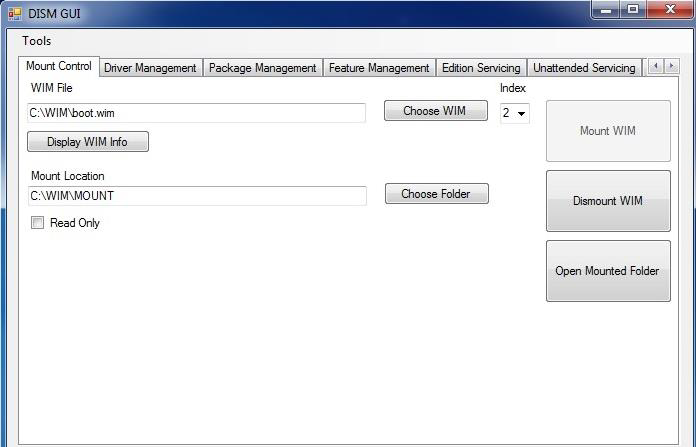
7. Mount boot.wim Image Index 2 (Windows Setup)
a) On the Mount Control tab, you should see boot.wim still listed as the WIM file from the previous step. If not, click the Choose WIM button. Navigate to where you copied boot.wim (C:\WIM, for example) and click Open.
b) Choose index number 2 (for Windows Setup) from the drop-down list under Index.
c) The Mount Location should still contain the appropriate folder. If not, click the Choose Folder button for the Mount Location. Browse to the proper folder (C:\WIM\MOUNT, for example) and click OK.
d) Verify the Read Only checkbox is clear and click the Mount WIM button.
8. Add USB 3.0 Drivers to boot.wim Image
a) On the Driver Management tab, all options should still be set up from adding them to the previous image. If not, click the Choose Driver Folder button. Select the location of your USB 3.0 drivers and click OK.
b) Verify the Recurse checkbox is selected.
c) If your drivers are unsigned or reported to be unsigned, select the Force Unsigned checkbox.
d) Click the Add Drivers button.
9. Commit Changes to boot.wim Image and Unmount
a) On the Mount Control tab, click the Dismount WIM button.
b) Select Yes to commit the changes. This will take about 30 seconds to finish.
10. Copy Modified WIM files Back to the USB Flash Drive Installer
a) Copy the newly-modified install.wim and boot.wim files back to the \sources directory of the Windows 7 USB Flash Drive Installer, overwriting the original files.
b) Eject and remove the USB Flash Drive from the Admin system.
链接:https://pan.baidu.com/s/1ZASrZC0AykafdrrMUnb50g 密码:1xoz

 浙公网安备 33010602011771号