

Flutter进阶组件(6):Form(表单)
Form是 Flutter 中的一个 widget,它负责管理表单的数据和验证逻辑。Form通常与TextFormField等子 widget 结合使用,以创建输入字段并处理用户的输入。
一般来说,每当你需要收集用户输入的时候,你都可以使用Flutter表单。这包括但不限于以下情况:
- 用户注册和登录页面
- 个人信息更新页面
- 任何需要用户填写和提交信息的场景
一、基本使用
使用Form的基本方式如下:
import 'package:flutter/material.dart';

void main() {
  runApp(const MaterialApp(
    debugShowCheckedModeBanner: false,
    home: FormExample(),
  ));
}

class FormExample extends StatefulWidget {
  const FormExample({super.key});
  @override
  State<FormExample> createState() => _FormExampleState();
}

class _FormExampleState extends State<FormExample> {
  final _formKey = GlobalKey<FormState>(); // 创建一个表单键

  @override
  Widget build(BuildContext context) {
    return MaterialApp(
      home: Scaffold(
        appBar: AppBar(
          title: const Text('Form Example'),
        ),
        body: Form(
          key: _formKey, // 使用表单键
          child: Column(
            children: <Widget>[
              TextFormField(
                decoration: const InputDecoration(labelText: 'Enter your name'),
                validator: (value) {
                  // 验证:名称不能为空,否则警告
                  if (value == null || value.isEmpty) {
                    return 'Please enter some text';
                  }
                  return null;
                },
              ),
              ElevatedButton(
                onPressed: () {
                  // 表单提交逻辑
                  if (_formKey.currentState!.validate()) {
                    // 如果表单验证成功
                    // 执行提交操作
                  }
                },
                child: const Text('Submit'),
              ),
            ],
          ),
        ),
      ),
    );
  }
}
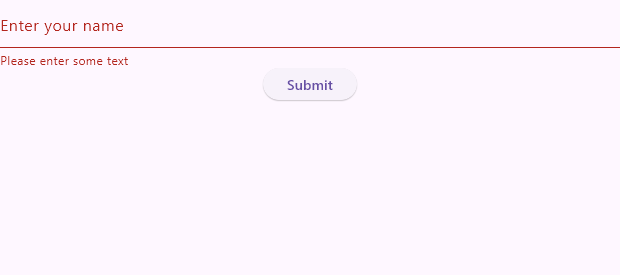
在这个例子中,我们创建了一个包含文本输入字段和提交按钮的表单。使用GlobalKey来获取FormState,以便我们可以在需要时验证表单。效果图如下所示:
二、属性
Form小部件的主要属性包括:
key: 一个GlobalKey<FormState>,用于在表单提交时访问表单的状态。child: 表单中包含的子 widget,通常是输入字段和按钮。onWillPop: 当用户尝试离开表单时调用的回调,可用于处理表单的退出逻辑。autovalidateMode:这个属性决定了表单的自动验证模式。它有三个可选值:AutovalidateMode.disabled(禁用自动验证),AutovalidateMode.always(总是自动验证),和AutovalidateMode.onUserInteraction(当用户交互时自动验证)。onWillPop:这是一个返回Future<bool>的函数,它在用户尝试离开包含表单的页面时被调用。如果这个函数返回false,那么用户将不能离开页面。onChanged:这个函数在表单中的任何FormField的内容发生变化时被调用。
三、自定义 Form
Form可以用于各种自定义场景,例如:
Form(
  key: _formKey,
  child: Column(
    children: <Widget>[
      TextFormField(
        decoration: InputDecoration(labelText: 'Email'),
        validator: (value) {
          if (!value.contains('@')) {
            return 'Enter a valid email';
          }
          return null;
        },
      ),
      TextFormField(
        decoration: InputDecoration(labelText: 'Password'),
        obscureText: true,
      ),
      ElevatedButton(
        onPressed: () {
          if (_formKey.currentState!.validate()) {
            // 执行提交操作
          }
        },
        child: Text('Login'),
      ),
    ],
  ),
)
四、示例
4.1 Form表单的基本示例
我们通过 Form 的包裹,来实现一个注册的页面:
// ignore_for_file: prefer_const_constructors
import 'package:flutter/material.dart';

main(List<String> args) {
  runApp(FormDemo());
}

class FormDemo extends StatefulWidget {
  @override
  _FormDemoState createState() => _FormDemoState();
}

class _FormDemoState extends State<FormDemo> {
  @override
  Widget build(BuildContext context) {
    return Form(
      child: Column(
        mainAxisAlignment: MainAxisAlignment.center,
        children: <Widget>[
          TextFormField(
            decoration:
                InputDecoration(icon: Icon(Icons.people), labelText: "用户名或手机号"),
          ),
          TextFormField(
            obscureText: true,
            decoration:
                InputDecoration(icon: Icon(Icons.lock), labelText: "密码"),
          ),
          SizedBox(
            height: 16,
          ),
          Container(
            width: double.infinity,
            height: 44,
            child: RaisedButton(
              color: Colors.lightGreen,
              child: Text(
                "注 册",
                style: TextStyle(fontSize: 20, color: Colors.white),
              ),
              onPressed: () {
                print("点击了注册按钮");
              },
            ),
          )
        ],
      ),
    );
  }
}
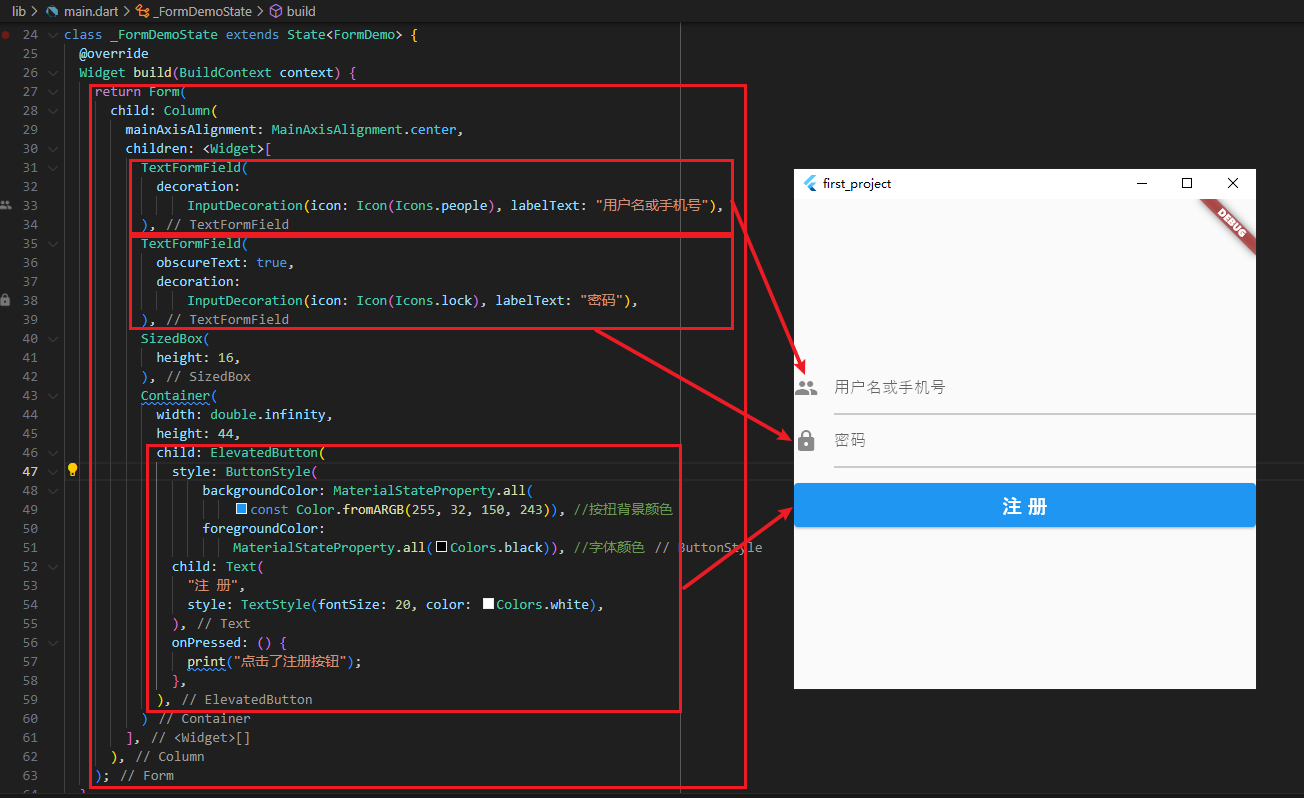
运行后,效果如下图所示:
4.2 保存和获取表单数据
有了表单后,我们需要在点击注册时,可以同时获取和保存表单中的数据,怎么可以做到呢?
- 需要监听注册按钮的点击,在之前我们已经监听的 onPressed 传入的回调中来做即可。(当然,如果嵌套太多,我们待会儿可以将它抽取到一个单独的方法中)
- 监听到按钮点击时,同时获取
用户名和密码的表单信息。
如何同时获取用户名和密码的表单信息?
- 如果我们调用
Form的State对象的 save 方法,就会调用 Form 中放入的 TextFormField 的 onSave 回调:
TextFormField(
  decoration: InputDecoration(
    icon: Icon(Icons.people),
    labelText: "用户名或手机号"
  ),
  onSaved: (value) {
    print("用户名:$value");
  },
),
- 但是,我们有没有办法可以在点击按钮时,拿到
Form对象来调用它的save方法呢?
知识点:在Flutter如何可以获取一个通过一个引用获取一个StatefulWidget的State对象呢?
答案:通过绑定一个GlobalKey即可。
案例代码演练:
class FormDemo extends StatefulWidget {
  @override
  _FormDemoState createState() => _FormDemoState();
}

class _FormDemoState extends State<FormDemo> {
  final registerFormKey = GlobalKey<FormState>();
  late String username, password;

  void registerForm() {
    registerFormKey.currentState!.save();

    print("username:$username password:$password");
  }

  @override
  Widget build(BuildContext context) {
    return Form(
      key: registerFormKey,
      child: Column(
        mainAxisAlignment: MainAxisAlignment.center,
        children: <Widget>[
          TextFormField(
            decoration:
                InputDecoration(icon: Icon(Icons.people), labelText: "用户名或手机号"),
            onSaved: (value) {
              this.username = value!;
            },
          ),
          TextFormField(
            obscureText: true,
            decoration:
                InputDecoration(icon: Icon(Icons.lock), labelText: "密码"),
            onSaved: (value) {
              this.password = value!;
            },
          ),
          SizedBox(
            height: 16,
          ),
          Container(
            width: double.infinity,
            height: 44,
            child: ElevatedButton(
              style: ButtonStyle(
                  backgroundColor: MaterialStateProperty.all(
                      const Color.fromARGB(255, 32, 150, 243)), //按扭背景颜色
                  foregroundColor:
                      MaterialStateProperty.all(Colors.black)), //字体颜色
              onPressed: registerForm,
              child: Text("注 册"),
            ),
          )
        ],
      ),
    );
  }
}
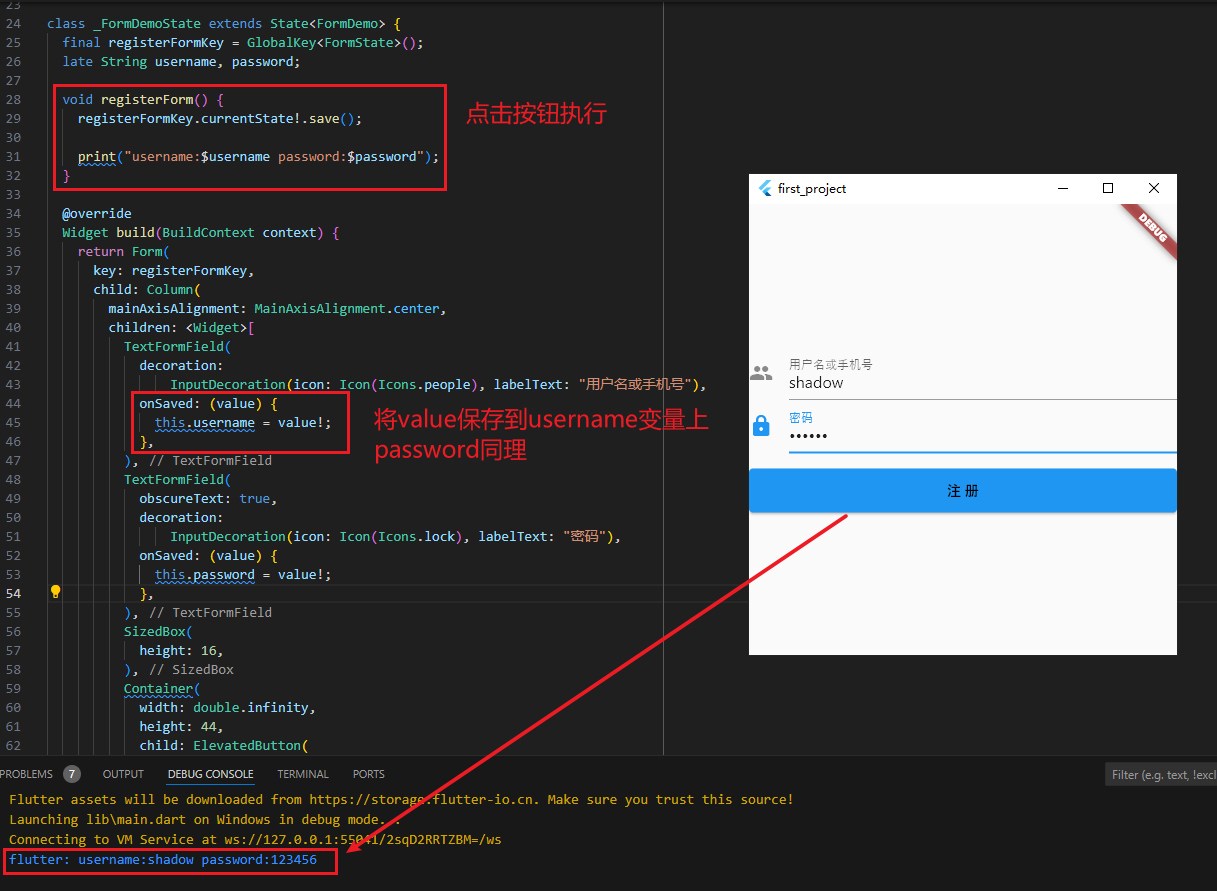
运行后,效果如下图所示:
4.3 验证填写的表单数据
在表单中,我们可以添加验证器,如果不符合某些特定的规则,那么给用户一定的提示信息
比如我们需要账号和密码有这样的规则:账号和密码都不能为空。
按照如下步骤就可以完成整个验证过程:
- 为 TextFormField 添加 validator 的回调函数;
- 调用 Form 的 State 对象的 validate 方法,就会回调 validator 传入的函数;
void registerForm() {
  registerFormKey.currentState!.save();
  registerFormKey.currentState!.validate(); // (1)添加 validator 的回调函数

  print("username:$username password:$password");
}

TextFormField(
  decoration:
  InputDecoration(icon: Icon(Icons.people), labelText: "用户名或手机号"),
  onSaved: (value) {
    this.username = value!;
  },
  validator: (value) { // (2)调用 Form 的 State 对象的 validate 方法
    if (value!.isEmpty) {
      return "账号不能为空";
    }
    return null;
  },
),
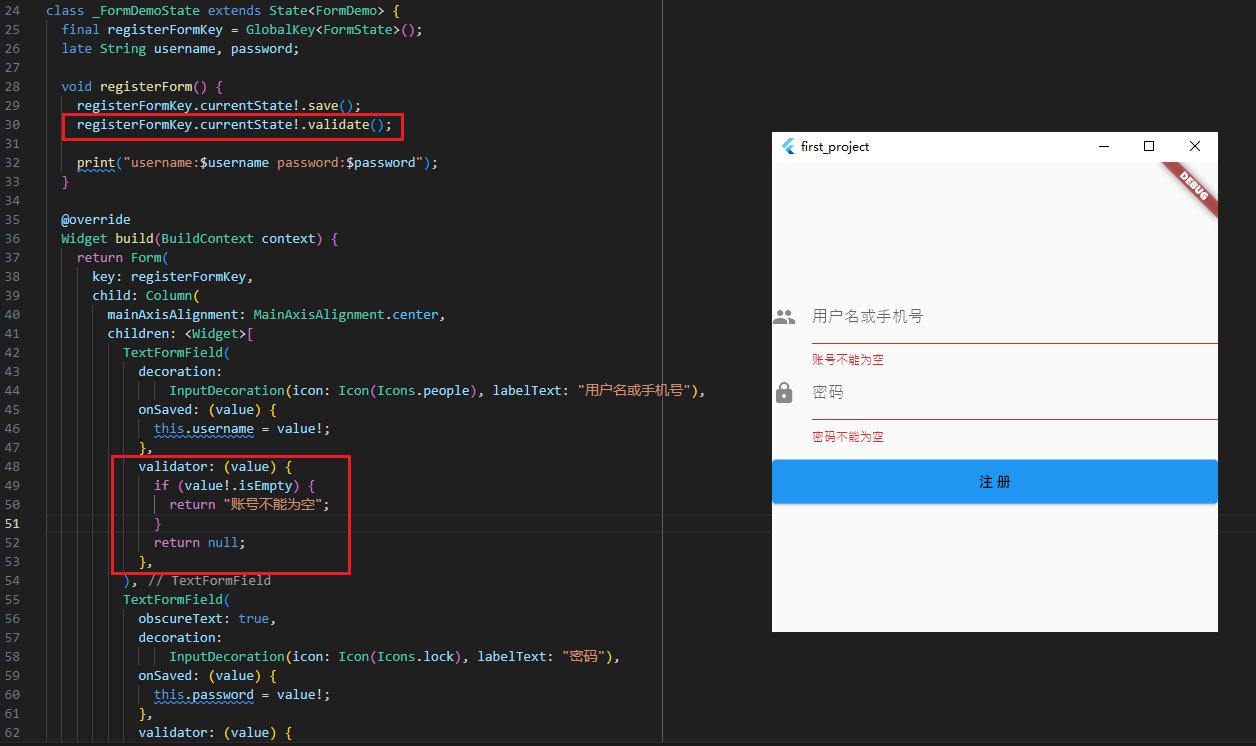
运行后,效果如下图所示:
还可以校验:密码不能少于 6 位,如果小于 6 为则提示“密码不能少于 6 位”。
TextFormField(
  obscureText: true,
  decoration:
  InputDecoration(icon: Icon(Icons.lock), labelText: "密码"),
  onSaved: (value) {
    this.password = value!;
  },
  validator: (value) {
    if (value!.isEmpty) {
      return "密码不能为空";
    }
    return value.trim().length > 5 ? null : "密码不能少于6位";
  },
),

 浙公网安备 33010602011771号